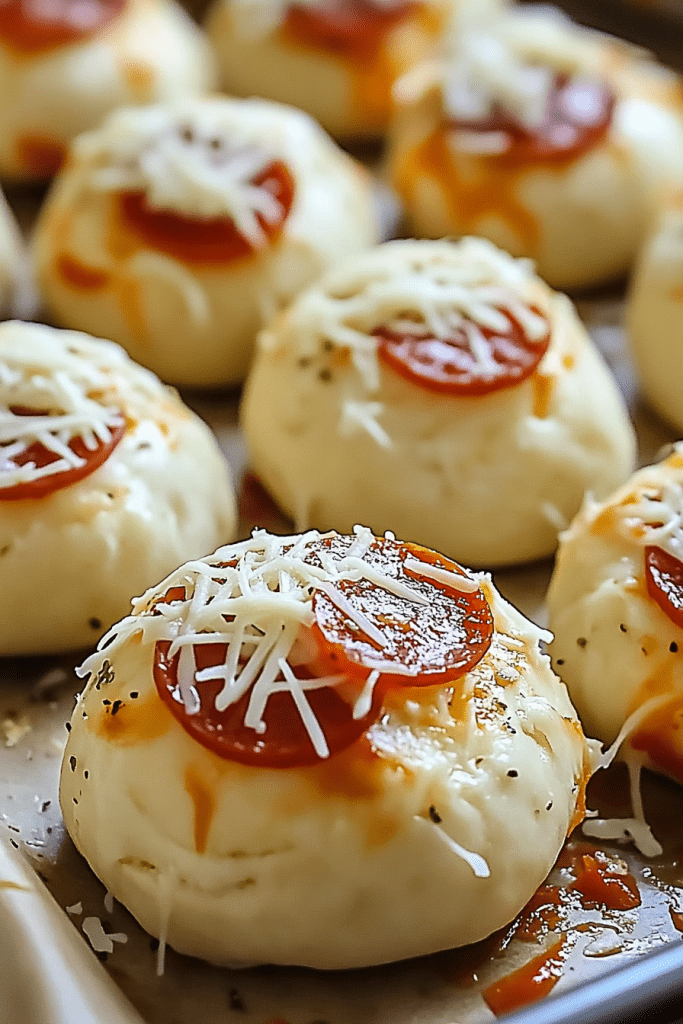
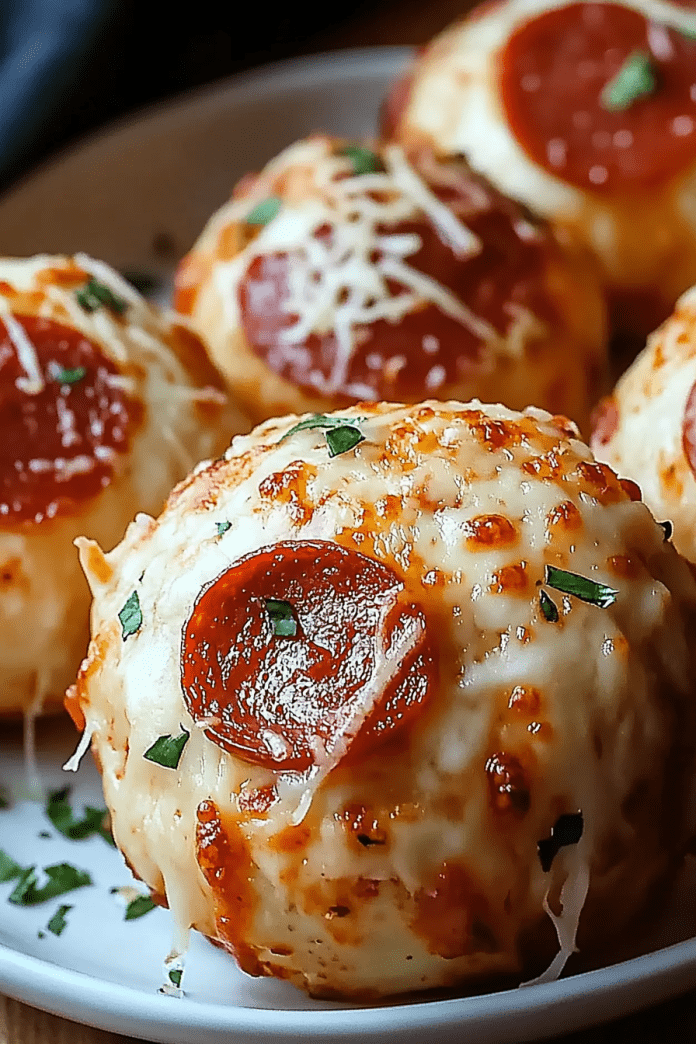
This Cheesy Pepperoni Pizza Bombs recipe is a fun, bite-sized twist on a classic favorite that will quickly become a crowd-pleaser at parties, game nights, or even as a comforting snack for yourself. These little treats combine the irresistible flavors of melty mozzarella and savory pepperoni, all wrapped in a tender, doughy shell made from refrigerated biscuit dough. Every bite offers a delightful explosion of pizza goodness that is both cheesy and satisfying. The dough is perfectly soft and pillowy, while the filling of gooey cheese and zesty pepperoni delivers an indulgent, mouthwatering experience reminiscent of a fresh-out-of-the-oven pizza. The addition of a garlic and Italian seasoning-infused butter glaze elevates the flavor profile, giving these bombs an extra layer of aromatic delight that will have everyone reaching for more. This recipe proves that you don’t have to commit to a full pizza to enjoy its delicious components; sometimes, a small, perfectly crafted snack can bring all the joy of pizza in one compact, delectable bite.
These pizza bombs are as versatile as they are delicious, offering endless possibilities for customization to suit your taste. Whether you prefer a classic combination of mozzarella and pepperoni or want to experiment with additional toppings like olives, diced bell peppers, or even a sprinkle of extra herbs, the basic recipe provides a solid foundation for creativity. The process is simple and quick—just a few minutes of prep work and a short baking time in the oven yield a batch of treats that are golden brown, flavorful, and utterly addictive. The convenience of using pre-made biscuit dough makes this recipe accessible to even the busiest cooks, while the option to serve them with a side of marinara or pizza sauce for dipping adds a familiar, comforting touch. With its appealing presentation and delightful taste, these Cheesy Pepperoni Pizza Bombs are perfect for any occasion, bringing the warmth and satisfaction of a homemade pizza in a playful, snackable format.
Why You’ll Love This Recipe:
• Burst of Flavor: Every bite is loaded with the classic taste of pizza—rich, melty mozzarella paired with zesty pepperoni, enhanced by aromatic garlic and Italian herbs.
• Fun and Easy: Simple steps make these pizza bombs a breeze to prepare, perfect for busy weeknights, parties, or impromptu get-togethers.
• Customizable: Tailor the filling to your preference by adding extra toppings or different types of cheese for a personal twist.
• Perfect Bite-Sized Treats: Their compact size makes them an ideal snack or appetizer that’s easy to share and enjoy without any mess.
• Comfort Food Delight: Enjoy the satisfying combination of a soft, doughy exterior with a warm, gooey interior—bringing all the comfort of a freshly baked pizza in every bite.

Ingredients
• 1 can (8 oz) refrigerated biscuit dough
• 3/4 cup shredded mozzarella cheese
• 1/2 cup mini pepperoni slices
• 2 tablespoons melted butter
• 1 teaspoon garlic powder
• 1 teaspoon Italian seasoning
• Marinara or pizza sauce, for dipping
Instructions
1. Preheat and Prepare the Baking Sheet:
• Preheat your oven to 375°F (190°C) to ensure it reaches the correct temperature by the time you’re ready to bake.
• Line a baking sheet with parchment paper. This step not only prevents the pizza bombs from sticking but also makes cleanup a breeze.
2. Prepare the Biscuit Dough:
• Open the can of refrigerated biscuit dough and carefully separate the dough into individual pieces.
• Take each biscuit and flatten it gently into a small circle using your fingers or a rolling pin. The goal is to create a thin, even surface that will allow the filling to be evenly distributed in every bomb.
3. Add the Filling:
• Place a small amount of shredded mozzarella cheese in the center of each flattened dough circle.
• Add a few mini pepperoni slices on top of the cheese. Be generous but careful not to overfill, as the dough needs to be able to completely enclose the filling.
• The combination of the melty cheese and the savory, slightly spicy pepperoni is the heart of these pizza bombs, so ensure that each one gets a satisfying amount.
4. Shape the Pizza Bombs:
• Carefully fold the edges of the dough over the filling. Pinch the edges together firmly to seal in the cheese and pepperoni, forming a neat little ball.
• Take your time with this step to ensure the seams are securely closed, preventing any cheese or sauce from leaking out during baking.
• Place each formed dough ball aside on a clean surface until you’re ready to brush them with the butter mixture.
5. Prepare the Seasoned Butter Glaze:
• In a small bowl, combine the 2 tablespoons of melted butter with 1 teaspoon of garlic powder and 1 teaspoon of Italian seasoning.
• Mix the ingredients well to ensure the garlic and herbs are evenly distributed throughout the butter. This glaze will not only add flavor but also give the pizza bombs a lovely, golden finish as they bake.
6. Brush and Arrange:
• Using a pastry brush or a spoon, generously brush the seasoned butter mixture over the entire surface of each pizza bomb.
• Make sure that every part of the dough is coated with the flavorful butter, as this will help develop a crisp, appetizing crust.
• Arrange the brushed pizza bombs seam-side down on the prepared baking sheet. This positioning helps ensure that the seams remain sealed and that the bombs maintain their shape while baking.
7. Bake to Perfection:
• Place the baking sheet in the preheated oven.
• Bake the pizza bombs for 12-15 minutes, or until they turn a beautiful golden brown. The exact baking time may vary slightly depending on your oven and the size of the bombs, so keep an eye on them during the final minutes of baking.
• The aroma of melting cheese and toasted dough will fill your kitchen, signaling that these delightful treats are almost ready.
8. Serve Warm:
• Once baked, remove the pizza bombs from the oven. Let them cool for just a few minutes so that the cheese inside sets slightly, making them easier to handle and eat.
• Serve the warm pizza bombs with a side of marinara or pizza sauce for dipping. The tangy, savory sauce complements the rich, cheesy flavor of the bombs perfectly.
Tips
• Even Dough Flattening: Ensure each biscuit is flattened evenly to create a uniform surface for the filling. A rolling pin can help achieve a consistent thickness, but gentle hands work just as well.
• Don’t Overfill: While it’s tempting to load up on cheese and pepperoni, be cautious not to overfill each dough circle. Overstuffing can cause the filling to leak out during baking and may result in an uneven cook.
• Sealing the Edges: Properly pinching the edges of the dough is crucial to keeping the filling inside. If you’re new to this technique, consider using a fork to press down along the seams after folding for extra security.
• Butter Glaze Distribution: Make sure to evenly brush the butter mixture over all sides of the pizza bombs. This not only enhances flavor but also helps achieve a uniformly golden and crispy exterior.
• Baking Sheet Spacing: Place the pizza bombs with enough space between them on the baking sheet. Overcrowding can lead to steaming rather than baking, which may prevent the dough from becoming crisp.
• Customize Your Fillings: Feel free to experiment with additional ingredients. Try adding a sprinkle of extra Italian seasoning on top before baking, or incorporate a bit of grated Parmesan cheese into the filling for a sharper, tangier flavor.
• Cheese Variations: Although mozzarella is the classic choice, you can blend in a bit of provolone or cheddar for a richer, more complex flavor profile. Adjust the ratios according to your personal taste.
Storage Options
• Refrigeration:
• If you have leftover pizza bombs, allow them to cool completely before transferring them to an airtight container.
• Store in the refrigerator for up to 3 days. To reheat, place them in an oven preheated to 350°F (175°C) for about 5-7 minutes, or microwave on a medium setting until warmed through.
• Freezing:
• To freeze, arrange the cooled pizza bombs on a baking sheet in a single layer and freeze until solid.
• Once frozen, transfer them to a freezer-safe bag or container. They can be stored in the freezer for up to 1 month.
• When ready to eat, thaw overnight in the refrigerator and reheat in the oven at 350°F (175°C) until heated through.
• Dipping Sauce Storage:
• If you have extra marinara or pizza sauce, store it in an airtight container in the refrigerator for up to 5 days.
• For a longer shelf life, you can also freeze the sauce in small portions and thaw as needed.
• Serving Suggestions:
• These pizza bombs make an excellent party appetizer when served alongside a fresh, crisp salad or a bowl of mixed olives.
• They also pair wonderfully with a light soup or a hearty stew for a comforting meal on cooler days.
• For a fun twist, consider serving them as part of a make-your-own snack platter, where guests can customize their dipping sauces with extra herbs or a dash of hot sauce.


