")
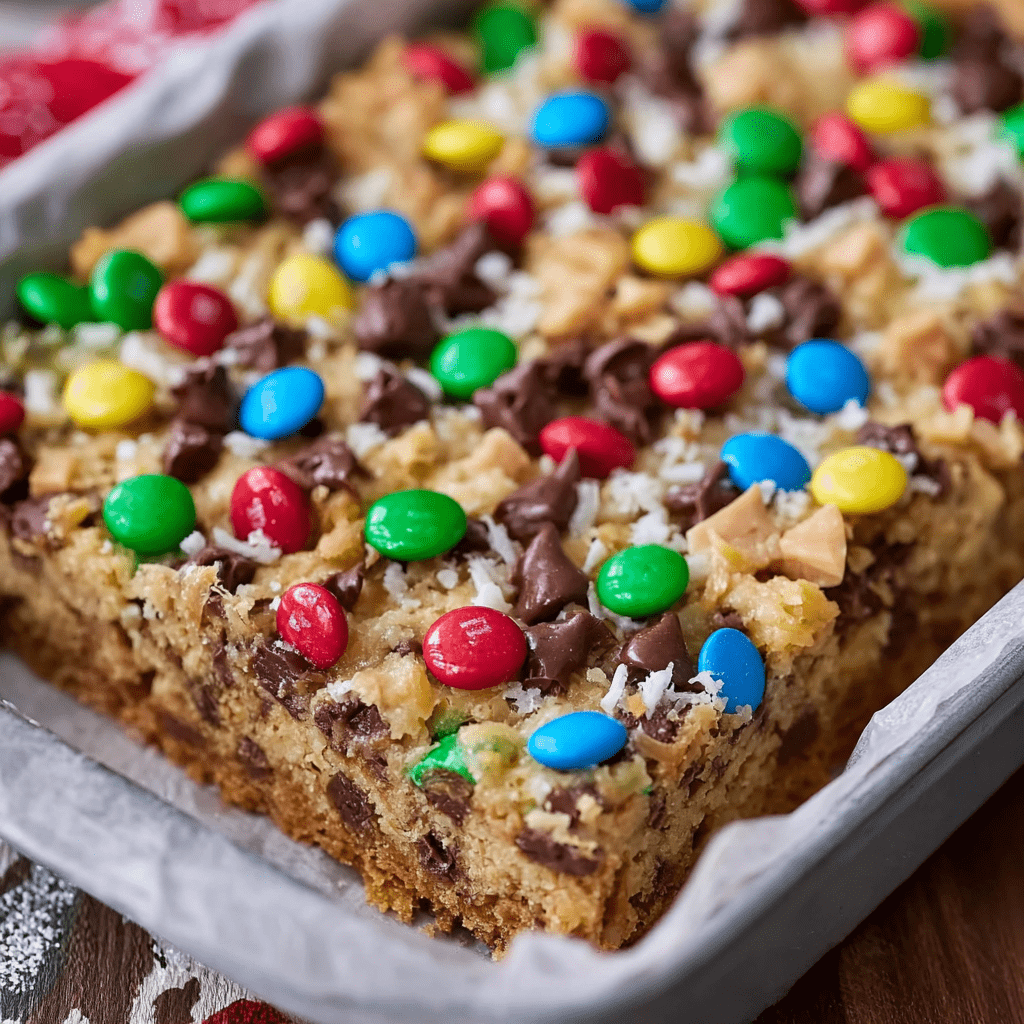
Christmas Magic Cookie Bars are the edible embodiment of holiday cheer, a dazzling, multi-layered confection that delivers an extraordinary amount of joy for a remarkably simple effort. This recipe, a festive twist on the classic “Magic Bar” or “Hello Dolly,” transforms a humble base of buttery graham cracker crumbs into a sturdy foundation for a jubilant tower of beloved holiday flavors and textures. The magic lies not in complex techniques, but in the alchemy that occurs in the oven, where a single can of sweetened condensed milk melts and cascades through the layers, acting as a rich, caramel-like glue that binds everything into a cohesive, chewy, and irresistible whole. Each bar is a mosaic of color and taste, offering the sweet crunch of M&M’s, the creamy nostalgia of chocolate and peanut butter chips, and the subtle, chewy texture of toasted coconut, all harmonized by that unmistakable, velvety sweetness. It’s a treat that feels both decadently special and wonderfully familiar, capable of stopping conversations and prompting contented sighs with every bite.
The brilliance of this recipe extends beyond its festive appearance to its foolproof nature and its powerful evocation of holiday memories. As it bakes, your kitchen will fill with the warm, comforting aromas of toasting coconut and melting chocolate—a scent that is, for many, the very essence of Christmas baking. The bars emerge from the oven as a stunning, jewel-toned tapestry that looks far more intricate than the simple layering required to create it. Their sturdiness makes them perfect for gifting, packing into cookie tins, or leaving out for Santa, as they hold their shape beautifully. More than just a dessert, these bars are a centerpiece of holiday sharing, a guaranteed crowd-pleaser that appeals to all ages, and a deliciously sweet reminder that the most magical Christmas creations often come from the simplest recipes, layered with love and shared with joy.
Why You’ll Love This Recipe:
- Visually Stunning Holiday Treat: The vibrant red and green M&M’s and layers of chips create a dazzling, festive appearance that screams Christmas cheer.
- Unbeatable Texture Symphony: Enjoy the perfect contrast of a crisp, buttery crust, a soft and chewy middle, and melty pockets of chocolate and peanut butter in every single bite.
- Remarkably Simple to Make: There is no mixer, no creaming, and no dough to chill. It’s a straightforward assembly of layers that yields spectacular results.
- The Ultimate Crowd-Pleaser: Combining chocolate, peanut butter, coconut, and candy, this bar has a universal appeal that makes it a star at any cookie swap, potluck, or family gathering.
- Perfect for Gifting: These bars are sturdy, travel well, and look gorgeous packaged in cellophane bags or stacked in a tin, making them a heartfelt homemade gift.
Ingredients:
For the Crust and Layers:
1/2 cup (1 stick / 113g) unsalted butter, melted
1 1/4 cups (about 125g) graham cracker crumbs (from about 10 full sheets)
1/2 cup (about 40g) sweetened shredded coconut
1 cup (170g) peanut butter chips
1 1/2 cups (255g) semi-sweet chocolate chips
1 cup (about 170g) holiday M&M’s (red and green)
For the Binding:
1 (14 ounce) can full-fat sweetened condensed milk
Instructions:
Step 1: Preheat and Prepare Pan
Preheat your oven to 350°F (175°C). Line a 13×9-inch metal baking pan with parchment paper, leaving an overhang on the two long sides. This “sling” is essential for cleanly removing the entire slab of bars later. Lightly grease the exposed short sides of the pan.
Step 2: Form the Graham Cracker Crust
In a medium bowl, combine the melted butter and graham cracker crumbs. Stir with a fork until the crumbs are evenly moistened and resemble wet sand. Pour the mixture into the prepared pan and press it firmly and evenly into the bottom using the bottom of a measuring cup or your fingers. This compact layer is the foundation of your bars.
Step 3: Layer the Dry Ingredients
Sprinkle the shredded coconut in a uniform layer over the pressed graham cracker crust. Follow with an even layer of semi-sweet chocolate chips, then the peanut butter chips. Finally, sprinkle the holiday M&M’s evenly over the top, reserving a small handful for garnish after baking if desired.
Step 4: Add the Sweetened Condensed Milk
Slowly and evenly drizzle the entire can of sweetened condensed milk over the layered ingredients. Take your time to cover as much surface area as possible. Using a small offset spatula or the back of a spoon, gently spread it into a thin, even layer, being careful not to disturb the layers beneath.
Step 5: Bake to Perfection
Place the pan in the preheated oven. Bake for 25 to 30 minutes. The bars are done when the edges are a deep golden brown, the condensed milk is bubbly and set, and the top M&M’s have lost their sheen. The center may still look slightly soft but will firm up as it cools.
Step 6: Cool Completely
Remove the pan from the oven and place it on a wire cooling rack. If you reserved extra M&M’s, you can gently press a few into the top now for extra color. Allow the bars to cool completely in the pan for at least 2 hours, or until the pan is completely cool to the touch.
Step 7: Chill, Slice, and Serve
For the cleanest cuts, once the pan is room temperature, cover it and refrigerate for at least 1 hour. Using the parchment paper sling, lift the entire slab of bars out of the pan and onto a cutting board. Use a sharp knife to slice into squares or rectangles. For pristine edges, wipe the knife clean with a hot, damp cloth between cuts.
Tips:
- Press the Crust Firmly: A well-compacted crust prevents crumbling when the bars are sliced and served.
- Even Layering: Distribute each layer as evenly as possible to ensure every bar gets a bit of every ingredient.
- Don’t Overbake: The bars will continue to set as they cool. Overbaking can lead to a hard, overly chewy texture instead of a perfect, soft chew.
- The Chill is Crucial: Resisting the urge to cut into warm bars is key. Chilling firms up all the layers and the condensed milk, allowing for perfect, neat slices.
- Customize Your Layers: Feel free to swap peanut butter chips for butterscotch chips, use white chocolate chips, or add 1/2 cup of chopped nuts (like pecans or walnuts) for extra texture.
Storage Options:
- Room Temperature: Store sliced bars in a single layer in an airtight container at cool room temperature for up to 4 days. Place parchment paper between layers to prevent sticking.
- Refrigerator: For a firmer texture and longer storage, keep the bars in the refrigerator for up to 1 week.
- Freezing: These bars freeze exceptionally well. Individually wrap cooled bars in plastic wrap and place them in a freezer-safe bag or container. Freeze for up to 3 months. Thaw at room temperature or in the refrigerator overnight.
- Make-Ahead: The entire slab can be baked, cooled, and stored (unsliced and well-wrapped) in the refrigerator 2-3 days before you need to slice and serve it.
Christmas Magic Cookie Bars are more than a dessert; they are a festive experience. They capture the spirit of the season in a pan, offering a guaranteed dose of sweetness and nostalgia that will make them a cherished part of your holiday baking tradition for years to come.