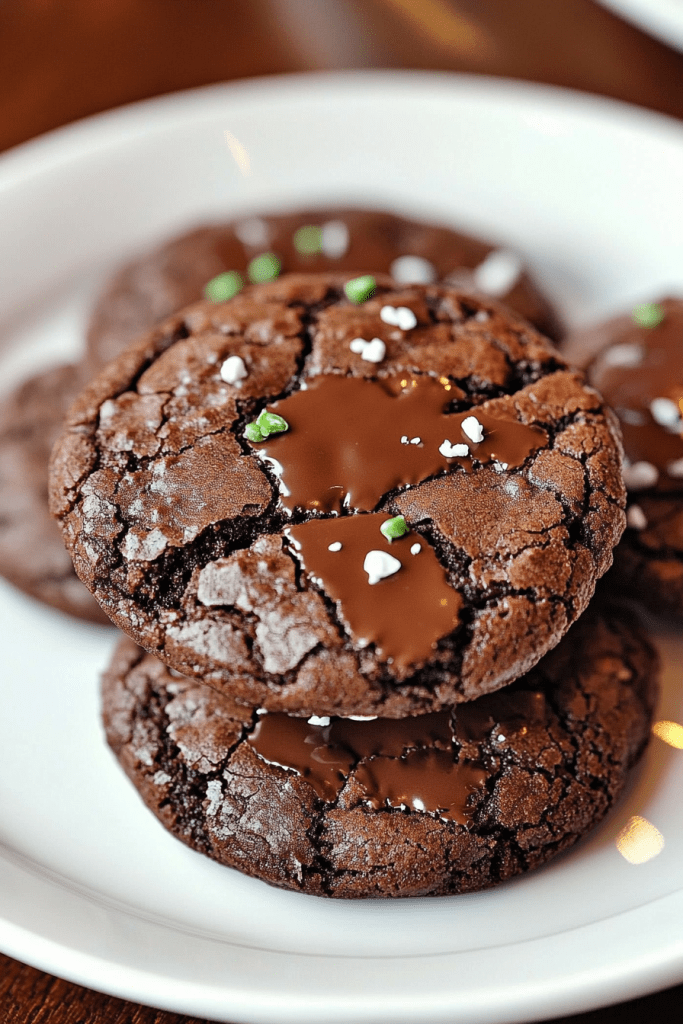
These Fudgy Brownie Cookies are the ultimate treat for anyone who loves the deep, rich flavors of chocolate combined with the soft, chewy texture of a classic brownie. Imagine biting into a cookie that carries the decadence of a fudgy brownie—each one boasts a luscious, melt-in-your-mouth center with a delicate, crinkly top that crackles ever so slightly as you bite in. This recipe has been perfected to balance the intensity of dark chocolate with a subtle hint of cocoa and a whisper of vanilla, ensuring every cookie is a burst of irresistible flavor. The process is straightforward yet rewarding, making it perfect for both busy bakers and those who enjoy the art of dessert-making. Whether you are planning a special treat for guests or simply indulging in a personal sweet escape, these cookies deliver a gourmet experience right from your home oven.
In creating these cookies, attention to detail is key—from carefully measuring your ingredients to ensuring the batter is mixed just enough to retain its fudgy character. The magic begins when the dark chocolate and butter melt together into a silky mixture that infuses the batter with a deep, chocolatey richness. As you beat the eggs and light brown sugar into a frothy, airy base, you set the stage for a texture that is both delicate and satisfying. The subsequent gentle incorporation of the dry ingredients and the brief chill in the refrigerator allow the flavors to meld and the batter to thicken, ensuring that every cookie bakes to perfection. With a final touch of precision in portioning the batter onto your trays, you’re well on your way to enjoying a dessert that feels indulgent yet surprisingly simple to prepare.
Why You’ll Love This Recipe:
• Decadent Flavor: Every bite delivers a powerful punch of dark chocolate enriched with a subtle cocoa nuance and hints of vanilla.
• Perfect Texture: The cookies emerge with a shiny, crinkly top and a soft, fudgy center that firm up just enough as they cool, offering a satisfying chew.
• Easy to Make: With clear, step-by-step instructions and straightforward techniques, this recipe is ideal for both seasoned bakers and beginners.
• Versatile Treat: Enjoy these cookies as a dessert, a midday snack, or even paired with a scoop of ice cream for an extra indulgent treat.
• Crowd-Pleasing: Their irresistible taste and elegant presentation make them a perfect choice for parties, potlucks, or special family gatherings.
Ingredients
• 1/2 cup (60g) all-purpose flour
• 1/4 cup (25g) cocoa powder
• 1/2 teaspoon baking powder
• 1/4 teaspoon salt
• 7 oz (200g) dark chocolate (60-70%), coarsely chopped
• 1/4 cup (56g) unsalted butter
• 2 large eggs, at room temperature
• 3/4 cup (150g) light brown sugar
• 1 teaspoon vanilla extract
Instructions
Step 1: Preheat the Oven and Prepare Your Baking Trays
1. Begin by preheating your oven to 180°C (350°F) or Gas Mark 4. This ensures that your oven is at the right temperature for a consistent bake, which is crucial for achieving the perfect texture.
2. Line two large baking trays with parchment paper or a silicone baking mat. The non-stick surface not only makes cleanup easier but also helps the cookies release effortlessly once baked. Set the trays aside while you prepare the batter.
Step 2: Mix the Dry Ingredients
1. In a small bowl, combine the all-purpose flour, cocoa powder, baking powder, and salt. Use a whisk to mix these ingredients thoroughly. This step is essential because it ensures that the cocoa and baking powder are evenly distributed, which will help maintain the balance of flavor and texture throughout the cookies.
2. Once mixed, set the dry ingredients aside. Keeping them separate until the right moment helps prevent overmixing later, preserving the desired fudgy consistency.
Step 3: Melt the Chocolate and Butter
1. In a microwave-safe bowl, place the coarsely chopped dark chocolate and unsalted butter. The combination of these two ingredients creates the rich, fudgy base that defines these cookies.
2. Microwave the mixture in 30-second intervals, stirring after each interval. Continue this process until the chocolate and butter have fully melted together into a smooth, glossy mixture. Take care not to overheat the chocolate, as this can cause it to seize or become grainy.
3. Once melted, set the chocolate and butter mixture aside to cool slightly. Allowing it to rest for a few minutes will prevent the eggs from cooking when you combine the mixtures.
Step 4: Beat the Eggs and Sugar
1. In a large mixing bowl, add the room temperature eggs and light brown sugar. Using a hand mixer or stand mixer fitted with a whisk attachment, beat the eggs and sugar together.
2. Continue to mix for about 5 minutes, or until the mixture becomes pale, fluffy, and has approximately tripled in volume. This step is crucial because it incorporates air into the batter, contributing to the light, delicate texture of the finished cookie even though it remains fudgy in the center.
Step 5: Incorporate the Chocolate Mixture and Vanilla
1. Once your eggs and sugar are well-beaten, slowly pour in the cooled chocolate and butter mixture. Add the teaspoon of vanilla extract as well.
2. Whisk the ingredients together until they are fully combined. The goal here is to create a homogeneous mixture where the rich, chocolatey base infuses every part of the batter without any lumps or unmixed streaks of chocolate.
Step 6: Fold in the Dry Ingredients
1. Gently fold the previously whisked dry ingredients into the chocolate mixture. Use a spatula to incorporate the flour blend with a delicate hand, ensuring that you mix just until the batter is smooth.
2. The batter will be quite runny at this stage, which is normal. It is important not to overmix the batter as that can lead to a tougher cookie. The light mixing helps maintain the fudgy texture you’re aiming for.
Step 7: Chill the Batter
1. Cover the bowl with plastic wrap or transfer the batter to an airtight container and place it in the refrigerator for about 15 minutes.
2. Chilling the batter allows it to thicken slightly, resembling a rich brownie batter. This step is critical because it helps the cookies maintain their shape during baking and contributes to the formation of that shiny, crinkly top that is so characteristic of this recipe.
Step 8: Portion and Bake the Cookies
1. Remove the batter from the refrigerator. Using a medium cookie scoop or a tablespoon, evenly portion the batter onto your prepared baking trays. Ensure that each portion is spaced sufficiently apart so that they have room to spread and bake evenly.
2. For best results, scoop all the dough at once onto the trays; this practice helps ensure that each cookie develops a uniform, glossy top.
3. Place one tray in the oven and bake for 10-12 minutes. The cookies are done when their tops are shiny and have developed a slight crack along the surface, and the edges have a gentle dome. If you are baking more than one tray, bake them one at a time to maintain the optimal oven temperature for even cooking.
Step 9: Cooling and Final Touches
1. Once baked, remove the tray from the oven and allow the cookies to cool on the tray for 15-20 minutes. This cooling period is important because the cookies will be very soft and delicate immediately out of the oven. As they cool, they will firm up to the ideal fudgy texture that is both chewy and tender.
2. After cooling, transfer the cookies carefully to a wire rack to cool completely. Enjoy them as they are, or consider dusting a light sprinkling of powdered sugar over the top for an extra touch of sweetness and elegance.
Tips
• Room Temperature Ingredients: Ensure your eggs are at room temperature to help achieve maximum volume and a light texture when beaten with the sugar.
• Melting Technique: When melting the chocolate and butter, microwave in short bursts and stir frequently to avoid burning or overcooking the chocolate.
• Chilling the Batter: Don’t skip the chilling step! It not only helps in thickening the batter but also contributes to the formation of that coveted shiny top.
• Baking Time: Keep a close eye on the cookies during the final minutes of baking. Overbaking can lead to a cookie that is too dry or loses its fudgy center, so aim for a slightly underdone center for the perfect bite.
• Portioning: Use a cookie scoop for uniformity, ensuring every cookie bakes evenly. Uniform cookies not only look professional but also help achieve a consistent texture in each bite.
Storage Options
• Room Temperature: Store the cooled cookies in an airtight container at room temperature. They will stay fresh for up to 3 days. For extra softness, place a slice of bread in the container; the cookies will absorb moisture from the bread as needed.
• Refrigeration: If you plan to keep the cookies for a longer period, store them in the refrigerator for up to a week. Before serving, let them come to room temperature or gently warm them in the microwave for a few seconds to revive their soft, fudgy texture.
• Freezing: These cookies freeze well. To freeze, arrange them in a single layer on a baking sheet and freeze until solid. Then, transfer the cookies to a freezer-safe bag or container. They can be stored in the freezer for up to 2 months. When you’re ready to enjoy them, thaw at room temperature and, if desired, warm them slightly in the microwave to restore their fresh-baked quality.
In conclusion, Fudgy Brownie Cookies offer an unparalleled chocolate experience that marries the best qualities of both brownies and cookies. With a rich, intense flavor and a texture that is at once soft, fudgy, and slightly chewy, these cookies are perfect for satisfying your chocolate cravings any time of day. The detailed steps—from carefully melting the chocolate and butter to beating the eggs and sugar until light and fluffy—ensure that every cookie is baked to perfection. Whether enjoyed on their own, with a scoop of ice cream, or as part of an indulgent dessert spread, these cookies are sure to become a staple in your baking repertoire. Enjoy the process, experiment with your favorite add-ins, and most importantly, savor every delicious bite of these decadent treats!