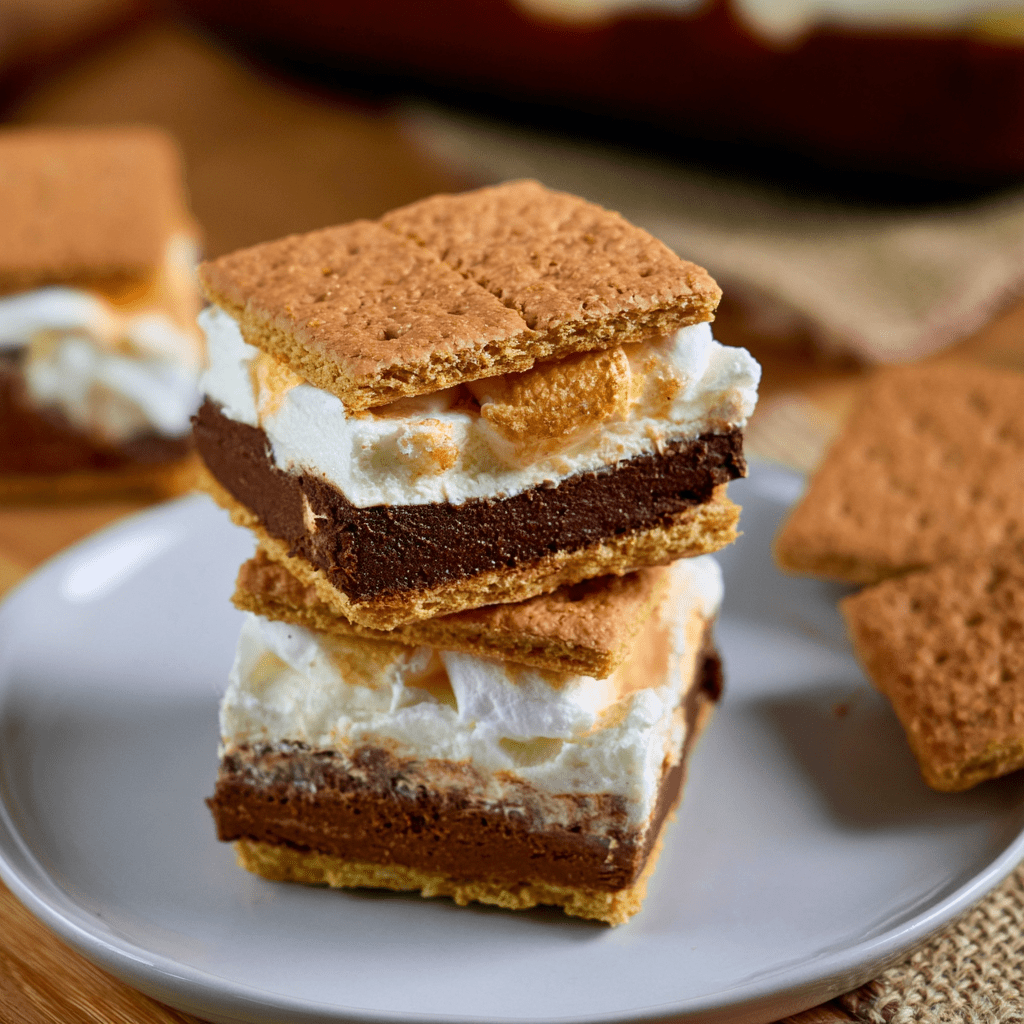
S’mores Ice Cream Sandwiches are the ultimate no-bake summer treat — a dreamy, creamy, frozen mashup of two beloved desserts: classic campfire s’mores and an ice cream sandwich. This recipe layers rich, chocolatey pudding, a fluffy marshmallow-cream cheese mixture, and whipped topping into a freezer-friendly slab, then slices it into perfect squares that get sandwiched between two honey-sweet graham crackers. The magic begins with instant chocolate pudding whisked with cold milk until thick and velvety, poured into a parchment-lined pan as the first decadent layer. Then comes the marshmallow layer — a heavenly blend of softened cream cheese and marshmallow creme beaten until creamy, then folded with thawed Cool Whip into a light, fluffy, cloud-like mixture that’s spread over the chocolate layer.
The brilliance of this recipe lies in its simplicity and the way it captures all the nostalgic flavors of a s’more — chocolate, marshmallow, and graham — in a cool, creamy, make-ahead dessert that requires no oven, no campfire, and no special equipment. After a few hours in the freezer, the layers set into a firm-but-creamy slab that’s easy to slice into perfect portions. Each square is then pressed between two graham cracker squares, creating a handheld ice cream sandwich that’s creamy, crunchy, chocolatey, and marshmallow-sweet all at once. These S’mores Ice Cream Sandwiches are perfect for summer barbecues, birthday parties, poolside snacks, or anytime you need a frozen treat that feels nostalgic and special.
Why You’ll Love This Recipe:
- No-Bake & Effortless: No oven, no stove, no ice cream maker — just mix, layer, freeze, and slice.
- All the S’mores Flavors: Chocolate, marshmallow, and graham cracker in every bite.
- Make-Ahead Magic: Prepare the slab days in advance, then slice and assemble when ready to serve.
- Perfect for Summer: A cool, creamy, frozen treat that’s ideal for hot days.
- Crowd-Pleasing: Kids and adults alike will go crazy for these.
Ingredients:
For the Chocolate Layer:*
1 large box (6-serving size) instant chocolate pudding mix
2½ cups cold milk
For the Marshmallow Cream Layer:*
8 ounces (1 container) frozen whipped topping (Cool Whip), thawed
4 ounces cream cheese, softened
7 ounces marshmallow creme (about 1 jar)
For Assembly:*
32 graham cracker squares (about 2 sleeves)
Instructions:
Step 1: Make the Chocolate Pudding Layer*
In a large mixing bowl, whisk together the instant chocolate pudding mix and cold milk until smooth and thickened, about 2 minutes. Let it sit for 5 minutes to fully set.
Step 2: Prepare the Pan*
Line the bottom of a 9×13-inch baking dish with aluminum foil or parchment paper, leaving some overhang on two sides for easy removal later.
Step 3: Spread the Pudding Layer*
Spread the chocolate pudding evenly in the bottom of the prepared baking dish, smoothing the top with a spatula. Set aside.
Step 4: Make the Marshmallow Cream Layer*
In a separate mixing bowl, beat the softened cream cheese and marshmallow creme together with an electric mixer on high speed until creamy and well incorporated, about 2 minutes.
Step 5: Fold in the Whipped Topping*
Gently fold the thawed Cool Whip into the cream cheese-marshmallow mixture until no streaks remain and the mixture is light and fluffy.
Step 6: Assemble the Layers*
Spread the marshmallow cream mixture evenly over the chocolate pudding layer in the baking dish, smoothing the top with a spatula.
Step 7: Freeze*
Place the baking dish in the freezer and freeze for a minimum of 6 hours, or overnight, until the layers are completely firm.
Step 8: Slice and Assemble Sandwiches*
Remove the frozen slab from the pan using the foil or parchment overhangs. Place it on a cutting board. Using a sharp knife, slice the slab into 16 equal squares. Place each square between two graham cracker squares, pressing gently to adhere.
Step 9: Serve*
Serve immediately, or wrap individual sandwiches in plastic wrap and return to the freezer until ready to serve.
Tips:
- Use Full-Fat Ingredients for Best Texture: Whole milk and full-fat cream cheese yield a creamier, richer result.
- Don’t Skip the Freeze Time: The slab needs at least 6 hours to firm up properly. Overnight is even better.
- Slice with a Warm Knife: Run your knife under hot water, wipe it dry, then slice — this helps create clean, neat cuts.
- Wrap Individually for Easy Serving: Once assembled, wrap each sandwich in plastic wrap or parchment paper and store in a freezer bag. Perfect for grabbing a quick treat.
- Customize It: Add a sprinkle of crushed graham crackers or mini chocolate chips between the layers for extra texture.
Flavor Variations:
- Peanut Butter S’mores: Swirl ½ cup of creamy peanut butter into the marshmallow layer before freezing.
- Mint Chocolate S’mores: Use mint chocolate pudding mix instead of regular chocolate.
- Salted Caramel S’mores: Drizzle caramel sauce over the chocolate layer before adding the marshmallow layer.
Storage Options:
- Freezer (Unassembled Slab): The frozen slab can be stored in the baking dish, tightly covered, for up to 2 weeks. Slice and assemble as needed.
- Freezer (Assembled Sandwiches): Wrap each sandwich individually in plastic wrap and store in a freezer bag for up to 2 months.
- Serving: Sandwiches can be enjoyed straight from the freezer or allowed to soften for 2-3 minutes at room temperature.
S’mores Ice Cream Sandwiches are the kind of dessert that brings people together — creamy, crunchy, chocolatey, and marshmallow-sweet, they’re a frozen twist on a campfire classic. Make a batch, keep them in the freezer, and be the hero of your next summer gathering. Enjoy!