These Soft and Fluffy Pancakes are a timeless breakfast treat that brings warmth and comfort to any morning. There’s something magical about waking up to a stack of golden, pillowy pancakes, lightly crisp on the edges and tender in the center, just waiting to be drizzled with butter and maple syrup or adorned with your favorite fruit and whipped cream. This recipe is designed for home cooks who appreciate the simplicity and delight of a well-made pancake. With a few basic ingredients and a little attention to detail, you can create pancakes that are light, airy, and full of flavor. The use of freshly measured ingredients like all-purpose flour, baking powder, and fresh milk, combined with the richness of melted butter and the subtle hint of vanilla, ensures that every bite is both satisfying and indulgent. The balance of these components creates a batter that cooks evenly and rises beautifully, giving you a breakfast that feels both classic and comforting.
Whether you’re preparing a weekend brunch for family and friends or a quick breakfast on a busy weekday, these pancakes deliver consistently delicious results. The process is straightforward, yet it celebrates the art of traditional pancake making. By sifting the dry ingredients together, you incorporate air into the mixture, which is key to achieving that soft and fluffy texture. The gentle folding in of the wet ingredients ensures that the batter remains light without overdeveloping gluten, which can make pancakes tough. As the pancakes cook, the heat works its magic to form a delicate crust while keeping the interior moist and tender. The aroma of sizzling batter, mingling with hints of vanilla and butter, will have your kitchen filled with the promise of a delightful meal. This recipe not only provides a satisfying start to your day but also serves as a canvas for creative toppings and variations, allowing you to customize your pancakes to suit your taste perfectly.
Why You’ll Love This Recipe:
• Light and Airy Texture: The careful mixing technique and balanced ingredients create pancakes that are incredibly soft and fluffy with every bite.
• Simple Ingredients: With pantry staples like flour, milk, and eggs, this recipe is both accessible and budget-friendly.
• Versatile Base: Enjoy them plain or dress them up with a variety of toppings such as fresh fruit, nuts, syrup, or whipped cream.
• Quick to Make: The straightforward steps mean you can whip up a delicious stack in no time, perfect for busy mornings.
• Comfort Food Classic: Nothing beats the nostalgic comfort of a warm, homemade pancake breakfast to start your day on a positive note.
Ingredients
• 1 1/2 cups all-purpose flour
• 2 1/2 teaspoons baking powder
• 1/2 teaspoon salt
• 2 1/2 tablespoons sugar
• 1 1/4 cups fresh milk (any type)
• 1 large egg
• 3 tablespoons melted butter
• 2 teaspoons vanilla extract (optional)
Instructions
1. Prepare the Dry Ingredients:
In a large bowl, sift together the all-purpose flour, baking powder, salt, and sugar. Sifting not only ensures that your dry ingredients are well combined but also helps to incorporate air into the mixture, which is crucial for achieving a light, fluffy texture. The baking powder acts as a leavening agent, and by distributing it evenly with the flour, you ensure that every pancake rises beautifully during cooking.
2. Mix in the Wet Ingredients:
In the bowl with the dry ingredients, add 1 1/4 cups of fresh milk, the large egg, the 3 tablespoons of melted butter, and, if desired, 2 teaspoons of vanilla extract. Using a whisk or a fork, gently mix the ingredients until they are just combined. It’s important not to overmix at this stage; a few small lumps are perfectly fine. Overmixing can lead to the development of gluten in the batter, resulting in pancakes that are tougher and less tender. The goal is to combine the ingredients to form a smooth, cohesive batter that still retains air for fluffiness.
3. Rest the Batter (Optional but Recommended):
If you have a few extra minutes, allow the batter to rest for about 5 to 10 minutes. This resting period gives the flour time to hydrate fully and the leavening agents a chance to activate, which will further contribute to the light, airy texture of your pancakes. This step also helps to reduce any lumps, ensuring a uniform mixture when the pancakes hit the griddle.
4. Heat Your Griddle or Pan:
Preheat a non-stick griddle or large skillet over medium heat. Once the cooking surface is hot, lightly grease it with a small amount of butter or cooking spray. A well-heated and properly greased pan is key to achieving an even, golden-brown color on your pancakes without them sticking or burning.
5. Cook the Pancakes:
Using a ladle or measuring cup, pour about 1/4 cup of batter onto the griddle for each pancake. Space them out evenly to give them room to spread without merging together. Cook the pancakes for about 2 minutes or until you see bubbles forming on the surface and the edges begin to look set. These bubbles are a sign that the pancake is ready to flip. Use a spatula to carefully turn each pancake over and cook for an additional minute, or until the other side is golden and the pancake is cooked through. Cooking times may vary slightly depending on your stove and the thickness of your batter, so adjust as needed.
6. Keep the Pancakes Warm:
Once a pancake is done, remove it from the griddle and place it on a plate. If you’re making a large batch and need to keep them warm, you can place the finished pancakes in a single layer on a baking sheet in an oven set to a low temperature (around 200°F or 90°C). Cover them lightly with foil to prevent them from drying out until you’re ready to serve.
7. Serve with Your Favorite Toppings:
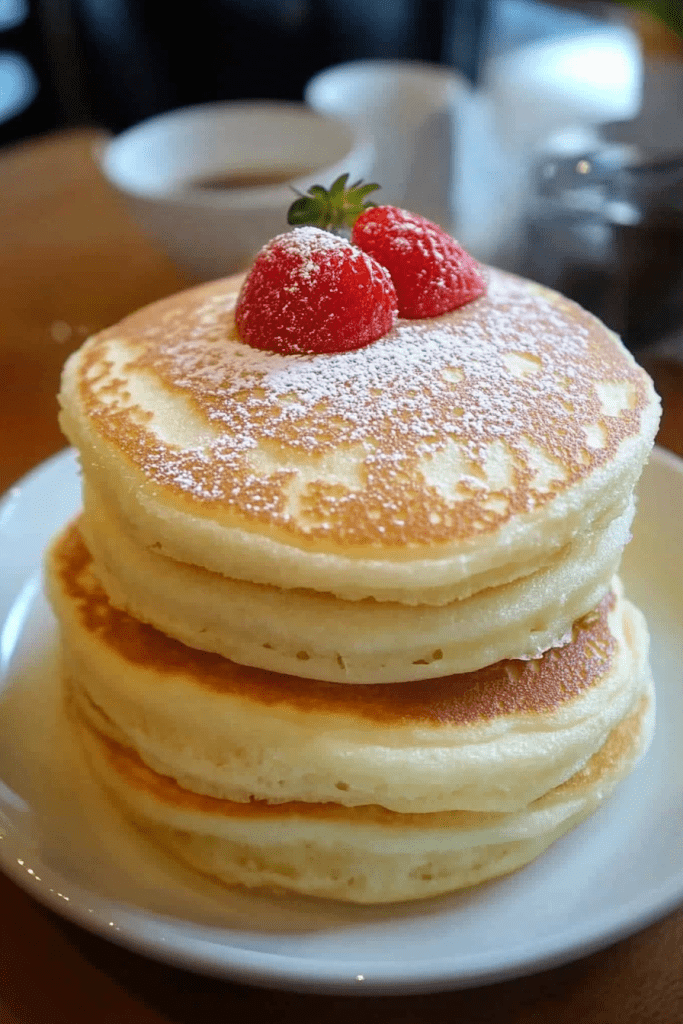
Transfer the pancakes to a serving plate and top them with your choice of toppings. Classic options include a pat of butter and a drizzle of maple syrup, but you can also opt for fresh berries, sliced bananas, a dusting of powdered sugar, or even a dollop of whipped cream. The versatility of this recipe makes it perfect for customizing to your taste.
Tips
• Do Not Overmix: When combining your wet and dry ingredients, mix just until you see no more dry spots. A few lumps are perfectly normal and will cook out.
• Batter Resting: Allowing the batter to rest for a few minutes can make a big difference in the texture. It helps the gluten relax and the leavening agents to do their work.
• Temperature Control: Ensure your griddle or pan is at the right temperature. Too hot, and the pancakes might burn on the outside before cooking through; too cool, and they may turn out flat and dense.
• Consistent Size: Using a 1/4 cup measure for each pancake ensures uniformity in size, which means they will all cook at roughly the same rate.
• Customize Your Flavor: If you’re feeling adventurous, try adding a handful of chocolate chips, blueberries, or even a sprinkle of cinnamon to the batter before cooking.
• Greasing the Pan: A light coat of butter or oil on your griddle helps prevent sticking and gives the pancakes a lovely, slightly crispy edge.
• Testing for Doneness: Look for bubbles forming on the surface and edges that appear set before flipping. This is the best indicator that the pancake is ready for its second side.
• Batch Cooking: If you’re preparing a large batch, keep the finished pancakes warm in the oven while you cook the rest. This ensures that every serving is hot and ready to enjoy.
Storage Options
• Refrigeration: If you have leftovers, allow the pancakes to cool completely and then store them in an airtight container in the refrigerator. They will keep well for up to 2 days. To reheat, simply warm them in a toaster, microwave, or on a skillet until heated through.
• Freezing: Pancakes freeze beautifully. Stack the cooled pancakes with a piece of wax or parchment paper between each to prevent sticking, then place them in a freezer-safe bag or container. They can be frozen for up to 1 month. To reheat, thaw overnight in the refrigerator and then toast in a toaster or warm in the microwave.
• Reheating Tips: For best results, reheat pancakes in a toaster or on a skillet with a little butter to restore their freshly made texture. Avoid over-microwaving as it can make them rubbery; instead, use short intervals and check frequently.