Salted Caramel Chocolate Sugar Cookie Bars

0

Salted Caramel Chocolate Sugar Cookie Bars are an indulgent treat that combines rich, dark cocoa and the sweet, buttery taste of salted caramel frosting. These bars offer the perfect balance of sweet and salty flavors in every bite, making them an irresistible dessert for any occasion. The soft, cookie-like base is easy to prepare and pairs wonderfully with the creamy, decadent frosting.

Whether you’re serving them at a party, sharing them with friends, or simply enjoying a treat at home, these bars are sure to satisfy any sweet tooth. With the option to top them with a sprinkle of coarse sea salt, they become a sophisticated dessert that highlights the contrast between the rich chocolate and the salted caramel.

Why You’ll Love This Recipe:

Decadent Flavor Combo: The dark cocoa base and salted caramel frosting create an irresistible sweet-salty pairing.

Soft and Chewy Texture: The cookie base stays tender, providing the perfect backdrop for the creamy frosting.

Simple to Make: Easy enough for a weeknight treat yet impressive enough for special gatherings.

Ingredients:

• ½ cup unsalted butter, at room temperature

• ½ cup brown sugar

• ½ cup granulated sugar

• 1 large egg

• 2 teaspoons vanilla extract

• 2 tablespoons caramel coffee creamer (or milk)

• 2 cups all-purpose flour

• ½ cup dark cocoa powder

• 1 teaspoon baking powder

• ½ teaspoon salt

• 1 batch of Salted Caramel Frosting

• Coarse ground sea salt (optional, for garnish)

Instructions:

1. Preparation:

• Preheat your oven to 375°F (190°C). Spray a 9×13-inch baking pan with non-stick baking spray and set aside.

2. Mix the Wet Ingredients:

• In a large mixing bowl, cream together the unsalted butter, brown sugar, and granulated sugar until smooth and fluffy.

• Add the egg, vanilla extract, and caramel coffee creamer (or milk). Mix until everything is well combined.

3. Combine Dry Ingredients:

• In a separate bowl, sift together the all-purpose flour, dark cocoa powder, baking powder, and salt.

• Gradually add the dry ingredients to the butter mixture, mixing until a consistent dough forms.

4. Bake:

• Spread the dough evenly in the prepared 9×13-inch baking pan.

• Bake in the preheated oven for 14-15 minutes. Avoid over-baking to maintain a soft texture.

• Remove from the oven and allow the cookie base to cool to room temperature.

5. Finish with Frosting:

• Once cooled, spread the Salted Caramel Frosting evenly over the top of the cookie base.

• Optionally, sprinkle coarse ground sea salt over the frosting for added flavor.

6. Serve and Store:

• Cut into 24 bars and serve. Store any leftovers in an airtight container to maintain freshness.

Tips:

Avoid Overmixing: When combining the dry ingredients with the wet, mix just until incorporated to keep the bars soft.

Sea Salt Topping: If you enjoy a stronger contrast of flavors, use a high-quality sea salt for sprinkling.

Frosting Variation: Enhance the frosting with a drizzle of melted chocolate for a decorative touch.

Storage Options:

Room Temperature: Store in an airtight container at room temperature for up to 3 days.

Refrigerator: For longer storage, keep them in the fridge for up to a week. Allow to come to room temperature before serving.

These Salted Caramel Chocolate Sugar Cookie Bars are perfect for those who love the combination of rich chocolate and sweet-salty caramel. Enjoy them as a sweet treat for any occasion!

Kielbasa Soup with Potatoes

0

Kielbasa Soup with Potatoes is a warm and hearty dish perfect for cooler weather or when you’re craving a comforting, satisfying meal. This soup is packed with the smoky flavor of kielbasa, tender potatoes, and the rich blend of Parmesan and cheddar cheeses. Fresh vegetables and garlic enhance the flavor, making this soup a balanced combination of savory and creamy.

This recipe is easy to prepare in a single pot, minimizing cleanup and maximizing convenience. It’s an ideal meal for busy weeknights or for feeding a crowd, providing a delightful mix of textures and tastes that will have everyone asking for seconds. Serve it with crusty bread or a side salad for a complete meal.

Why You’ll Love This Recipe:

Full of Flavor: The combination of smoky kielbasa, creamy cheeses, and savory chicken stock is rich and satisfying.

Easy One-Pot Meal: Simple preparation in one pot means less cleanup.

Comfort Food at Its Best: Perfect for warming up on a chilly day or when you want a hearty, filling meal.

Ingredients:

• 1 pound kielbasa sausage, sliced

• 2 garlic cloves, freshly minced

• 1 tbsp olive oil

• 1 small yellow onion, diced

• ½ cup celery, finely sliced

• 2 large carrots, peeled and diced

• 4 cups chicken stock

• 1 ½ pounds potatoes, diced

• ½ cup Parmesan cheese, shredded

• 2 cups milk

• 2 cups cheddar cheese, shredded

• 1/4 cup parsley, roughly chopped

• Salt and black pepper to taste

How to Make Kielbasa Soup with Potatoes:

1. Sauté the Sausage:

• In a large Dutch oven or soup kettle, heat the olive oil over medium-high heat.

• Add the sliced kielbasa and cook for 5-6 minutes until browned. Remove the sausage from the pot and set it aside.

2. Sauté the Vegetables:

• In the same pot, add the diced onion, minced garlic, carrots, and celery. Cook for 2 minutes, stirring occasionally, until the vegetables start to soften.

3. Add the Stock and Potatoes:

• Pour in the chicken stock and add the diced potatoes. Bring the mixture to a boil, then reduce the heat to medium-low, cover, and simmer for 15 minutes or until the potatoes are tender.

4. Incorporate the Sausage and Cheeses:

• Add the cooked kielbasa back into the pot. Stir in the milk, Parmesan cheese, and cheddar cheese. Season with salt and black pepper to taste.

5. Simmer and Finish:

• Stir the soup well and cook over medium-low heat for another 10 minutes, or until the cheese has melted and the soup is smooth and creamy.

6. Garnish and Serve:

• Remove from heat and garnish with chopped parsley. Serve immediately while hot.

Tips:

Cheese Melting Tip: To prevent the cheese from clumping, add it gradually while stirring continuously.

Thicker Soup: For a thicker consistency, mash some of the potatoes directly in the pot before adding the cheeses.

Substitute Veggies: Feel free to add or substitute other vegetables like spinach or green beans for added variety.

Storage Options:

Refrigerator: Store leftovers in an airtight container for up to 3 days. Reheat on the stovetop or microwave until warmed through.

Freezer: Freeze for up to 2 months in a freezer-safe container. Thaw overnight in the refrigerator before reheating.

This Kielbasa Soup with Potatoes is a deliciously comforting dish that is perfect for a cozy night in. Enjoy the blend of flavors and warmth in each bite!

Chicken Bacon Ranch Tater Tot Casserole

0

Chicken Bacon Ranch Tater Tot Casserole is the ultimate comfort food that combines the satisfying crunch of Tater Tots with the creamy goodness of chicken, sour cream, and cheese. This dish is infused with the classic flavors of ranch and crispy bacon, making it a hit for both family dinners and potluck gatherings. With layers of seasoned potatoes and a savory, cheesy chicken mixture, every bite delivers warmth and delicious satisfaction.

This casserole is easy to prepare, making it a perfect option for weeknight meals or when you want a no-fuss dish that still impresses. It’s versatile enough to be served as a main dish or a hearty side. Top it off with fresh tomatoes and green onions for a pop of color and extra flavor, making it as visually appealing as it is tasty.

Why You’ll Love This Recipe:

Crowd-Pleaser: The blend of ranch, bacon, and cheese ensures flavors everyone will love.

Easy Preparation: A simple layered process makes this casserole straightforward and quick to put together.

Hearty and Satisfying: A complete meal in one dish that’s filling and comforting.

Ingredients:

• 1 teaspoon vegetable oil

• 1/2 cup finely chopped onion

• 1 can (10.5 ounces) condensed cream of chicken soup

• 1 cup sour cream

• 1/2 cup milk

• 2 cups shredded Colby-Monterey Jack cheese blend (approximately 8 ounces)

• 1 package (1 ounce) ranch dressing and seasoning mix

• 1/4 teaspoon ground black pepper

• 3 cups shredded cooked chicken

• 1 bag (32 ounces) frozen Ore-Ida™ Tater Tots™

• 1/2 cup chopped cooked bacon

• 1/2 cup chopped tomatoes

• 1/4 cup thinly sliced green onions

Instructions:

1. Preheat and Prepare:

• Preheat your oven to 350°F (175°C). Lightly coat a 13×9-inch glass baking dish with cooking spray.

2. Sauté Onions:

• Heat the vegetable oil in a nonstick skillet over medium heat. Add the chopped onions and sauté for 3 to 5 minutes until soft and translucent, stirring occasionally.

3. Combine Ingredients:

• In a medium-sized bowl, combine the sautéed onions, cream of chicken soup, sour cream, milk, one cup of cheese blend, 2 tablespoons of ranch dressing mix, and black pepper. Mix thoroughly.

• Fold in the shredded cooked chicken until evenly mixed.

4. Assemble the Base Layer:

• Arrange half of the frozen Tater Tots in a single layer at the bottom of the prepared baking dish.

5. Layer the Chicken Mixture:

• Spoon the chicken mixture over the Tater Tots, spreading it evenly. Sprinkle 1/4 cup of the chopped bacon over this layer.

6. Top Layer of Tater Tots:

• Place the remaining Tater Tots in a resealable plastic bag with the remaining ranch dressing mix. Seal and shake to coat the Tater Tots evenly with the seasoning. Arrange these on top of the casserole.

7. Bake:

• Bake the casserole in the preheated oven for 40 minutes.

8. Add Cheese and Bacon:

• Sprinkle the remaining one cup of cheese and the remaining 1/4 cup of bacon over the top. Continue baking for an additional 10 to 15 minutes until the cheese is melted and the Tater Tots are slightly browned.

9. Garnish and Serve:

• Remove from the oven and garnish with chopped tomatoes and green onions. Serve hot.

Tips:

Make It Ahead: Assemble the casserole the night before and bake when needed.

Extra Flavor: Add a touch of hot sauce or diced jalapeños for a kick of spice.

Cheese Variations: Substitute the cheese blend with cheddar or pepper jack for a different taste.

Storage Options:

Refrigerator: Store leftovers in an airtight container for up to 3 days. Reheat in the oven or microwave before serving.

Freezer: Freeze portions in a freezer-safe container for up to 2 months. Thaw in the refrigerator overnight before reheating.

This Chicken Bacon Ranch Tater Tot Casserole is perfect for satisfying comfort food cravings with minimal effort. Serve it for dinner, potlucks, or any occasion that calls for a warm, hearty dish that everyone will love.

Sweet Pork Fried Dumplings

0

Sweet Pork Fried Dumplings are a delightful treat that combines savory and slightly sweet flavors in every bite. Encased in a delicate wrapper and cooked to a perfect crisp on one side, these dumplings have a juicy, flavorful pork filling enhanced with fresh ginger, garlic, and cabbage. The addition of mirin and soy sauce gives the dumplings an umami punch, while a hint of sesame oil adds a subtle nuttiness. Paired with a simple soy-mirin dipping sauce, these dumplings are an irresistible appetizer or main course that can elevate any meal.

Making these dumplings from scratch may seem challenging, but the process is straightforward and rewarding. With a bit of practice, you’ll be folding and cooking dumplings like a pro. Serve them as a crowd-pleasing starter at a party or a special dinner with family and friends.

Why You’ll Love This Recipe:

Bursting with Flavor: The combination of pork, fresh ginger, garlic, and soy sauce creates an aromatic filling.

Perfectly Balanced: A touch of mirin adds sweetness, balancing the savory filling.

Fun to Make: Folding and cooking the dumplings can be a fun activity for both beginners and seasoned cooks.

Ingredients:

• 12 oz package all-natural round wraps (e.g., Nasoya wraps)

• 1 egg, beaten

• 1 lb pork sausage, uncooked or very lightly browned

• 2 cups finely chopped savoy or napa cabbage

• 1 1/2 tablespoons fresh grated ginger or ginger paste

• 3 cloves garlic, minced

• 2 tablespoons low sodium soy sauce

• 1 tablespoon mirin

• 1/2 teaspoon sesame oil

• 3 green onions, sliced 1/4 inch wide

• Vegetable oil (for frying)

Dipping Sauce:

• 2/3 cup low sodium soy sauce

• 1/3 cup mirin

• 1/8 teaspoon sesame oil

• Several tablespoons of chopped green onions for garnish

Instructions:

1. Prepare the Filling:

• In a medium bowl, combine the beaten egg, pork sausage, cabbage, ginger, garlic, 2 tablespoons of soy sauce, 1 tablespoon of mirin, and 1/2 teaspoon of sesame oil. Mix thoroughly until the ingredients are well combined.

• Place the mixture in the refrigerator for 30 minutes to let the flavors meld.

2. Assemble the Dumplings:

• When working with the wraps, keep them covered with cold, wet paper towels to prevent drying out.

• Hold one wrapper in your hand and dip your index finger in cold water. Moisten half of the wrapper’s edge, creating a 180-degree circle.

• Place a rounded teaspoon of the pork filling in the center of the wrapper. Fold the wrapper over and press the edges together to seal tightly, ensuring no air pockets remain.

• Repeat until all the filling is used, placing the assembled dumplings on a lightly greased cookie sheet and covering them with moistened paper towels.

3. Cook the Dumplings:

• Heat 2 tablespoons of vegetable oil in a large skillet over medium heat. Add about 10 dumplings in a single layer and cook until the bottom is browned, approximately 2-3 minutes.

• Pour 2/3 cup of water into the skillet, cover, and cook for 3 minutes to steam the dumplings.

• Uncover the skillet, flip the dumplings, and continue to cook until the water has evaporated and the other side is browned, approximately 3-5 minutes.

4. Prepare the Dipping Sauce:

• In a small bowl, mix 2/3 cup soy sauce, 1/3 cup mirin, and 1/8 teaspoon sesame oil.

• Garnish the dipping sauce with several tablespoons of chopped green onions.

5. Serve:

• Sprinkle the remaining green onions over the dumplings just before serving.

• Serve the dumplings warm with the prepared dipping sauce on the side.

Tips:

Avoid Overfilling: Ensure the filling is not too much, as overfilling may cause the dumplings to burst during cooking.

Sealing Technique: Press the edges firmly to avoid any gaps where the filling might leak out.

Make Ahead: Assemble the dumplings in advance and freeze them for later. Just cook from frozen, adding a few extra minutes to the cooking time.

Storage Options:

Refrigerator: Store leftover cooked dumplings in an airtight container for up to 2 days. Reheat in a skillet to maintain crispness.

Freezer: Freeze uncooked dumplings in a single layer on a baking sheet. Once frozen, transfer to a freezer-safe container for up to 2 months.

These Sweet Pork Fried Dumplings are a delightful combination of flavors and textures that are sure to become a favorite in your recipe rotation. Enjoy them as an appetizer or as a main dish alongside a crisp salad or steamed rice!

Pineapple Coconut Cake

0

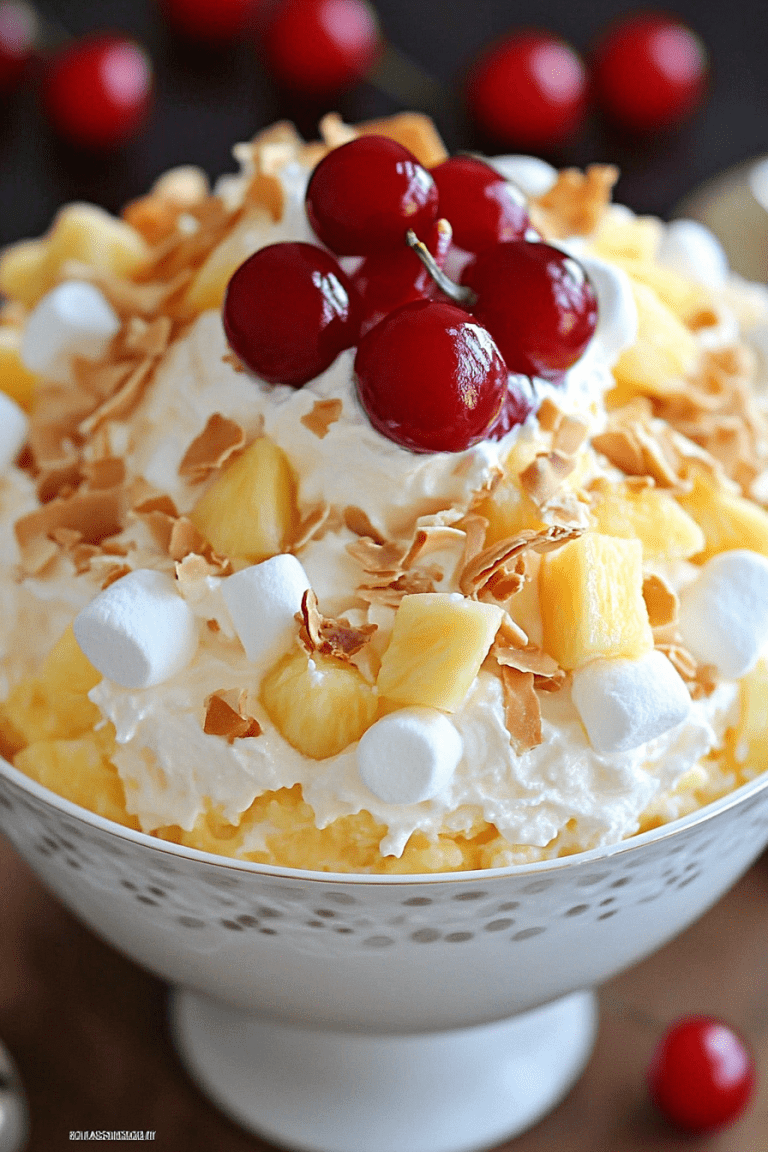
Pineapple Coconut Cake is the perfect treat for those who crave a taste of the tropics. The cake itself is infused with the juicy sweetness of crushed pineapple, ensuring a moist and tender crumb in every bite. Topped with a rich, buttery coconut-pecan icing that seeps into the cake as it cools, this dessert strikes a delightful balance between sweet and nutty. Its texture and flavors transport you to a sun-soaked paradise with each bite.

Ideal for family gatherings, potlucks, or any occasion that calls for a show-stopping dessert, this Pineapple Coconut Cake is as easy to make as it is impressive. With simple ingredients and straightforward steps, you can create a moist, flavorful cake that looks and tastes like it came from a bakery. Its unique flavor profile will have guests reaching for seconds and asking for the recipe.

Why You’ll Love This Recipe:

Tropical Flavor Profile: The combination of pineapple, coconut, and pecans creates a luscious, summery taste.

Moist and Delicious: Crushed pineapple and a rich icing ensure every bite is moist and flavorful.

Simple Preparation: Easy to make and perfect for sharing with friends and family.

Ingredients:

Cake:

• 1 can (20 oz.) crushed pineapple, including juice

• 2 large eggs

• 1/4 cup vegetable oil

• 1 cup granulated sugar

• 1/2 cup brown sugar, firmly packed

• 2 cups all-purpose flour

• 2 teaspoons baking soda

• 1/2 teaspoon salt

Icing:

• 1 can (12 oz.) evaporated milk

• 1 cup (2 sticks) unsalted butter

• 1 1/2 cups granulated sugar

• 2 cups shredded coconut

• 1 cup pecans, coarsely chopped and toasted

• 1 teaspoon pure vanilla extract

• 1/4 teaspoon salt

Instructions:

Step 1: Preheat and Prepare the Baking Dish

• Preheat your oven to 350°F (175°C).

• Lightly grease a 9×13-inch baking dish to prevent sticking.

Step 2: Make the Cake Batter

• In a large mixing bowl, combine the eggs, granulated sugar, brown sugar, vegetable oil, and crushed pineapple (with its juice). Mix until well combined.

• Gradually fold in the all-purpose flour, baking soda, and salt until the batter is smooth and fully integrated.

Step 3: Bake the Cake

• Pour the cake batter into the prepared baking dish.

• Bake in the preheated oven for 25-30 minutes, or until a toothpick inserted into the center comes out clean, indicating the cake is fully baked.

Step 4: Prepare the Icing

• While the cake bakes, start the icing. In a large saucepan, combine the evaporated milk, granulated sugar, and unsalted butter. Place over high heat and bring to a boil.

• Once boiling, reduce the heat to a simmer and let it cook for 10 minutes, stirring occasionally.

Step 5: Finish the Icing

• Remove the saucepan from the heat. Stir in the shredded coconut, toasted pecans, vanilla extract, and salt. Mix until everything is evenly incorporated.

Step 6: Assemble the Cake

• Once the cake is done baking, remove it from the oven. Pour the prepared icing evenly over the hot cake, allowing the icing to soak into the surface.

• Let the cake rest to allow the icing to set before slicing and serving.

Tips:

Toasting Pecans: Toast the pecans in a dry skillet over medium heat for 3-4 minutes, stirring frequently, until they are golden brown and fragrant.

Icing Texture: Ensure the icing is poured over the cake while both are hot for optimal absorption.

Storage: Store any leftovers in an airtight container at room temperature for up to 2 days or refrigerate for up to 5 days.

Storage Options:

Room Temperature: Keep the cake in an airtight container for up to 2 days.

Refrigerator: Store in the fridge for up to 5 days. Allow the cake to come to room temperature before serving for the best texture.

Freezer: Freeze slices of the cake in an airtight container for up to 3 months. Thaw overnight in the refrigerator and bring to room temperature before serving.

This Pineapple Coconut Cake is a crowd-pleasing dessert that combines sweet, tangy, and nutty flavors in each bite. Perfect for any gathering, it’s sure to become a family favorite!
Taco Stuffed Baked Potatoes

0

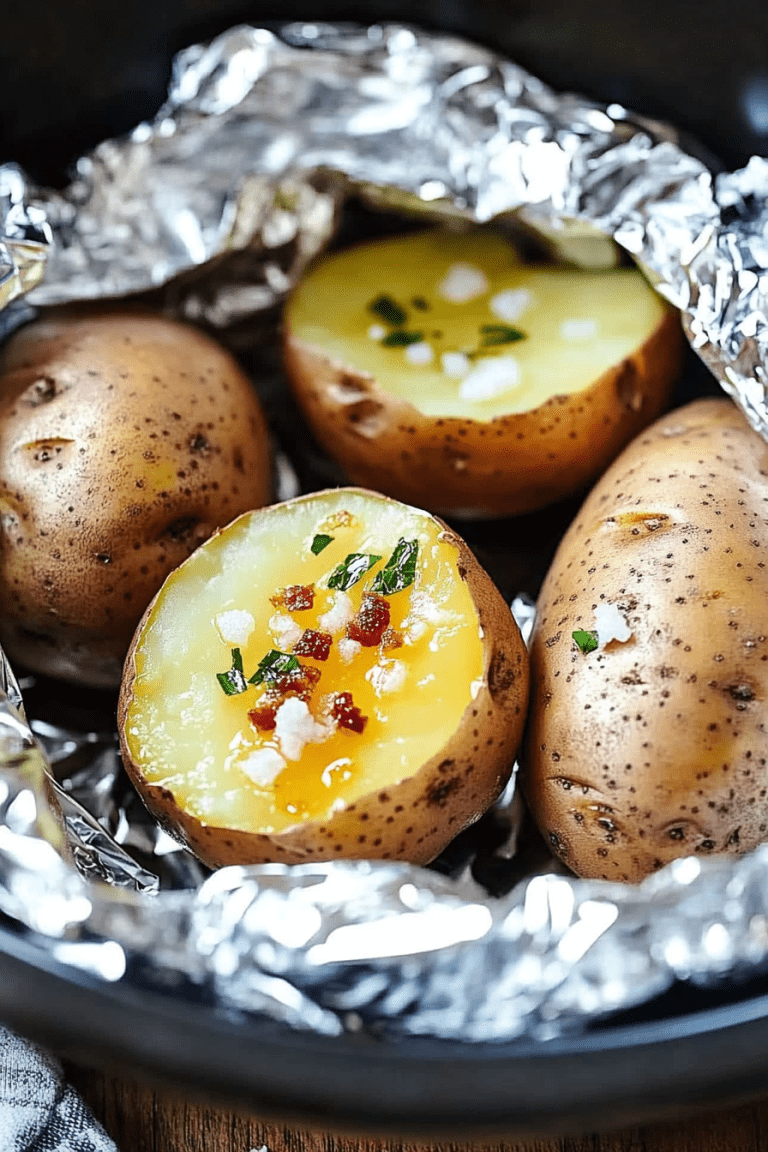
Taco Stuffed Baked Potatoes are a delicious and hearty twist on traditional tacos, combining the comforting texture of baked potatoes with the bold flavors of seasoned ground beef and classic taco toppings. This recipe is perfect for busy weeknights, offering an easy and satisfying meal that the whole family will enjoy. The tender baked potato provides a perfect vessel for the rich, savory filling, making each bite a blend of fluffy potato and flavorful taco goodness.

Why You’ll Love This Recipe:

Quick and Easy: Simple steps make this an ideal weeknight meal.

Customizable: Load it up with your favorite toppings to create a personalized dish.

Comforting and Flavorful: Combines the best of baked potatoes and tacos for a filling, hearty meal.

Ingredients:

• 4 large baked potatoes

• 1 pound ground beef

• 1/2 medium onion, diced

• 2 cloves garlic, minced

• 2 tablespoons homemade taco seasoning (or 1 packet of store-bought taco seasoning)

• 1/2 cup water

• 1 cup salsa

• Salt and black pepper to taste

• 1 cup shredded cheddar cheese

• 1 tablespoon sour cream per potato, optional

• Diced tomatoes and green onions, optional for garnish

Instructions:

1. Prepare the Potatoes:

• Preheat your oven to 400°F (200°C).

• Wash the potatoes thoroughly and prick them all over with a fork to allow steam to escape.

• Bake the potatoes directly on the oven rack for 45-60 minutes, or until tender when pierced with a fork.

• Let the potatoes cool for about 10 minutes. Slice each potato lengthwise and gently squeeze the sides to create a pocket for the filling.

2. Cook the Taco Meat:

• In a large skillet over medium heat, cook the ground beef with the diced onion and minced garlic. Season with a pinch of salt and black pepper.

• Cook for 7-10 minutes, or until the beef is browned and the onions are translucent. Drain any excess grease.

• Add the taco seasoning, 1/2 cup of water, and salsa. Stir well to combine, then bring the mixture to a simmer.

• Reduce the heat to low, cover, and let simmer for 15 minutes to allow the flavors to meld.

3. Prepare the Potatoes for Filling:

• Lightly season the opened potatoes with a pinch of salt and black pepper. Mash the inside slightly with a fork to create a more substantial base for the filling.

• Add a dollop of sour cream if desired for an extra creamy touch.

4. Assemble the Stuffed Potatoes:

• Spoon the taco meat mixture generously into each prepared potato pocket.

• Top with shredded cheddar cheese and any additional toppings you like, such as diced tomatoes, green onions, or an extra dollop of sour cream.

5. Optional: Melt the Cheese:

• For a bubbly, melted cheese topping, place the stuffed potatoes under the broiler for a few minutes. Watch carefully to prevent burning.

6. Serve:

• Serve the taco stuffed baked potatoes warm and enjoy!

Tips:

Potato Shortcuts: For a quicker version, use the microwave to partially cook the potatoes before finishing in the oven for a crispier skin.

Toppings Galore: Try adding guacamole, jalapeños, or hot sauce for added flavor.

Cheese Variety: Swap cheddar for Monterey Jack or a Mexican cheese blend for different flavor profiles.

Storage Options:

Refrigerator: Store leftovers in an airtight container for up to 3 days. Reheat in the oven or microwave until warmed through.

Freezer: Freeze the stuffed potatoes without toppings in a freezer-safe container for up to 2 months. Thaw in the refrigerator overnight before reheating.

These Taco Stuffed Baked Potatoes are a tasty, filling meal perfect for taco lovers looking for a creative spin on a classic dish. Enjoy the warm, cheesy, and flavorful experience with each bite!

Pork Chop and Potato Bake

0

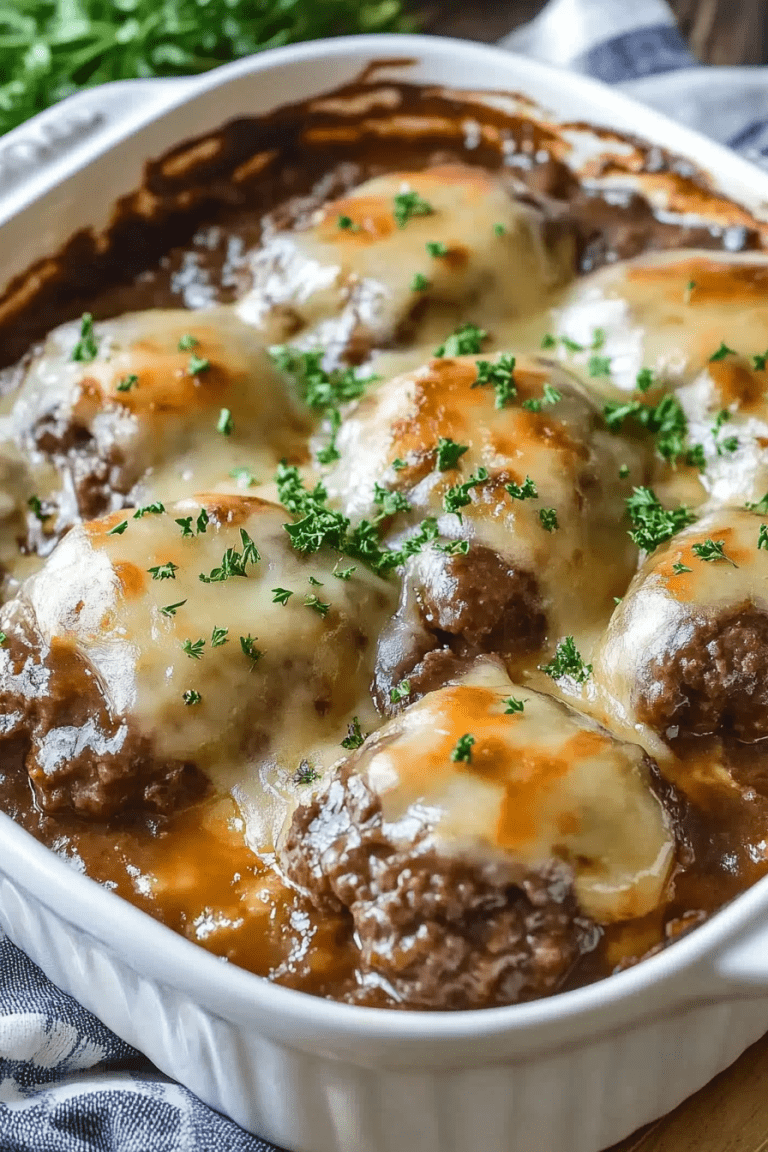
Pork Chop and Potato Bake is a comforting, hearty dish that brings together tender pork chops and creamy, flavorful potatoes. The combination of cream of onion soup and French onion soup mix creates a rich, savory sauce that infuses both the pork and potatoes with deep flavor. Perfect for a weeknight dinner or a family gathering, this dish is easy to prepare and satisfying to eat.

The beauty of this casserole lies in its simplicity—just a few basic ingredients come together to make a filling and flavorful meal that’s sure to please even the pickiest eaters. Serve it with a side of steamed vegetables or a fresh salad for a complete meal.

Why You’ll Love This Recipe:

Simple Preparation: Easy to make with basic ingredients.

One-Pan Meal: Combines meat and potatoes for a complete main dish.

Rich Flavor: The combination of soups creates a deep, savory taste that pairs perfectly with the pork.

Ingredients:

• 6 boneless pork chops (bone-in can be used, but cook time will vary)

• 4 potatoes, peeled and sliced

• 1/4 cup milk

• 1 packet French onion soup mix

• 1 can (10.5 oz) cream of onion soup

• 2 tablespoons olive oil

• Salt and black pepper to taste

• Fresh parsley for garnish (optional)

Directions:

Step 1: Preheat and Prepare

1. Preheat Your Oven:

• Preheat your oven to 350°F (175°C). Grease a 9×13-inch baking dish and set it aside.

2. Season and Sear the Pork Chops:

• Season the pork chops with salt and black pepper.

• In a large skillet, heat the olive oil over medium-high heat. Sear the pork chops on both sides until they are golden brown, about 3-4 minutes per side.

• Remove the pork chops from the skillet and set them aside.

Step 2: Prepare the Soup Mixture

1. Mix the Ingredients:

• In a medium bowl, combine the cream of onion soup, French onion soup mix, and milk. Stir until well combined.

Step 3: Assemble the Casserole

1. Layer the Potatoes:

• Arrange the sliced potatoes evenly on the bottom of the prepared baking dish.

2. Add the Pork Chops:

• Place the seared pork chops on top of the potatoes.

3. Pour the Soup Mixture:

• Pour the soup mixture over the pork chops and potatoes, ensuring everything is evenly coated.

Step 4: Bake

1. Bake the Casserole:

• Cover the baking dish with aluminum foil and bake in the preheated oven for 60 minutes. If using bone-in pork chops, you may need to bake a bit longer. The pork chops are done when they reach an internal temperature of 145°F (63°C).

2. Rest and Serve:

• Allow the casserole to rest for a few minutes before serving. Garnish with fresh parsley if desired. Serve hot and enjoy!

Tips:

Potato Slices: Try to slice the potatoes evenly for consistent cooking. A mandoline slicer can help with this.

Extra Creaminess: Add a sprinkle of cheese over the top before baking for a cheesy twist.

Vegetable Add-Ins: Consider adding sliced onions or bell peppers to the potato layer for additional flavor and texture.

Storage Options:

Refrigerator: Store leftovers in an airtight container for up to 3 days. Reheat in the oven or microwave until warmed through.

Freezer: Freeze portions in a freezer-safe container for up to 2 months. Thaw overnight in the refrigerator and reheat before serving.

This Pork Chop and Potato Bake is a comforting, all-in-one dish perfect for feeding a hungry crowd. Enjoy the tender, flavorful pork and creamy potatoes for a satisfying, home-cooked meal!

Copy Cat Cracker Barrel Hashbrown Casserole

0

Copy Cat Cracker Barrel Hashbrown Casserole is a beloved dish that brings comfort food to a whole new level. With its creamy, cheesy base and perfectly baked hash browns, this casserole is perfect for breakfast, brunch, or even as a side dish for dinner. The blend of melted cheddar cheese, sour cream, and cream of chicken soup creates a rich, savory dish that’s sure to be a hit at any gathering or meal.

This recipe replicates the popular Cracker Barrel dish with easy-to-find ingredients, and it comes together quickly for a no-fuss meal. Whether you’re serving it for a special occasion or a simple family breakfast, this hashbrown casserole will impress with its perfect balance of flavors and textures.

Why You’ll Love This Recipe:

Classic Comfort Food: Perfectly captures the creamy, cheesy goodness of the original Cracker Barrel dish.

Simple Ingredients: Easy to find and use ingredients make this dish quick to prepare.

Versatile: Ideal as a breakfast, brunch, or dinner side dish.

Ingredients:

• 2 pounds frozen hash browns, thawed

• 1/2 cup margarine or butter, melted

• 1 can (10 1/4 ounces) cream of chicken soup

• 1 pint sour cream

• 1/2 cup onion, finely chopped

• 2 cups cheddar cheese, finely grated

• 1 teaspoon salt

• 1/4 teaspoon black pepper

Instructions:

1. Preheat the Oven:

• Set the oven to 350°F (177°C) and allow it to fully preheat before placing the casserole inside.

2. Prepare the Baking Dish:

• Lightly coat an 11 x 14-inch baking dish with cooking spray to prevent sticking and facilitate easy removal after baking.

3. Combine Ingredients:

• In a large mixing bowl, combine the thawed hash browns and melted margarine or butter.

• Add the finely chopped onion, sour cream, grated cheddar cheese, cream of chicken soup, salt, and black pepper.

• Mix thoroughly until the hash browns are evenly coated with the creamy and cheesy mixture.

4. Transfer to Baking Dish:

• Spoon the mixture into the prepared baking dish, spreading it evenly for consistent cooking.

5. Bake the Casserole:

• Place the baking dish in the preheated oven and bake for approximately 45 minutes. The top should be golden brown, and the edges should be bubbly when the casserole is fully cooked.

Tips:

Cheese Choices: Feel free to use a combination of cheeses such as Monterey Jack or Colby for extra flavor.

Additions: For a twist, consider adding diced ham or cooked bacon to make it heartier.

Thawing Hash Browns: To speed up thawing, place the hash browns in the refrigerator overnight or spread them out at room temperature for an hour.

Storage Options:

Refrigerator: Store leftovers in an airtight container in the fridge for up to 3 days. Reheat in the oven or microwave before serving.

Freezer: Freeze portions in a freezer-safe container for up to 2 months. Thaw in the refrigerator before reheating.

This Copy Cat Cracker Barrel Hashbrown Casserole is a warm and inviting dish that’s perfect for any meal or gathering. Its rich and creamy flavor will make it an instant favorite at your table. Enjoy!

7 Up Pound Cake

0

7 Up Pound Cake is a classic dessert with a moist, dense crumb and a hint of citrus that makes it perfect for any occasion. The addition of lemon-lime soda like 7Up® gives this pound cake a light and airy texture while enhancing its flavor. This cake is easy to make yet delivers impressive results, with a delicate glaze that adds just the right touch of sweetness. Whether served as an afternoon treat or a celebratory dessert, 7 Up Pound Cake is bound to become a favorite.

Why You’ll Love This Recipe:

Moist and Dense Texture: The combination of butter, eggs, and lemon-lime soda creates a rich, moist cake that’s full of flavor.

Citrus Infusion: The lemon extract and soda give the cake a subtle citrus flavor that complements its sweetness.

Perfect for Gatherings: This cake is large enough to serve a crowd, making it ideal for parties, potlucks, or family dinners.

Ingredients:

Cake:

• 3 cups granulated sugar

• 1 ½ cups unsalted butter, softened to room temperature

• 5 large eggs

• 3 cups all-purpose flour, sifted

• 2 tablespoons pure lemon extract

• 1 cup lemon-lime carbonated beverage (e.g., 7Up®)

Glaze:

• 1 cup confectioners’ sugar, sifted

• ¼ cup whole milk

• ½ teaspoon pure vanilla extract

Instructions:

1. Preparation of Ingredients and Equipment:

• Gather all necessary ingredients.

• Preheat your oven to 325°F (165°C).

• Generously butter a 10-inch fluted tube pan (e.g., a Bundt pan) to ensure the cake releases smoothly.

2. Cake Batter Preparation:

• In a large mixing bowl, combine the granulated sugar and softened butter. Use an electric mixer to beat on medium speed until the mixture is light and fluffy.

• Add the eggs one at a time, mixing well after each addition to fully incorporate and maintain the structure of the batter.

• Gradually add the sifted all-purpose flour to the batter, one cup at a time, blending thoroughly after each addition for a smooth consistency.

• Stir in the lemon extract to flavor the batter.

• Gently mix in the lemon-lime carbonated beverage until the batter is smooth and evenly combined.

3. Baking:

• Pour the prepared batter into the greased fluted tube pan, smoothing the top with a spatula for an even surface.

• Place the cake in the preheated oven and bake for approximately 75 minutes, or until a toothpick inserted into the center comes out clean.

• Once baked, remove the cake from the oven. Place a wire cooling rack over the base of the pan and invert the cake onto the rack to release it.

4. Glaze Preparation and Application:

• While the cake cools slightly, prepare the glaze by combining the sifted confectioners’ sugar, milk, and vanilla extract in a mixing bowl. Beat with an electric mixer on medium speed until smooth and lump-free.

• Drizzle the glaze evenly over the warm cake, allowing it to cascade down the sides.

• Let the cake cool completely to set the glaze before slicing and serving.

Tips:

Room Temperature Ingredients: Make sure the butter and eggs are at room temperature to achieve the best texture.

Sifting Flour: Sift the flour to remove any lumps and create a finer texture for the cake.

Cooling Time: Allow the cake to cool for at least 10 minutes in the pan before unmolding to prevent it from breaking apart.

Storage Options:

Room Temperature: Store in an airtight container at room temperature for up to 3 days.

Refrigerator: For longer storage, refrigerate in an airtight container for up to a week. Bring to room temperature before serving.

Freezer: Freeze individual slices or the whole cake wrapped tightly in plastic wrap and foil for up to 3 months. Thaw in the refrigerator overnight before serving.

Enjoy this delicious, citrusy 7 Up Pound Cake as a delightful addition to any dessert spread or as a standalone treat with a cup of coffee or tea!

Vegetable Beef Soup

0

This hearty Vegetable Beef Soup is the quintessence of comfort food, perfect for chilly days or anytime you need a filling and nutritious meal. Packed with tender beef, a medley of fresh vegetables, and a rich, flavorful broth, this soup is both satisfying and delicious. It’s a one-pot wonder that not only fills your kitchen with wonderful aromas but also ensures you get a balanced meal in a bowl.

The combination of succulent beef chunks browned to perfection and a variety of vegetables simmered in a herb-infused broth makes this soup a favorite for both its taste and ease of preparation. Each ingredient adds its own unique flavor and texture, creating a complex and layered dish that improves with time, making it even better the next day.

Why You’ll Love This Recipe:

Robust and Hearty: Ideal for a filling meal that’s loaded with proteins and veggies.

Flavorful Broth: The herbs and spices meld together to create a deep, rich broth that enhances the natural flavors of the beef and vegetables.

Versatile: Easy to customize with whatever vegetables you have on hand or prefer.

Ingredients:

• 1 1/2 lbs beef stew meat

• 2 1/2 Tbsp olive oil, divided

• Salt and freshly ground black pepper

• 1 3/4 cups chopped yellow onion (1 large)

• 1 1/4 cups peeled and chopped carrots (3 medium)

• 1 cup chopped celery (3 medium)

• 1 1/2 Tbsp minced garlic (4 cloves)

• 8 cups low-sodium beef or chicken broth

• 2 (14 oz.) cans diced tomatoes

• 1 1/2 tsp dried basil

• 1 tsp dried oregano

• 1/2 tsp dried thyme

• 1 lb red or yellow potatoes, chopped into 3/4-inch cubes

• 1 1/2 cups chopped green beans

• 1 1/2 cups frozen corn

• 1 cup frozen peas

• 1/3 cup chopped fresh parsley

Instructions:

1. Brown the Beef:

• Heat 1 Tbsp olive oil in a large pot over medium-high heat.

• Dab beef dry with paper towels, season with salt and pepper. Add half of the beef to the pot and brown for about 4 minutes, turning halfway through. Transfer to a plate.

• Add another 1/2 Tbsp oil to the pot and repeat with the remaining beef.

2. Sauté Vegetables:

• Add another 1 Tbsp oil to the now-empty pot. Add onions, carrots, and celery; sauté for 3 minutes.

• Add garlic and sauté for an additional minute.

3. Simmer the Soup:

• Pour in the broth and diced tomatoes. Add the browned beef, basil, oregano, thyme, and season with salt and pepper to taste.

• Bring to a boil, then reduce heat to low, cover, and simmer, stirring occasionally, for 30 minutes.

4. Add Potatoes and More Vegetables:

• Add potatoes and continue to simmer, covered, for 20 minutes. You can add green beans with the potatoes if you prefer them very soft.

• Add the remaining green beans and simmer for 15 minutes longer, or until all the vegetables and beef are tender.

5. Final Touches:

• Stir in corn and peas, and simmer until heated through, about 5 minutes.

• Stir in fresh parsley just before serving.

Tips:

Meat Cuts: Use chuck roast cut into pieces if you can’t find pre-cut beef stew meat for better flavor and texture.

Herb Variations: Fresh herbs can be used instead of dried for a more vibrant flavor. Multiply the amount by three when using fresh.

Thickening: For a thicker soup, mash some of the potatoes directly in the pot.

Storage Options:

Refrigerator: Store leftovers in an airtight container for up to 4 days.

Freezer: Freeze in sealed containers for up to 3 months. Thaw overnight in the refrigerator before reheating.

This Vegetable Beef Soup is a delightful blend of flavors and textures, providing a wholesome and comforting meal that’s perfect for any day of the week. Whether you’re feeding a crowd or looking for leftovers to enjoy throughout the week, this soup is sure to be a hit!