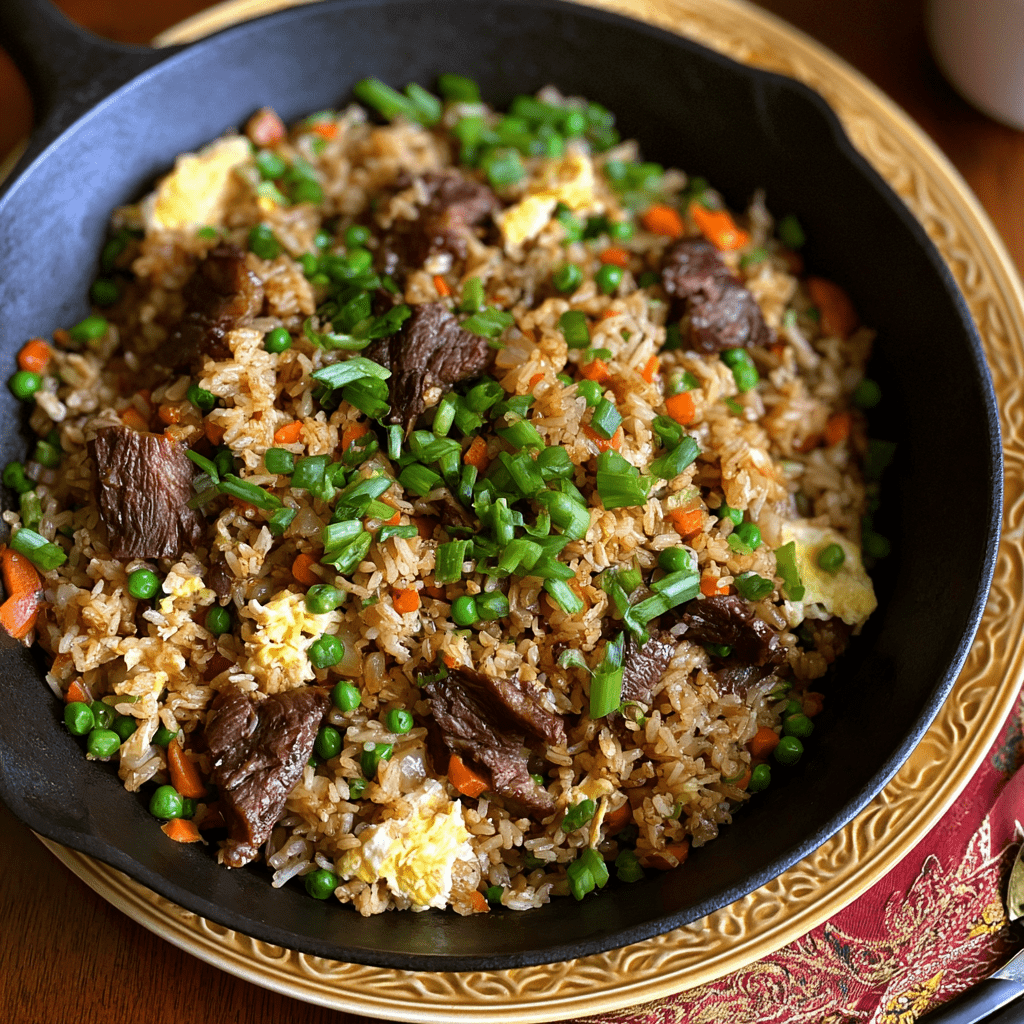
LATEST ARTICLES

I Almost Opened That Can… Until I Noticed the Lid Was Puffed

0

I had already grabbed the spoon.

That’s how close I was.

It was just a regular can of soup sitting in the pantry—nothing unusual. But when I turned it in my hand, something felt off. The lid looked… slightly raised. Not dramatic. Just enough to make me pause.

And that pause? Probably a good thing.

Because here’s the truth—when a can looks even a little “wrong,” it’s usually not something to ignore.

That Puffed Lid Isn’t Random

At first glance, it might not seem like a big deal.

Maybe it got knocked around. Maybe it’s just the packaging, right?

Not really.

A puffed lid usually means there’s pressure building inside the can—and that pressure doesn’t come out of nowhere. It’s often caused by gases produced by bacteria growing inside.

And once that happens… the food inside isn’t in a safe, sealed environment anymore.

Dents Can Be Just as Tricky

Now dents—those are a little more confusing.

Because not all dents are dangerous.

A small dent on the side? Usually fine.

But if it’s deep, sharp, or sitting right along the seams or the lid… that’s where things get risky.

That kind of damage can weaken the seal—sometimes in ways you can’t even see—and that’s all bacteria need.

So yeah, not every dent is a problem. But some absolutely are.

What’s Actually Happening Inside the Can?

Here’s the part people don’t always realize.

Canned food is safe because it’s sealed tight—no air, no bacteria, no activity.

But if that seal breaks—even slightly—microorganisms can start doing what they do: growing, fermenting, producing gas.

That’s what causes the swelling.

And in some cases, it can lead to bacteria like Clostridium botulinum, which produces toxins you definitely don’t want anywhere near your food.

Not trying to be dramatic… but this is one of those situations where caution really matters.

The Quick Checks Most People Skip

Before opening a can, it takes maybe five seconds to look for warning signs:

  • Is the lid bulging?
  • Any rust, leaks, or sticky residue?
  • Does it feel unusually pressurized?

If something looks even slightly off, trust that instinct.

It’s not worth second-guessing.

And If You Already Opened It…

This happens. You don’t always notice until it’s too late.

So if the can is already open, check:

  • Does it smell normal?
  • Does the food look the way it should?
  • Did anything spray or foam when you opened it?

If there’s a weird smell or anything looks unusual—just stop there.

Don’t taste it “just to check.” That’s one of the biggest mistakes people make.

The “Just a Tiny Bite Won’t Hurt” Myth

It’s tempting.

You don’t want to waste food, so you think—maybe it’s fine, I’ll just try a little.

But with certain toxins, especially the ones linked to spoiled canned foods, even a small amount can be dangerous.

So no tasting. No testing.

If you’re unsure, it’s a no.

What You Should Do Instead

If a can seems suspicious, the safest move is simple:

Throw it out.

But do it properly—seal it in a bag so nothing leaks, and clean the area if anything spilled.

It’s a small step, but it prevents cross-contamination.

And if you bought it recently, it’s worth letting the store know too. Not everyone thinks to do that, but it helps.

A Small Habit That Saves a Lot of Trouble

This part’s easy to overlook.

When you’re at the store, just take a second to check the cans before you buy them:

  • No dents on the seams
  • No swelling
  • No rust

Most of the time, everything’s fine. But catching a bad can early? Saves you from dealing with it later.

Final Thought (And Honestly, This Stuck With Me)

That moment when I hesitated before opening the can—I almost ignored it.

And I probably would have, a few years ago.

But now? I pay attention to those little signs.

Because with canned food, things are either sealed and safe… or they’re not.

There’s not much in between.

So if something looks off—even slightly—it’s okay to walk away from it.

Better a wasted can than a real problem.

Calico Beans

0

Calico Beans are the quintessential potluck dish—a hearty, sweet-tangy, and deeply satisfying baked bean casserole that combines three types of beans with savory ground beef and smoky bacon in a rich, caramelized sauce. This recipe is a celebration of rustic American comfort food, where humble pantry staples are transformed into something truly greater than the sum of their parts. The magic begins with browning ground beef and bacon together, their rendered fats creating a flavorful foundation. Diced onion softens in the mixture, adding sweetness and depth. Then come the beans—pork and beans, kidney beans, butter beans, and lima beans—each contributing its own unique texture and flavor, earning the dish its “calico” name for the colorful, speckled appearance. The sauce is a perfect balance of sweet and tangy, made from ketchup, brown sugar, apple cider vinegar, and yellow mustard, which thickens as it simmers, coating every bean in glossy, sticky perfection.

The brilliance of this recipe lies in its simplicity and the incredible depth of flavor achieved with minimal effort. It’s a “set it and forget it” stovetop dish that comes together in about 30 minutes, yet tastes like it simmered for hours. The combination of sweet brown sugar and tangy vinegar cuts through the richness of the meat and beans, creating a perfectly balanced, addictive flavor profile. Calico Beans are the ultimate side dish for summer barbecues, church potlucks, or any casual gathering. They pair beautifully with grilled meats, hot dogs, or cornbread, and they’re just as delicious served warm or at room temperature. It’s a classic for a reason—simple, hearty, and absolutely unforgettable.

Why You’ll Love This Recipe:

  • Hearty, Savory, and Satisfying: Packed with protein from beef, bacon, and four types of beans.
  • Perfectly Balanced Sweet-Tangy Sauce: The combination of brown sugar, ketchup, vinegar, and mustard is irresistible.
  • Quick and Easy: Ready in about 30 minutes with minimal prep—no baking required.
  • Colorful and Beautiful: The mix of beans creates a beautiful, speckled “calico” appearance.
  • The Ultimate Potluck Dish: A guaranteed crowd-pleaser that travels well and tastes great warm or at room temperature.

Ingredients:

For the Meat Base:*
1 lb ground beef (85/15 recommended)
8 slices bacon, chopped
1 medium yellow onion, diced

For the Beans:*
1 (28-ounce) can pork and beans (do not drain)
1 (16-ounce) can kidney beans, drained and rinsed
1 (16-ounce) can butter beans, drained and rinsed
1 (8.5-ounce) can lima beans, drained and rinsed

For the Sauce:*
½ cup ketchup
⅓ cup packed light brown sugar
2 tablespoons apple cider vinegar (or white vinegar)
1 tablespoon yellow mustard
Salt, to taste
Freshly ground black pepper, to taste

Instructions:

Step 1: Brown the Meat and Bacon*
In a large skillet or Dutch oven over medium heat, add the ground beef and chopped bacon. Cook, breaking up the meat with a spoon, until they are about halfway browned, about 5 minutes.

Step 2: Add the Onion*
Add the diced onion to the skillet. Continue cooking until the beef is fully browned, the bacon is crispy, and the onion is soft and translucent, about 5-7 minutes more. Drain any excess grease.

Step 3: Add the Beans and Sauce*
Stir in the pork and beans (with their liquid), kidney beans, butter beans, lima beans, ketchup, brown sugar, apple cider vinegar, and yellow mustard. Mix well to combine.

Step 4: Simmer*
Reduce the heat to low and let the mixture simmer gently, uncovered, for about 25 minutes, stirring occasionally. The sauce will thicken and become glossy as it reduces.

Step 5: Season and Serve*
Taste and season with salt and freshly ground black pepper as needed. Serve warm.

Tips:

  • Don’t Skip Draining the Canned Beans: Draining and rinsing the kidney, butter, and lima beans removes excess sodium and prevents the dish from becoming too watery.
  • Customize the Beans: Use any combination of beans you like—great northern, pinto, or black beans all work beautifully.
  • Make it in the Slow Cooker: After browning the meat, transfer everything to a slow cooker and cook on LOW for 3-4 hours or HIGH for 1-2 hours.
  • Add a Kick: Stir in a teaspoon of sriracha, a dash of hot sauce, or a pinch of red pepper flakes for heat.
  • Double the Recipe: Calico Beans freeze beautifully, so make a double batch and save some for later.

Storage Options:

  • Refrigerator: Store leftovers in an airtight container in the refrigerator for up to 5 days.
  • Reheating: Reheat gently on the stovetop over low heat, stirring occasionally, or in the microwave.
  • Freezer: Calico Beans freeze wonderfully for up to 3 months. Cool completely, portion into freezer-safe containers, and freeze. Thaw overnight in the refrigerator before reheating.
  • Make-Ahead: This dish tastes even better the next day as the flavors meld. Prepare a day in advance and refrigerate; reheat before serving.

Calico Beans are the ultimate comfort food side dish—hearty, flavorful, and deeply satisfying. With their perfect balance of sweet, tangy, and savory, they’re a classic that belongs at every barbecue, potluck, and family dinner.

Easter Cake Mix Cookie Bars

0

Easter Cake Mix Cookie Bars are the ultimate festive, foolproof treat—a soft, chewy, and gloriously colorful dessert that comes together in minutes using a simple box of yellow cake mix. This recipe is a celebration of effortless baking, transforming just a handful of pantry staples into a batch of bakery-worthy cookie bars that are perfect for Easter celebrations, spring parties, or any occasion that calls for a pop of pastel color. The magic begins with a thick, rich dough made from cake mix, eggs, oil, and vanilla, which bakes into a tender, buttery base with the perfect amount of chew. Folded into the dough are generous handfuls of Easter M&Ms and semi-sweet chocolate chips, creating pockets of vibrant color and rich, melty chocolate in every single bite.

The brilliance of this recipe lies in its incredible simplicity and the stunning, crowd-pleasing result it delivers. There’s no creaming butter, no chilling dough, and no complicated steps—just mix, press, bake, and slice. The bars emerge from the oven with a beautifully golden, slightly crackled top, hiding a soft, chewy interior studded with candy-coated chocolate. The pastel M&Ms make them instantly recognizable as an Easter treat, but they’re delicious enough to enjoy all year round. Whether you’re baking with kids, need a last-minute dessert for a holiday gathering, or simply want a quick and satisfying sweet treat, these Easter Cake Mix Cookie Bars are guaranteed to bring smiles to the table.

Why You’ll Love This Recipe:

  • Incredibly Quick and Easy: Just 6 ingredients and 5 minutes of prep—no mixer required.
  • Soft, Chewy, and Buttery: The cake mix creates a perfectly tender cookie bar with a rich, homemade taste.
  • Festive and Fun: Pastel Easter M&Ms make these bars a colorful holiday showstopper.
  • Perfect for Baking with Kids: Simple steps and no complicated techniques make this a great family activity.
  • Crowd-Pleasing Favorite: A guaranteed hit at Easter brunch, spring parties, or potlucks.

Ingredients:

For the Cookie Bars:*
1 box (about 15 oz) yellow cake mix
2 large eggs
⅓ cup vegetable oil
1 teaspoon vanilla extract
1 cup Easter M&M candies (pastel colors)
1 cup semi-sweet chocolate chips

Instructions:

Step 1: Preheat and Prepare Pan*
Preheat your oven to 350°F (175°C). Grease a 9×13-inch baking dish with non-stick cooking spray or line it with parchment paper.

Step 2: Make the Dough*
In a large mixing bowl, combine the yellow cake mix, eggs, vegetable oil, and vanilla extract. Stir with a spatula or wooden spoon until a thick, sticky dough forms.

Step 3: Add the Mix-Ins*
Fold in the Easter M&Ms and semi-sweet chocolate chips until evenly distributed throughout the dough.

Step 4: Press into Pan*
Transfer the dough to the prepared baking dish. Using your hands or the back of a spatula, press the dough firmly and evenly into the bottom of the pan, making sure it reaches the corners.

Step 5: Bake*
Bake for 20-25 minutes, until the edges are set and lightly golden brown. The center will still be slightly soft. Do not overbake.

Step 6: Cool and Slice*
Remove from the oven and let the bars cool completely in the pan on a wire rack. Once cooled, slice into squares or rectangles.

Tips:

  • Don’t Overbake: The bars continue to set as they cool. They should be just set at the edges and slightly soft in the center when you remove them from the oven.
  • Press Firmly: Pressing the dough evenly into the pan ensures uniform thickness and even baking.
  • Customize the Mix-Ins: Use white chocolate chips, butterscotch chips, or pastel sprinkles for a different look.
  • Use Any Cake Mix: White cake mix, funfetti, or even chocolate cake mix work beautifully in this recipe.
  • Let Cool Completely: Cutting into the bars while they’re still warm can cause them to crumble.

Storage Options:

  • Room Temperature: Store bars in an airtight container at room temperature for up to 1 week.
  • Freezer: These bars freeze beautifully. Wrap individually or place in a freezer-safe container with parchment between layers. Freeze for up to 3 months. Thaw at room temperature.
  • Make-Ahead: Bake the bars a day or two in advance and store in an airtight container until ready to serve.

Easter Cake Mix Cookie Bars are the perfect combination of simplicity, flavor, and festive fun. With their soft, chewy texture, buttery taste, and colorful candy-studded appearance, they’re a delightful treat that will make any spring celebration a little sweeter.

Do Bay Leaves Actually Do Anything? The Quiet Ingredient That Changes Everything

0

I used to pull them out.

Not at the end—like you’re supposed to. I mean before the dish even started cooking.

You know when you’re following a recipe and it casually says, “add 2 bay leaves” like it’s obvious? I’d look at that dry little leaf, shrug, and think… this can’t possibly matter.

And for a while, I was convinced it didn’t.

But then—this is the annoying part—I made the same soup twice. Same ingredients, same pot, same everything… except one had bay leaves and the other didn’t.

And yeah. There was a difference.

Not a loud one. Not a “wow what is that flavor” kind of thing. Just… something was missing.

First, What Are We Even Dealing With Here?

Bay leaves come from the Laurus nobilis, which sounds fancy but really just means they’ve been around forever—like ancient civilization forever.

Back then, people weren’t just cooking with them—they were wearing them on their heads like trophies.

Which feels excessive, but also kind of makes you think… okay, maybe this leaf has something going on.

The Weird Part: You Don’t Really Taste Them

Let me say this clearly, because this is where most people get tripped up:

Bay leaves are not there to be tasted.

If you’re expecting a bold flavor—like garlic or basil—you’re going to be disappointed. That’s not what they do.

They’re more like… structure. Or glue.

They sit in the background and make everything else make more sense.

Honestly, it reminds me of when you add salt to chocolate. You don’t taste “salt,” but without it, the whole thing feels flat. Same idea.

But Technically… They Do Have a Flavor

If you really break it down (and yeah, this is where it gets a little nerdy), bay leaves release a mix of aromas when they simmer:

  • Slightly piney
  • A little minty
  • Kind of warm and peppery

Nothing aggressive. Nothing that jumps out.

But when you let it sit in a soup or sauce for a while, it softens everything. Rounds it out. Makes it feel like the flavors actually belong together.

And that only really happens with time.

Which Is Why They Shine in Slow Cooking

Quick sauté? You probably won’t notice much.

But give them 30 minutes… an hour… longer?

That’s where they quietly do their thing.

Soups, stews, braises—anything that simmers for a while—that’s their territory.

It’s kind of like steeping tea. You wouldn’t dip the bag in for two seconds and expect magic. Same logic here.

“I Still Can’t Taste It” — Yeah, That’s Normal

Some people genuinely don’t pick up on bay leaves at all.

And that’s not you doing something wrong. It’s just how subtle they are.

But here’s the catch: even if you don’t taste them, you might notice when they’re gone.

That’s the frustrating magic of it.

So… Are They Actually Worth Using?

Short answer? Yeah.

Long answer? Also yeah, but not for the reason you think.

They’re cheap. They last forever. And they quietly make your food better without asking for attention.

That’s kind of rare, honestly.

And no, they’re not going to save a bad dish. But in something that’s already good? They push it just a little further.

Can You Skip Them?

Of course.

People do it all the time.

You’ll still end up with something perfectly edible—probably even delicious. But it might feel just a little… flatter.

Not worse, exactly. Just not as full.

You can swap in herbs like thyme or oregano if you really need to, but that changes the flavor more than it replaces it.

So it’s not really a one-to-one thing.

If You’re Still Skeptical, Try This

This is what convinced me.

Next time you make something simple—like a tomato sauce or basic soup—split it in half.

Add a bay leaf to one pot. Leave the other alone.

Let them simmer, then taste both.

You’re not going to get hit with a dramatic difference. It’s quieter than that.

But it’s there.

And once you notice it, you can’t really un-notice it.

Final Thought (And I Mean This)

Bay leaves are kind of like good background lighting.

You don’t walk into a room and say, “wow, incredible lighting.”

But if it’s bad—or missing—you feel it immediately.

That’s what they do.

So no, they’re not useless.

They’re just… quiet about it.

Carrot Cake Cookies with Cream Cheese Filling

0

Carrot Cake Cookies with Cream Cheese Filling are a stunning, decadent twist on the beloved classic—a soft, warmly spiced cookie that captures all the comforting flavors of traditional carrot cake, then takes it to the next level with a surprise center of sweet, tangy cream cheese filling. This recipe is a masterful combination of texture and taste, where a tender, cinnamon-and-nutmeg-spiced cookie dough, studded with finely grated carrots, is wrapped around a frozen core of silky cream cheese. As the cookies bake, the filling melts into a luscious, molten center, creating a gooey, cheesecake-like surprise with every bite. The dough itself is perfectly balanced—moist from the carrots and butter, fragrant with warm spices, and just sweet enough to complement the tangy filling.

The brilliance of this recipe lies in its thoughtful construction and the irresistible result it delivers. The filling is pre-frozen in small portions, making it easy to encase in the cookie dough without melting prematurely. A brief second freeze before baking ensures the cookies hold their shape and the filling remains perfectly centered. The result is a cookie that is bakery-worthy—golden brown on the outside, soft and chewy in the middle, with a pocket of creamy, tangy sweetness at its heart. Whether enjoyed on their own or drizzled with a simple cream cheese frosting for an extra touch of elegance, these Carrot Cake Cookies are a showstopper. They’re perfect for Easter, spring gatherings, or any time you’re craving the warm, comforting flavors of carrot cake in a fun, portable form.

Why You’ll Love This Recipe:

  • All the Flavors of Carrot Cake in a Cookie: Warm cinnamon, nutmeg, sweet carrots, and a rich cream cheese filling.
  • Surprise Molten Center: A frozen cream cheese filling melts into a luscious, gooey pocket as the cookies bake.
  • Soft, Tender, and Perfectly Spiced: The cookie itself is moist and flavorful, with just the right balance of spice and sweetness.
  • Bakery-Quality Presentation: Beautiful, impressive cookies that look like they came from a gourmet bakery.
  • Perfect for Holidays and Gatherings: A unique, crowd-pleasing treat for Easter, spring parties, or any special occasion.

Ingredients:

For the Cream Cheese Filling:*
6 oz (170g) cream cheese, softened
3 tablespoons granulated sugar
1 teaspoon vanilla extract

For the Carrot Cake Cookies:*
3 cups (360g) all-purpose flour
1 teaspoon baking soda
1 teaspoon salt
2 teaspoons ground cinnamon
¼ teaspoon ground nutmeg
1 cup (2 sticks / 226g) unsalted butter, melted and cooled
1 cup (200g) packed light brown sugar
½ cup (100g) granulated sugar
1 cup finely grated carrots (about 2 medium carrots)
1 teaspoon vanilla extract
2 large egg yolks

For the Optional Cream Cheese Frosting:*
2 oz (56g) cream cheese, softened
2 tablespoons unsalted butter, softened
¾ cup (90g) powdered sugar, sifted
1 teaspoon vanilla extract

Instructions:

Step 1: Make the Cream Cheese Filling
In a small bowl, beat together the 6 oz of softened cream cheese, 3 tablespoons of sugar, and 1 teaspoon of vanilla until smooth. Line a small baking sheet with parchment paper. Scoop teaspoon-sized portions of the mixture onto the sheet and freeze for at least 1 hour, or until completely solid.

Step 2: Prepare the Carrots*
Grate the carrots on the finest side of a box grater. Place the grated carrots on a paper towel and gently squeeze to remove excess moisture. Set aside.

Step 3: Mix the Dry Ingredients*
In a medium bowl, whisk together the flour, baking soda, salt, cinnamon, and nutmeg until well combined.

Step 4: Make the Cookie Dough*
In a large bowl, beat the melted butter, brown sugar, and granulated sugar until smooth. Add the grated carrots, 1 teaspoon of vanilla, and the egg yolks. Mix until combined. Gradually add the dry ingredients, mixing until just combined. Do not overmix. Let the dough rest for 10 minutes.

Step 5: Assemble the Cookies*
Scoop about 1½ tablespoons of cookie dough and flatten it in your palm. Place one frozen cream cheese filling portion in the center. Wrap the dough around the filling, sealing it completely. Roll gently into a ball. Repeat with the remaining dough and filling. Place the shaped cookies on a parchment-lined baking sheet and freeze for 15 minutes.

Step 6: Bake*
Preheat your oven to 350°F (175°C). Place the chilled cookies on parchment-lined baking sheets, spacing them about 2 inches apart. Bake for 13-15 minutes, until the edges are set and the tops are lightly golden. The centers will look soft. Let cool on the baking sheet for 5 minutes, then transfer to a wire rack to cool completely.

Step 7: Make the Frosting (Optional)*
While the cookies cool, beat together the remaining 2 oz cream cheese, 2 tablespoons butter, powdered sugar, and 1 teaspoon vanilla until smooth. Drizzle or pipe over the cooled cookies.

Tips:

  • Freeze the Filling Thoroughly: Solid filling is essential for easy assembly and to prevent it from melting into the dough.
  • Remove Excess Moisture from Carrots: Squeezing the grated carrots prevents the dough from becoming too wet.
  • Chill the Shaped Cookies: A second freeze helps the cookies hold their shape during baking and keeps the filling centered.
  • Don’t Overbake: The cookies should be lightly golden at the edges; the centers will set as they cool.
  • Store Properly: These cookies are best stored in the refrigerator to keep the cream cheese filling fresh.

Storage Options:

  • Refrigerator: Store cookies in an airtight container in the refrigerator for up to 5 days. Bring to room temperature before serving.
  • Freezer: Freeze baked, unfrosted cookies for up to 2 months. Thaw in the refrigerator and bring to room temperature before frosting and serving.
  • Make-Ahead: You can prepare the frozen filling portions and cookie dough separately up to 2 days in advance. Assemble and bake when ready.

Carrot Cake Cookies with Cream Cheese Filling are a delightful, inventive twist on a beloved classic. With their soft, spiced cookie exterior and luscious, tangy center, they’re a guaranteed hit for any occasion.

Hawaiian Macaroni Salad

0

Hawaiian Macaroni Salad is the quintessential side dish of the islands—a creamy, tangy, and irresistibly rich pasta salad that’s as beloved at backyard luaus as it is alongside a plate lunch with kalua pork or teriyaki chicken. This recipe is a masterful balance of textures and flavors, where tender elbow macaroni is transformed by a simple but essential step: a splash of apple cider vinegar tossed with the warm pasta, infusing every bite with a subtle tang that cuts through the creamy richness. The dressing is luxuriously smooth—a blend of mayonnaise and half-and-half, subtly sweetened with a touch of brown sugar and seasoned with grated onion, carrots, and celery for a soft crunch. The result is a macaroni salad that is creamy without being heavy, flavorful without being overpowering, and utterly addictive.

The brilliance of this recipe lies in its patience and technique. The vinegar-soaked pasta, allowed to rest and absorb, creates the foundational tang that defines true Hawaiian-style mac salad. The dressing is added in two stages: half is mixed in during the initial assembly, allowing the flavors to meld as the salad chills, and the remainder is folded in just before serving for that signature creamy, glistening finish. The grated onion, carrot, and finely chopped celery add subtle texture and sweetness without overwhelming the dish. Whether served alongside grilled meats, as part of a picnic spread, or simply enjoyed on its own, this Hawaiian Macaroni Salad is the perfect balance of creamy, tangy, and comforting—a taste of the islands in every bite.

Why You’ll Love This Recipe:

  • Authentic Hawaiian Flavor: The vinegar-soaked pasta and creamy, slightly sweet dressing capture the essence of classic Hawaiian mac salad.
  • Creamy, Tangy, and Addictive: The perfect balance of rich mayonnaise and bright vinegar keeps it from being heavy.
  • Make-Ahead Perfection: Tastes even better after a few hours of chilling, making it ideal for parties and potlucks.
  • Simple, Wholesome Ingredients: Uses pantry staples to create something truly special.
  • Versatile Side Dish: Pairs perfectly with grilled meats, fried chicken, or as part of a plate lunch.

Ingredients:

For the Pasta:*
16 ounces elbow macaroni pasta
2 tablespoons apple cider vinegar

For the Dressing:*
2 cups full-fat mayonnaise
1 cup half-and-half
1 tablespoon brown sugar
½ teaspoon sea salt
¼ teaspoon freshly ground black pepper

For the Salad:*
3 tablespoons grated yellow onion (about ½ small onion)
2 large carrots, grated
2 ribs celery, finely chopped
3 green onions, thinly sliced (white and light green parts)

Instructions:

Step 1: Cook the Pasta
Bring a large pot of generously salted water to a boil. Add the elbow macaroni and cook according to package instructions until al dente. Do not overcook. Drain the pasta well and return it to the empty pot.

Step 2: Soak with Vinegar*
While the pasta is still warm, stir in the apple cider vinegar. Cover the pot and let it sit for 10-15 minutes, allowing the vinegar to absorb into the pasta. This step is essential for authentic flavor.

Step 3: Make the Dressing*
In a medium bowl, whisk together the mayonnaise, half-and-half, brown sugar, salt, and pepper until smooth and well combined.

Step 4: Assemble the Salad*
Transfer the cooled, vinegar-soaked pasta to a large serving bowl. Add half of the dressing, the grated onion, grated carrots, and chopped celery. Stir well to coat everything evenly.

Step 5: Chill*
Cover the bowl with plastic wrap and refrigerate the macaroni salad for at least 2 hours, and ideally overnight. Store the remaining dressing in an airtight container in the refrigerator as well.

Step 6: Finish and Serve*
Before serving, add the remaining dressing and the sliced green onions to the chilled salad. Toss well to combine. The salad should be creamy and slightly loose; the pasta will continue to absorb dressing as it sits.

Tips:

  • Don’t Overcook the Pasta: Cook the macaroni just to al dente. Overcooked pasta will become mushy in the salad.
  • Vinegar is Essential: Soaking the warm pasta with vinegar is the key to authentic Hawaiian mac salad. Don’t skip this step!
  • Grate the Onion: Grating the onion (rather than chopping) releases its juice into the dressing, adding flavor without large chunks.
  • Chill Completely: The flavors need time to meld. Overnight chilling yields the best results.
  • Adjust Creaminess: For a looser, more traditional Hawaiian-style mac salad, add a splash of milk or extra half-and-half just before serving.

Storage Options:

  • Refrigerator: Store in an airtight container in the refrigerator for up to 4 days. The flavors continue to improve.
  • Not for Freezing: The creamy dressing will separate and become grainy upon thawing.
  • Make-Ahead: This salad is ideal for making a day ahead. Prepare completely (including the second dressing addition) and refrigerate. Stir before serving.

Hawaiian Macaroni Salad is a beloved island classic for good reason—it’s creamy, tangy, comforting, and the perfect companion to any grilled or fried dish. With its simple ingredients and thoughtful technique, it’s a recipe that will transport your taste buds straight to the islands.

My Neighbor Taught Me This Trick to Clean Green Algae Off Siding with 0 Effort. Here’s How It Works.

0

Green algae on siding is one of those things that sneaks up on you. One minute your house looks fine. The next, there’s a faint green tinge on the north side that slowly turns into something that makes you cringe every time you pull into the driveway.

For years, I tried everything. Pressure washing, store-bought cleaners, scrubbing until my arms ached. Nothing really worked without a whole lot of effort.

Then one day, my neighbor—the one with the perpetually clean house—shared a trick that changed everything. It was almost embarrassingly simple. No scrubbing, no expensive equipment, barely any work at all. I was skeptical. But after trying it myself? I haven’t cleaned siding any other way since.

Here’s how it works.

1. The Surprising No-Scrub Trick My Neighbor Shared

The trick came down to a simple mixture of common household products. No harsh chemicals, no scrubbing brushes, no climbing up and down ladders for hours.

My neighbor told me to grab a garden sprayer—the kind you use for fertilizer or weed killer—fill it with a specific solution, and just spray it onto the siding. That’s it. No scrubbing. No pressure washer. Just spray, wait, and rinse.

I honestly didn’t believe it would work until I saw the green patches practically melt away on their own.

2. Why Green Algae Loves Vinyl and Painted Siding

Algae thrives in damp, shady spots. That’s why the north side of a house or the areas under trees always seem to get hit first. Vinyl and painted siding, in particular, can trap moisture longer than other materials, giving algae exactly what it needs to settle in and spread.

The algae feeds off that moisture and whatever organic matter is on the siding, slowly creeping across the surface until what started as a faint shadow turns into a full green patch. Understanding that moisture is the main culprit makes it easier to see why this simple cleaning trick works.

3. The Simple Cleaning Cocktail: What You Actually Need

The mixture itself is surprisingly straightforward. You probably already have everything in your kitchen or laundry room.

All you need is:

  • Water
  • White vinegar
  • A little dish soap

That’s it. No specialized cleaners, no bleach, no complicated formulas.

4. Exact Mixing Ratios So You Don’t Damage Your Siding

Getting the ratios right matters—not because it’s tricky, but because you don’t want anything too harsh sitting on your siding.

The sweet spot is:

  • 1 gallon of water
  • 1 cup of white vinegar
  • 1 tablespoon of dish soap

Mix it together, pour it into your garden sprayer, and you’re ready to go. If you’re worried about delicate paint, test a small spot first. But for most standard siding, this ratio is gentle enough to be safe and strong enough to actually work.

5. How to Apply the Solution Without Ladders or Scrubbing

This is the part that feels almost too easy. Using your garden sprayer, spray the solution directly onto the algae-covered areas. Start from the bottom and work your way up so the solution doesn’t drip down over dry patches.

The beauty of this method is that the sprayer gives you plenty of reach. No ladder required. No balancing acts. Just stand on the ground and spray.

6. The ‘Let It Sit’ Step That Does All the Hard Work

This step requires the most patience—and the least effort.

Once you’ve sprayed the siding, walk away. Let it sit for at least 20 to 30 minutes. The vinegar and soap mixture needs time to break down the algae’s hold on the surface.

If the algae growth is heavy, you can leave it for up to an hour. The longer it sits, the more it loosens. This is where the real “no scrubbing” magic happens.

7. Rinsing It All Away: When the Algae Practically Falls Off

After the waiting period, take your garden hose—not a pressure washer, just a regular hose with a spray nozzle—and rinse the siding from the top down.

The algae should come off with barely any effort. It’s oddly satisfying to watch. Most of it will rinse away on the first pass. Stubborn spots might need a second spray and wait, but in most cases, one treatment does the job.

8. Safety Rules: Protecting Plants, Pets, and Your Paint

Vinegar and dish soap are mild, but it’s still smart to take basic precautions.

Before you spray, wet down any plants or bushes near the foundation so they absorb less of the solution. Keep pets and kids away from the area until everything has been rinsed and dried.

If your siding has older or delicate paint, test a small hidden patch first. That way you know exactly how it will react before you cover the whole side of the house.

9. How Long the Results Last and When to Repeat the Trick

In most cases, a single treatment keeps the siding clean for six months to a year. If your house is heavily shaded or you live in a humid area, the algae may come back sooner.

Checking your siding once or twice a year and hitting it with this spray when you first notice any green coming back makes it easy to stay ahead of it. A quick pass takes less time than letting it build up again.

10. Easy Preventive Habits to Keep Algae from Coming Back

A few small habits can make this cleaning job less frequent.

  • Trim back trees or bushes that keep your siding shaded and damp.
  • Make sure gutters and downspouts are directing water away from the house.
  • Give your siding a quick rinse with a mild detergent and water now and then to remove the dirt and organic matter that algae feeds on.

None of this takes much time, but together they make a noticeable difference.

11. When This Hack Isn’t Enough and What to Try Next

This method works well for normal algae buildup. But if the growth has been there for years or the siding has never been cleaned, you might need something stronger.

If the vinegar solution doesn’t get it all after a couple of tries, a commercial siding cleaner may be the next step. In extreme cases, professional power washing can help—but that should be a last resort. Too much pressure can damage siding, especially if it’s older.

For most homeowners, though? This simple neighborly trick is more than enough to keep things looking fresh without the headache.

How Long Does Cooked Pasta Last in the Fridge? (And Why It’s Not Always a Straight Answer)

0

I picked this habit up from my dad, actually.

He’d cook way more pasta than we needed—like, a lot more—and just stash the extra in the fridge for later. No big deal. It was just how things were done.

And honestly, it worked.

Quick lunches, easy dinners, less time waiting for water to boil… it felt smart. Efficient.

But I remember thinking, even back then—how long can that actually sit there before it’s not okay anymore?

Because leftover pasta is convenient. Until it’s… questionable.

Why People Do This in the First Place

Cooking pasta fresh every time sounds ideal. And sure, when you have the time, it’s nice.

But on a random weekday? When you’re tired, hungry, and just want something on the table?

Pre-cooked pasta feels like a shortcut you’re glad you took earlier.

You open the fridge, and dinner is halfway done already.

That’s hard to beat.

So… How Long Is Too Long?

Here’s the general rule most people land on:

About 3 to 5 days in the fridge.

That’s the window where it’s still considered safe and still tastes decent.

After that… it’s a bit of a gamble.

Not always obvious right away, either—which is part of the problem.

The Part Nobody Thinks About (Until It’s Too Late)

Cooked pasta holds moisture.

Which sounds harmless, but it’s actually what makes it more vulnerable to bacteria over time.

Refrigeration slows things down, sure—but it doesn’t stop it completely.

So while your pasta might look fine on day four… that doesn’t always mean it’s still a good idea.

That’s where people get caught off guard.

Texture Changes (And Why It Feels “Off” Later)

If you’ve ever reheated pasta and thought, this isn’t quite right, you’re not imagining it.

There’s this thing that happens—basically the starch in the pasta starts to firm up again as it cools.

So when you reheat it, it can feel a little tougher. Or oddly soft if it absorbed too much moisture.

Not bad, just… different.

Sometimes you can fix it. Sometimes you can’t.

Signs You Shouldn’t Ignore

This is where it gets simple.

  • If it smells off—even slightly—don’t overthink it. Toss it.
  • If it feels slimy or sticky in a weird way? Same thing.
  • And if you see mold, even a little? Yeah, that’s done.

It’s not worth trying to salvage.

The Way You Store It Actually Matters More Than You Think

This part makes a bigger difference than people expect.

If you just throw pasta into a container and leave it loosely covered, it won’t last as long.

Airtight containers help. A lot.

Also—letting it cool before putting it in the fridge matters too. Not for perfection, just to avoid raising the temperature inside your fridge.

Little things, but they add up.

There’s a Trade-Off Here

Pre-cooked pasta saves time. No question.

But it doesn’t stay perfect.

Sometimes it dries out. Sometimes it gets a little too soft when reheated.

And occasionally… it just sits there longer than it should have.

That’s the risk.

If You Want It to Last Longer, There Is Another Option

Freezing.

It’s not something everyone thinks of with pasta, but it works.

You can freeze cooked pasta for a couple of months without much issue. Just make sure it’s cooled and stored properly.

It’s not exactly the same when you reheat it—but it’s still good enough for most meals.

Reheating Makes a Bigger Difference Than You’d Expect

Cold pasta straight into the microwave? It works, but it’s not the best result.

Adding a little water or sauce helps bring it back.

Reheating it slowly—whether in a pan or in short microwave bursts—keeps it from drying out or overheating in spots.

It’s a small step, but it changes the outcome.

So… Is Pre-Cooking Pasta a Good Idea?

Honestly? Yes.

It makes life easier. That alone is a strong argument.

But it only works if you keep track of how long it’s been sitting there.

Because once you lose track… that’s when you start second-guessing.

And food is one of those things where second-guessing usually means it’s time to let it go.

Final Thought (The Real One)

Leftover pasta isn’t the problem.

Forgetting about it is.

If you use it within a few days, store it well, and reheat it properly—it’s one of the easiest ways to simplify your week.

If not… it quietly turns into one of those “I should probably throw this out” moments.

And we’ve all had enough of those already.

Milk in Scrambled Eggs: A Culinary Genius Move or a Total Mistake?

0

Scrambled eggs really are one of those kitchen classics, aren’t they? On the surface, they seem so simple—just eggs and a skillet. But ask just about anybody how they make theirs and, oh boy, you’ll get a passionate answer (maybe even a family secret or two). One question that seems to get folks fired up over brunch is this: Should you add milk to your scrambled eggs?

Some folks swear by it—they’ll say it’s the secret to fluffy, creamy eggs. Others feel just as strongly that it waters everything down and messes with that lovely pure egg flavor. Who’s right? Well, grab your mug and let’s dig into the science, the opinions, and what the experts have to say about this very important kitchen debate.

Why Do You Add Milk to Scrambled Eggs?

Adding milk to your morning eggs isn’t exactly a newfangled notion—it’s straight out of the comfort food playbook, right up there with buttery toast and weekend pajamas. So why do so many home cooks and grandmas keep reaching for the milk carton?

  • For a Creamier Texture
    A splash of milk brings extra moisture to your eggs, which most people agree leads to a softer, more pillowy bite. If you use whole milk or even cream, that extra fat can make your scrambled eggs feel almost luscious, especially if you go slow and gentle with the heat.
  • To Balance the Richness
    Egg yolks are rich and a little bit decadent all on their own (especially if you get the good eggs). But not everyone’s on board with that super-savory, almost buttery flavor on its own. Some folks add milk just to temper things down a little—make it a gentler experience for those whose palates aren’t ready for straight-up eggy richness.
  • To Stretch the Dish
    If you’ve got extended family rolling in for breakfast, but not quite enough eggs for everyone, a bit of milk can help stretch things out. It adds to the volume, so your skillet goes just a little bit further—handy for feeding a crowd (or for when the groceries are running thin… ask me how I know).

Why Some Cooks Avoid Milk

On the other side of things, there’s a whole contingent—professional chefs, egg fanatics, some picky kids—who say milk in scrambled eggs is a mistake. Here’s where they’re coming from:

  • It Dilutes the Flavor
    Eggs are already rich, tender, and basically perfect when cooked right. Purists will tell you that milk just blurs those flavors, making your eggs feel milder, maybe even a touch bland or sweet.
  • It Can Cause a Rubber-Band Texture
    Cooking is part science, part art. Toss in too much milk, and the eggs might take longer to cook. And once the pan sits on the heat for too long, those curds can turn rubbery, or worse—end up sitting in a watery puddle (if you’ve had a sad brunch buffet, you’ll know).
  • Eggs Don’t Need It
    If you’re starting with good eggs—especially those beautiful farm eggs with rich, golden yolks—you just don’t need anything else competing for attention. Many chefs will tell you: Let your eggs shine, all on their own, and focus on good technique.

The Science Behind Adding Milk

Let’s nerd out for a quick second: Eggs have proteins that firm up, or “coagulate,” as you raise the heat. When you add milk, you’re bringing in more water and fat. That can slow down the way those proteins set up.

  • Too much milk? The eggs drag out on the stove, sometimes turning soupy or rubbery (we’ve all been there).
  • Just a teeny bit? If you’re cooking nice and gently, you can get a silkier finish, but there’s a sweet spot.

The big secret? If you like milk, a little goes a long way. Less is always more.

What Do Experts Say?

Most celebrity chefs have pretty strong feelings about this one. Truth is, nearly all side with the no-milk crowd. Gordon Ramsay, Jacques Pépin, Julia Child—these folks put their faith in classic methods.

Instead of milk, they focus on technique:

  • Low and Slow Cooking – Gentle heat keeps those eggs from seizing up. It’s the key to creamy, dreamy results.
  • Butter Is Better – A pat of butter adds depth and richness without getting in the way of the eggs’ natural flavor.
  • Well Whisked – Give your eggs a real workout with the whisk before they hit the pan. It brings in air for built-in fluffiness.

Milk: The Middle Ground, When It Might Work

Now, let’s be honest—sometimes you just want to do things your own way, and that’s perfectly fine. There are a couple times when milk actually comes in pretty handy:

  • For Beginners
    If you’re just getting comfortable with the frying pan, a bit of milk helps keep things from overcooking and going dry on you. It offers a touch of forgiveness if you’re easily distracted (raises hand… who else forgets to stir?).
  • For Buffet-Style Serving
    Big breakfast spreads and brunch buffets have their own challenges. Eggs can dry out and sit a bit too long. Adding a little milk to the mix keeps them moist for longer—helpful for those lazy, linger-over-coffee mornings.
  • If You Simply Prefer It
    At the end of the day, cooking is about making food you love. If you grew up adding milk and you love the creamy, mellow result, then why not? There’s no rulebook in the kitchen, just what tastes best to you and yours.

How to Make Perfect Scrambled Eggs (No Milk Needed)

If you want to skip the milk and let those eggs really shine, here’s my go-to, never-fails method for scrambles that are tender, silky, and rich enough for Sunday best.

Ingredients:

  • 4 large eggs
  • 1 tablespoon unsalted butter
  • A pinch of salt and pepper
  • Optional: Fresh herbs like chives or parsley (your call, but fresh always wakes things up)

Instructions:

  1. Whisk the Eggs – Get in there with a fork or whisk. You want the yolks and whites well blended and just a couple pinches of salt tossed in early. (Trust me, a good whisk builds natural fluff.)
  2. Melt Butter Low – Slide your knob of butter into a nonstick skillet and let it melt nice and slow over low heat.
  3. Pour In the Eggs – Once the butter is melted but not browning, in go the eggs. Use a spatula to gently sweep the eggs from the edges into the center.
  4. Cook Low and Slow – Patience pays off here—keep the heat low and move those eggs gently. Creaminess is all about slow setting.
  5. Take Off the Heat Just Before Cooked Through – They’ll keep cooking once you pull the pan off, thanks to that hot skillet. This makes the difference between perfect and overcooked.
  6. Season and Serve – Sprinkle on fresh herbs, a little cheese, or a grind of black pepper if you want. Plate up and enjoy on warm toast.

The Verdict: Who’s Right?

In the end, there’s no one-size-fits-all answer—just what makes you swoon over your breakfast plate.

  • If extra-creamy and mild eggs make your morning, go ahead and add that splash of milk. (Maybe it’s your mother-in-law’s way, and that’s perfectly okay.)
  • If you want those rich, pure egg flavors to shine, skip the milk and focus on your cooking method.

Final Thought

The “perfect” scrambled eggs are the ones that make you (and your family) smile. Play around, trust your taste buds, and don’t be afraid to make breakfast your own—no matter what the experts say. Who knows, you might end up with a brand-new family tradition. (And if you ever have a scramble cook-off with a stubborn relative, let me know how it goes… I’ll bring the coffee!)

3-Ingredient Pan-Fried Halloumi

0

Pan-Fried Halloumi is a revelation in simplicity—a dish that transforms a single block of cheese into a golden, crispy, squeaky, and utterly addictive Mediterranean delight using just three ingredients and a hot skillet. This recipe is a celebration of halloumi’s unique qualities: its high melting point allows it to be pan-fried to a beautiful, shatteringly crisp crust while the interior becomes warm, soft, and delightfully squeaky. The magic begins with slicing the cheese into ½-inch slabs, then placing them in a hot pan with a touch of olive oil. In just a few minutes per side, the halloumi develops a deep, golden-brown crust that gives way to a warm, salty, milky interior. A final crack of freshly ground black pepper adds a subtle heat that perfectly complements the cheese’s natural saltiness.

The brilliance of this recipe lies in its incredible simplicity and the stunning result it delivers with almost no effort. Halloumi is the star, and its unique texture makes it perfect for pan-frying, grilling, or even roasting. Served immediately while still hot and crispy, it’s a versatile dish that can be enjoyed as an appetizer, a light lunch, a side dish, or even a vegetarian main. Pair it with a drizzle of honey for sweet contrast, a squeeze of lemon for brightness, or serve alongside fresh tomatoes and olives for a complete meze platter. Whether you’re new to halloumi or a longtime fan, this three-ingredient method is the perfect way to experience this incredible cheese at its absolute best.

Why You’ll Love This Recipe:

  • Incredibly Simple: Just three ingredients and a hot skillet for a dish that feels special.
  • Perfectly Crispy on the Outside, Soft Inside: Halloumi’s unique texture makes for the perfect pan-fried cheese.
  • Quick and Easy: Ready in under 10 minutes from start to finish.
  • Versatile: Serve as an appetizer, side dish, salad topping, or vegetarian main.
  • Naturally Gluten-Free: A perfect option for gluten-free diets.

Ingredients:

For the Halloumi:*
225 g (8 oz) halloumi cheese, sliced into 1 cm (½-inch) thick pieces
1 tablespoon olive oil
Freshly ground black pepper, to taste

Instructions:

Step 1: Prepare the Halloumi
Remove the halloumi from its packaging and pat it dry with paper towels to remove excess moisture. Slice the block into ½-inch thick slabs.

Step 2: Heat the Skillet*
Place a non-stick or cast-iron skillet over medium heat and add the olive oil. Allow the oil to heat until shimmering but not smoking.

Step 3: Pan-Fry the Halloumi*
Carefully place the halloumi slices in the skillet in a single layer (you may need to work in batches depending on the size of your pan). Cook for 2-3 minutes per side, until the cheese is deep golden brown and crisp on the outside.

Step 4: Serve*
Transfer the fried halloumi to a plate and sprinkle generously with freshly ground black pepper. Serve immediately while hot and crispy.

Tips:

  • Pat the Halloumi Dry: Removing excess moisture helps achieve a crispier crust.
  • Don’t Overcrowd the Pan: Give the slices room to crisp properly. Cook in batches if needed.
  • Medium Heat is Key: Too high, and the cheese will burn before the inside warms; too low, and it won’t crisp properly.
  • Serve Immediately: Halloumi is best enjoyed hot and fresh from the pan; it becomes chewier as it cools.
  • Add Flavor Variations: Drizzle with honey, balsamic glaze, or a squeeze of lemon; serve with fresh herbs, chili flakes, or a sprinkle of za’atar.

Storage Options:

  • Not Recommended for Storage: Pan-fried halloumi is best enjoyed immediately. The texture changes significantly upon cooling and reheating.
  • Reheating: If you must reheat, do so in a dry skillet over medium heat for 1-2 minutes per side. The microwave will make it rubbery.

3-Ingredient Pan-Fried Halloumi is a testament to the beauty of simple cooking. With its golden, crispy exterior and warm, squeaky interior, it’s a dish that proves sometimes the most memorable bites come from the most humble preparations.