Creamy Crockpot Chicken Spaghetti

0

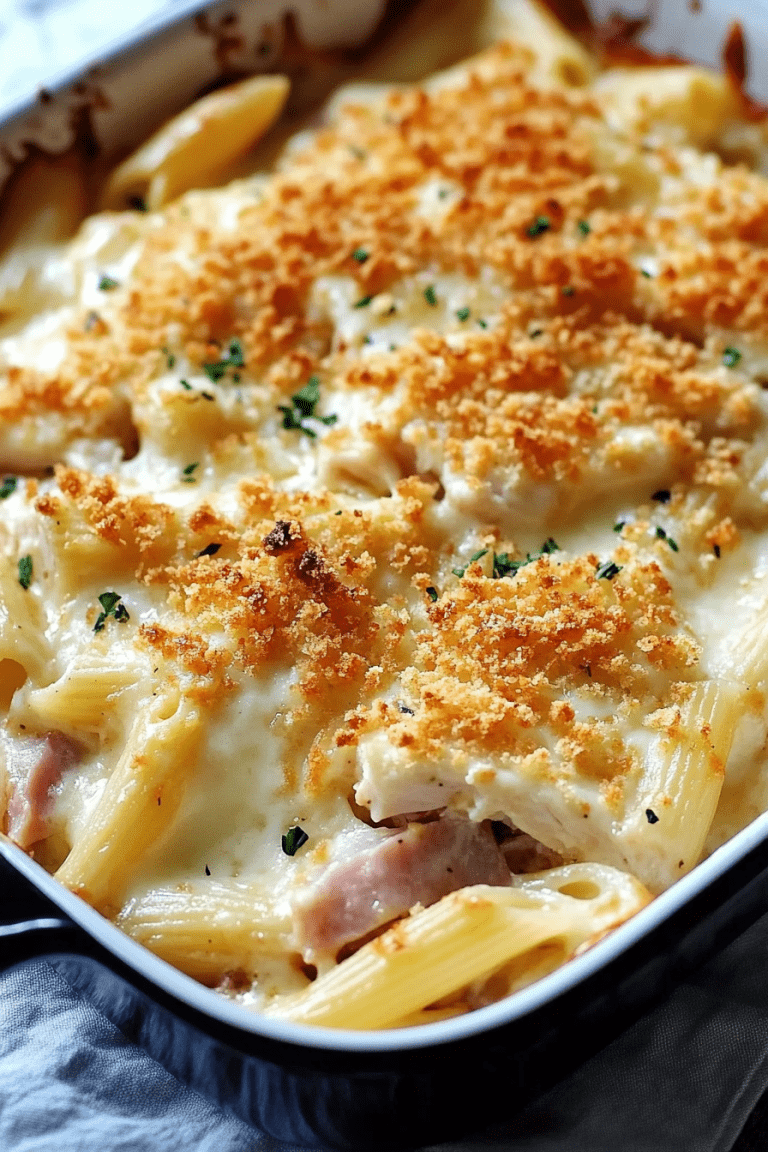
Creamy Crockpot Chicken Spaghetti is a delightful comfort dish that brings together tender chicken, perfectly cooked spaghetti, and a creamy, cheesy sauce with a touch of spice from Rotel tomatoes. This dish is perfect for busy days when you want a hearty and satisfying meal without spending hours in the kitchen. The slow-cooked chicken becomes tender and flavorful, melding beautifully with the rich, cheesy sauce and al dente spaghetti for a crowd-pleasing dish.

This recipe is an easy-to-follow, one-pot wonder that simplifies weeknight dinners and is a guaranteed hit with family and friends. Just a few simple steps and your Crock Pot will do the rest, leaving you with a deliciously creamy and savory meal.

Why You’ll Love This Recipe:

Easy Preparation: Just set it and forget it! The Crock Pot takes care of the cooking while you go about your day.

Rich and Creamy: The combination of soups, cream cheese, and shredded cheese creates a luscious, smooth sauce.

Family-Friendly: A dish that both kids and adults will enjoy, with flavors that are hearty and satisfying.

Ingredients:

• 10.5 ounces cream of chicken soup

• 10.5 ounces cream of mushroom soup

• 10 ounces Rotel diced tomatoes with chilies (undrained)

• 4 ounces cream cheese, cubed

• 2 tablespoons Italian seasoning

• 1.5 pounds boneless, skinless chicken breasts

• 12 ounces spaghetti

• 2 cups shredded mozzarella and cheddar cheese blend

Instructions:

1. Prepare the Crock Pot:

• Spray the interior of the Crock Pot with non-stick cooking spray to prevent sticking.

2. Create the Soup Base:

• Pour the cream of chicken soup and cream of mushroom soup into the Crock Pot.

• Add the Rotel diced tomatoes (undrained), cubed cream cheese, and Italian seasoning to the soup mixture. Stir to combine all the ingredients evenly.

3. Add the Chicken:

• Place the boneless, skinless chicken breasts into the Crock Pot, ensuring they are submerged in the soup mixture for even cooking.

4. Cook:

• Secure the lid and set the Crock Pot to cook on LOW for four hours.

5. Shred the Chicken:

• After four hours, remove the chicken breasts and transfer them to a cutting board. Use two forks to shred the chicken into bite-sized pieces.

6. Cook the Spaghetti:

• While the chicken is being shredded, cook the spaghetti according to the package instructions until al dente. Drain and set aside.

7. Combine Everything:

• Return the shredded chicken to the Crock Pot. Add the cooked spaghetti to the Crock Pot and stir to ensure the pasta is well coated in the creamy sauce.

8. Add Cheese:

• Sprinkle the shredded mozzarella and cheddar cheese blend over the spaghetti mixture. Stir to incorporate the cheese throughout.

9. Final Cooking Phase:

• Replace the lid and continue cooking on LOW for an additional 30 minutes, or until the cheese is melted and the flavors are fully combined.

10. Serve:

• Serve the Creamy Crockpot Chicken Spaghetti while hot. Enjoy the hearty, cheesy, and creamy goodness!

Tips:

Adjusting Spice Level: If you prefer a milder dish, use a can of diced tomatoes without chilies instead of Rotel.

Make It Your Own: Add sautéed mushrooms or spinach for an extra layer of flavor and nutrition.

Pasta Texture: For firmer pasta, add the cooked spaghetti closer to the end of the main cooking time.

Storage Options:

Refrigerator: Store leftovers in an airtight container for up to 3 days. Reheat in the microwave or on the stovetop over low heat.

Freezer: Freeze portions in a freezer-safe container for up to 2 months. Thaw overnight in the refrigerator and reheat before serving.

This Creamy Crockpot Chicken Spaghetti is a simple yet satisfying dish that combines savory, cheesy, and creamy elements into a delightful meal perfect for any occasion. Enjoy this easy recipe for cozy weeknight dinners or share it at a gathering for a guaranteed hit!

Pumpkin Bread with Cinnamon Glaze

0

Pumpkin Bread with Cinnamon Glaze is the perfect autumn-inspired treat, boasting warm spices and a moist, tender crumb. Each bite brings comforting flavors of cinnamon, nutmeg, cloves, and ginger, paired with the rich, earthy taste of pumpkin. This bread is ideal for breakfast, an afternoon snack, or a dessert that celebrates the best of fall flavors. The sweet cinnamon glaze adds just the right touch of sweetness and enhances the spiced notes in the bread.

This recipe makes two loaves, so it’s perfect for sharing with friends and family or freezing one for later. Whether served plain or with a spread of butter, this pumpkin bread is a cozy, crowd-pleasing favorite.

Why You’ll Love This Recipe:

Warm Spices: The combination of cinnamon, nutmeg, cloves, and ginger creates an irresistible spiced flavor.

Moist Texture: The blend of pumpkin puree, melted butter, and oil ensures a soft, tender crumb.

Simple and Delicious Glaze: The cinnamon glaze adds an extra layer of flavor that pairs perfectly with the spiced pumpkin bread.

Ingredients:

Pumpkin Bread:

• 3 1/2 cups all-purpose flour

• 2 teaspoons baking soda

• 1 teaspoon salt

• 2 teaspoons ground cinnamon

• 1 teaspoon ground nutmeg

• 1/2 teaspoon ground cloves

• 1/2 teaspoon ground ginger

• 1 can (15-ounce) pumpkin puree

• 4 large eggs, room temperature

• 1/2 cup melted butter

• 1/2 cup vegetable or canola oil

• 1 cup granulated sugar

• 1 cup brown sugar

Cinnamon Glaze:

• 1 1/2 cups powdered sugar

• 3 tablespoons melted butter

• 3 tablespoons milk

• 1/4 teaspoon vanilla extract

• 1/4 teaspoon ground cinnamon

• 1/4 teaspoon allspice

• 1/8 teaspoon ground cloves

Instructions:

1. Preheat the Oven:

• Preheat your oven to 350°F (175°C). Grease two 8 x 4-inch loaf pans well and set aside.

2. Mix Dry Ingredients:

• In a medium bowl, whisk together the flour, baking soda, salt, cinnamon, nutmeg, ground cloves, and ginger.

3. Combine Wet Ingredients:

• In a large bowl, stir together the pumpkin puree, eggs, melted butter, oil, granulated sugar, and brown sugar until well combined.

4. Incorporate Dry Ingredients:

• Gradually add the dry ingredients to the wet ingredients in three parts, stirring just until combined after each addition. Be careful not to overmix, as this can affect the texture of the bread.

5. Pour and Bake:

• Divide the batter evenly between the prepared loaf pans. Smooth the tops with a spatula.

• Bake in the preheated oven for 50 minutes or until a toothpick inserted into the center of each loaf comes out clean.

6. Cool the Loaves:

• Allow the loaves to cool in the pans for 10 minutes before carefully removing them and placing them on a wire rack to cool further.

7. Prepare the Cinnamon Glaze:

• In a small bowl, whisk together the powdered sugar, melted butter, milk, vanilla extract, cinnamon, allspice, and ground cloves until smooth and pourable. Adjust the consistency with a bit more milk if needed.

8. Glaze the Loaves:

• Drizzle the cinnamon glaze over the warm (not hot) loaves. Let the glaze set for a few minutes before slicing and serving.

Tips:

Pumpkin Flavor: Use pure pumpkin puree, not pumpkin pie filling, for the best flavor.

Room Temperature Eggs: Ensure eggs are at room temperature for better incorporation with other ingredients.

Storage Tip: Store cooled loaves in an airtight container at room temperature for up to 3 days, or refrigerate for up to a week.

Storage Options:

Room Temperature: Wrap in plastic wrap or store in an airtight container for up to 3 days.

Freezer: Wrap each loaf tightly in plastic wrap and foil, then freeze for up to 3 months. Thaw at room temperature and reheat slices as desired.

This Pumpkin Bread with Cinnamon Glaze is a delicious way to bring the cozy flavors of fall to your table. Enjoy it warm with a cup of tea or coffee for the ultimate seasonal treat!

Sausage, Egg & Cream Cheese Hash Brown Breakfast Casserole

0

Sausage, Egg & Cream Cheese Hash Brown Breakfast Casserole is a comforting, crowd-pleasing dish perfect for breakfast or brunch gatherings. This casserole features layers of crispy hash browns, creamy sausage, and fluffy eggs, all topped with gooey melted cheese. It’s an easy make-ahead meal that brings everyone to the table, whether for a weekend breakfast or a holiday brunch.

With the combination of savory sausage, rich cream cheese, and a hint of garlic and onion, this dish delivers an explosion of flavors in every bite. The melted cheddar cheese on top creates a golden, bubbly crust that adds just the right amount of texture. This dish is simple to put together, making it an excellent option for busy mornings when you want something hearty and satisfying.

Why You’ll Love This Recipe:

Hearty and Filling: Packed with protein and carbs, this casserole keeps you satisfied for hours.

Perfect for a Crowd: Serves a large group, making it ideal for family gatherings or potlucks.

Easy to Make Ahead: Prepare it the night before and simply bake in the morning for stress-free hosting.

Ingredients:

• 1 bag (30-32 oz) frozen shredded hash browns

• 2 lbs hot breakfast sausage

• 16 oz cream cheese, room temperature

• 8 eggs

• 2 cups milk

• 2 cups shredded cheddar cheese

• 1 tsp salt

• 1/2 tsp black pepper

• 1/4 tsp garlic powder

• 1/4 tsp onion powder

Instructions:

1. Preheat the Oven

• Set your oven to 350°F (175°C). Grease a 9×13-inch baking dish with cooking spray or butter.

2. Cook the Sausage

• In a large skillet over medium heat, cook the sausage, breaking it up as it cooks, until it is browned and fully cooked (about 7-10 minutes). Drain excess fat.

3. Combine Sausage and Cream Cheese

• While the sausage is still warm, add the cream cheese and mix until fully combined and creamy.

4. Prepare the Egg Mixture

• In a large mixing bowl, whisk together the eggs, milk, salt, black pepper, garlic powder, and onion powder until well combined.

5. Assemble the Casserole

• Spread the frozen hash browns evenly across the bottom of the greased baking dish.

• Spoon the sausage and cream cheese mixture over the hash browns.

• Pour the egg mixture evenly over the hash browns and sausage.

• Sprinkle the shredded cheddar cheese over the top.

6. Bake

• Place the baking dish in the preheated oven and bake for 45-50 minutes, or until the eggs are set and the cheese is melted and bubbly.

• For a crispier top, broil for an additional 2-3 minutes at the end of the baking time.

7. Cool and Serve

• Remove from the oven and allow the casserole to cool slightly before slicing and serving.

Tips:

Make-Ahead Option: Assemble the casserole the night before, cover it with foil, and store it in the refrigerator. Bake as directed the next morning.

Spice Level: If you prefer a milder flavor, use regular breakfast sausage instead of hot.

Cheese Variations: Swap cheddar for a mix of cheeses like Monterey Jack or Colby for a different flavor profile.

Storage Options:

Refrigerator: Store leftovers in an airtight container in the refrigerator for up to 4 days. Reheat individual servings in the microwave or oven.

Freezer: Freeze portions of the fully cooked casserole for up to 3 months. Thaw overnight in the refrigerator and reheat in the oven at 350°F (175°C) until warmed through.

This Sausage, Egg & Cream Cheese Hash Brown Breakfast Casserole is a versatile and delicious dish that will be the star of your breakfast or brunch spread. Enjoy the ease of preparation and the hearty flavors that will have everyone asking for seconds!
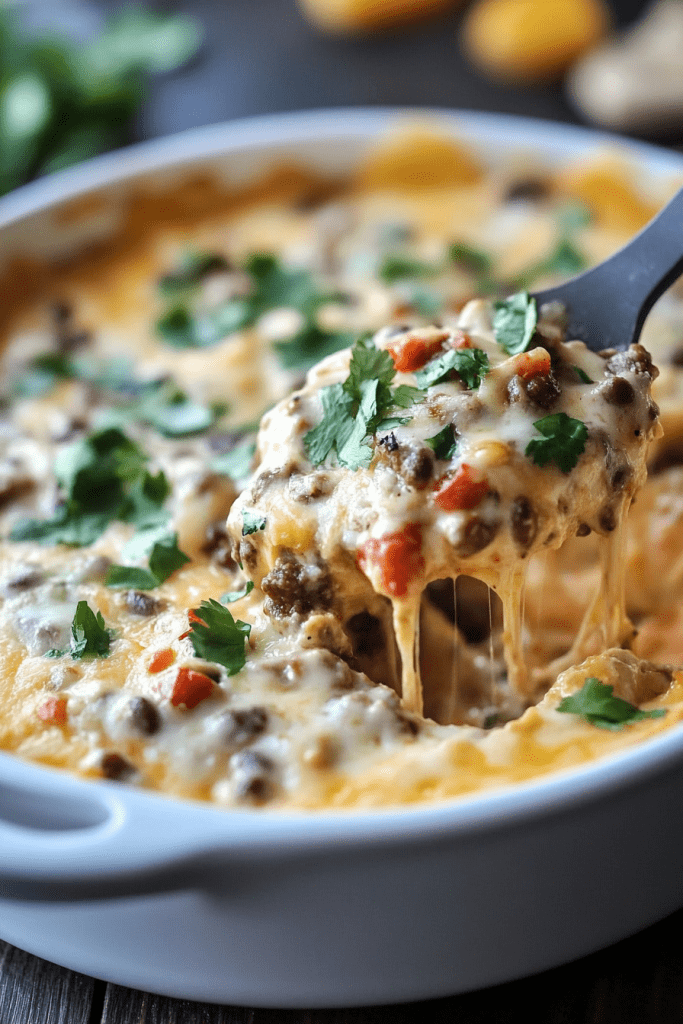
No-Bake Coconut Pecan Praline Cookies

0

No-Bake Coconut Pecan Praline Cookies are a delightful confection that combines the richness of pecans with the tropical sweetness of coconut, all held together by a caramel-like praline. This no-bake recipe is perfect for those days when you crave something sweet but don’t want to turn on the oven. These cookies are not only delicious but also incredibly easy to make, requiring just a stovetop and a few minutes of your time.

The mixture of granulated and brown sugars with evaporated milk creates a smooth and rich base, while the addition of vanilla and salt enhances the flavors, making them more complex and satisfying. These cookies are ideal for holiday treats, family gatherings, or simply as a delightful snack to enjoy with a cup of tea or coffee.

Why You’ll Love This Recipe:

No Oven Needed: Perfect for warm days or when you want a quick dessert without baking.

Rich and Flavorful: The combination of caramelized sugars, coconut, and pecans offers a deep, satisfying taste.

Quick and Easy: From start to finish, these cookies can be prepared in about 15 minutes, plus cooling time.

Ingredients:

• 2 cups pecans

• 2 cups sweetened shredded coconut

• 1 1/2 cups granulated sugar

• 1 cup brown sugar

• 1/2 cup evaporated milk

• 1/2 cup light corn syrup

• 1/2 cup (1 stick) unsalted butter

• 1 teaspoon vanilla extract

• 1/2 teaspoon salt

Instructions:

1. Combine Sugars and Wet Ingredients

• In a large saucepan, combine the granulated sugar, brown sugar, evaporated milk, corn syrup, and unsalted butter. Heat the mixture over medium-high heat, stirring continuously until it is well combined and smooth.

2. Bring to Boil

• Allow the mixture to reach a boil. Maintain the boil for 3 minutes, making sure to stir constantly to prevent scorching.

3. Add Flavorings

• Remove the saucepan from heat. Stir in the vanilla extract and salt until well incorporated.

4. Mix in Coconut and Pecans

• Gradually add the shredded coconut and pecans, stirring continuously for another 3-4 minutes. The mixture will start to thicken slightly as it cools.

5. Scoop and Set

• Using a tablespoon or a small ice cream scoop, drop the mixture onto baking sheets lined with wax paper.

• Spread each portion slightly with the back of the spoon if desired, to form cookie shapes.

6. Cool and Harden

• Allow the cookies to set at room temperature until firm. For quicker setting, you can place the cookies in the freezer.

Tips:

Proper Measurement: Ensure accurate measurements of ingredients to achieve the perfect texture.

Consistent Stirring: Keep stirring the mixture while cooking to prevent any ingredients from sticking to the bottom of the pan and burning.

Setting Time: If the cookies are too soft or sticky, let them set longer or chill them in the refrigerator.

Storage Options:

Room Temperature: Store the cookies in an airtight container at room temperature for up to 5 days.

Refrigerate: For longer storage, keep them in the refrigerator for up to 2 weeks.

Freeze: Freeze the cookies for up to 3 months. Thaw at room temperature before serving.

These No-Bake Coconut Pecan Praline Cookies are not just easy to make but are a surefire delight for any sweet tooth, combining textures and flavors that are bound to please. Whether you’re a seasoned baker or a novice in the kitchen, these cookies are foolproof and guaranteed to impress.

Maple Cookies With Maple Icing

0

Maple Cookies with Maple Icing are the perfect treat for anyone who loves the rich, distinctive flavor of maple. This recipe transforms simple ingredients into delightful cookies that carry the essence of fall in each bite. The addition of a smooth, maple-infused glaze complements the soft, chewy texture of the cookies, making them irresistibly appealing. These cookies are not just a dessert; they are a celebration of flavor that can turn a simple coffee break into a special moment.

The beauty of this recipe lies in its simplicity and the deep, caramelized flavor that brown sugar and maple syrup bring to the table. Each cookie offers a warm, comforting taste that pairs wonderfully with a cold glass of milk or a hot cup of coffee. Whether you’re looking to impress at a bake sale, treat your family, or simply indulge in a sweet snack, these Maple Cookies with Maple Icing are sure to satisfy.

Why You’ll Love This Recipe:

Rich Maple Flavor: Every component, from the cookie dough to the icing, is infused with pure maple syrup, delivering a genuine and robust maple taste.

Perfectly Chewy Texture: These cookies are soft with a slight chew, giving you the ultimate comfort food experience.

Customizable Toppings: Add roasted pecans or bacon to enhance texture and introduce savory notes that contrast beautifully with the sweetness.

Ingredients:

• 1/2 cup butter, softened (1 stick)

• 1 cup brown sugar

• 1/4 cup maple syrup

• 1 large egg

• 1 tsp vanilla extract

• 2 1/2 cups all-purpose flour

• 1 tsp baking soda

• 1/4 tsp ground cinnamon

• 1 1/2 cups powdered sugar

• 3 tbsp maple syrup (for glaze)

• 1-2 tbsp milk (as needed for glaze)

• Roasted chopped pecans (optional garnish)

• Crumbled cooked bacon (optional garnish)

Instructions:

Preheat your oven to 350°F (175°C). Line two baking sheets with parchment paper.

Step 1: Cream Butter and Sugar

• In a large bowl, beat the softened butter and brown sugar on medium speed until light and fluffy, about 2 minutes.

Step 2: Add Wet Ingredients

• Blend in the maple syrup, egg, and vanilla extract until fully combined. Scrape down the sides of the bowl as needed.

Step 3: Combine Dry Ingredients

• In a separate bowl, whisk together the flour, baking soda, and ground cinnamon.

Step 4: Mix Dry and Wet Ingredients

• Gradually add the dry ingredients to the butter mixture, mixing just until combined.

Step 5: Shape Cookies

• Using a cookie scoop, measure out 1 1/2 to 2 tablespoons of dough per cookie. Roll into balls and place on the prepared sheets, spacing them about 2 inches apart. Flatten each ball to about 1/2 inch thick using the bottom of a glass.

Step 6: Bake

• Bake for 10-12 minutes, until the cookies are set but still soft. Let them cool completely on the baking sheets.

Step 7: Prepare Maple Icing

• In a medium bowl, whisk together powdered sugar, 3 tbsp of maple syrup, and 1 tbsp of milk until smooth. Adjust consistency with more milk if necessary, one teaspoon at a time.

Step 8: Ice Cookies

• Dip the tops of the cookies into the glaze or spoon it over, spreading gently.

Step 9: Add Garnishes

• While the glaze is still wet, sprinkle with roasted chopped pecans or crumbled bacon, if using.

Tips:

Maple Syrup Quality: Use pure maple syrup for the best flavor rather than maple-flavored syrups.

Cookie Consistency: For softer cookies, take them out at 10 minutes. Leave them a bit longer for a firmer texture.

Glaze Thickness: For a thicker glaze, reduce the amount of milk or add more powdered sugar.

Storage Options:

Room Temperature: Keep in an airtight container for up to 5 days.

Freezer: Freeze the unglazed cookies for up to 3 months. Thaw and apply fresh glaze before serving.

Enjoy these Maple Cookies With Maple Icing as a special treat that brings the comforting flavors of maple into your home. Each cookie offers a delightful sweetness balanced with optional savory notes, making them a versatile choice for any occasion.

KFC Coleslaw

0

KFC Coleslaw is a classic side dish known for its creamy, tangy, and subtly sweet flavor. This recipe captures the essence of the famous KFC version, making it a perfect addition to any picnic, barbecue, or family meal. The combination of finely chopped cabbage and carrots with a smooth, flavorful dressing creates a satisfying and refreshing side that pairs well with a variety of main dishes.

This homemade version ensures freshness and control over the ingredients, making it healthier than store-bought options. With simple prep and a chilling time to meld the flavors, this coleslaw is easy to make and sure to impress.

Why You’ll Love This Recipe:

Classic Flavor: A spot-on replica of KFC’s beloved coleslaw.

Easy to Prepare: Simple ingredients and quick assembly.

Perfect Make-Ahead Side: Tastes better when made ahead and chilled, freeing you up on serving day.

Ingredients:

• 1 tablespoon onion, finely grated

• 1/3 cup sugar

• 1/2 cup mayonnaise

• 1/4 cup buttermilk, well shaken

• 1/4 cup whole milk

• 1 1/2 tablespoons white vinegar

• 2 1/2 tablespoons fresh lemon juice

• 1/2 teaspoon salt

• 1/8 teaspoon black pepper

• 8 cups finely diced coleslaw cabbage (or 1-16 ounce bag of coleslaw mix)

• 1/4 cup shredded carrot (omit if using bagged coleslaw mix that includes carrots)

Instructions:

Step 1: Make the Dressing

• In a large mixing bowl, whisk together the finely grated onion, sugar, mayonnaise, buttermilk, whole milk, white vinegar, fresh lemon juice, salt, and black pepper. Whisk until the mixture is smooth and all ingredients are well combined.

Step 2: Add the Vegetables

• Add the finely diced cabbage and shredded carrot to the bowl. If you’re using a bagged coleslaw mix, just pour it in. Mix until all the cabbage and carrots are evenly coated with the dressing.

Step 3: Chill

• Cover the bowl tightly with plastic wrap or transfer the coleslaw to an airtight container. Refrigerate for at least 4 hours to allow the flavors to meld. For best results, refrigerate overnight.

Step 4: Serve

• Before serving, stir the coleslaw well to ensure the dressing is evenly distributed. Serve chilled and enjoy as a refreshing side dish.

Tips:

Finely Chopped Cabbage: For the best texture, finely chop the cabbage or pulse it in a food processor.

Tangier Flavor: Adjust the lemon juice and vinegar to taste for more tang.

Buttermilk Substitute: If you don’t have buttermilk, mix 1/4 cup whole milk with 1/2 tablespoon of white vinegar or lemon juice and let it sit for 5 minutes.

Storage Options:

Refrigerator: Store leftovers in an airtight container in the refrigerator for up to 3 days. Stir before serving.

Not Suitable for Freezing: The texture of the cabbage can become watery and mushy after freezing, so this coleslaw is best enjoyed fresh.

This KFC Coleslaw copycat recipe is easy to make and delivers the perfect balance of creamy, tangy, and slightly sweet flavors. Serve it alongside fried chicken, barbecued meats, or sandwiches for a delicious homemade side dish that everyone will love.

Poppy Seed Dinner Rolls

0

Poppy Seed Dinner Rolls are a soft, flavorful addition to any meal, with a touch of sweetness and a lovely crunch from poppy seeds. These rolls are perfect for holiday dinners or any special occasion, and they’re easy to make at home. Each roll is light, fluffy, and topped with a beautiful golden crust from the egg wash. The poppy seeds add a mild, nutty flavor and an elegant look to the rolls, making them the star of the breadbasket.

With minimal ingredients and simple steps, you’ll enjoy the satisfaction of homemade rolls that taste and look like they came from a bakery!

Why You’ll Love This Recipe:

Soft and Fluffy Texture: These rolls are tender and airy, thanks to a well-risen dough.

Mildly Sweet with a Nutty Crunch: The poppy seeds provide a delightful flavor contrast.

Perfect for Any Occasion: A beautiful side that complements any meal.

Ingredients:

• 500g all-purpose flour

• 50g sugar

• 10g salt

• 7g instant yeast

• 300ml warm milk

• 1 large egg

• 50g unsalted butter, softened

• 2 tablespoons poppy seeds

• Egg wash: 1 beaten egg mixed with 2 tablespoons water

Instructions:

Step 1: Mix Dry Ingredients

• In a large mixing bowl, whisk together the flour, sugar, salt, and yeast.

Step 2: Add Wet Ingredients

• Add the warm milk, egg, and softened butter to the dry ingredients. Mix until a soft dough begins to form.

Step 3: Knead the Dough

• Transfer the dough to a lightly floured surface. Knead by hand for about 10 minutes until the dough is smooth and elastic. This step develops the gluten for a soft, fluffy texture.

Step 4: First Rise

• Place the dough in a greased bowl, cover with a damp cloth, and let it rise in a warm place for about 1 hour or until doubled in size.

Step 5: Shape the Rolls

• Punch down the risen dough to release any air bubbles. Divide the dough into 12 equal portions. Roll each portion into a ball, then press gently to flatten slightly.

Step 6: Prepare Ramekins and Seed Topping

• Grease individual ramekins and sprinkle the bottoms with poppy seeds. Place each dough ball into a ramekin, pressing the seed-coated side down, then flip so the poppy seeds are on top.

Step 7: Second Rise

• Cover the ramekins with a cloth and let the rolls rise again in a warm place for about 45 minutes, or until they look puffy and fill the ramekins.

Step 8: Preheat the Oven

• Preheat your oven to 375°F (190°C).

Step 9: Brush with Egg Wash

• Brush the tops of the rolls with the egg wash to give them a shiny, golden finish when baked.

Step 10: Bake

• Bake the rolls in the preheated oven for 20-25 minutes or until they are golden brown on top and baked through.

Step 11: Cool and Serve

• Remove the rolls from the oven and let them cool on a wire rack for at least 15 minutes before serving. Enjoy them warm for the best texture and flavor.

Tips:

Warm Milk for Yeast Activation: Make sure the milk is warm, not hot, to activate the yeast properly.

Even Shaping: Use a kitchen scale to divide the dough evenly for uniformly sized rolls.

Baking Without Ramekins: If you don’t have ramekins, place the rolls directly on a greased or parchment-lined baking sheet.

Storage Options:

Room Temperature: Store leftovers in an airtight container at room temperature for up to 2 days.

Freezer: For longer storage, freeze the rolls in a freezer-safe bag for up to 1 month. Thaw at room temperature or reheat briefly in the oven.

These Poppy Seed Dinner Rolls are a delicious homemade addition to any meal, adding a touch of elegance with the poppy seed topping and a tender, fluffy texture everyone will love.

Smothered Cheesy Sour Cream Chicken

0

Smothered Cheesy Sour Cream Chicken is a creamy, flavorful dish that combines tender chicken breasts with a rich sour cream and Parmesan topping, finished with a melty layer of mozzarella. This recipe is perfect for a cozy family dinner and requires minimal prep time. With hints of garlic, oregano, and a golden Parmesan crust, each bite is a delicious balance of creamy and savory flavors.

Easy to prepare and incredibly satisfying, this chicken bake is a fantastic choice for busy weeknights or a comforting weekend meal.

Why You’ll Love This Recipe:

Rich and Creamy: The sour cream and cheese mixture creates a luscious sauce that keeps the chicken moist and flavorful.

Minimal Ingredients: With simple, everyday ingredients, this recipe is easy to make and budget-friendly.

Family-Friendly: It’s a comforting dish that everyone at the table will enjoy.

Ingredients:

• 4 boneless, skinless chicken breasts

• 1 cup sour cream

• 3/4 cup grated Parmesan cheese, divided

• 4 slices mozzarella cheese

• 1 tbsp cornstarch

• 1 tsp dried oregano

• 1 tsp garlic powder

• Salt and black pepper, to taste

Instructions:

Step 1: Preheat the Oven

• Preheat your oven to 375°F (190°C). Lightly grease a 9×13-inch baking dish to prevent sticking and ensure easy cleanup.

Step 2: Prepare the Chicken

• Place the chicken breasts in the baking dish in a single layer, arranging them so they cook evenly.

Step 3: Make the Sour Cream Mixture

• In a mixing bowl, combine the sour cream, 1/2 cup Parmesan cheese, cornstarch, oregano, garlic powder, and a pinch of salt and black pepper. Stir until the mixture is smooth and well-blended.

Step 4: Add Mozzarella Cheese

• Place a slice of mozzarella cheese on top of each chicken breast. This adds a melty layer that enhances the creamy texture of the dish.

Step 5: Spread the Sour Cream Mixture

• Spread the sour cream mixture evenly over each chicken breast, ensuring they’re fully coated for maximum flavor.

Step 6: Add Parmesan Topping

• Sprinkle the remaining Parmesan cheese over the top of each chicken breast, creating a golden crust as it bakes.

Step 7: Bake

• Bake the chicken in the preheated oven for about 60 minutes, or until the internal temperature of the chicken reaches 165°F (74°C) and the cheese is golden and bubbly.

Step 8: Serve

• Allow the dish to rest for a few minutes before serving. This helps the flavors meld and makes for easier serving.

Tips:

Use Fresh Herbs: Fresh oregano or basil can enhance the flavor of the dish.

Cheese Variations: Substitute mozzarella with provolone or a sharp cheddar for a different flavor profile.

Add Crunch: Sprinkle some panko breadcrumbs mixed with a little Parmesan on top for added texture.

Storage Options:

Refrigerator: Store leftovers in an airtight container in the fridge for up to 3 days. Reheat in the oven or microwave until warmed through.

Freezer: This dish can be frozen for up to 2 months. Wrap individual portions tightly and thaw in the fridge before reheating.

Smothered Cheesy Sour Cream Chicken is a delicious, comforting dish that’s easy to prepare and loaded with flavor. Serve with rice, mashed potatoes, or a side salad for a complete, satisfying meal that everyone will enjoy!

Pumpkin Muffins

0

Pumpkin Muffins are a perfect fall treat, combining warm spices, moist pumpkin flavor, and a deliciously crumbly streusel topping. These muffins are easy to make, with a cozy blend of cinnamon, nutmeg, and ginger that gives them a comforting autumnal aroma. Topped with a cinnamon maple drizzle, these muffins are ideal for breakfast, a snack, or dessert. Every bite offers a burst of flavor and texture that’s hard to resist.

With a simple ingredient list and straightforward steps, these muffins come together effortlessly, making them a great choice for seasonal baking.

Why You’ll Love This Recipe:

Warm, Seasonal Flavors: The blend of spices perfectly complements the pumpkin.

Versatile: Enjoy these muffins any time of day—breakfast, snack, or dessert.

Easy to Make: Simple ingredients and steps make these muffins a breeze to prepare.

Ingredients:

For the Muffins:

• 1 ¾ cup all-purpose flour

• 1 teaspoon baking soda

• ½ teaspoon salt

• 2 teaspoons ground cinnamon

• ½ teaspoon ground nutmeg

• ½ teaspoon ground ginger

• ¾ cup granulated sugar

• ½ cup brown sugar

• 2 large eggs

• ½ cup vegetable oil

• 1 cup pumpkin puree (canned or fresh)

• ¼ cup milk

• 1 teaspoon vanilla extract

For the Streusel Topping:

• 1 cup all-purpose flour

• ¼ cup granulated sugar

• ¼ cup brown sugar

• 1 teaspoon ground cinnamon

• ½ teaspoon salt

• ½ cup unsalted butter, melted

For the Cinnamon Maple Drizzle:

• 1 ½ cups powdered sugar

• 2 tablespoons milk

• 1 tablespoon maple syrup

• Pinch of ground cinnamon

Instructions:

Step 1: Preheat the Oven

• Preheat your oven to 375°F (190°C). Line a 12-count standard muffin pan with paper liners.

Step 2: Mix Dry Ingredients

• In a medium bowl, whisk together the flour, baking soda, salt, ground cinnamon, nutmeg, and ginger until well combined.

Step 3: Combine Wet Ingredients

• In a large mixing bowl, stir together the granulated sugar, brown sugar, eggs, vegetable oil, pumpkin puree, milk, and vanilla extract until smooth and fully incorporated.

Step 4: Combine Wet and Dry Mixtures

• Gradually add the dry flour mixture to the wet pumpkin mixture, stirring just until combined. Be careful not to overmix to keep the muffins tender.

Step 5: Fill Muffin Liners

• Divide the batter evenly among the prepared muffin liners, filling each about three-quarters full.

Step 6: Prepare the Streusel Topping

• In a separate bowl, whisk together the flour, granulated sugar, brown sugar, cinnamon, and salt for the streusel. Slowly pour in the melted butter, stirring with a fork until the mixture becomes crumbly.

Step 7: Add Streusel Topping to Muffins

• Evenly divide the streusel mixture over each muffin and gently press it down so that it adheres to the batter.

Step 8: Bake the Muffins

• Bake the muffins in the preheated oven for 25-30 minutes, or until a toothpick inserted into the center comes out clean. Allow the muffins to cool in the pan for 5 minutes before transferring them to a wire rack to cool completely.

Step 9: Prepare the Cinnamon Maple Drizzle

• In a small bowl, whisk together the powdered sugar, milk, maple syrup, and a pinch of ground cinnamon until smooth.

Step 10: Drizzle and Serve

• Once the muffins have fully cooled, drizzle the cinnamon maple icing over the tops of each muffin. Serve and enjoy the warm, seasonal flavors.

Tips:

Room Temperature Ingredients: Ensure your eggs are at room temperature for a smoother batter.

Pumpkin Variation: Fresh pumpkin puree can be used for a more intense pumpkin flavor.

Optional Add-Ins: Add chopped pecans or walnuts for extra crunch and flavor.

Storage Options:

Room Temperature: Store muffins in an airtight container for up to 3 days.

Refrigerator: These muffins can be refrigerated for up to a week.

Freezer: Freeze muffins (without the drizzle) in a freezer-safe bag for up to 2 months. Thaw and add the drizzle just before serving.

Pumpkin Muffins with Streusel Topping and Cinnamon Maple Drizzle bring the best of fall flavors to your table. Whether enjoyed warm or at room temperature, these muffins are a sweet and satisfying way to celebrate the season!

Slow Cooker Pepper Steak

0

Slow Cooker Pepper Steak is a hearty, flavorful dish that combines tender strips of beef with colorful bell peppers in a savory sauce. The slow cooker does all the work, allowing the beef to become melt-in-your-mouth tender as it absorbs the rich flavors of soy sauce, garlic, and a touch of sweetness from brown sugar. Perfect for busy days, this recipe is a family favorite that’s easy to prepare and serves up beautifully with rice or noodles.

This recipe is ideal for meal prep, filling the house with an amazing aroma as it cooks, and yields a satisfying, flavorful meal with minimal effort.

Why You’ll Love This Recipe:

Effortless Cooking: The slow cooker does all the work, requiring only simple prep and minimal monitoring.

Rich, Savory Flavor: A blend of soy sauce, garlic, and brown sugar makes a robust sauce that perfectly complements the beef and peppers.

Perfect for Meal Prep: This dish stores and reheats well, making it an excellent choice for batch cooking.

Ingredients:

• 3 pounds flank steak, sliced into thin strips

• 4 bell peppers, sliced (mix of colors for vibrant presentation)

• 2 onions, sliced

• 3 tbsp olive oil

• 2 cloves garlic, minced

• 1 1/2 cups soy sauce

• 1 1/2 cups water

• 1/2 cup cornstarch

• 1 cup brown sugar, packed

Instructions:

Step 1: Prep the Steak

• Slice the flank steak into thin strips. Place the sliced steak in a large ziplock bag with the cornstarch. Seal the bag and shake until all beef strips are evenly coated. This step helps thicken the sauce and gives the steak a tender texture.

Step 2: Make the Sauce

• In the slow cooker, combine olive oil, brown sugar, soy sauce, water, and minced garlic. Stir until the sugar is dissolved.

Step 3: Add the Beef

• Place the coated beef strips into the slow cooker, spreading them out evenly to ensure they’re submerged in the sauce.

Step 4: Slow Cook

• Cover the slow cooker and set it to low heat for approximately 6 hours. Avoid lifting the lid frequently to retain heat and ensure the meat cooks evenly and tenderly.

Step 5: Add Vegetables

• About 1 1/2 hours before the end of the cooking time, slice the bell peppers and onions and add them to the slow cooker. Re-cover and let the vegetables cook until they are tender but still vibrant.

Step 6: Serve and Enjoy

• Once done, give the pepper steak a gentle stir to mix everything well. Serve over steamed rice, noodles, or mashed potatoes, and enjoy the flavorful sauce with each bite of tender beef.

Tips:

Use Fresh Ingredients: Fresh garlic and bell peppers will give the dish a more vibrant flavor.

Customize the Heat: For a bit of spice, add a pinch of red pepper flakes to the sauce.

Thicker Sauce: If you prefer a thicker sauce, dissolve an additional tablespoon of cornstarch in a small amount of water, then stir it into the sauce at the end and let it cook for a few more minutes.

Storage Options:

Refrigerator: Store leftovers in an airtight container in the refrigerator for up to 3 days. Reheat in the microwave or on the stove until warmed through.

Freezer: This dish freezes well. Transfer cooled pepper steak to a freezer-safe container and freeze for up to 2 months. Thaw overnight in the fridge before reheating.

Slow Cooker Pepper Steak is a delicious, easy-to-make dish that brings the warmth of home-cooked flavor with minimal effort. Perfect for weeknight dinners or meal prepping, it’s a recipe you’ll want to make again and again!