Mini Banana Cream Pies

0

Mini Banana Cream Pies are an irresistible treat, offering the classic flavors of a banana cream pie in a convenient, single-serving format. With a buttery graham cracker crust, creamy homemade custard, and slices of fresh banana, these pies are topped with fluffy whipped cream for the perfect balance of textures and flavors. They’re not only visually delightful but also incredibly satisfying with every bite.

What makes these mini pies truly special is their versatility. Perfect for parties, holidays, or a casual dessert, they’re easy to serve and transport. The individual portions allow everyone to enjoy their own pie without the need for slicing and serving. Plus, the combination of fresh bananas and silky custard is a nostalgic flavor that evokes warmth and comfort. Prepare these pies ahead of time and let the flavors meld together for a truly indulgent experience.

Why You’ll Love This Recipe

Single-Serve Elegance: Perfect for entertaining, these pies are easy to serve and look stunning.

Classic Flavors: The blend of creamy custard, fresh bananas, and whipped cream is timeless.

Make-Ahead Friendly: Ideal for preparing in advance, making them stress-free for events.

Ingredients

For the Crust:

• 1 1/2 cups (180g) graham cracker crumbs

• 1/4 cup (50g) granulated sugar

• 1/2 cup (115g) unsalted butter, melted

For the Filling:

• 1/2 cup (100g) granulated sugar

• 1/4 cup (30g) cornstarch

• 1/2 teaspoon salt

• 3 cups (720ml) whole milk

• 4 large egg yolks, lightly beaten

• 2 tablespoons unsalted butter

• 1 teaspoon vanilla extract

• 2-3 ripe bananas, sliced

For the Topping:

• 1 cup (240ml) heavy whipping cream

• 2 tablespoons powdered sugar

• 1 teaspoon vanilla extract

• Additional banana slices for garnish

• Optional: Drizzle of caramel sauce

Instructions

Step 1: Prepare the Crust

1. Preheat your oven to 350°F (175°C).

2. In a medium bowl, mix graham cracker crumbs and granulated sugar. Add melted butter and stir until the crumbs are evenly coated.

3. Press the mixture firmly into the bottoms and up the sides of a muffin tin to form mini pie crusts.

4. Bake for 5-7 minutes, or until lightly golden. Remove from the oven and let cool completely.

Step 2: Make the Custard Filling

1. In a medium saucepan, whisk together sugar, cornstarch, and salt. Gradually add milk, whisking to ensure no lumps.

2. Cook over medium heat, stirring constantly, until the mixture thickens and starts to boil. Let it boil for 1 minute.

3. Remove from heat. Slowly whisk 1/2 cup of the hot mixture into the beaten egg yolks to temper them.

4. Gradually return the yolk mixture to the saucepan, whisking constantly.

5. Bring the custard back to a gentle boil and cook for 1 more minute.

6. Remove from heat, stir in butter and vanilla extract, and let cool to room temperature with plastic wrap directly on the surface to prevent a skin from forming.

Step 3: Assemble the Pies

1. Spoon a layer of custard into each cooled crust.

2. Add a few banana slices on top of the custard, then cover with another layer of custard.

3. Refrigerate the assembled pies for at least 2 hours to allow the filling to set.

Step 4: Make the Whipped Cream

1. In a large bowl, whip heavy cream with powdered sugar and vanilla extract until stiff peaks form.

Step 5: Add Toppings

1. Top each pie with a dollop of whipped cream.

2. Garnish with additional banana slices and, if desired, drizzle with caramel sauce.

Tips

Perfect Crusts: Press the crust mixture firmly into the tin to ensure it holds its shape.

Custard Consistency: Stir constantly while cooking to prevent lumps. If lumps form, strain the custard before cooling.

Fresh Bananas: Slice bananas just before assembling to prevent browning.

Whipping Cream: Use cold cream for the best results when whipping.

Storage Options

Refrigerator: Store the pies in an airtight container for up to 3 days. Keep the whipped cream and garnishes separate until ready to serve for the freshest appearance.

Freezing: The crust and custard can be assembled and frozen without bananas or whipped cream for up to 1 month. Thaw overnight in the refrigerator before adding toppings.

Mini Banana Cream Pies are an elegant and delightful dessert that transforms simple ingredients into something extraordinary. Perfect for any gathering, these individual pies are sure to impress with their creamy, nutty, and sweet flavor profile.

Pecan Caramel Bars

0

Pecan Caramel Bars are the epitome of indulgent desserts, combining a buttery shortbread crust, rich caramel, toasted pecans, and a luscious layer of melted chocolate. These bars are the perfect balance of crunchy, gooey, and creamy textures, offering a treat that’s as decadent as it is satisfying. Whether you’re preparing for a holiday gathering, looking for an impressive dessert to share, or simply craving something sweet, these bars deliver a gourmet experience with surprisingly simple ingredients.

The combination of toasted pecans and caramelized sugar creates a warm, nutty flavor that pairs beautifully with the smooth chocolate topping. These bars are not only visually appealing but also pack a flavor punch in every bite. Easy to prepare and even easier to love, they’re destined to become a favorite among your family and friends.

Why You’ll Love This Recipe

Decadent Layers: Buttery crust, creamy caramel, and rich chocolate make these bars a multi-layered delight.

Crowd-Pleaser: Perfect for parties, holidays, or anytime you want to impress with minimal effort.

Make-Ahead Friendly: These bars can be prepared in advance and stored for several days.

Ingredients

For the Crust:

• 2 cups all-purpose flour

• 1/2 cup powdered sugar

• 1 cup unsalted butter, softened

For the Caramel Layer:

• 1 cup unsalted butter

• 1 cup packed brown sugar

• 1/4 cup light corn syrup

• 1 can (14 oz) sweetened condensed milk

For the Topping:

• 2 cups coarsely chopped pecans

• 1 1/2 cups semisweet chocolate chips

Instructions

Prepare the Crust:

1. Preheat the Oven: Set your oven to 350°F (175°C). Grease a 9×13-inch baking pan.

2. Mix Ingredients: In a large bowl, combine the flour, powdered sugar, and softened butter. Mix until the dough forms a cohesive ball.

3. Press and Bake: Evenly press the dough into the bottom of the prepared pan. Bake for 15-20 minutes, or until the edges are lightly golden. Remove from the oven and set aside to cool slightly.

Make the Caramel Layer:

1. Melt Butter: In a medium saucepan, melt the butter over medium heat.

2. Combine Ingredients: Add the brown sugar, corn syrup, and sweetened condensed milk. Stir constantly until well combined.

3. Cook Caramel: Bring the mixture to a gentle boil, then reduce the heat to low and simmer for 5-7 minutes, stirring frequently, until it thickens and reaches a deep caramel color.

4. Pour Over Crust: Evenly spread the caramel mixture over the baked crust.

Add the Topping and Bake:

1. Sprinkle Pecans: Scatter the chopped pecans evenly over the caramel layer.

2. Bake Again: Return the pan to the oven and bake for an additional 10-15 minutes, or until the caramel bubbles and the pecans are lightly toasted.

Add the Chocolate Layer:

1. Melt Chocolate Chips: Remove the pan from the oven and immediately sprinkle the chocolate chips over the hot pecan and caramel layer.

2. Spread Chocolate: Allow the chips to soften from the heat for a few minutes, then use a spatula to spread the melted chocolate evenly.

Cool and Set:

1. Cool at Room Temperature: Let the bars cool completely at room temperature.

2. Refrigerate: Place the pan in the refrigerator for at least 1 hour to allow the chocolate to set fully.

Slice and Serve:

1. Cut into Bars: Once set, slice the dessert into squares or rectangles.

2. Serve: Enjoy these rich, caramel-pecan-chocolate treats!

Tips

Line the Pan: Use parchment paper for easy removal and cleaner edges when slicing.

Even Slicing: For clean cuts, use a sharp knife and wipe it clean between slices.

Toasted Pecans: For deeper flavor, lightly toast the pecans before adding them to the caramel.

Storage Options

Room Temperature: Store in an airtight container for up to 3 days.

Refrigeration: Keep refrigerated for up to a week to maintain freshness and firmness.

Freezing: Wrap individual bars in plastic wrap and store in a freezer-safe container for up to 3 months. Thaw at room temperature before serving.

Pecan Caramel Bars are a decadent treat that combines rich flavors and textures for a truly indulgent experience. Whether you’re sharing them with loved ones or savoring them solo, these bars are guaranteed to satisfy your sweet tooth!

Garlic Butter Pork Chops with Cheesy Potato Bake

0

Garlic Butter Pork Chops with Cheesy Potato Bake is the ultimate comfort food combo, blending tender, juicy pork chops with rich, creamy potatoes baked to perfection. The dish is a harmony of savory garlic butter flavors, earthy thyme, and the gooey indulgence of cheddar cheese. Perfect for family dinners, this hearty meal is a crowd-pleaser that’s sure to impress without requiring complex techniques or hours in the kitchen.

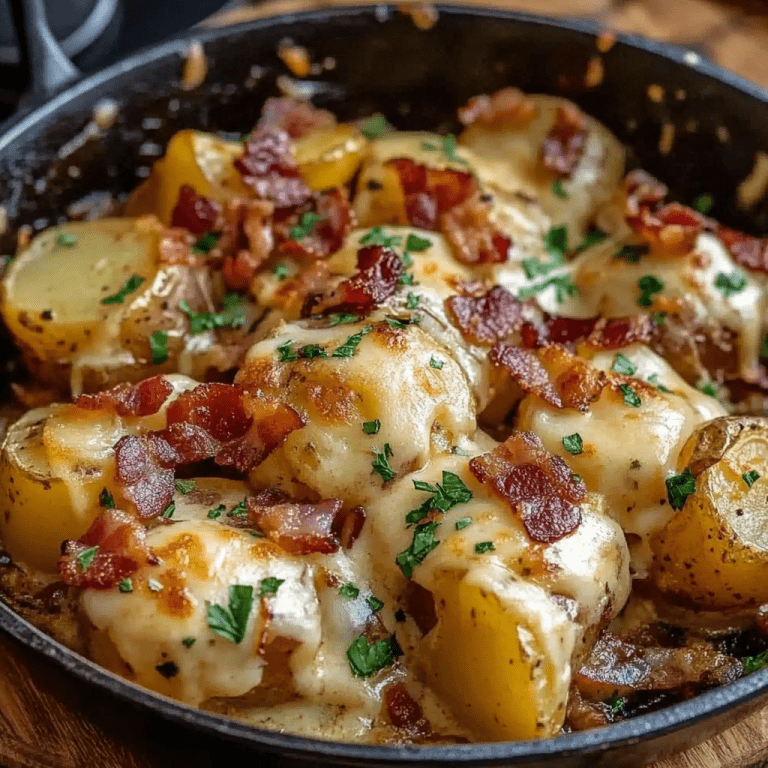
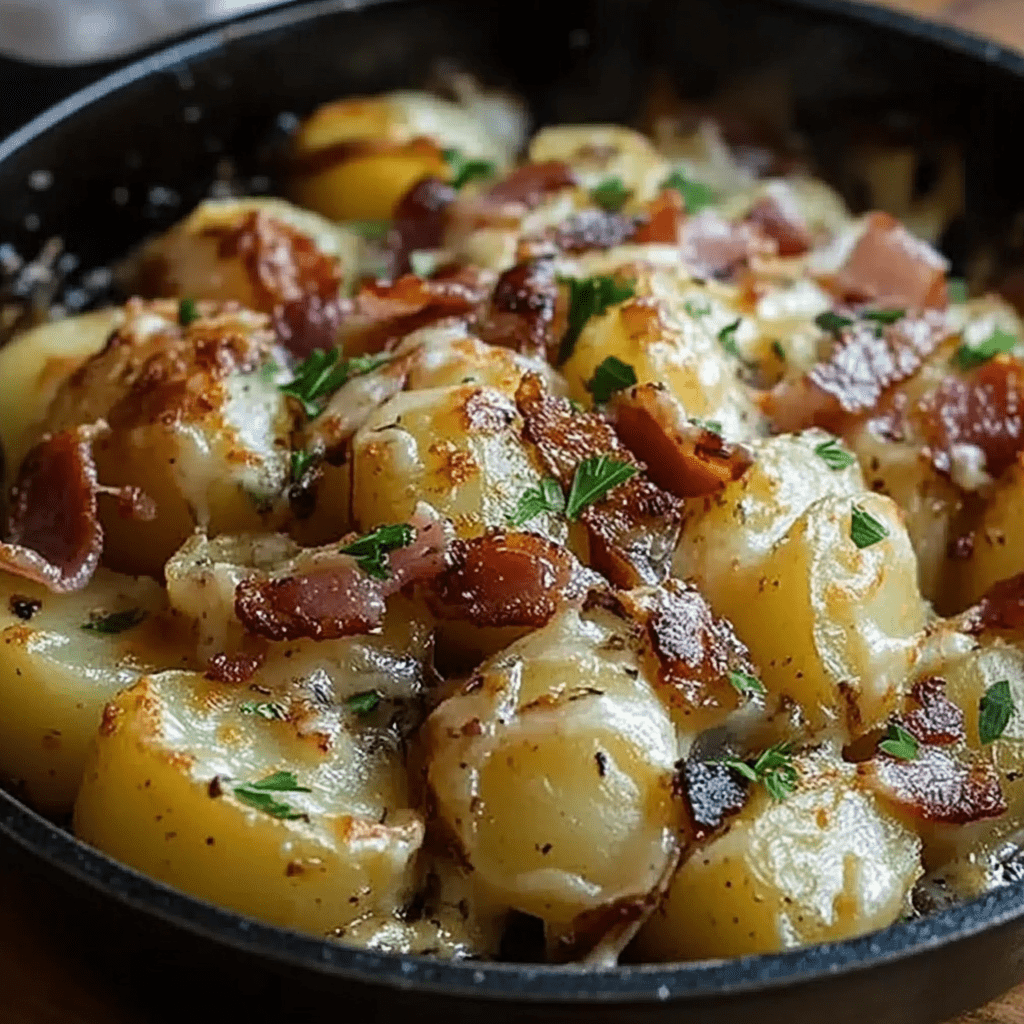
This recipe is not only delicious but also versatile. You can easily swap ingredients to suit your preferences—use Gruyère cheese for a sophisticated twist or add a handful of crispy bacon bits for extra flavor. With its golden crust and fragrant, buttery sauce, paired with the creamy, cheesy potatoes, this dish is as beautiful to present as it is satisfying to eat.

Why You’ll Love This Recipe

Rich and Flavorful: Garlic butter, fresh thyme, and melted cheddar cheese come together for an irresistible flavor profile.

One-Dish Wonder: The pork chops and potatoes bake together, making cleanup a breeze.

Crowd-Pleaser: Perfect for family gatherings or a comforting weeknight meal.

Ingredients

For the Pork Chops:

• 4 bone-in pork chops, about 1 inch thick

• 3 tablespoons olive oil

• 4 tablespoons butter, divided

• 4 cloves garlic, minced

• 2 sprigs fresh thyme

• Salt and pepper, to taste

• Fresh parsley, for garnish (optional)

For the Cheesy Potato Bake:

• 4-5 medium potatoes, thinly sliced

• 1 medium onion, thinly sliced

• 2 cups shredded cheddar cheese

• 1 cup milk

• 1/2 cup sour cream

• 2 tablespoons butter

• 1 teaspoon garlic powder

• Salt and pepper, to taste

Instructions

Prepare the Cheesy Potato Bake:

1. Preheat the Oven: Set your oven to 375°F (190°C) and grease a 9×13 inch baking dish with butter or non-stick spray.

2. Caramelize the Onions: In a skillet over medium heat, melt 2 tablespoons of butter. Add the sliced onions and cook until translucent and slightly caramelized, about 5-7 minutes. Stir in garlic powder, salt, and pepper.

3. Layer the Potatoes and Onions: Place half of the sliced potatoes in the prepared baking dish. Top with half of the caramelized onions and sprinkle with 1 cup of shredded cheddar cheese. Repeat the layering with the remaining potatoes, onions, and cheese.

4. Prepare the Sauce: In a saucepan, warm the milk and sour cream over medium heat, stirring occasionally to prevent curdling. Once warmed, pour the mixture evenly over the potatoes.

5. Bake Initially: Cover the dish with aluminum foil and bake for 30 minutes.

Cook the Pork Chops:

1. Season and Sear: Season the pork chops with salt and pepper. Heat olive oil in a skillet over medium-high heat and sear the pork chops for 3-4 minutes per side, until golden brown. Remove from the skillet and set aside.

2. Make Garlic Butter Sauce: In the same skillet, melt 2 tablespoons of butter. Add minced garlic and thyme, cooking until fragrant, about 1-2 minutes. Return the pork chops to the skillet, spooning the garlic butter sauce over them.

Assemble and Finish the Dish:

1. Combine Pork and Potatoes: Remove the foil from the potato dish. Place the browned pork chops on top of the potatoes and pour over any remaining garlic butter sauce.

2. Final Bake: Return the dish to the oven, uncovered, and bake for an additional 30 minutes, or until the potatoes are tender and the pork chops reach an internal temperature of 145°F (63°C).

Serve and Garnish:

1. Rest: Let the dish rest for 5-10 minutes before serving to allow the flavors to settle.

2. Garnish: Optionally, sprinkle freshly chopped parsley over the dish for a burst of color and freshness.

Tips

Slice Potatoes Evenly: Use a mandoline slicer for consistent thickness, ensuring the potatoes cook evenly.

Choose Quality Cheese: Use sharp cheddar for a bold flavor, or experiment with other cheeses like Gruyère or Monterey Jack.

Test for Doneness: Ensure the pork chops reach an internal temperature of 145°F (63°C) to avoid undercooking.

Storage Options

Refrigeration: Store leftovers in an airtight container in the refrigerator for up to 3 days. Reheat in the oven at 350°F (175°C) for 10-15 minutes to maintain crispness.

Freezing: Freeze individual portions in airtight containers for up to 3 months. Thaw in the refrigerator overnight before reheating.

Garlic Butter Pork Chops with Cheesy Potato Bake is the perfect combination of hearty, cheesy, and savory goodness. Whether you’re hosting a dinner party or treating your family to something special, this recipe is sure to become a favorite at your table!

Cinnamon Sugar Muffins

0

Cinnamon Sugar Muffins are the perfect fusion of sweet, spiced goodness and a fluffy, tender texture. These muffins are a delightful treat that can brighten up your mornings, serve as a midday pick-me-up, or even satisfy late-night dessert cravings. The warm notes of cinnamon and nutmeg, paired with the sweet crunch of a cinnamon sugar topping, make these muffins irresistible. They’re quick to whip up and bake, making them an excellent choice for busy weekdays or leisurely weekend breakfasts.

The real charm of Cinnamon Sugar Muffins lies in their simplicity and versatility. While delicious on their own, you can easily elevate them with toppings like whipped cream, fresh berries, or a drizzle of maple syrup for a more indulgent experience. Whether served warm with coffee or packed for an on-the-go snack, these muffins are guaranteed to become a household favorite.

Why You’ll Love This Recipe

Classic Flavor: The warm, sweet combination of cinnamon and nutmeg creates a comforting, nostalgic taste.

Versatile: Perfect for breakfast, a snack, or dessert, and easy to customize with optional toppings.

Quick and Easy: Simple ingredients and minimal prep time make these muffins a breeze to bake.

Ingredients

For the Muffins:

• 2 cups all-purpose flour

• 1 cup granulated sugar

• 2 teaspoons baking powder

• 1/4 teaspoon salt

• 1/2 cup unsalted butter, melted

• 1 cup milk

• 2 large eggs

• 1 teaspoon ground cinnamon

• 1/4 teaspoon ground nutmeg

• 1/4 teaspoon vanilla extract

For the Cinnamon Sugar Coating:

• 1/2 cup granulated sugar

• 1 tablespoon ground cinnamon

Optional Toppings:

• Whipped cream

• Powdered sugar

• Fresh berries

• Maple syrup

• Chopped nuts

Instructions

Prepare the Muffin Batter:

1. Preheat the Oven: Set your oven to 375°F (190°C). Line a 12-cup muffin tin with paper liners for easy removal and clean-up.

2. Mix Dry Ingredients: In a medium bowl, whisk together the flour, granulated sugar, baking powder, salt, and ground cinnamon.

3. Combine Wet Ingredients: In a large bowl, whisk together the melted butter, milk, eggs, ground nutmeg, and vanilla extract until smooth.

4. Incorporate Dry Ingredients: Gradually add the dry mixture to the wet mixture, stirring gently until just combined. Be careful not to overmix to ensure light, fluffy muffins.

Cook the Muffins:

1. Fill the Muffin Cups: Divide the batter evenly among the muffin cups, filling each about two-thirds full to allow for rising.

2. Bake: Place the tin in the oven and bake for 20-25 minutes. The muffins are done when a toothpick inserted into the center comes out clean, and the tops are golden brown.

3. Cool: Let the muffins cool in the tin for 5 minutes before transferring them to a wire rack to cool completely.

Cinnamon Sugar Coating:

1. Prepare the Coating: In a shallow dish, mix the granulated sugar and ground cinnamon.

2. Coat the Muffins: While the muffins are still warm, dip the tops into the cinnamon sugar mixture, pressing gently to ensure the topping adheres.

Make it Crispy (Optional):

1. Extra Crispy Topping: Return the coated muffins to the oven for an additional 2-3 minutes to achieve a slightly crispy, caramelized top. Watch closely to avoid overbaking.

Tips

Don’t Overmix: Stir the batter just until the ingredients are combined to avoid dense muffins.

Fresh Spices: Use freshly ground cinnamon and nutmeg for the best flavor.

Warm Coating: Coat the muffins while they’re warm to help the cinnamon sugar adhere better.

Storage Options

Room Temperature: Store muffins in an airtight container at room temperature for up to 3 days.

Refrigeration: Extend their freshness by refrigerating for up to a week. Bring to room temperature or warm briefly before serving.

Freezing: Wrap muffins individually in plastic wrap and freeze for up to 3 months. Thaw at room temperature or reheat in the microwave for a quick treat.

Cinnamon Sugar Muffins are a timeless classic, perfect for every occasion. Whether enjoyed plain or dressed up with toppings, these muffins are guaranteed to bring warmth and sweetness to your table!

Pizza Pot Pie

0

Pizza Pot Pie combines the best of two worlds—pizza and pie—into a single dish that’s as comforting as it is delicious. Imagine all your favorite pizza flavors, from rich tomato sauce to gooey mozzarella cheese, baked into a golden, flaky crust. This dish is perfect for those who love hearty, flavorful meals with a creative twist. Unlike a traditional pizza, the crust encases the savory filling, keeping it warm and packed with flavor in every bite. Whether you’re serving it for a casual dinner or a weekend gathering, Pizza Pot Pie is a crowd-pleaser that’s sure to become a new favorite.

What makes this dish so special is its adaptability. You can customize the filling to include your favorite pizza toppings, whether that’s spicy sausage, colorful veggies, or extra cheese. The double crust option provides an extra layer of indulgence, making each slice feel like a complete meal. Simple to prepare yet impressive to serve, Pizza Pot Pie is the perfect way to shake up your dinner routine and bring something fun and delicious to the table.

Why You’ll Love This Recipe

Hearty and Comforting: Combines the familiar flavors of pizza with the coziness of a pot pie.

Customizable: Add your favorite toppings or adjust ingredients to suit your taste.

Family-Friendly: Loved by kids and adults alike, it’s a hit at family dinners.

Ingredients

For the Crust:

• 1 package refrigerated pie crusts (or homemade pie dough)

• 1 tablespoon olive oil

For the Filling:

• 1 tablespoon olive oil

• 1/2 onion, chopped

• 2 cloves garlic, minced

• 1 pound ground sausage (or Italian sausage, casing removed)

• 1 cup pizza sauce

• 1 cup mozzarella cheese, shredded

• 1/2 cup pepperoni slices

• 1/2 cup bell peppers, diced

• 1/2 cup mushrooms, sliced

• 1 teaspoon Italian seasoning

• Salt and pepper, to taste

Additional Toppings:

• Extra mozzarella cheese

• Additional pepperoni slices

Instructions

Prepare the Crust:

1. Preheat Oven: Heat your oven to 375°F (190°C).

2. Roll Out Crust: Roll out the pie crust to fit a deep pie dish, allowing the edges to drape over the sides.

3. Brush with Olive Oil: Brush the crust with olive oil for added flavor and a golden finish.

4. Pre-Bake Crust: Place the crust in the oven and pre-bake for about 8 minutes. Remove from the oven and let it cool slightly.

Make the Filling:

1. Sauté Vegetables: In a skillet, heat olive oil over medium heat. Sauté the chopped onion and minced garlic until translucent and aromatic.

2. Cook Sausage: Add the ground sausage, breaking it apart as it cooks. Continue until the sausage is browned and crumbly. Drain any excess fat.

3. Combine Ingredients: Stir in pizza sauce, shredded mozzarella, pepperoni slices, bell peppers, mushrooms, and Italian seasoning. Season with salt and pepper to taste. Cook until the cheese begins to melt and the mixture is well blended.

Assemble the Pie:

1. Fill the Crust: Transfer the prepared filling into the pre-baked crust, spreading it evenly.

2. Add Toppings: Sprinkle extra mozzarella cheese and additional pepperoni slices on top.

3. Optional Top Crust: If using a double crust, add the second layer of pie dough over the filling. Press the edges to seal, and cut slits into the top to allow steam to escape.

Bake:

1. Bake the Pie: Place the pie in the preheated oven and bake for 25-30 minutes, or until the crust is golden brown and the filling is bubbling.

2. Cool Slightly: Remove the pie from the oven and let it cool for about 10 minutes to allow the filling to set.

Tips

Use Fresh Ingredients: Fresh vegetables and high-quality sausage elevate the flavors in this dish.

Customize Your Pie: Swap out the sausage for chicken, or add olives, spinach, or even jalapeños for a spicy kick.

Golden Crust Tip: Brush the top crust with an egg wash (1 beaten egg with a splash of water) for a beautifully golden finish.

Storage Options

Refrigeration: Store leftovers in an airtight container in the refrigerator for up to 3 days. Reheat slices in the oven or microwave before serving.

Freezing: Pizza Pot Pie freezes well. Wrap individual slices in plastic wrap, then place in a freezer-safe bag. Freeze for up to 3 months. Thaw overnight in the refrigerator before reheating.

Pizza Pot Pie is an irresistible combination of classic pizza flavors and the warmth of a homemade pie. Serve it alongside a crisp green salad or garlic bread for a complete meal that’s as satisfying as it is fun!

Mexican Cookies “Biscochitos”

0

Biscochitos, the official state cookie of New Mexico, are a treasured treat with a rich history. These cookies combine the earthy sweetness of anise seed with a hint of brandy, creating a flavor profile that is as unique as it is traditional. With their flaky, melt-in-your-mouth texture, Biscochitos make the perfect companion to a cup of coffee or tea, a celebration, or simply a quiet afternoon at home. Often enjoyed during holidays, weddings, and special gatherings, these cookies are not just a dessert—they are a symbol of hospitality and culture.

What sets Biscochitos apart is the use of lard as the fat of choice, lending the cookies their signature crumbly texture. The touch of brandy enhances their richness, while the cinnamon-sugar topping provides an irresistible finish. Whether you’re new to these traditional Mexican cookies or rediscovering a childhood favorite, Biscochitos are sure to become a staple in your baking repertoire.

Why You’ll Love This Recipe

Traditional Flavor: The combination of anise seed and brandy gives these cookies an authentic taste that’s hard to resist.

Perfectly Crumbly: Lard ensures a flaky texture that melts in your mouth.

Holiday Favorite: These cookies are perfect for festive occasions or as thoughtful gifts.

Ingredients

For the Cookies:

• 3 cups all-purpose flour

• 1 1/2 teaspoons baking powder

• 1/2 teaspoon salt

• 3 teaspoons crushed anise seed

• 1 1/4 cups lard

• 3/4 cup sugar

• 1 large egg

• 1 tablespoon brandy

For the Topping:

• 1 cup sugar

• 2 teaspoons ground cinnamon

Instructions

Prepare the Dough:

1. Mix Dry Ingredients: In a medium bowl, whisk together the flour, baking powder, salt, and crushed anise seed.

2. Cream Lard and Sugar: Using a stand mixer, cream the lard and sugar until the mixture is light and fluffy.

3. Add Egg and Brandy: Beat in the egg and brandy, ensuring everything is well combined.

4. Combine Wet and Dry Ingredients: Gradually add the flour mixture to the creamed lard mixture. Mix until a cohesive dough forms.

5. Chill the Dough: Shape the dough into a ball, wrap it in plastic wrap, and refrigerate for at least 30 minutes.

Prepare for Baking:

1. Preheat the Oven: Set your oven to 350°F (175°C). Line two baking sheets with parchment paper or silicone baking mats.

Prepare the Topping:

1. Mix Sugar and Cinnamon: In a small bowl, combine the sugar and cinnamon. Set this mixture aside for topping the cookies.

Shape and Bake the Cookies:

1. Roll Out the Dough: Divide the chilled dough in half. Roll each portion out on a lightly floured surface to about 1/4-inch thickness.

2. Cut Out Shapes: Use cookie cutters of your choice to shape the dough into cookies.

3. Bake: Place the cookies on the prepared baking sheets and bake for about 15 minutes, or until the edges are just barely golden.

4. Top with Cinnamon Sugar: Immediately after removing the cookies from the oven, sprinkle 1 teaspoon of the cinnamon-sugar mixture over each cookie.

Finish and Cool:

1. Dip Bottoms in Cinnamon Sugar: Let the cookies cool on the baking sheet for 10 minutes. Then, carefully dip the bottoms of each cookie into the remaining cinnamon-sugar mixture.

2. Cool Completely: Transfer the cookies to a wire rack and let them cool completely before serving or storing.

Tips

Use Fresh Anise Seeds: Crush the anise seeds just before use to maximize their flavor.

Don’t Skip the Lard: While alternatives like butter can be used, lard gives these cookies their authentic, crumbly texture.

Customize Your Topping: Add a touch of nutmeg to the cinnamon sugar for a unique twist.

Storage Options

Room Temperature: Store Biscochitos in an airtight container at room temperature for up to a week.

Refrigeration: If you prefer to keep them longer, refrigerate for up to two weeks.

Freezing: These cookies freeze well. Place them in an airtight container or freezer bag, and store for up to three months. Thaw at room temperature before serving.

With their distinctive flavors and rich cultural history, Biscochitos are more than just a cookie—they’re an experience. Share them with loved ones or savor them yourself for a treat that’s both timeless and delicious!

Decoding the Color Stripes on Toothpaste Tubes: What They Really Mean

0

The colored stripes on toothpaste tubes have sparked curiosity and debate regarding their significance. These stripes are more than just decorative; they can provide insights into the composition of the toothpaste, helping consumers make informed choices based on their oral health needs and lifestyle preferences. Here’s a breakdown of what each color typically represents:

Red Stripe: Toothpaste tubes with a red stripe generally contain a mix of natural and synthetic ingredients. This combination offers comprehensive dental care, including fluoride for cavity protection and synthetic additives that enhance the toothpaste’s effectiveness. For those concerned about chemical exposure, it’s wise to review the ingredient list to understand the balance and purposes of the components used.

Green Stripe: A green stripe indicates that the toothpaste consists entirely of natural ingredients, free from artificial chemicals, medications, or whitening agents. Such toothpastes might include elements like baking soda, essential oils, and herbal extracts, making them ideal for those who prefer an organic approach to dental care.

Blue Stripe: Toothpaste with a blue stripe suggests a formulation that combines natural ingredients with medicinal additives. These additives might include whitening agents like hydrogen peroxide or substances like potassium nitrate for sensitivity relief, catering to specific dental needs while still maintaining some natural elements.

Black Stripe: A black stripe on a toothpaste tube often signals that the product is composed entirely of artificial chemicals, with no natural components. These toothpastes are typically aimed at addressing particular dental issues like advanced whitening or intensive plaque removal. However, due to the heavy reliance on synthetic ingredients, it may be prudent to use these toothpastes selectively and consider integrating more natural options into your regimen.

Ingredient Awareness and Making Informed Choices:
While the color stripes provide a preliminary guide, it is crucial to delve deeper into the ingredient list of toothpaste to fully understand what you are using. Key ingredients to be aware of include:

  • Fluoride: Essential for cavity prevention and enamel strengthening, but excessive intake can cause fluorosis.
  • Triclosan: Effective against gum disease but controversial due to potential hormone disruption.
  • Sodium Lauryl Sulfate (SLS): Helps in foaming and debris removal but may irritate some users.
  • Preservatives and Flavorings: These enhance stability and taste but may involve artificial chemicals.

When choosing toothpaste, consider your specific dental needs, such as cavity prevention, gum health, or whitening. Whether opting for a product marked by a green stripe for its natural composition or a blue stripe for its medicinal properties, understanding the implications of these color codes and the ingredients they hint at can help you make choices that align with your health priorities and oral care goals.

Conclusion:
The colored stripes on toothpaste tubes serve as a helpful indicator of the product’s ingredient makeup, guiding consumers in selecting a toothpaste that best fits their oral health requirements and personal preferences. Whether aiming for entirely natural dental products or those that address specific conditions, being informed about the contents of your toothpaste empowers you to optimize your oral hygiene routine effectively.

Do You Know The Real Significance Of The Small Scar

0

Before the 1970s, the smallpox vaccination was a widespread practice that left many with a distinct scar on their upper arms—a small, circular mark that signifies one of the most significant public health triumphs in history. To truly understand the importance of this scar, it’s essential to delve into the history of smallpox, the evolution of the vaccine, and its profound impact on global health.

The History of Smallpox
Smallpox, caused by the Variola virus, was a fearsome disease marked by fever, body aches, and a telltale rash that developed into pus-filled sores. This disease had a dramatic effect on mortality rates and societal structures throughout history, often shaping the destiny of populations. Its severe impact spurred numerous attempts at containment and prevention.

A groundbreaking moment in medical history was Edward Jenner’s development of the smallpox vaccine in 1796. Jenner noted that milkmaids who had previously caught cowpox did not catch smallpox. Using material from cowpox sores, he created a vaccine that successfully immunized against smallpox, ushering in the modern era of vaccination.

Development and Impact of the Smallpox Vaccine
By the mid-20th century, the smallpox vaccine had evolved significantly and was derived from the Vaccinia virus, a safer relative of Variola. The vaccine was administered using a bifurcated needle that delivered a series of punctures to the skin, stimulating a robust immune response without severe illness.

The vaccination process was distinct: the injection site would initially swell, then develop blisters that eventually healed into the characteristic scar, a testament to the vaccine’s efficacy and the body’s adaptive response.

Global Eradication Efforts
The vaccine was central to the worldwide eradication of smallpox. In the 1950s and 1960s, mass vaccination campaigns were launched globally, dramatically reducing smallpox incidence. In 1967, the WHO initiated an intensified eradication program that focused on vaccination and outbreak surveillance, which culminated in the eradication of smallpox by 1980—a monumental milestone declared by the WHO.

Legacy of the Smallpox Scar
The smallpox vaccination scar is more than a physical remnant; it symbolizes the monumental success of global cooperative health initiatives and serves as a potent reminder of the disease’s defeat. In contemporary times, this scar underscores the critical role of vaccines in disease prevention and public health safeguarding. It stands as a symbol of scientific achievement and the enduring impact of collaborative health efforts.

Conclusion
The smallpox scar is a small but powerful emblem of a significant victory over a deadly disease through vaccination. It serves as a reminder of the importance of vaccines and the ongoing need to engage in global health efforts. As we face new health challenges, the legacy of the smallpox scar continues to inspire hope and drive forward the mission of disease prevention and control.

Banana Oat Blueberry Breakfast Cookies

0

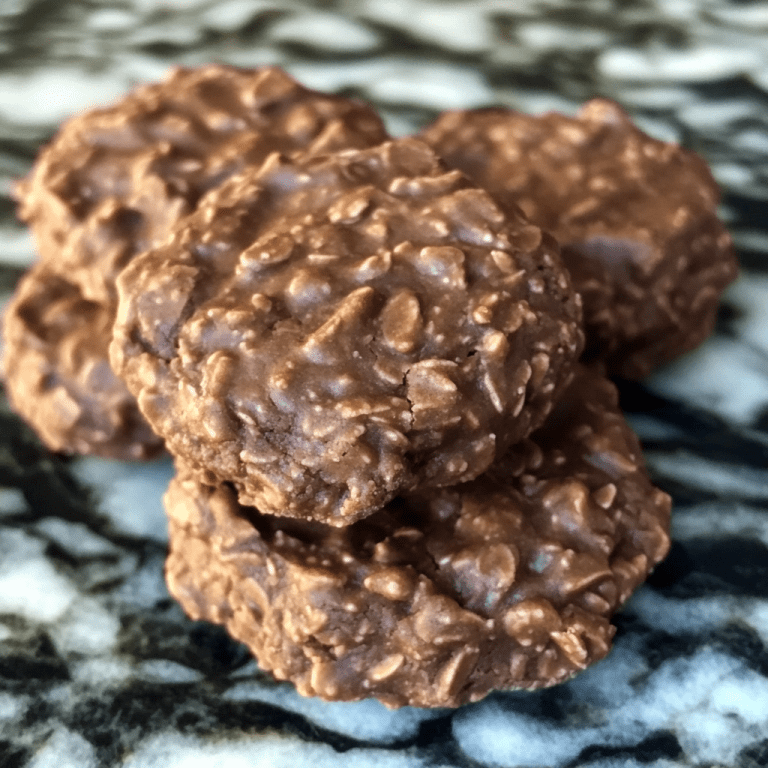
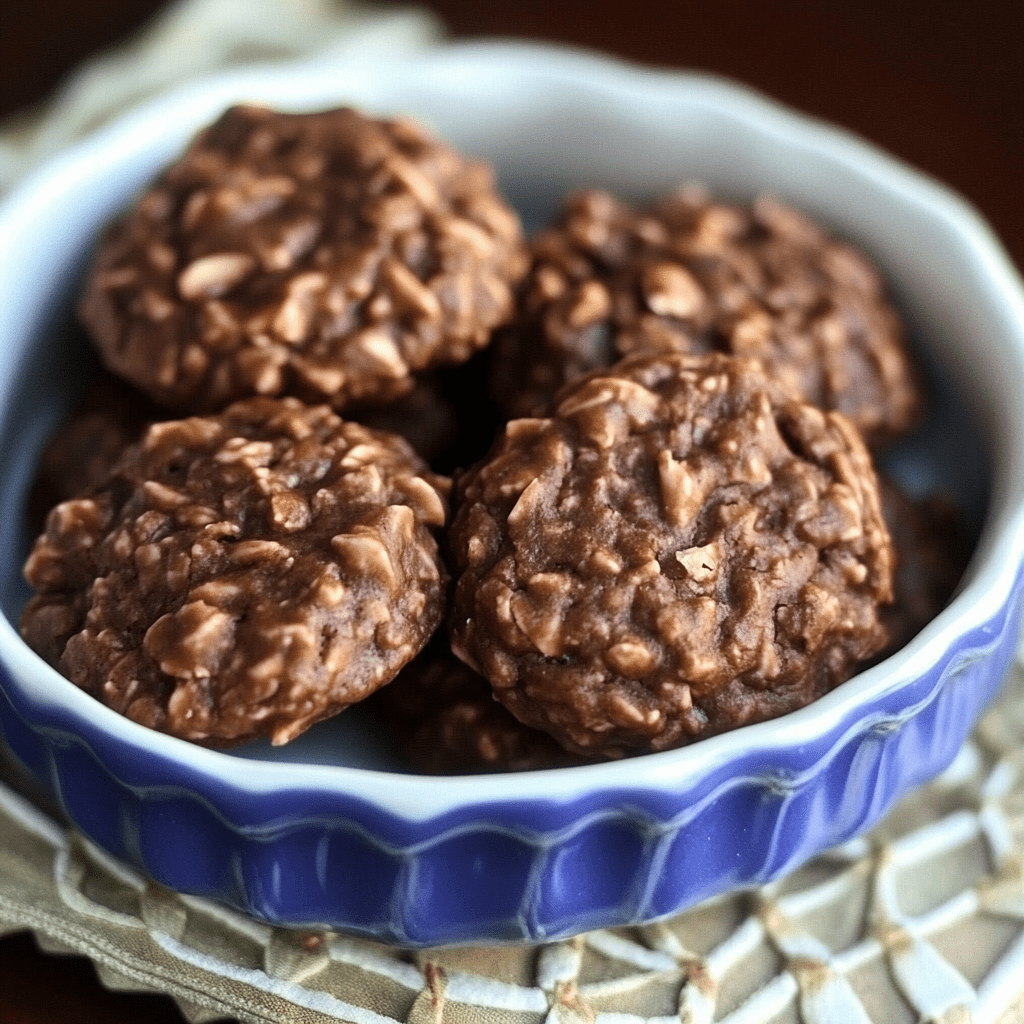
Banana Oat Blueberry Breakfast Cookies are the perfect combination of simplicity, nutrition, and flavor. Designed to meet the needs of busy mornings or healthy snacking, these cookies deliver a delightful blend of naturally sweet bananas, fiber-rich oats, and antioxidant-packed blueberries. Unlike many store-bought options, these cookies are made without refined sugars, relying on the natural sweetness of ripe bananas and a touch of honey or maple syrup. Their soft, chewy texture and bursts of juicy blueberries make them a treat you can enjoy guilt-free. Whether you’re packing lunchboxes, prepping for the week, or simply satisfying a sweet craving, these cookies fit the bill.

What sets this recipe apart is its versatility. You can customize the mix-ins to include nuts, dried fruits, or even a sprinkle of chocolate chips to cater to your preferences. These breakfast cookies aren’t just a quick grab-and-go option; they’re a nutrient-dense powerhouse that keeps you fueled throughout the day. They’re easy to prepare, requiring just one bowl and less than 30 minutes, making them a practical yet indulgent choice for anyone looking to prioritize health without compromising on flavor.

Why You’ll Love This Recipe

Naturally Sweet: Sweetened with ripe bananas and a touch of honey or maple syrup, these cookies are a healthier alternative to store-bought snacks.

Nutrient-Dense: Packed with fiber, vitamins, and antioxidants from oats and blueberries, they offer a balanced energy boost.

Quick and Easy: With minimal prep and baking time, they’re ready in under 30 minutes.

Ingredients

• 2 ripe bananas, mashed

• 1 cup rolled oats

• 1/2 cup blueberries

• 1/4 cup honey or maple syrup

• 1 tsp vanilla extract

• 1/2 tsp cinnamon

• A pinch of salt

Instructions

Step 1: Preheat the Oven

Preheat your oven to 350°F (175°C). Line a baking sheet with parchment paper or a silicone baking mat to prevent sticking.

Step 2: Prepare the Wet Ingredients

1. Mash Bananas: In a large mixing bowl, mash the ripe bananas with a fork until smooth. The bananas act as the primary binder and sweetener for the cookies.

2. Add Sweetener and Flavor: Stir in the honey (or maple syrup), vanilla extract, and cinnamon. Mix until well combined.

Step 3: Combine Ingredients

1. Add Dry Ingredients: Fold the rolled oats into the banana mixture. Stir until the oats are evenly coated and begin to absorb the banana’s moisture.

2. Incorporate Blueberries: Gently fold in the blueberries, taking care not to crush them to preserve their shape and burst of flavor.

Step 4: Shape and Bake Cookies

1. Form Cookies: Use a spoon to scoop the mixture onto the prepared baking sheet, spacing the cookies about 2 inches apart. Flatten each scoop slightly, as the cookies won’t spread much during baking.

2. Bake: Place the baking sheet in the preheated oven and bake for 15-18 minutes, or until the edges are golden brown and the tops are set.

Step 5: Cool and Serve

1. Cool on the Sheet: Allow the cookies to cool on the baking sheet for 5 minutes to firm up.

2. Transfer to a Rack: Move the cookies to a wire rack to cool completely.

Tips

Ripeness Matters: The riper the bananas, the sweeter and more flavorful your cookies will be.

Customize Add-Ins: Swap blueberries for dried fruit, nuts, or dark chocolate chips for variety.

Storage: Store in an airtight container at room temperature for up to 5 days or in the refrigerator for up to a week.

Serving Suggestions

Enjoy these breakfast cookies on their own, or pair them with a dollop of yogurt for a more filling meal. They’re also a great companion to a cup of coffee or tea, making them versatile enough for breakfast, snacks, or even a healthy dessert.

With their perfect blend of taste and nutrition, Banana Oat Blueberry Breakfast Cookies are sure to become a staple in your kitchen!

Pioneer Woman Cheeseburger Pie

0

Cheeseburger Pie is a creative, hearty twist on a classic comfort food. This dish combines the savory goodness of seasoned ground beef, gooey cheddar cheese, and a golden, fluffy crust. Easy to make and endlessly customizable, it’s a perfect weeknight dinner or potluck crowd-pleaser.

The pie captures the essence of a cheeseburger, offering all the familiar flavors in a unique, sliceable format. Add your favorite toppings for a personalized touch, and enjoy a fun, satisfying meal that everyone will love.

Why You’ll Love This Recipe

Family-Friendly: Perfect for kids and adults alike.

Quick and Easy: Simple steps and basic ingredients make it a breeze to prepare.

Customizable: Top it just like your favorite cheeseburger!

Ingredients

• 1 pound ground beef

• 1 small onion, finely chopped

• 1 tsp garlic powder

• 1 tsp onion powder

• Salt and freshly ground black pepper, to taste

• 1 cup shredded cheddar cheese

• 1 cup milk

• ½ cup all-purpose flour

• 2 large eggs

• 1 tsp baking powder

• Optional toppings: chopped tomatoes, shredded lettuce, pickles, ketchup, mustard

Instructions

Step 1: Preheat and Prep

1. Preheat the oven to 400°F (200°C).

2. Lightly grease a 9-inch pie dish to prevent sticking and ensure easy cleanup.

Step 2: Cook the Beef

1. Heat a skillet over medium heat. Add the ground beef and cook, breaking it apart with a wooden spoon or spatula.

2. Stir in the finely chopped onion, garlic powder, onion powder, salt, and pepper.

3. Cook for 5–7 minutes, or until the onion is softened and the beef is fully browned.

4. Drain any excess grease to prevent the pie from being overly oily.

Step 3: Assemble the Pie

1. Spread the beef and onion mixture evenly in the bottom of the prepared pie dish.

2. Sprinkle the shredded cheddar cheese over the beef for a melty, cheesy layer.

Step 4: Prepare the Pie Filling

1. In a mixing bowl, whisk together the milk, flour, eggs, and baking powder until smooth.

2. Gently pour the batter over the beef and cheese, ensuring it covers the filling evenly.

Step 5: Bake

1. Place the pie dish in the preheated oven and bake for 25–30 minutes.

2. The pie is done when the top is golden brown, the filling is set, and a toothpick inserted into the center comes out clean.

Step 6: Cool and Serve

1. Allow the pie to cool for a few minutes before slicing. This helps the filling set and makes it easier to serve.

2. Serve warm, and offer optional toppings like chopped tomatoes, shredded lettuce, pickles, ketchup, and mustard.

Tips

Cheese Options: Substitute cheddar with Monterey Jack, mozzarella, or a cheese blend for different flavors.

Vegetarian Option: Replace ground beef with plant-based ground meat or crumbled tofu.

Add Veggies: Mix in diced bell peppers, mushrooms, or zucchini for extra nutrition.

Make Ahead: Cook the beef mixture and prepare the batter in advance. Assemble and bake when ready to serve.

Storage Options

Refrigerator: Store leftovers in an airtight container for up to 3 days. Reheat slices in the oven or microwave before serving.

Freezing: Freeze the baked pie for up to 2 months. Thaw in the refrigerator overnight and reheat in the oven.

Pioneer Woman Cheeseburger Pie is a comforting, satisfying dish that combines the best parts of a cheeseburger into an easy-to-make pie. It’s a fun, customizable meal that’s perfect for any occasion!