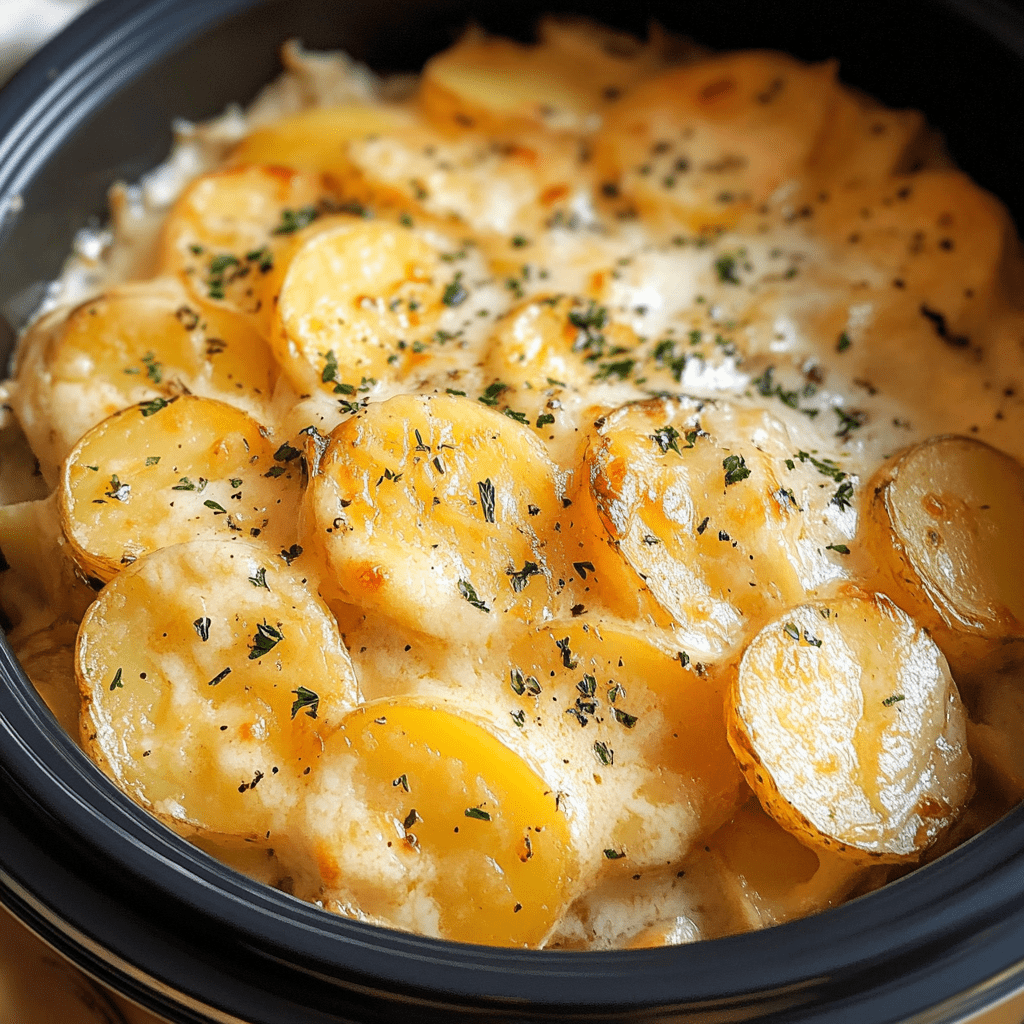
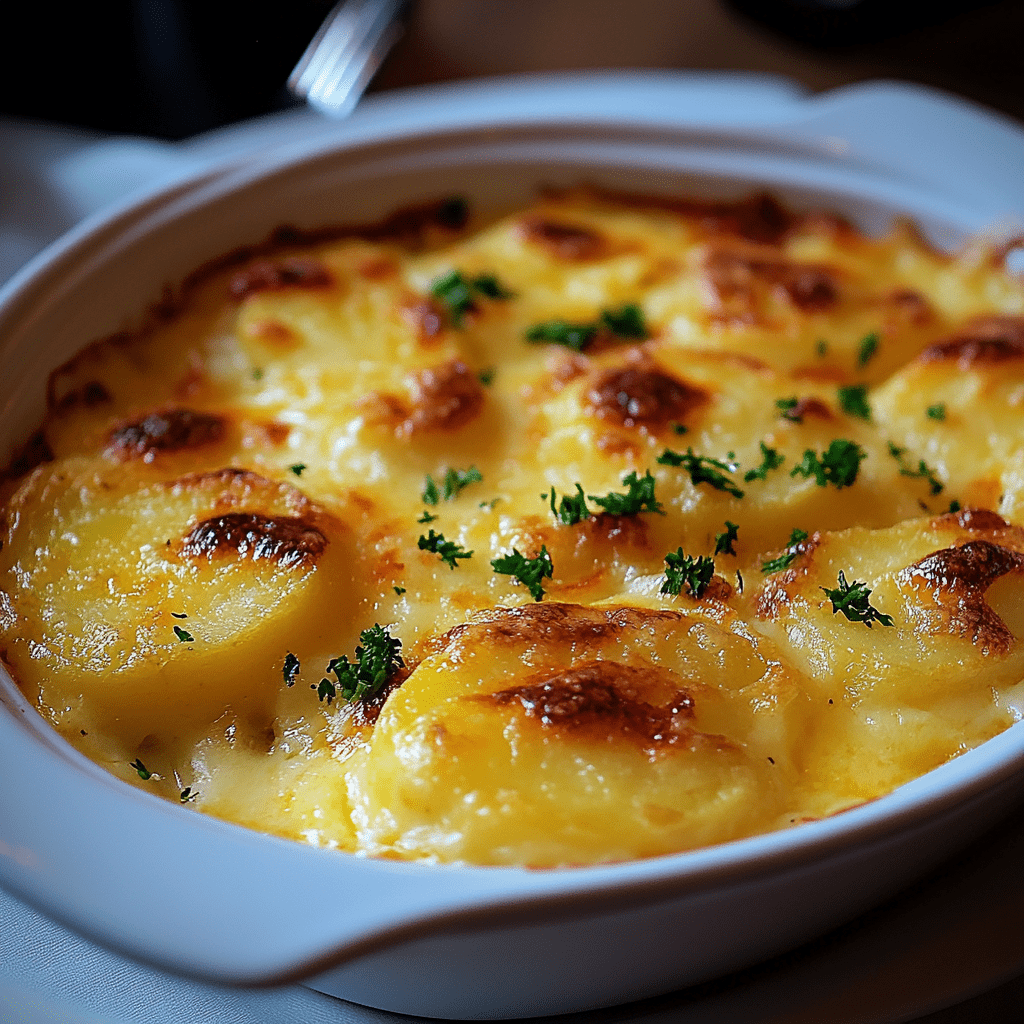
Homemade Spaghetti

0

Homemade Spaghetti is the ultimate comfort food, blending tender noodles with a savory meat sauce to create a hearty and satisfying meal. This recipe simplifies the process by using an Air Pot (or Instant Pot) to streamline cooking, making it perfect for busy weeknights or when you’re craving a warm, delicious dinner without spending hours in the kitchen.

With perfectly seasoned ground beef, aromatic onions, and a rich spaghetti sauce, this one-pot meal delivers all the flavors of a traditional spaghetti dinner with minimal cleanup. Pair it with a fresh salad and garlic cheese toast for a complete family-friendly feast.

Why You’ll Love This Recipe

Quick and Easy: The Air Pot handles the heavy lifting, reducing cooking time and effort.

One-Pot Meal: Everything cooks in a single pot, making cleanup a breeze.

Classic Flavor: Traditional Italian seasonings bring out rich, bold flavors.

Ingredients

• 1 tbsp olive oil

• 1 pound lean ground beef

• ½ yellow onion, finely diced

• 1 tbsp Italian seasoning

• 2 tsp garlic powder

• 1 tsp salt

• ½ tsp pepper

• 1 tbsp freshly minced garlic

• 3 cups water

• 1 jar spaghetti sauce (about 24 ounces)

• 1 can diced tomatoes (optional)

• 16 ounces spaghetti noodles

Instructions

Step 1: Sauté the Onions and Meat

1. Set your Air Pot to the “Sauté” function.

2. Add olive oil and diced onions. Sauté until the onions are softened.

3. Add the ground beef, Italian seasoning, garlic powder, salt, pepper, and minced garlic. Cook until the meat is browned and fully cooked.

Step 2: Deglaze the Pot

1. Remove the cooked meat and set aside.

2. Add 3 cups of water to the pot and scrape the bottom thoroughly to prevent a “Burn” warning.

Step 3: Layer the Spaghetti

1. Break the spaghetti noodles in half and layer them in the Air Pot in a criss-cross pattern to prevent clumping.

2. Pour the spaghetti sauce evenly over the noodles.

3. Add the can of diced tomatoes on top of the sauce, if using.

Step 4: Add Water and Pressure Cook

1. Pour the water around the edges of the pot and over the tomatoes to ensure the noodles are covered.

2. Gently press the noodles down without stirring to keep them submerged.

3. Place the lid on the Air Pot and set the valve to “Sealing.”

4. Select the “Pressure Cook” function and set the time for 5 minutes.

Step 5: Release the Pressure

1. Once the cooking time is complete, allow a natural pressure release for 5 minutes.

2. Perform a quick release by turning the valve to “Venting” until the pin drops.

Step 6: Mix and Serve

1. Open the lid and stir the spaghetti, sauce, tomatoes, and cooked meat together until well combined.

2. Serve immediately with a side salad and garlic cheese toast, if desired.

Tips

Prevent Sticking: Layer the spaghetti in a criss-cross pattern and avoid stirring before cooking.

Customize the Flavor: Add red pepper flakes, fresh basil, or a splash of red wine for extra flavor.

Vegetarian Option: Skip the meat and add sautéed mushrooms, zucchini, or bell peppers.

Storage Options

Refrigeration: Store leftovers in an airtight container in the fridge for up to 3 days. Reheat in the microwave or on the stovetop.

Freezing: Freeze portions in freezer-safe containers for up to 2 months. Thaw overnight in the fridge before reheating.

Homemade Spaghetti is a classic dish with timeless appeal. This Air Pot version makes it quicker and easier than ever while retaining all the bold, comforting flavors you love. Perfect for feeding a crowd or meal prepping for the week, it’s a recipe you’ll return to again and again. Enjoy!

Tennessee Onions

0

Tennessee Onions are a simple yet decadent side dish that transforms sweet Vidalia onions into a cheesy, buttery delight. Perfectly baked until tender and topped with a blend of bubbling cheeses, this dish pairs wonderfully with grilled meats, roasts, or even as a standalone appetizer. The sweetness of the onions melds beautifully with the rich, savory flavors of garlic, oregano, and the melted cheese topping.

This recipe is ideal for holidays, family dinners, or any time you want a side dish that’s both comforting and packed with flavor. It’s easy to make, requiring just a few pantry staples, and it never fails to impress.

Why You’ll Love This Recipe

Easy to Make: Requires minimal prep and simple ingredients.

Rich and Flavorful: Sweet onions combined with melted cheeses and butter.

Perfect Side Dish: Pairs well with a variety of main courses.

Ingredients

• 3 to 4 Sweet Vidalia onions

• 4 tablespoons butter

• 1 teaspoon salt

• 1 teaspoon garlic powder

• ½ teaspoon oregano

• 1 cup Italian blend cheese, shredded

• 1 cup cheddar cheese, shredded

• ½ cup Parmesan cheese, shredded

Instructions

Step 1: Preheat the Oven

1. Preheat your oven to 350°F (175°C).

2. Spray a 9×13-inch baking dish with nonstick cooking spray.

Step 2: Prepare the Onions

1. Slice the Vidalia onions into ¼-inch thick rounds.

2. Separate the onion rings and spread them evenly in the prepared baking dish.

Step 3: Season the Onions

1. Sprinkle the onion rings with garlic powder, salt, and oregano.

Step 4: Add the Butter

1. Slice the butter into 8 pieces and distribute them evenly across the top of the onions and spices.

Step 5: Add the Cheeses

1. Sprinkle the Italian blend cheese and cheddar cheese evenly over the onions.

2. Finish by sprinkling Parmesan cheese on top.

Step 6: Bake

1. Place the dish in the preheated oven and bake for 35–40 minutes, or until the cheese is melted, bubbling, and slightly browned on top.

Step 7: Serve

1. Remove from the oven and serve immediately while hot.

Tips

Use Sweet Onions: Vidalia onions are recommended for their natural sweetness, but any sweet onion variety will work.

Customize the Cheese: Try swapping one of the cheeses for mozzarella or Gruyère for a different flavor profile.

Make It a Meal: Add cooked, crumbled bacon or diced ham for a heartier dish.

Storage Options

Refrigeration: Store leftovers in an airtight container in the fridge for up to 3 days. Reheat in the oven or microwave.

Freezing: Not recommended, as the texture of the onions may become watery upon thawing.

Tennessee Onions are a deliciously indulgent dish that will quickly become a favorite at your dinner table. With their sweet, tender texture and gooey cheese topping, they’re a comforting side dish that’s as satisfying as it is easy to make. Enjoy!

Broccoli Rice Cheese and Chicken Casserole

0

Broccoli Rice Cheese and Chicken Casserole is the ultimate comfort food, bringing together tender chicken, fluffy rice, fresh broccoli, and gooey melted cheese in one hearty dish. This casserole is a family favorite, thanks to its rich flavors and creamy texture. It’s perfect for weeknight dinners, meal prep, or when you’re in need of a warm, satisfying meal.

With a crunchy Ritz cracker topping and a cheesy, creamy base, this dish offers a variety of textures and flavors that everyone will love. Easy to make and packed with wholesome ingredients, it’s a recipe you’ll turn to again and again.

Why You’ll Love This Recipe

Comforting and Hearty: A one-dish meal that’s filling and flavorful.

Family-Friendly: Combines favorite ingredients like chicken, cheese, and broccoli.

Versatile: Easily customizable with your favorite seasonings and add-ins.

Ingredients

• 2 tablespoons butter

• 2 boneless, skinless chicken breasts (or 2 cups diced rotisserie chicken)

• 1 teaspoon Italian seasoning

• Salt and pepper, to taste

• 2½ cups chicken broth

• 1 tablespoon olive oil

• 1¼ cups white long grain rice, uncooked

• 2 cups fresh broccoli florets, uncooked

• 10.5 oz condensed cream of chicken soup

• ½ cup milk

• ½ cup sour cream

• 2 cups shredded cheddar cheese, divided

Optional Seasonings:

• 1 teaspoon dried thyme

• ½ teaspoon garlic powder

Casserole Topping:

• 1 cup Ritz crackers, crushed

• 2 tablespoons melted butter

Instructions

Step 1: Preheat the Oven

1. Preheat your oven to 350°F (175°C).

2. Lightly grease a 9×13-inch casserole dish and set aside.

Step 2: Prepare the Chicken

1. Cut the chicken into bite-sized pieces and season with Italian seasoning, salt, and pepper.

2. Heat butter in a large pot over medium heat.

3. Add the chicken and cook until golden brown on all sides, about 5 minutes. (Skip this step if using rotisserie chicken.)

Step 3: Cook the Rice and Broccoli

1. In the same pot, add chicken broth, olive oil, and rice. Bring to a boil, then reduce heat to a simmer.

2. Cover tightly and cook for 7 minutes.

3. Add fresh broccoli florets on top of the rice, replace the cover, and cook for an additional 8 minutes. Do not stir.

Step 4: Rest the Rice

1. Turn off the heat and remove the cover. Let the rice sit undisturbed for 10 minutes to allow the bottom rice to release.

Step 5: Combine the Casserole Base

1. Add the cooked chicken, condensed soup, milk, sour cream, optional seasonings, and half of the shredded cheddar cheese to the pot.

2. Stir gently to combine.

Step 6: Assemble the Casserole

1. Transfer the mixture to the prepared casserole dish.

2. Top with the remaining cheddar cheese.

Step 7: Add the Topping

1. In a small bowl, combine crushed Ritz crackers with melted butter.

2. Sprinkle the mixture evenly over the casserole.

Step 8: Bake

1. Cover the casserole with foil and bake for 15 minutes, or until heated through and the cheese is melted.

2. Optional: Remove the foil during the last 5 minutes for a crispier topping.

Tips

Rotisserie Chicken Shortcut: Save time by using pre-cooked rotisserie chicken.

Frozen Broccoli Option: If using frozen broccoli, thaw and drain well before adding to the pot.

Customize the Seasoning: Add cayenne pepper, paprika, or other spices for extra flavor.

Storage Options

Refrigeration: Store leftovers in an airtight container in the fridge for up to 3 days. Reheat in the oven or microwave.

Freezing: Freeze the casserole before baking. Thaw overnight in the fridge and bake as directed.

This Broccoli Rice Cheese and Chicken Casserole is a comforting, flavorful dish that’s as easy to make as it is delicious. With its creamy base, cheesy topping, and crunchy cracker crust, it’s a guaranteed hit for any occasion. Enjoy!

Amish Baked Custard

0

Amish Baked Custard is a timeless dessert that combines simple, wholesome ingredients to create a creamy, silky treat. This classic recipe delivers a luscious custard with a velvety texture and a gentle sweetness, enhanced by the warm, aromatic notes of vanilla and nutmeg. It’s a dessert that feels indulgent yet comforting, perfect for any occasion.

Traditionally baked in individual ramekins or a larger dish, this custard can be enjoyed warm for a cozy treat or chilled for a refreshing dessert. Its elegant simplicity makes it a favorite among dessert lovers, and its nostalgic flavors will transport you to the heart of Amish country.

Why You’ll Love This Recipe

Elegant Simplicity: With just a few ingredients, you can create a show-stopping dessert.

Versatile: Serve it warm for a comforting treat or chilled for a refreshing option.

Timeless Flavor: A classic dessert that appeals to all ages.

Ingredients

• 1 (14-ounce) can sweetened condensed milk

• 4 cups hot water

• 6 eggs

• 2 teaspoons vanilla extract

• ¼ teaspoon salt

• Nutmeg (for garnish)

Instructions

Step 1: Preheat the Oven

1. Preheat your oven to 325°F (163°C).

2. Prepare a large baking pan with high sides for the water bath.

Step 2: Prepare the Milk Mixture

1. In a large glass or metal bowl, combine the sweetened condensed milk and hot water. Stir until well mixed.

Step 3: Beat the Eggs

1. In a separate bowl, beat the eggs until they are light in color and fluffy in texture.

Step 4: Temper the Eggs

1. Gradually pour a small amount of the hot milk mixture into the eggs, whisking constantly to temper them.

2. Slowly combine the tempered eggs with the remaining milk mixture.

Step 5: Add Vanilla and Salt

1. Stir in the vanilla extract and salt until fully incorporated.

Step 6: Pour the Custard

1. Divide the custard mixture evenly among ramekins or pour it into a 2-quart baking dish.

2. Place the ramekins or dish into the prepared baking pan.

Step 7: Create the Water Bath

1. Carefully pour hot water into the baking pan until it reaches about ½ inch up the sides of the ramekins or dish.

2. Place the pan in the oven.

Step 8: Bake

1. Bake individual ramekins for 1 hour, or until a knife inserted in the center comes out clean.

2. If using a larger baking dish, bake for 1 hour 40 minutes.

Step 9: Cool and Garnish

1. Allow the custard to cool for at least 1 hour.

2. Sprinkle with nutmeg before serving.

Step 10: Serve

1. Serve warm for a comforting dessert or refrigerate and serve chilled for a cool treat.

Tips

Water Bath Importance: The water bath helps regulate the temperature and ensures even cooking for a creamy texture.

Nutmeg Garnish: Freshly grated nutmeg enhances the custard’s flavor and adds a decorative touch.

Serving Ideas: Pair with fresh berries, whipped cream, or a drizzle of caramel sauce for added flair.

Storage Options

Refrigeration: Store leftover custard in an airtight container in the fridge for up to 3 days. Serve chilled or gently reheat.

Freezing: Custard does not freeze well due to its high egg content; enjoy it fresh or refrigerated.

Amish Baked Custard is a dessert that brings simplicity and indulgence together in one elegant dish. Whether you serve it warm or chilled, its rich flavor and creamy texture will make it a favorite in your dessert rotation. Enjoy this classic treat that’s as comforting as it is delicious!

Easy Stuffed Pepper Soup

0

Easy Stuffed Pepper Soup is a hearty, comforting dish that transforms the classic flavors of stuffed peppers into a rich and satisfying soup. Loaded with ground sirloin, tender bell peppers, and aromatic spices, this one-pot meal is a quick and simple way to enjoy all the goodness of a family favorite in soup form.

The combination of savory beef, tangy tomatoes, and perfectly cooked rice creates a warm, filling dish that’s perfect for cozy dinners or meal prep. Whether you’re looking for a comforting bowl on a chilly night or a deliciously easy dinner option, this soup is sure to hit the spot.

Why You’ll Love This Recipe

One-Pot Wonder: Easy to make with minimal cleanup.

Classic Flavors: Brings the familiar taste of stuffed peppers to a comforting soup.

Hearty and Filling: Packed with protein, vegetables, and rice for a complete meal.

Ingredients

• 1 pound ground sirloin

• 1 green bell pepper, chopped

• 1 cup finely diced onion

• 1 (29-ounce) can diced tomatoes

• 1 (15-ounce) can tomato sauce

• 1 (14-ounce) can chicken broth

• ¼ teaspoon dried thyme

• ¼ teaspoon dried sage

• Salt and pepper to taste

• 1 cup white rice

Instructions

Step 1: Cook the Meat and Vegetables

1. In a large stockpot over medium heat, brown the ground sirloin. Drain any excess fat.

2. Add the chopped green bell pepper and finely diced onion to the pot.

3. Cook until the onion is translucent, stirring occasionally. Avoid browning the vegetables.

Step 2: Build the Soup Base

1. Add the diced tomatoes, tomato sauce, chicken broth, thyme, and sage to the pot.

2. Season generously with salt and pepper to taste.

3. Stir to combine, then cover the pot and let the soup simmer for 30–45 minutes, or until the peppers are tender.

Step 3: Cook the Rice

1. In a separate saucepan, bring 2 cups of water to a boil.

2. Add the rice, reduce the heat, and simmer until the rice is tender and fully cooked.

Step 4: Combine and Serve

1. Add the cooked rice to the soup and stir to combine.

2. Heat through for a few minutes before serving.

3. Serve warm, optionally garnished with fresh parsley or a sprinkle of Parmesan cheese.

Tips

Rice Options: Use brown rice, wild rice, or even cauliflower rice for a healthier twist.

Add Heat: For a spicy kick, include a pinch of red pepper flakes or chopped jalapeños.

Make It Cheesy: Stir in shredded cheddar cheese or sprinkle some on top before serving.

Storage Options

Refrigeration: Store leftover soup in an airtight container in the fridge for up to 3 days.

Freezing: Freeze the soup (without rice) in freezer-safe containers for up to 2 months. Add freshly cooked rice when reheating.

This Easy Stuffed Pepper Soup is a flavorful, hassle-free dinner that’s perfect for busy nights. With its robust flavors and hearty ingredients, it’s a recipe you’ll want to make again and again. Serve it with crusty bread or a fresh salad for a complete, satisfying meal. Enjoy!

Famous Red Lobster Shrimp Scampi

0

Red Lobster Shrimp Scampi is a beloved seafood classic known for its tender shrimp bathed in a luscious garlic butter sauce with white wine and a hint of lemon. This dish perfectly balances rich, buttery flavors with a fresh, citrusy tang, making it an ideal choice for an elegant dinner that’s surprisingly easy to prepare at home.

The recipe brings restaurant-quality taste to your table, with shrimp that’s perfectly cooked and coated in a silky sauce. Whether served over pasta, alongside crusty bread, or as a standalone dish, it’s a recipe that impresses with every bite.

Why You’ll Love This Recipe

Restaurant Quality: Enjoy the flavors of Red Lobster from the comfort of your own kitchen.

Quick and Easy: Ready in under 30 minutes, perfect for a weeknight meal or special occasion.

Rich and Flavorful: A buttery, garlicky sauce enhanced with white wine and lemon juice.

Ingredients

• 1 lb medium shrimp, peeled and deveined

• 1 tablespoon pure olive oil

• 2 tablespoons garlic, finely chopped

• 1½ cups white wine (Chardonnay recommended)

• Juice of ½ fresh lemon

• 1 teaspoon Italian seasoning

• ½ cup softened butter

• 1 tablespoon parsley, chopped

• ½ cup grated Parmesan cheese

Instructions

Step 1: Sauté the Shrimp

1. Heat a cast iron skillet over medium heat and add olive oil.

2. Add the shrimp and cook until tender and no longer translucent, about 2–3 minutes per side.

3. Remove the shrimp from the skillet and set aside.

Step 2: Cook the Garlic

1. Lower the heat and add the finely chopped garlic to the skillet.

2. Sauté for 2–3 minutes, stirring frequently, without letting the garlic brown to avoid bitterness.

Step 3: Create the Sauce

1. Pour in the white wine and lemon juice, stirring to combine.

2. Cook until the wine is reduced by half, about 5–7 minutes.

3. Once reduced, stir in the Italian seasoning.

Step 4: Add the Butter

1. Reduce the heat to low and slowly add the softened butter to the skillet, stirring constantly.

2. Ensure the pan is not too hot to prevent the butter from separating.

Step 5: Combine and Garnish

1. Return the cooked shrimp to the skillet, tossing them gently to coat in the sauce.

2. Add chopped parsley and season with salt and pepper to taste.

3. Sprinkle grated Parmesan cheese over the shrimp.

Step 6: Serve and Enjoy

1. Serve immediately over pasta, rice, or with crusty bread to soak up the sauce.

Tips

Choose the Right Wine: Use a dry white wine like Chardonnay for the best flavor. Avoid cooking wines.

Don’t Overcook the Shrimp: Cook just until opaque to keep them tender and juicy.

Make It Your Own: Add a pinch of red pepper flakes for a spicy kick or more lemon juice for extra tang.

Storage Options

Refrigeration: Store leftovers in an airtight container in the fridge for up to 2 days. Reheat gently on the stovetop or in the microwave.

Freezing: Freeze the cooked shrimp and sauce in a freezer-safe container for up to 1 month. Thaw overnight in the fridge before reheating.

This Famous Red Lobster Shrimp Scampi recipe delivers all the rich, buttery goodness of the original, making it a standout dish for any seafood lover. It’s quick, elegant, and utterly delicious—perfect for impressing guests or treating yourself to a restaurant-quality meal at home. Enjoy!

The Best Pasta Salad

0

This pasta salad is a vibrant and satisfying dish that brings together tender pasta, fresh veggies, savory salami, creamy mozzarella, and a bold homemade Italian dressing. It’s perfect for picnics, potlucks, or as a flavorful side dish for any meal. The combination of tangy olives, juicy cherry tomatoes, and zesty pepperoncini creates a delicious medley of flavors that only gets better with time.

The homemade Italian dressing is the star of the show, balancing tanginess, herbs, and a touch of sweetness for a salad that’s full of flavor. Whether you serve it fresh or enjoy it the next day, this pasta salad is guaranteed to be a crowd-pleaser.

Why You’ll Love This Recipe

Fresh and Flavorful: Packed with fresh veggies, herbs, and a tangy dressing.

Easy to Make: Simple steps and pantry staples make it an effortless dish.

Great for Leftovers: Tastes even better after sitting in the fridge, as the flavors meld together.

Pasta Salad Ingredients

• 1 pound uncooked pasta (rotini recommended)

• 3 cups cherry tomatoes, halved

• 8 ounces fresh mozzarella cheese balls, halved

• 1 pound salami or summer sausage, cubed

• ¾ cup kalamata olives, sliced

• ¾ cup pepperoncini, sliced (optional, but highly recommended)

• ½ cup sliced red onion

• ½ cup fresh parsley, chopped

Italian Pasta Salad Dressing

• 1½ cups olive oil

• ¼ cup white vinegar (or red wine vinegar)

• ¼ cup water

• 2 tablespoons coarse sea salt (see notes)

• 2 cloves garlic (minced, or 1 teaspoon garlic powder)

• 1 tablespoon sugar

• 2 teaspoons dried oregano

• 2 teaspoons dried basil

• Black pepper to taste

• Optional: Fresh parsley, basil, or chives

Instructions

Step 1: Cook the Pasta

1. Cook the pasta according to package directions in salted water for added flavor.

2. Drain and let it cool slightly. Toss with a little olive oil to prevent sticking.

Step 2: Prepare the Dressing

1. Blend the dressing ingredients together in a blender until smooth, or shake them in a jar for easy preparation.

Step 3: Combine the Ingredients

1. In a large mixing bowl, combine the cooked pasta, cherry tomatoes, mozzarella balls, salami, kalamata olives, pepperoncini, red onion, and fresh parsley.

2. Pour about three-fourths of the dressing over the salad and toss to combine. Reserve the remaining dressing for leftovers.

Step 4: Chill and Serve

1. Cover and refrigerate the pasta salad for at least 1 hour to let the flavors meld.

2. Taste before serving and add more dressing if needed. Garnish with additional fresh herbs if desired.

Tips

Salt in the Dressing: The dressing calls for 2 tablespoons of salt, which may seem like a lot, but it ensures the flavors are bold and well-seasoned. Adjust to taste if needed.

Custom Add-ins: Add roasted red peppers, artichoke hearts, or cucumbers for extra flavor and crunch.

Pasta Tip: Use short, sturdy pasta shapes like rotini or penne that hold the dressing and ingredients well.

Storage Options

Refrigeration: Store in an airtight container in the fridge for up to 3 days. The salad tastes best the day after making it as the flavors deepen over time.

Dressing Storage: Keep leftover dressing in a sealed jar in the fridge for up to 1 week.

This pasta salad is an irresistible blend of textures and flavors, perfect for any occasion. With its tangy dressing, hearty mix-ins, and ease of preparation, it’s a dish that will quickly become a favorite. Make it today and enjoy a bright, delicious addition to your table!

Krispy Kreme Peach Cobbler

0

Krispy Kreme Peach Cobbler is a delightful twist on a classic Southern dessert, blending the warm, comforting flavors of peaches with a rich, buttery batter. This easy-to-make cobbler comes together with simple ingredients and bakes to a beautiful golden-brown perfection. With a hint of vanilla and optional cinnamon, this dessert is perfect for warm summer evenings or cozy gatherings. Serve it with a scoop of vanilla ice cream or a dollop of whipped cream for an irresistible treat.

The magic of this cobbler lies in its baking method: the batter rises up around the peaches, creating a fluffy, cake-like texture with a crisp edge. The result is a dessert that’s not too sweet, with just the right balance of fruit and buttery crust.

Why You’ll Love This Recipe:

Simple Ingredients: Uses pantry staples and fresh or canned peaches.

Easy Preparation: No need for complicated steps; the batter and peaches come together effortlessly.

Perfect for Any Occasion: Great for family dinners, potlucks, or holiday gatherings.

Ingredients:

• 4 cups sliced fresh peaches (or canned peaches in syrup, drained)

• 1 cup granulated sugar

• 1/2 cup brown sugar

• 1/2 cup unsalted butter, melted

• 1 cup all-purpose flour

• 1 cup milk

• 1 tbsp baking powder

• 1/2 tsp salt

• 1/2 tsp cinnamon (optional)

• 1 tsp vanilla extract

Instructions:

Step 1: Preheat the Oven

• Preheat your oven to 350°F (175°C). Lightly grease a 9×13-inch baking dish with butter or non-stick spray.

Step 2: Prepare the Peaches

• In a medium saucepan over medium heat, combine the sliced peaches, 1/2 cup of the granulated sugar, and a dash of cinnamon if using.

• Cook for 5-7 minutes, stirring occasionally, until the peaches are soft and the sugar is dissolved. Remove from heat and set aside.

Step 3: Make the Batter

• In a mixing bowl, whisk together the flour, the remaining 1/2 cup of granulated sugar, brown sugar, baking powder, and salt.

• Stir in the milk and vanilla extract until the batter is smooth and free of lumps.

Step 4: Prepare the Baking Dish

• Pour the melted butter into the bottom of the greased baking dish, ensuring it covers the entire base.

• Carefully pour the batter over the melted butter. Do not mix or stir.

Step 5: Assemble the Cobbler

• Spoon the peach mixture evenly over the batter in the baking dish. Remember not to stir; the batter will rise up around the peaches during baking.

Step 6: Bake the Cobbler

• Place the dish in the preheated oven and bake for 40-45 minutes, or until the top is golden brown and the batter is fully set.

• Let the cobbler cool slightly for about 10 minutes before serving to allow the flavors to meld and the cobbler to firm up a bit.

Tips:

Peach Substitute: If peaches are not in season, use frozen peaches (thawed) or canned peaches, ensuring they are drained well.

Add a Twist: For added flavor, sprinkle a little extra cinnamon and brown sugar on top before baking.

Serving Suggestion: Serve warm with a scoop of vanilla ice cream or a dollop of whipped cream.

Storage Options:

Refrigerator: Store leftovers in an airtight container in the refrigerator for up to 3 days. Reheat in the oven at 300°F (150°C) for 10-15 minutes or in the microwave for a quicker option.

Freezer: For longer storage, freeze the cooled cobbler in a freezer-safe container for up to 2 months. Thaw overnight in the refrigerator and reheat before serving.

Krispy Kreme Peach Cobbler is a simple, crowd-pleasing dessert that combines the juicy sweetness of peaches with a buttery, cake-like batter. It’s a perfect end to any meal and guaranteed to become a family favorite!

15 Canned Foods That Never Expire

0

In a world where certainty is a luxury, having a stash of enduring food items like canned goods offers both convenience and peace of mind. Celebrated for their long shelf life, affordability, and ease of storage, canned foods are quintessential staples for any pantry. While many carry a ‘best by’ date, certain canned goods can theoretically last forever if stored under ideal conditions, making them excellent for both emergency supplies and routine culinary use.

Decoding Expiration Dates on Canned Goods

The expiration dates on canned foods often mislead consumers into thinking the food will spoil past that date. However, these dates merely indicate peak quality. The canning process, which eradicates harmful microbes, allows these foods to remain stable and safe to eat for many years, provided they are kept in a cool, dry place away from sunlight.

Why Do Some Canned Foods Last Indefinitely?

The longevity of certain canned foods can be attributed to their inherent properties, such as low moisture levels, high concentrations of salt or sugar, and lack of fats and oils that could degrade. While taste and texture may evolve over time, these foods remain safe for consumption.

Key Factors Enhancing Canned Food Durability

  • Airtight Sealing: Keeps out air and moisture, staving off spoilage.
  • Sterilization: High heat during canning kills off potential spoilage agents like bacteria and mold.
  • Preservative Elements: Ingredients such as salt, sugar, or natural acids help maintain the food’s integrity over time.

Optimal Storage Practices for Canned Goods

For maximum shelf life, store your canned items in a stable, cool, and dry environment. Ensure cans remain undamaged and routinely check for any signs of wear such as rust, dents, or swelling — all of which can compromise the safety of the contents.

15 Indestructible Canned Foods

Here’s a list of 15 canned foods known for their indefinite shelf life when properly stored:

  1. Canned Beans: A protein-rich staple, free from perishable meat or dairy, making it ideal for long-term storage.
  2. Canned Corn: Preserves its nutrients and flavor, offering a reliable source of fiber and vitamins.
  3. Canned Carrots: Their high water content and absence of fats help them last endlessly.
  4. Canned Peas: Provide green vegetables’ benefits for decades, thanks to their stable preservation.
  5. Canned Tomatoes: Their natural acidity prevents bacterial growth, ensuring longevity.
  6. Canned Pumpkin: A versatile base for many recipes, loaded with essential nutrients and capable of enduring storage.
  7. Canned Fish: Items like tuna and sardines are excellent protein sources, preserved impeccably in cans.
  8. Canned Chicken: Offers convenience and longevity as a precooked protein source.
  9. Canned Beef: Similar to canned chicken in terms of its long shelf life and versatility.
  10. Canned Chili: Its ingredients promote preservation, making it a hearty, long-lasting meal option.
  11. Canned Coconut Milk: Although not as enduring as other canned goods, it remains viable for years under the right conditions.
  12. Canned Soups: Especially those with high salt content, can be safely stored indefinitely.
  13. Canned Stews: These mixtures of meats and vegetables are perfect for extended storage.
  14. Canned Fruit: Fruits in syrup or juice maintain their flavor and nutritional value over time.
  15. Canned Spaghetti Sauces: High acidity content like that in tomato-based sauces aids in long-term preservation.

Health Pros and Possible Cons of Canned Foods

Canned goods retain most of their nutrients, providing essential vitamins and minerals when fresh produce is unavailable. However, it’s wise to opt for versions with reduced sodium or no added salt to balance your diet.

Risks Linked to Outdated Canned Foods

Even with their robust shelf life, it’s crucial to discard cans that show signs of spoilage, such as bulging, leaking, rusting, or containing food with off smells or colors, as these are indications of potential contamination.

Conclusion: Maximizing Your Canned Food Benefits

The ability to stockpile foods that virtually never expire offers a reliable way to ensure you always have access to nutritious meals. By understanding which items last and how to store them, you can maintain a well-prepared pantry suited for any situation, from everyday meal prep to emergency readiness.

Easy Homemade Dog Ice Cream: A Refreshing Treat for Your Furry Friend

0

When the summer heat peaks, both humans and pets seek relief, and treating your dog to a homemade, nutritious treat is a delightful way to cool them down. This Easy Homemade Dog Ice Cream recipe is perfect for that. It’s straightforward to prepare, full of healthy ingredients, and a sure hit with your furry friend.

A Personal Touch

Every summer, my dog Baxter and I have our small adventures, often culminating in a treat to cool him down after a sunny stroll. Seeing his joy at tasting homemade ice cream inspired me to share this joy with others. This treat has now become a key part of our summer enjoyment.

Ingredients Explained

Here’s what you’ll need to whip up this tasty treat for your pooch:

  • 1 Ripe Banana: Adds a creamy texture and natural sweetness, packed with potassium, vitamin B6, and vitamin C.
  • 4 Tablespoons Creamy, Natural Peanut Butter: A dog favorite, it provides protein and healthy fats, enhancing the flavor and texture of the ice cream. Check that it’s free of xylitol, which is harmful to dogs.
  • 12 Ounces Plain or Vanilla Greek Yogurt: Rich in probiotics for digestive health, it gives the ice cream a creamy and slightly tangy flavor. Make sure it doesn’t contain artificial sweeteners or additives.

Making the Dog Ice Cream

Here’s how to put it all together:

  1. Blend the Ingredients: In a blender, mix the banana, peanut butter, and yogurt until smooth. Aim for a consistent, creamy mixture.
  2. Pour into Molds: Spoon the mixture into silicone molds or an ice cube tray for easy removal later. Tip: A dab of coconut oil can help prevent sticking.
  3. Freeze: Freeze for about two hours, or until solid.
  4. Store Properly: Once solid, pop the treats out and store them in a freezer-safe bag or container for up to three weeks. Label the container with the freezing date to track freshness.

This homemade dog ice cream not only satisfies your pet’s taste buds but also strengthens the bond you share through these caring, shared moments. Enjoy the wagging tails and happy licks as your dog enjoys this cool summer treat!