Krispy Kreme Peach Cobbler

0

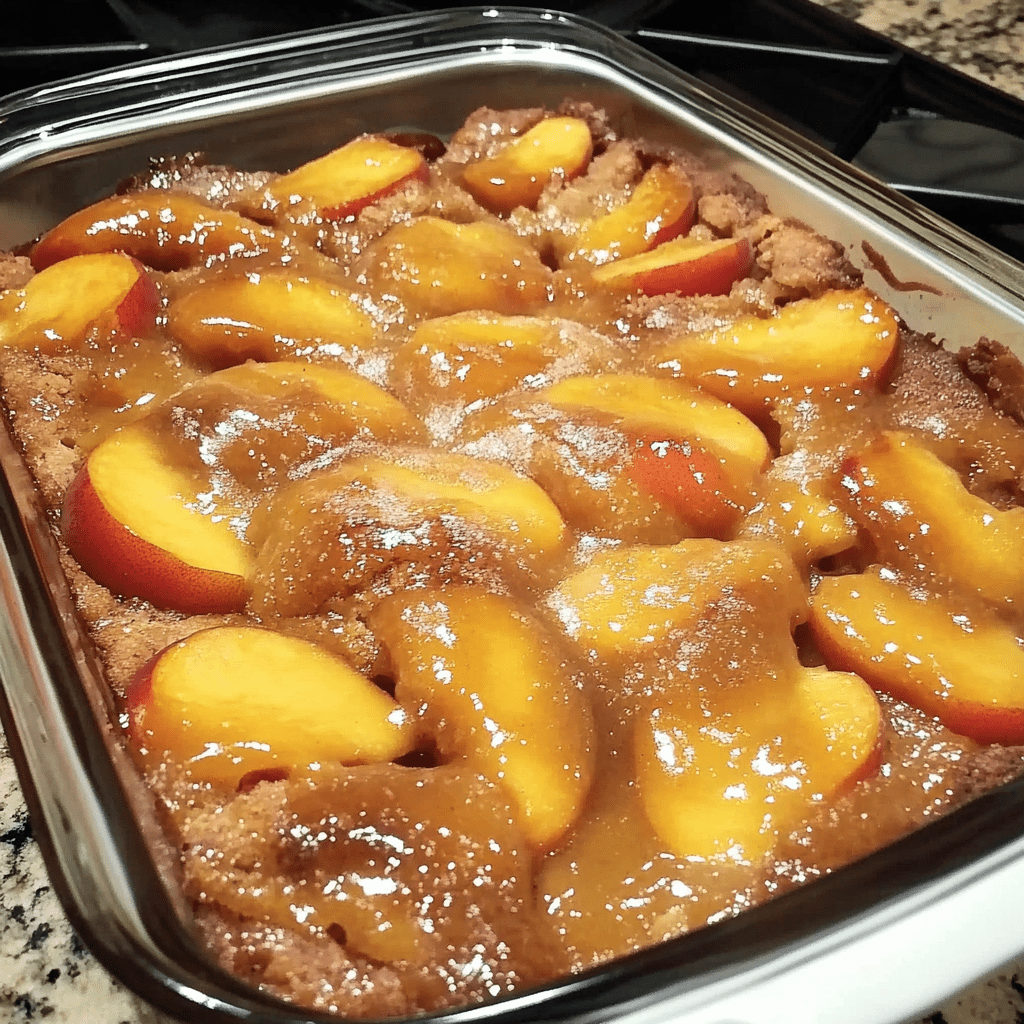
Krispy Kreme Peach Cobbler is a delightful twist on a classic Southern dessert, blending the warm, comforting flavors of peaches with a rich, buttery batter. This easy-to-make cobbler comes together with simple ingredients and bakes to a beautiful golden-brown perfection. With a hint of vanilla and optional cinnamon, this dessert is perfect for warm summer evenings or cozy gatherings. Serve it with a scoop of vanilla ice cream or a dollop of whipped cream for an irresistible treat.

The magic of this cobbler lies in its baking method: the batter rises up around the peaches, creating a fluffy, cake-like texture with a crisp edge. The result is a dessert that’s not too sweet, with just the right balance of fruit and buttery crust.

Why You’ll Love This Recipe:

Simple Ingredients: Uses pantry staples and fresh or canned peaches.

Easy Preparation: No need for complicated steps; the batter and peaches come together effortlessly.

Perfect for Any Occasion: Great for family dinners, potlucks, or holiday gatherings.

Ingredients:

• 4 cups sliced fresh peaches (or canned peaches in syrup, drained)

• 1 cup granulated sugar

• 1/2 cup brown sugar

• 1/2 cup unsalted butter, melted

• 1 cup all-purpose flour

• 1 cup milk

• 1 tbsp baking powder

• 1/2 tsp salt

• 1/2 tsp cinnamon (optional)

• 1 tsp vanilla extract

Instructions:

Step 1: Preheat the Oven

• Preheat your oven to 350°F (175°C). Lightly grease a 9×13-inch baking dish with butter or non-stick spray.

Step 2: Prepare the Peaches

• In a medium saucepan over medium heat, combine the sliced peaches, 1/2 cup of the granulated sugar, and a dash of cinnamon if using.

• Cook for 5-7 minutes, stirring occasionally, until the peaches are soft and the sugar is dissolved. Remove from heat and set aside.

Step 3: Make the Batter

• In a mixing bowl, whisk together the flour, the remaining 1/2 cup of granulated sugar, brown sugar, baking powder, and salt.

• Stir in the milk and vanilla extract until the batter is smooth and free of lumps.

Step 4: Prepare the Baking Dish

• Pour the melted butter into the bottom of the greased baking dish, ensuring it covers the entire base.

• Carefully pour the batter over the melted butter. Do not mix or stir.

Step 5: Assemble the Cobbler

• Spoon the peach mixture evenly over the batter in the baking dish. Remember not to stir; the batter will rise up around the peaches during baking.

Step 6: Bake the Cobbler

• Place the dish in the preheated oven and bake for 40-45 minutes, or until the top is golden brown and the batter is fully set.

• Let the cobbler cool slightly for about 10 minutes before serving to allow the flavors to meld and the cobbler to firm up a bit.

Tips:

Peach Substitute: If peaches are not in season, use frozen peaches (thawed) or canned peaches, ensuring they are drained well.

Add a Twist: For added flavor, sprinkle a little extra cinnamon and brown sugar on top before baking.

Serving Suggestion: Serve warm with a scoop of vanilla ice cream or a dollop of whipped cream.

Storage Options:

Refrigerator: Store leftovers in an airtight container in the refrigerator for up to 3 days. Reheat in the oven at 300°F (150°C) for 10-15 minutes or in the microwave for a quicker option.

Freezer: For longer storage, freeze the cooled cobbler in a freezer-safe container for up to 2 months. Thaw overnight in the refrigerator and reheat before serving.

Krispy Kreme Peach Cobbler is a simple, crowd-pleasing dessert that combines the juicy sweetness of peaches with a buttery, cake-like batter. It’s a perfect end to any meal and guaranteed to become a family favorite!

15 Canned Foods That Never Expire

0

In a world where certainty is a luxury, having a stash of enduring food items like canned goods offers both convenience and peace of mind. Celebrated for their long shelf life, affordability, and ease of storage, canned foods are quintessential staples for any pantry. While many carry a ‘best by’ date, certain canned goods can theoretically last forever if stored under ideal conditions, making them excellent for both emergency supplies and routine culinary use.

Decoding Expiration Dates on Canned Goods

The expiration dates on canned foods often mislead consumers into thinking the food will spoil past that date. However, these dates merely indicate peak quality. The canning process, which eradicates harmful microbes, allows these foods to remain stable and safe to eat for many years, provided they are kept in a cool, dry place away from sunlight.

Why Do Some Canned Foods Last Indefinitely?

The longevity of certain canned foods can be attributed to their inherent properties, such as low moisture levels, high concentrations of salt or sugar, and lack of fats and oils that could degrade. While taste and texture may evolve over time, these foods remain safe for consumption.

Key Factors Enhancing Canned Food Durability

  • Airtight Sealing: Keeps out air and moisture, staving off spoilage.
  • Sterilization: High heat during canning kills off potential spoilage agents like bacteria and mold.
  • Preservative Elements: Ingredients such as salt, sugar, or natural acids help maintain the food’s integrity over time.

Optimal Storage Practices for Canned Goods

For maximum shelf life, store your canned items in a stable, cool, and dry environment. Ensure cans remain undamaged and routinely check for any signs of wear such as rust, dents, or swelling — all of which can compromise the safety of the contents.

15 Indestructible Canned Foods

Here’s a list of 15 canned foods known for their indefinite shelf life when properly stored:

  1. Canned Beans: A protein-rich staple, free from perishable meat or dairy, making it ideal for long-term storage.
  2. Canned Corn: Preserves its nutrients and flavor, offering a reliable source of fiber and vitamins.
  3. Canned Carrots: Their high water content and absence of fats help them last endlessly.
  4. Canned Peas: Provide green vegetables’ benefits for decades, thanks to their stable preservation.
  5. Canned Tomatoes: Their natural acidity prevents bacterial growth, ensuring longevity.
  6. Canned Pumpkin: A versatile base for many recipes, loaded with essential nutrients and capable of enduring storage.
  7. Canned Fish: Items like tuna and sardines are excellent protein sources, preserved impeccably in cans.
  8. Canned Chicken: Offers convenience and longevity as a precooked protein source.
  9. Canned Beef: Similar to canned chicken in terms of its long shelf life and versatility.
  10. Canned Chili: Its ingredients promote preservation, making it a hearty, long-lasting meal option.
  11. Canned Coconut Milk: Although not as enduring as other canned goods, it remains viable for years under the right conditions.
  12. Canned Soups: Especially those with high salt content, can be safely stored indefinitely.
  13. Canned Stews: These mixtures of meats and vegetables are perfect for extended storage.
  14. Canned Fruit: Fruits in syrup or juice maintain their flavor and nutritional value over time.
  15. Canned Spaghetti Sauces: High acidity content like that in tomato-based sauces aids in long-term preservation.

Health Pros and Possible Cons of Canned Foods

Canned goods retain most of their nutrients, providing essential vitamins and minerals when fresh produce is unavailable. However, it’s wise to opt for versions with reduced sodium or no added salt to balance your diet.

Risks Linked to Outdated Canned Foods

Even with their robust shelf life, it’s crucial to discard cans that show signs of spoilage, such as bulging, leaking, rusting, or containing food with off smells or colors, as these are indications of potential contamination.

Conclusion: Maximizing Your Canned Food Benefits

The ability to stockpile foods that virtually never expire offers a reliable way to ensure you always have access to nutritious meals. By understanding which items last and how to store them, you can maintain a well-prepared pantry suited for any situation, from everyday meal prep to emergency readiness.

Easy Homemade Dog Ice Cream: A Refreshing Treat for Your Furry Friend

0

When the summer heat peaks, both humans and pets seek relief, and treating your dog to a homemade, nutritious treat is a delightful way to cool them down. This Easy Homemade Dog Ice Cream recipe is perfect for that. It’s straightforward to prepare, full of healthy ingredients, and a sure hit with your furry friend.

A Personal Touch

Every summer, my dog Baxter and I have our small adventures, often culminating in a treat to cool him down after a sunny stroll. Seeing his joy at tasting homemade ice cream inspired me to share this joy with others. This treat has now become a key part of our summer enjoyment.

Ingredients Explained

Here’s what you’ll need to whip up this tasty treat for your pooch:

  • 1 Ripe Banana: Adds a creamy texture and natural sweetness, packed with potassium, vitamin B6, and vitamin C.
  • 4 Tablespoons Creamy, Natural Peanut Butter: A dog favorite, it provides protein and healthy fats, enhancing the flavor and texture of the ice cream. Check that it’s free of xylitol, which is harmful to dogs.
  • 12 Ounces Plain or Vanilla Greek Yogurt: Rich in probiotics for digestive health, it gives the ice cream a creamy and slightly tangy flavor. Make sure it doesn’t contain artificial sweeteners or additives.

Making the Dog Ice Cream

Here’s how to put it all together:

  1. Blend the Ingredients: In a blender, mix the banana, peanut butter, and yogurt until smooth. Aim for a consistent, creamy mixture.
  2. Pour into Molds: Spoon the mixture into silicone molds or an ice cube tray for easy removal later. Tip: A dab of coconut oil can help prevent sticking.
  3. Freeze: Freeze for about two hours, or until solid.
  4. Store Properly: Once solid, pop the treats out and store them in a freezer-safe bag or container for up to three weeks. Label the container with the freezing date to track freshness.

This homemade dog ice cream not only satisfies your pet’s taste buds but also strengthens the bond you share through these caring, shared moments. Enjoy the wagging tails and happy licks as your dog enjoys this cool summer treat!

Salted Watermelon with Optional Flavors

0

This simple yet refreshing dish highlights the natural sweetness of watermelon enhanced by a touch of salt. For added flair, you can include a drizzle of honey, a pinch of chili powder, or a sprinkle of citrus zest.

Ingredients:

  • 1 small watermelon, chilled and cut into wedges or cubes
  • 1-2 tsp coarse sea salt, flaky salt, or kosher salt
  • Optional: honey, chili powder, citrus zest for added flavors

Instructions:

Arrange the cut watermelon on a platter or in a bowl.

Lightly sprinkle the salt over the top of the watermelon pieces, using about 1 tsp salt per 1 lb of watermelon.

Let the salted watermelon sit for 5-10 minutes to allow the juices to be drawn out and to enhance the flavor.

Serve immediately for maximum juiciness and flavor. For an added twist, drizzle with honey, sprinkle with chili powder, or add a zest of citrus.

Enjoy this refreshing and flavorful treat!