Georgia Cracker Salad

0

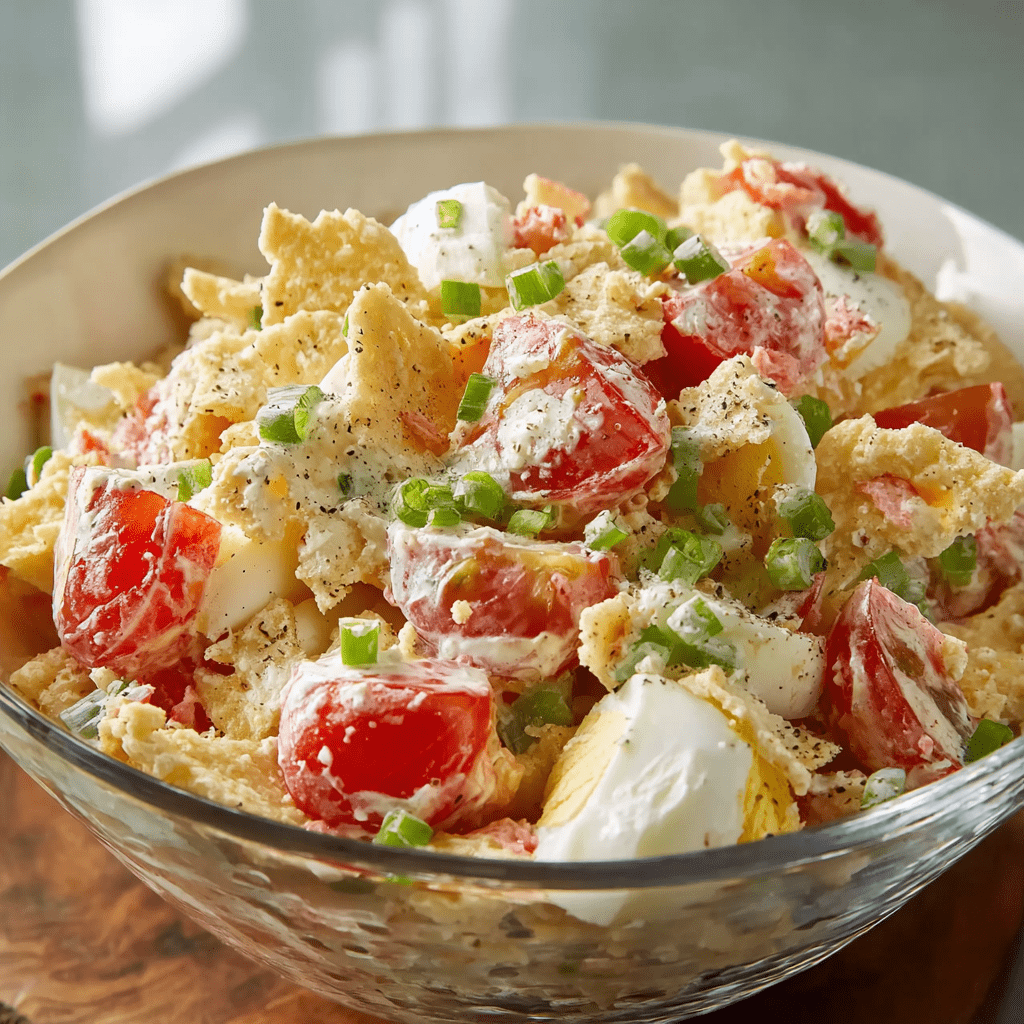
Georgia Cracker Salad is a quintessential example of humble, no-fuss Southern ingenuity, a dish that transforms a handful of simple, pantry-staple ingredients into a uniquely textured, creamy, and satisfying salad with a personality all its own. This recipe is a study in delightful contrasts, built upon a foundation of salted crackers that provide a surprising and addictive crunch against the soft, creamy backdrop of mayonnaise and the juicy freshness of ripe tomato. The addition of finely chopped scallions offers a mild, sharp bite, while hard-boiled eggs contribute a rich, hearty substance that makes the salad feel more substantial. Unlike most salads that rely on greens, this one gets its character from the dynamic interplay between the crisp, salty crackers and the cool, creamy dressing, creating a side dish that is as intriguing as it is delicious.

The true charm of this salad lies in its versatility and its fleeting, perfect texture. It is a recipe that embraces two distinct experiences: served immediately, it is a crisp, chunky, and vibrant mixture where the crackers hold their own; allowed to chill briefly, the crackers soften, absorbing the flavors of the tomato and mayo to become wonderfully tender, creating a cohesive, almost dip-like consistency that is perfect for scooping. This makes it an incredibly fast and easy side for summer barbecues, potlucks, or a quick lunch alongside a sandwich. Georgia Cracker Salad is more than just a recipe; it’s a piece of Southern comfort food history, a testament to making something wonderfully tasty out of practically nothing, and a guaranteed conversation starter at any table.

Why You’ll Love This Recipe:

  • Uniquely Addictive Texture: The combination of crisp, salty crackers and a cool, creamy base creates a fascinating and delightful mouthfeel that is both crunchy and soft.
  • 5-Minute Preparation: With no cooking required beyond pre-boiled eggs, this salad comes together in mere minutes.
  • The Ultimate Comfort Food Side: It’s a beloved, nostalgic side dish in the South, perfect for picnics, potlucks, and family gatherings.
  • Two Textures in One: Enjoy it immediately for a crisp salad, or let it chill for a softer, more unified side that’s almost like a savory dip.

Ingredients:

  • 1 sleeve (about 40-50) saltine or butter crackers
  • 1 large ripe tomato, seeded and finely chopped
  • ¼ cup scallions (green onions), thinly sliced
  • 2 hard-boiled eggs, peeled and chopped
  • 1 ½ cups mayonnaise
  • Kosher salt, to taste
  • Cracked black pepper, to taste
  • Optional add-in: A dash of hot sauce or a teaspoon of Dijon mustard

Instructions:

Step 1: Prepare the Crackers
Place the crackers in a large zip-top bag. Using your hands or a rolling pin, gently crush them until you have a mix of pieces, ranging from the size of a dime down to small crumbs. Avoid crushing them into a uniform powder.

Step 2: Combine Main Ingredients
In a large mixing bowl, combine the crushed crackers, finely chopped tomato, sliced scallions, and chopped hard-boiled eggs.

Step 3: Add the Dressing
Spoon the mayonnaise over the top of the cracker and vegetable mixture. If using, add a dash of hot sauce or mustard at this stage.

Step 4: Gently Fold Together
Using a spatula, gently fold all the ingredients together until they are evenly coated with the mayonnaise. Be careful not to over-stir or mash the ingredients; you want to maintain some texture.

Step 5: Season and Serve
Taste the salad and season with kosher salt and cracked black pepper as needed. Remember that the crackers are already salty. Serve immediately for a crisp texture, or cover and refrigerate for 15-30 minutes for a softer, more unified salad.

Tips:

  • Seed the Tomato: Taking a moment to scoop out the seeds and excess juice from the tomato before chopping will prevent the salad from becoming too watery.
  • Crush by Hand: Crushing the crackers in a bag by hand gives you the ideal variety of sizes for the best texture. A food processor will likely over-crush them.
  • Don’t Make it Ahead: This salad is best made and consumed within an hour or two. If left too long, the crackers will become unpleasantly mushy.
  • Customize It: Feel free to add other finely chopped vegetables like a tablespoon of bell pepper or a pinch of fresh dill.

Storage Options:

  • Best Served Fresh: Georgia Cracker Salad is at its peak within the first hour of being made. It does not store well due to the crackers breaking down.
  • Leftovers: Any leftovers will be very soft and are best enjoyed the same day. Store covered in the refrigerator, but expect a significant change in texture.

Almond Joy Cookies

0

Almond Joy Cookies are a delightful and ingenious homage to the classic candy bar, masterfully capturing its iconic trio of flavors—chocolate, coconut, and almond—in a soft, chewy, and irresistible cookie form. This recipe elevates the standard chocolate chip cookie by incorporating sweetened coconut flakes and toasted sliced almonds directly into the dough, ensuring that every single bite is packed with the nostalgic taste of the beloved treat. The foundation is a perfectly balanced cookie base, made with a blend of white and brown sugars for a depth of flavor and a delightfully chewy texture. The careful creaming of butter and sugar creates a light and tender crumb, while the generous mix-ins transform the dough into a chunky, textured masterpiece. As they bake, the cookies spread just enough to develop crispy edges while remaining wonderfully soft and pillowy in the center, with the chocolate chips melting into pockets of gooey richness and the coconut toasting to a subtle, nutty perfection.

The true brilliance of this recipe lies in its simplicity and its flawless execution of a beloved flavor combination. Unlike the candy bar, which has distinct layers, these cookies offer a harmonious blend of all three components in every mouthful. The toasted almonds provide a crucial crunch and earthy note that balances the sweetness of the chocolate and coconut, preventing the cookie from being overly saccharine. The use of a cookie scoop ensures they bake evenly and have a professional, uniform appearance, making them perfect for gift-giving, holiday trays, or a simple family treat. Almond Joy Cookies are more than just a cookie; they are a portable, shareable, and utterly delicious celebration of a classic candy, guaranteed to satisfy any sweet tooth and evoke a sense of joyful nostalgia with each and every batch.

Why You’ll Love This Recipe:

  • The Iconic Candy Bar in Cookie Form: It delivers the beloved chocolate, coconut, and almond flavor of an Almond Joy in a soft, chewy, and easy-to-eat cookie.
  • Perfect Texture: Enjoy a cookie with crisp edges, a soft and chewy center, and delightful crunch from the almonds.
  • Simple and Straightforward: Uses classic cookie-making techniques with no complicated steps, making it accessible for bakers of any skill level.
  • Crowd-Pleasing Favorite: These cookies are a universal hit, perfect for parties, bake sales, or as a special homemade gift.

Ingredients:

  • 1 ⅙ cups all-purpose flour (1 cup + 2 tablespoons)
  • ½ teaspoon baking soda
  • ¼ teaspoon salt
  • ½ cup (1 stick) unsalted butter, softened
  • ⅓ cup granulated sugar
  • ⅓ cup packed light brown sugar
  • 1 teaspoon vanilla extract
  • 1 large egg, at room temperature
  • 1 ½ cups semi-sweet chocolate chips
  • 1 cup sweetened shredded coconut flakes
  • ¾ cup sliced almonds, toasted

Instructions:

Step 1: Preheat and Prepare
Preheat your oven to 350°F (175°C). Line two baking sheets with parchment paper.

Step 2: Combine Dry Ingredients
In a medium bowl, whisk together the all-purpose flour, baking soda, and salt. Set aside.

Step 3: Cream Butter and Sugars
In the bowl of a stand mixer fitted with the paddle attachment, or using a hand mixer, cream the softened butter, granulated sugar, and brown sugar together on medium speed for 2-3 minutes, until the mixture is light, fluffy, and pale in color.

Step 4: Add Wet Ingredients
Add the vanilla extract and the room-temperature egg to the creamed butter and sugar. Mix on medium speed until just combined, scraping down the sides of the bowl as needed.

Step 5: Incorporate Dry Ingredients
With the mixer on low speed, gradually add the dry flour mixture to the wet ingredients. Mix until just combined, being careful not to overmix.

Step 6: Fold in Mix-Ins
Using a spatula, gently fold in the semi-sweet chocolate chips, shredded coconut, and toasted sliced almonds until they are evenly distributed throughout the cookie dough.

Step 7: Scoop and Bake
Using a 1.5-tablespoon cookie scoop, drop rounded portions of dough onto the prepared baking sheets, spacing them about 2 inches apart to allow for spreading.

Step 8: Bake to Perfection
Bake for 9-12 minutes, or until the edges are lightly golden and the centers appear soft and set. The cookies will continue to cook on the hot baking sheet after being removed from the oven.

Step 9: Cool
Allow the cookies to cool on the baking sheet for 10 minutes before transferring them to a wire rack to cool completely.

Tips:

  • Toast the Almonds: Toasting the sliced almonds in a dry skillet over medium heat for 3-5 minutes until fragrant dramatically enhances their nutty flavor and crunch.
  • Room Temperature Ingredients: Using room-temperature butter and egg is crucial for proper emulsification, which creates a better texture in the baked cookie.
  • Don’t Overbake: For a soft and chewy cookie, remove them from the oven when the centers still look slightly underdone. They will firm up as they cool.
  • Chill the Dough (Optional): For a thicker, chewier cookie, you can cover and chill the dough for 30-60 minutes before scooping and baking.

Storage Options:

  • Room Temperature: Store completely cooled cookies in an airtight container at room temperature for up to 5 days.
  • Freeze the Dough: Scooped cookie dough balls can be frozen solid on a baking sheet and then transferred to a freezer bag. Bake from frozen, adding 1-2 minutes to the baking time.
  • Freeze Baked Cookies: Fully baked and cooled cookies freeze very well. Layer them between parchment paper in an airtight container for up to 3 months. Thaw at room temperature.

Canadian Poutine

0

Canadian Poutine is a legendary dish hailing from Quebec, a glorious and indulgent symphony of textures and flavors that has become a beloved national treasure. This recipe faithfully recreates the iconic trio of components that define an authentic poutine: perfectly crispy, golden-brown French fries, fresh, squeaky cheese curds that soften without fully melting, and a rich, deeply savory brown gravy that brings everything together. The magic of poutine lies in the careful balance of these elements—the fries must be sturdy enough to support the weight of the toppings without becoming soggy, which is achieved through a double-frying technique that creates a crisp exterior and a fluffy interior. The cheese curds are non-negotiable; their mild, milky flavor and unique springy texture provide a delightful contrast, becoming wonderfully warm and slightly gooey under the hot gravy. The gravy itself is the unifying force, a robust and flavorful sauce made from a blend of beef and chicken broth, enhanced with Worcestershire sauce and aromatics, which is then thickened to a perfect, spoon-coating consistency.

The true brilliance of poutine is its deceptively simple composition, which results in a comfort food experience that is far greater than the sum of its parts. It is a dish that celebrates contrast: the hot gravy meets the cool curds, the crisp fries soften slightly under the sauce, and the salty, savory, and creamy notes mingle in every single bite. While it stands proudly as a hearty side dish or a late-night snack, it can also be transformed into a full meal with the addition of toppings like pulled pork or bacon. Making poutine at home allows you to master each component, ensuring the fries are extra crispy, the cheese is authentically squeaky, and the gravy is packed with homemade flavor. Canadian Poutine is more than just a recipe; it’s a cultural experience, a decadent treat, and the ultimate expression of hearty, satisfying comfort food.

Why You’ll Love This Recipe:

  • The Ultimate Comfort Food: The combination of crispy fries, warm cheese, and rich gravy is an irresistibly satisfying and indulgent experience.
  • Authentic Quebec-Style: This recipe stays true to the classic method and ingredients, delivering a genuine taste of Canada.
  • Perfect Textural Harmony: Enjoy the contrast of crispy fries, soft potato interiors, squeaky-chewy cheese curds, and silky gravy.
  • Incredibly Versatile: While perfect on its own, poutine is a fantastic base for other toppings like pulled pork, caramelized onions, or even a fried egg.

Ingredients:

For the Fries:

  • 4 medium to large Russet potatoes
  • Vegetable oil, for frying
  • Kosher salt

For the Gravy:

  • 1 ½ cups beef broth
  • ½ cup chicken broth
  • ½ teaspoon onion powder
  • ½ teaspoon garlic powder
  • 2 teaspoons Worcestershire sauce
  • 2 ½ tablespoons cornstarch
  • ¼ cup cold water
  • Salt and freshly ground black pepper, to taste

For Assembly:

  • 8 ounces white cheddar cheese curds

Instructions:

Step 1: Prepare and Soak the Potatoes
Scrub the potatoes thoroughly. You can peel them or leave the skins on for a more rustic texture. Cut the potatoes into ¼-inch thick batons, aiming for uniform size for even cooking. Place the cut fries in a large bowl and cover with cold water. Soak for at least 45 minutes, or up to overnight in the refrigerator. This crucial step removes excess starch, resulting in a crispier fry.

Step 2: First Fry (Blanching)
Drain the fries and pat them completely dry with a clean kitchen towel or paper towels. Moisture is the enemy of crispiness and will cause the oil to splatter. In a large Dutch oven or heavy-bottomed pot, heat 2-3 inches of vegetable oil to 325°F (163°C). Working in batches to avoid overcrowding, fry the potatoes for 5-7 minutes. They should be soft and pale, but not yet browned. Remove with a slotted spoon or spider strainer and drain on a wire rack set over a baking sheet lined with paper towels.

Step 3: Second Fry (Crisping)
Increase the oil temperature to 360°F (182°C). Working in batches again, return the par-cooked fries to the hot oil and fry for a second time for 2-4 minutes, until they are deep golden brown and very crisp. Drain again on the wire rack and immediately season with kosher salt while they are still hot.

Step 4: Prepare the Gravy
While the fries are undergoing their second fry, make the gravy. In a medium saucepan, combine the beef broth, chicken broth, onion powder, garlic powder, and Worcestershire sauce. Bring to a gentle boil over medium heat. In a small separate bowl, make a slurry by whisking the cornstarch and cold water together until completely smooth. While whisking the simmering broth continuously, slowly pour in the cornstarch slurry. Continue to cook, whisking constantly, until the gravy thickens to a rich, coat-the-spoon consistency, about 2-3 minutes. Season with salt and pepper to taste. Reduce the heat to low to keep it warm.

Step 5: Assemble and Serve
Preheat your oven to 450°F (230°C). Spread the hot, freshly fried fries in a single layer on an oven-safe platter or baking sheet. Scatter the cheese curds evenly over the top. Place the platter in the hot oven for just 3-4 minutes to warm the curds—they should be soft and starting to melt around the edges but still hold their shape. Remove from the oven and immediately ladle the hot gravy over the top. Serve promptly while the fries are still crisp, the cheese is warm, and the gravy is piping hot.

Tips:

  • The Double Fry is Key: The first, lower-temperature fry cooks the potato through, while the second, higher-temperature fry creates the signature crispy exterior.
  • Dry Potatoes Thoroughly: Any surface moisture will cause dangerous oil splatters and prevent the fries from crisping properly.
  • Use Fresh Cheese Curds: For the authentic “squeaky” texture, fresh cheese curds are essential. If you cannot find them, mozzarella cheese cut into small, irregular chunks is the best substitute.
  • Serve Immediately: Poutine is a race against time. Assemble and serve it right away to enjoy the perfect contrast of crisp fries and warm gravy before the fries soften.

Storage Options:

  • Best Served Immediately: Poutine is at its absolute peak the moment it is assembled and does not store or reheat well.
  • Component Storage: You can prepare the gravy up to 3 days in advance and reheat it gently on the stovetop or in the microwave. The fries are best enjoyed fresh but can be held warm and crisp in a 200°F (95°C) oven for a short period after their second fry.

Cozy Beef and Noodle Casserole

0

Cozy Beef and Noodle Casserole is the quintessential definition of homestyle comfort food, a hearty and satisfying dish that wraps you in warmth with every single bite. This recipe is a masterful blend of simple, pantry-staple ingredients that come together to create a meal that is both deeply nostalgic and incredibly easy to prepare. It builds upon the classic combination of ground beef and egg noodles, enveloping them in a rich and creamy sauce made from cream of mushroom soup and tangy sour cream, which melds together during baking to create a velvety, cohesive texture. The savory foundation of sautéed onions and garlic adds a crucial layer of aromatic depth, while a generous blanket of shredded cheddar cheese bakes into a golden, bubbly crust that provides a delightful contrast to the tender noodles and savory beef beneath. This casserole is the culinary equivalent of a warm hug, offering unwavering comfort and familiarity.

The true brilliance of this dish lies in its straightforward, one-pan preparation and its unparalleled versatility. It is a reliable, family-friendly dinner that pleases both kids and adults alike, and it can be easily adapted to suit what you have on hand. The entire mixture comes together in a single skillet before being transferred to a baking dish, making cleanup a breeze. It’s also a fantastic make-ahead meal; you can assemble it completely a day in advance and simply pop it in the oven when you’re ready to eat. Whether you’re serving it for a busy weeknight dinner, bringing it to a potluck, or simply craving a dose of classic comfort, this Cozy Beef and Noodle Casserole is a dependable, delicious, and deeply nourishing choice that consistently delivers on its promise of simple, satisfying goodness.

Why You’ll Love This Recipe:

  • Ultimate Comfort Food: The creamy, cheesy, and savory combination is the very definition of a comforting, homestyle meal.
  • Family-Friendly and Crowd-Pleasing: With its familiar flavors and appealing texture, this casserole is a guaranteed hit with both kids and adults.
  • Simple and Quick to Prepare: Using mostly pantry staples and a straightforward method, this dish comes together with minimal effort.
  • Perfect for Make-Ahead Meals: The casserole can be fully assembled ahead of time and refrigerated until you’re ready to bake, making it ideal for busy schedules.

Ingredients:

  • 1 pound ground beef (80/20 or 90/10)
  • 1 medium yellow onion, chopped
  • 2 cloves garlic, minced
  • 1 tablespoon olive oil
  • 8 ounces wide egg noodles
  • 1 can (10.5 ounces) cream of mushroom soup, undiluted
  • 1 cup sour cream
  • 1 cup shredded cheddar cheese
  • 1 teaspoon dried parsley (optional, for garnish)
  • Salt and black pepper, to taste
  • Non-stick cooking spray or butter for greasing

Instructions:

Step 1: Preheat and Cook Noodles
Preheat your oven to 350°F (175°C). Grease a 9×13-inch baking dish and set it aside. Cook the egg noodles according to package directions in a large pot of salted water until al dente. Drain well and set aside.

Step 2: Brown the Beef and Aromatics
While the noodles cook, heat the olive oil in a large skillet over medium heat. Add the chopped onion and cook for 4-5 minutes until softened. Add the minced garlic and cook for another minute until fragrant. Add the ground beef, breaking it up with a spoon, and cook until no pink remains. Drain off any excess grease.

Step 3: Create the Creamy Sauce
Reduce the heat to low. Add the undiluted cream of mushroom soup and sour cream to the skillet with the beef. Stir until everything is well combined and the mixture is smooth and heated through. Season generously with salt and pepper to taste.

Step 4: Combine Noodles and Beef Mixture
Add the drained cooked egg noodles to the skillet. Gently stir until all the noodles are evenly coated in the creamy beef mixture.

Step 5: Assemble and Top with Cheese
Transfer the entire contents of the skillet into the prepared 9×13-inch baking dish, spreading it out into an even layer. Sprinkle the shredded cheddar cheese evenly over the top.

Step 6: Bake to Bubbly Perfection
Bake, uncovered, for 25-30 minutes, or until the casserole is hot and bubbly around the edges and the cheese on top is fully melted and lightly golden.

Step 7: Rest and Serve
Remove the casserole from the oven and let it stand for 5-10 minutes before serving. This allows it to set slightly for easier serving. Garnish with dried parsley if desired, and scoop onto plates while warm.

Tips:

  • Don’t Overcook the Noodles: Cook the noodles just to al dente, as they will continue to soften and absorb sauce while baking.
  • Customize Your Add-Ins: Feel free to stir in a cup of frozen peas, corn, or mixed vegetables with the beef for an extra boost of color and nutrition.
  • Boost the Flavor: For a deeper flavor, you can add a teaspoon of Worcestershire sauce or a dash of onion powder to the beef mixture.
  • Cheese Variations: While cheddar is classic, you can use a Monterey Jack and cheddar blend or even top with crispy fried onions for a different texture.

Storage Options:

  • Refrigerator: Store leftovers in an airtight container in the refrigerator for up to 3-4 days.
  • Reheating: Reheat individual portions in the microwave. For larger portions, reheat in a 350°F (175°C) oven, covered with foil, for 15-20 minutes or until hot.
  • Freezing: This casserole freezes well before baking. Assemble it completely but do not bake. Wrap tightly in plastic wrap and foil and freeze for up to 2 months. Thaw in the refrigerator overnight and bake as directed, adding 5-10 minutes to the baking time if needed.

Slow Cooker Creamy Garlic Chicken with Herbs

0

Slow Cooker Creamy Garlic Chicken with Herbs is the epitome of effortless elegance, a dish that delivers the rich, complex flavors of a restaurant-quality meal with the simple, set-it-and-forget-it convenience of a slow cooker. This recipe masterfully coaxes maximum flavor from its ingredients, beginning with a crucial step of searing the chicken to create a golden-brown crust that adds a deep, savory foundation. The chicken is then gently poached in a luxurious bath of chicken broth, heavy cream, and an abundance of minced garlic, which mellows and sweetens during the long, slow cook, infusing the entire dish with its aromatic essence. A classic blend of dried thyme, rosemary, and parsley provides a warm, earthy backbone that complements the garlic and cream without overpowering it. The final transformation occurs with a simple cornstarch slurry, which thickens the cooking liquids into a velvety, clingy sauce that beautifully coats the tender chicken and is perfect for spooning over pasta, rice, or mashed potatoes.

The true brilliance of this recipe lies in its perfect balance of simplicity and sophistication. While the ingredient list is straightforward and the method is forgiving, the result is a creamy, herbaceous, and deeply satisfying dish that feels special enough for a weekend dinner party yet simple enough for a busy weeknight. The slow cooker ensures the chicken remains incredibly moist and juicy, while the initial sear guarantees a depth of flavor that is often missing from slow-cooker-only recipes. The sauce, which starts as a thin liquid, reduces and thickens into a creamy gravy that is far greater than the sum of its parts. Slow Cooker Creamy Garlic Chicken with Herbs is a versatile and reliable recipe that proves you don’t need complicated techniques or hard-to-find ingredients to create a truly memorable and comforting meal.

Why You’ll Love This Recipe:

  • Restaurant-Quality Flavor at Home: Achieves a rich, creamy, and herbaceous taste that rivals any bistro-style chicken dish.
  • Foolproof and Tender Chicken: The slow, gentle cooking guarantees perfectly cooked, juicy chicken breasts every single time.
  • Hands-Off Cooking: After a quick sear and simple assembly, the slow cooker does all the work, freeing up your time.
  • Versatile and Comforting: The creamy garlic sauce is a perfect pairing for a variety of sides, from pasta and rice to roasted vegetables.

Ingredients:

  • 4 boneless, skinless chicken breasts (about 1.5 – 2 lbs)
  • 2 tablespoons olive oil
  • Salt and black pepper, to taste
  • 5 cloves garlic, minced
  • 1 cup chicken broth
  • 1 cup heavy cream
  • 1 teaspoon dried thyme
  • 1 teaspoon dried rosemary
  • 1 teaspoon dried parsley
  • 2 tablespoons cornstarch
  • 2 tablespoons cold water
  • 2 tablespoons fresh parsley, chopped (for garnish)

Instructions:

Step 1: Sear the Chicken
Pat the chicken breasts dry and season generously with salt and pepper. Heat the olive oil in a large skillet over medium-high heat. Once hot, add the chicken and sear for 3-4 minutes per side, until a golden-brown crust forms. The chicken does not need to be cooked through.

Step 2: Assemble in the Slow Cooker
Transfer the seared chicken breasts to the slow cooker insert, arranging them in a single layer. In a medium bowl, whisk together the chicken broth, heavy cream, minced garlic, dried thyme, dried rosemary, and dried parsley. Pour this mixture evenly over the chicken in the slow cooker.

Step 3: Slow Cook to Perfection
Cover and cook on LOW for 4-5 hours, or until the chicken is tender and cooked through (internal temperature of 165°F / 74°C).

Step 4: Thicken the Sauce
About 30 minutes before serving, prepare a slurry by whisking the cornstarch and cold water together in a small bowl until smooth. Remove the lid from the slow cooker and stir the slurry into the sauce. Switch the setting to HIGH, re-cover, and cook for an additional 20-30 minutes, or until the sauce has thickened to a creamy, gravy-like consistency.

Step 5: Serve and Garnish
Serve the chicken hot, spooning the generous amount of creamy garlic sauce over the top. Garnish with freshly chopped parsley. This dish pairs wonderfully with egg noodles, mashed potatoes, or steamed rice to soak up the delicious sauce.

Tips:

  • Don’t Skip the Sear: Searing the chicken is a critical step for building a rich, deep flavor foundation that permeates the entire dish.
  • Use Fresh Garlic: For the best and most potent garlic flavor, use freshly minced garlic rather than the pre-minced jarred variety.
  • Check for Doneness: Chicken breast cook times can vary. Use an instant-read thermometer to ensure the thickest part of the chicken has reached 165°F (74°C).
  • Adjust Sauce Thickness: If the sauce isn’t thick enough after adding the slurry, you can create and add a second one. If it becomes too thick, simply whisk in a splash of chicken broth or cream to thin it to your desired consistency.

Storage Options:

  • Refrigerator: Store leftovers in an airtight container in the refrigerator for up to 3 days. The sauce will thicken considerably when cold.
  • Reheating: Reheat gently in a saucepan over low heat, stirring frequently. Add a splash of broth or cream to loosen the sauce as it warms.
  • Freezing: Freezing is not recommended, as the dairy-based sauce is likely to separate and become grainy upon thawing.

Easy Nebraska Runzas

0

Easy Nebraska Runzas are a cherished Midwestern comfort food, a handheld pastry pocket that encapsulates a savory, homestyle filling of ground beef, cabbage, and onions in a soft, fluffy, and slightly sweet bread dough. This recipe brilliantly simplifies the traditional process by using frozen Rhodes roll dough as a convenient and reliable shortcut, eliminating the need to make dough from scratch while still delivering an authentic, bakery-quality result. The magic begins as the frozen dough balls slowly thaw and rise, developing a light and airy texture that is the perfect vessel for the hearty filling. The filling itself is a classic and comforting combination, where ground beef is browned and then simmered with softened onions and cabbage until tender and flavorful, creating a simple yet deeply satisfying mixture that is the soul of the Runza. The process of enclosing this filling in the pillowy dough is both simple and rewarding, resulting in golden-brown, portable pastries that are as fun to make as they are to eat.

The true genius of this recipe lies in its ability to deliver the iconic flavor of a Nebraska staple with minimal effort and maximum payoff. The long, slow rise of the dough is the only real waiting period, and it requires no active work, making it easy to fit into a day of cooking or weekend preparation. The final egg wash before baking gives the Runzas a beautiful, glossy, and professional-looking finish, while the enclosed seam ensures all the savory juices stay locked inside during baking. These Easy Nebraska Runzas are the ultimate portable meal—perfect for a hot lunch, a picnic, a road trip, or a freezer-friendly dinner solution. They are a warm, comforting, and nostalgic taste of the Heartland that will quickly become a beloved favorite in any household.

Why You’ll Love This Recipe:

  • Ultimate Comfort Food: The combination of soft, sweet bread and savory beef and cabbage filling is incredibly comforting and satisfying.
  • Handheld and Portable: These are a self-contained, no-mess meal, perfect for packed lunches, picnics, or eating on the go.
  • Perfect Freezer Meal: Runzas freeze and reheat beautifully, making them an ideal make-ahead meal for busy weeks.
  • Family-Friendly Favorite: Their mild, savory flavor and fun, pocket-like shape are a huge hit with both kids and adults.

Ingredients:

  • 16 Rhodes White Dinner Rolls, frozen
  • 1 lb ground beef (80/20 works well)
  • 2 tablespoons unsalted butter
  • 1 small yellow onion, finely chopped
  • 2 cups finely chopped green cabbage
  • Salt and black pepper, to taste
  • 1-2 tablespoons all-purpose flour, for dusting
  • 1 large egg
  • 1 tablespoon milk or water

Instructions:

Step 1: Thaw and Rise the Dough
Arrange the frozen dinner rolls several inches apart on baking sheets lined with parchment paper. Cover the baking sheets loosely with plastic wrap. Let the rolls rise at room temperature for 3-5 hours, or until they have doubled in size.

Step 2: Prepare the Filling
While the dough rises, brown the ground beef in a large skillet over medium heat. When the beef is about halfway cooked, add the butter, chopped onion, and cabbage. Continue cooking, stirring occasionally, until the beef is fully browned and the onions and cabbage are soft and translucent. Season generously with salt and pepper. Drain any excess grease and allow the mixture to cool completely.

Step 3: Preheat and Prep
Preheat your oven to 350°F (175°C). Lightly dust a clean work surface with flour.

Step 4: Assemble the Runzas
Working with one dough ball at a time, use your fingers to gently flatten and stretch it into a circle about 5-6 inches in diameter. Place a rounded ¼ cup of the cooled filling in the center of the dough circle. Bring the edges of the dough up and over the filling, pinching them firmly together at the top to seal. Gently roll the sealed bundle between your hands to smooth the seam and form a uniform oval shape. Place the Runza seam-side down on the parchment-lined baking sheet. Repeat with the remaining dough and filling.

Step 5: Final Rise and Egg Wash
Once all Runzas are assembled, cover the baking sheets again with plastic wrap and let them rest for 30 minutes. In a small bowl, whisk together the egg and milk to create an egg wash. Gently brush the top and sides of each Runza with the egg wash.

Step 6: Bake to Golden Brown
Bake for 18-20 minutes, rotating the baking sheet halfway through, until the Runzas are a deep, golden brown. Let them cool on the pan for at least 5-10 minutes before serving, as the filling will be very hot.

Tips:

  • Cool the Filling Completely: This is crucial. A warm filling will make the dough sticky, difficult to work with, and can cause it to tear or not seal properly.
  • Seal Tightly: Take your time to pinch the dough together firmly. A good seal prevents the filling from leaking out during baking.
  • Don’t Skip the Second Rise: The 30-minute rest after shaping allows the gluten to relax, resulting in a softer, more tender bread.
  • Customize the Filling: Add a teaspoon of caraway seeds, a dash of Worcestershire sauce, or some shredded cheese to the filling for a personal touch.

Storage Options:

  • Refrigerator: Store cooled Runzas in an airtight container in the refrigerator for up to 4 days.
  • Reheating: Reheat in a 350°F (175°C) oven for 10-12 minutes until warm, or in the microwave for 60-90 seconds. The oven will restore the best texture to the bread.
  • Freezing: Runzas freeze exceptionally well. Place cooled Runzas on a baking sheet to freeze solid, then transfer to a freezer bag. They will keep for up to 3 months. Reheat from frozen in a 350°F (175°C) oven for 20-25 minutes.

Frosty Strawberry Mimosas

0

Frosty Strawberry Mimosas are a vibrant and elegant twist on the classic brunch cocktail, transforming it into a slushy, refreshing, and visually stunning drink that is perfect for celebrations, warm-weather gatherings, or simply elevating a leisurely weekend morning. This recipe masterfully blends the convenience of frozen strawberries with the sophisticated effervescence of champagne, creating a drink that is both effortlessly chic and delightfully easy to prepare. The magic begins in the blender, where the frozen strawberries are pureed with a touch of sugar and a base of champagne into a thick, vibrant, and frosty slush. This strawberry base acts as a flavorful foundation that, when topped with more chilled bubbly, creates a beautiful ombre effect in the glass and ensures the drink stays cold without being diluted by traditional ice cubes. The result is a perfectly balanced cocktail that is neither too sweet nor too tart, with the natural berry flavor shining through alongside the crisp, dry notes of the champagne.

The true brilliance of this cocktail lies in its versatility and its make-ahead potential. The strawberry slush base can be prepared several hours in advance and stored in the freezer, allowing you to simply pour and top with champagne when your guests arrive, making entertaining seamless and stress-free. Unlike a standard mimosa, the thick, frozen base provides a luxurious, sorbet-like texture that slowly melds with the bubbly, creating a dynamic drinking experience that evolves with every sip. The garnish of a fresh strawberry, artfully sliced and perched on the rim, adds a final touch of elegance and freshness. Frosty Strawberry Mimosas are more than just a drink; they are a festive, celebratory experience that brings a burst of color and joy to any table, promising to be the star of your next brunch or special occasion.

Why You’ll Love This Recipe:

  • Refreshingly Frosty Texture: The slushy, sorbet-like base keeps the drink perfectly chilled without watery dilution, offering a unique and delightful texture.
  • Elegant and Impressive: With its beautiful pink hue and ombre effect, this mimosa looks far more sophisticated and special than a standard orange juice version.
  • Perfect for Make-Ahead Ease: The strawberry slush can be blended hours ahead of time, making last-minute assembly a breeze for effortless entertaining.
  • Customizable Sweetness: You have full control over the sugar level, allowing you to tailor the sweetness to your preference and the dryness of your chosen sparkling wine.

Ingredients:

  • 3 cups frozen strawberries
  • 2 tablespoons granulated sugar (adjust to taste)
  • 1 bottle (750 ml) well-chilled champagne, Prosecco, Cava, or other dry sparkling wine
  • Fresh whole strawberries, for garnish

Instructions:

Step 1: Prepare the Strawberry Slush Base
In a high-powered blender, combine the frozen strawberries, sugar, and 1 cup of the chilled champagne. Blend on high speed for 1-2 minutes, until the mixture is completely smooth and has a thick, slushy consistency. If the mixture is too thick for the blender to process, add an additional ¼ cup of champagne and blend again.

Step 2: Assemble the Mimosas
For each serving, pour the strawberry slush into a champagne flute, filling the glass about halfway. Slowly top off each glass with additional chilled champagne, pouring it gently over the back of a spoon to create a distinct layered effect.

Step 3: Garnish and Serve Immediately
To prepare the garnish, take a fresh strawberry and make a single slice from the tip towards the stem, stopping about ¾ of the way so the berry remains intact. Gently slide the strawberry onto the rim of the flute. Serve the mimosas immediately while frosty and effervescent.

Tips:

  • Choose Your Bubbly Wisely: A dry (brut) sparkling wine, Prosecco, or Cava works best to balance the sweetness of the strawberries. Avoid sweet or demi-sec varieties, as the drink may become overly sweet.
  • Taste and Adjust: Before assembling all the drinks, taste the strawberry slush base. Depending on the natural sweetness of your berries, you may want to add a bit more sugar or a squeeze of lemon juice to perfect the balance.
  • Keep Everything Cold: For the frostiest result, ensure the champagne is very well chilled and the glasses are cold. You can chill the glasses in the freezer for 15-20 minutes before serving.
  • Blend in Batches: If you are making a large quantity for a party, blend the strawberry base in batches to avoid overworking your blender and to ensure a consistently smooth texture.

Storage Options:

  • Strawberry Slush Base: The blended strawberry and champagne mixture can be stored in an airtight container in the freezer for up to 24 hours. It will freeze solid, so let it sit at room temperature for 10-15 minutes to soften slightly before scooping into glasses.
  • Assembled Drinks: Frosty Strawberry Mimosas are best enjoyed immediately after assembly to preserve the bubbly effervescence and the desired slushy texture. They are not suitable for storing once mixed.

Crock Pot Smothered Pork Chops

0

Crock Pot Smothered Pork Chops are the quintessential comfort food, a dish that transforms simple, economical pork chops into a tender, flavorful, and deeply satisfying meal with minimal effort. This recipe masterfully uses the slow cooker to create a rich, savory gravy that not only cooks the pork chops to fall-apart perfection but also serves as a luxurious sauce that smothers every bite. The gravy is a powerhouse of flavor from the very beginning, built on a foundation of cream of chicken soup, onion soup mix, and dry pork gravy mix, which together create a complex, umami-rich base with no need for tedious sautéing or roux-making. The bone-in pork chops, seasoned simply with garlic powder, slowly braise in this mixture for hours, allowing the connective tissue to break down and the meat to become incredibly tender and juicy, while simultaneously infusing the gravy with their own savory essence.

The true brilliance of this dish lies in its effortless path to a result that tastes like it simmered on the stove all day. The final step of thickening the gravy with a cornstarch slurry elevates the dish from a simple braise to an elegant, restaurant-quality presentation, creating a velvety, clingy sauce that is perfect for spooning over mashed potatoes or buttered noodles. This method ensures the pork chops remain the star, never tough or dry, but instead fork-tender and permeated with the flavors of onion, garlic, and herbs from the gravy. Crock Pot Smothered Pork Chops are a reliable, family-pleasing classic that delivers the warm, homestyle comfort of a grandmother’s kitchen with the straightforward convenience of modern, set-it-and-forget-it cooking.

Why You’ll Love This Recipe:

  • Ultimate Comfort Food: Tender pork chops swimming in a rich, savory gravy is the very definition of a hearty, comforting meal.
  • Effortless Elegance: The slow cooker does all the work, transforming simple ingredients into a dish that tastes complex and deeply developed.
  • Foolproof Tenderness: The slow, moist cooking environment guarantees juicy, fall-off-the-bone pork chops every single time, eliminating the risk of drying them out.
  • Perfect Gravy Every Time: The combination of soup mixes and a final slurry creates a perfectly seasoned, lump-free gravy that requires no guesswork.

Ingredients:

  • 4 bone-in pork chops, about 1-inch thick
  • 1 (1 oz) packet dry onion soup mix
  • 1 (1 oz) packet dry pork gravy mix
  • 1 (10.5 oz) can cream of chicken soup, low sodium
  • 2 cups low-sodium chicken broth
  • 1 teaspoon garlic powder
  • 3 tablespoons cornstarch
  • 3 tablespoons cold water
  • Fresh chopped parsley for garnish (optional)

Instructions:

Step 1: Create the Gravy Base
In a 5-6 quart slow cooker, whisk together the dry onion soup mix, dry pork gravy mix, cream of chicken soup, and chicken broth. Continue whisking until the mixture is smooth and all the dry ingredients are fully incorporated.

Step 2: Season the Pork Chops
Pat the pork chops dry with a paper towel. Season both sides evenly with the garlic powder.

Step 3: Assemble in the Slow Cooker
Nestle the seasoned pork chops into the gravy base in the slow cooker, ensuring they are submerged in the liquid. Spoon a little of the sauce over the top of each chop.

Step 4: Slow Cook to Perfection
Cover the slow cooker and cook on LOW for 4-6 hours. The pork chops are done when they are tender and easily pull apart with a fork.

Step 5: Thicken the Gravy
About 30 minutes before you are ready to serve, prepare the slurry. In a small bowl, whisk the cornstarch and cold water together until completely smooth. Remove the lid from the slow cooker and stir the slurry into the gravy. Switch the setting to HIGH, re-cover, and cook for another 20-30 minutes, or until the gravy has thickened to your desired consistency.

Step 6: Serve and Garnish
Serve the pork chops hot, generously smothered with the thickened gravy. Garnish with fresh parsley if desired. This dish is perfect served over a bed of mashed potatoes, rice, or egg noodles to soak up every bit of the delicious gravy.

Tips:

  • Bone-In for Best Results: Bone-in pork chops are highly recommended as the bone adds immense flavor and helps the meat stay juicier and more tender during the long cooking process.
  • Avoid Overcooking: While the slow cooker is forgiving, pork chops can become too tender and start to disintegrate if cooked for an excessively long time. The 4-6 hour window on low is ideal for 1-inch thick chops.
  • Don’t Skip the Slurry: The cornstarch slurry is essential for transforming the thin braising liquid into a luxurious, spoon-coating gravy. Be sure to use cold water to prevent lumps.
  • Brown for Extra Flavor (Optional): For a deeper flavor and more appealing color, quickly sear the seasoned pork chops in a hot skillet with a little oil for 2-3 minutes per side before placing them in the slow cooker.

Storage Options:

  • Refrigerator: Store leftovers in an airtight container in the refrigerator for up to 3-4 days. The gravy will thicken considerably when cold.
  • Reheating: Reheat gently in a covered skillet over low heat or in the microwave, adding a splash of broth or water to loosen the gravy to its original consistency.
  • Freezing: This dish freezes quite well. Cool completely and store in a freezer-safe container for up to 3 months. Thaw overnight in the refrigerator before reheating.

Mini Cannoli Cups

0

Mini Cannoli Cups are a delightful and elegant reimagining of the classic Italian pastry, transforming its iconic flavors into a charming, bite-sized dessert that is perfect for parties, gatherings, or a sophisticated treat. This recipe masterfully simplifies the traditional cannoli-making process by using pre-made pie crust as a vessel, creating a flaky, buttery cup that bakes into a golden, crisp shell. The filling is a beautifully authentic blend of whole-milk ricotta cheese, gently sweetened and brightened with a hint of citrus zest and vanilla, resulting in a creamy, lush texture that is far superior to any pre-made filling. The final dusting of powdered sugar and sprinkle of miniature chocolate chips or chopped pistachios provide the perfect traditional finish, making each cup a miniature masterpiece that captures the essence of a cannoli in a single, delightful bite.

The true brilliance of this recipe lies in its effortless elegance and make-ahead convenience. Unlike traditional cannoli shells that require special tubes and frying, these cups are baked in a standard mini muffin tin, making them accessible to any home cook. The process of rolling the cinnamon-sugar directly into the pie crust not only adds flavor but also creates a sparkling, slightly caramelized texture that is irresistibly crisp. The components can be prepared separately ahead of time—the cups baked and stored at room temperature, the filling chilled in a piping bag—allowing you to assemble them just before serving to ensure the shells remain perfectly crisp. Mini Cannoli Cups are more than just a dessert; they are a versatile, crowd-pleasing confection that brings a touch of Italian bakery charm to your table with minimal fuss and maximum reward.

Why You’ll Love This Recipe:

  • Elegant and Impressive: These mini cups look professionally made and are perfect for entertaining, offering a sophisticated, individual dessert option.
  • Simplified Classic: You get all the authentic flavor of a cannoli without the need for deep-frying or special equipment.
  • Perfect Make-Ahead Components: Both the shells and the filling can be prepared a day in advance, making final assembly quick and easy.
  • Crowd-Pleasing Fun: Their bite-sized nature makes them a hit at parties, and they are easy for guests to enjoy without utensils.

Ingredients:

For the Cannoli Cups:

  • 1 box (14.1 oz, 2-count) refrigerated pie crusts, softened as directed
  • 3 tablespoons turbinado sugar (raw sugar)
  • 1 teaspoon ground cinnamon

For the Filling:

  • 1 container (15 oz) whole-milk ricotta cheese
  • ½ cup powdered sugar, plus more for dusting
  • 2 tablespoons granulated sugar
  • 1 teaspoon finely grated orange or lemon zest
  • ½ teaspoon vanilla extract

For the Garnish:

  • ¼ cup miniature semisweet chocolate chips or finely chopped pistachios

Instructions:

Step 1: Preheat and Prepare
Preheat your oven to 425°F (220°C). Unroll the two pie crusts onto a lightly floured surface.

Step 2: Create the Spiced Crust
In a small bowl, mix the turbinado sugar and cinnamon. Sprinkle this mixture evenly over the surface of both pie crusts. Using a rolling pin, gently roll over the crusts to press the sugar and cinnamon into the dough.

Step 3: Cut and Shape the Cups
Using a 3-inch round cookie cutter, cut out circles from the pie crusts. You should get about 12-14 circles from each crust. Gently press each circle into the cups of a mini muffin tin, shaping them to form a small cup.

Step 4: Bake to Golden Perfection
Bake for 8-10 minutes, or until the edges are golden brown and crisp. Keep a close watch, as they can brown quickly. Remove the pan from the oven and let the cups cool in the tin for 5 minutes before carefully transferring them to a wire rack to cool completely.

Step 5: Prepare the Filling
While the cups are cooling, prepare the filling. Place the ricotta cheese in a fine-mesh strainer over a bowl for 10-15 minutes to drain off any excess liquid (this step is crucial for a thick, non-watery filling). In a medium bowl, combine the drained ricotta, powdered sugar, granulated sugar, citrus zest, and vanilla extract. Beat with an electric mixer on medium speed until the mixture is smooth and creamy. Transfer the filling to a piping bag or a zip-top bag with a corner snipped off. Refrigerate until ready to use.

Step 6: Assemble and Garnish
Just before serving, pipe the chilled ricotta filling into the completely cooled cannoli cups. Garnish the tops with miniature chocolate chips or chopped pistachios. Give the assembled cups a light dusting of powdered sugar and serve immediately.

Tips:

  • Drain the Ricotta: Do not skip draining the ricotta. This is the single most important step for achieving a thick, creamy filling that won’t make the pastry shells soggy.
  • Prevent Soggy Shells: Only fill the cups right before you plan to serve them. The moisture from the filling will soften the crisp shells over time.
  • Re-roll the Dough: Don’t waste the scraps! Gently gather and re-roll the dough to cut out more circles.
  • Zest is Best: The citrus zest is not optional for an authentic flavor—it provides a essential bright note that cuts through the richness of the cheese and chocolate.

Storage Options:

  • Component Storage: Store the completely cooled, unfilled cannoli cups in an airtight container at room temperature for up to 2 days. The filling can be stored separately in the refrigerator for up to 3 days.
  • Assembled: Once assembled, the cups are best enjoyed within a few hours.
  • Freezing: The baked and cooled cannoli cups freeze very well. Store in a freezer-safe bag for up to 1 month. Thaw at room temperature before filling. The filling does not freeze well.

3-Ingredient Slow Cooker Kalua Pig

0

3-Ingredient Slow Cooker Kalua Pig is a breathtakingly simple yet profoundly flavorful dish that brings the authentic taste of a traditional Hawaiian luau directly to your kitchen with minimal effort. This recipe is a masterclass in minimalist cooking, proving that with just a few high-quality ingredients and the transformative power of time, you can achieve a result that is both rustic and elegant. The star of the dish is a whole pork shoulder, a well-marbled cut that becomes unbelievably tender and juicy through a long, slow braise. It is seasoned exclusively with Alaea sea salt, a Hawaiian red clay salt that imparts a unique, earthy minerality, and a touch of liquid smoke, which masterfully replicates the smoky flavor traditionally achieved by cooking the pig in an underground oven, or imu. The process of piercing the meat before cooking allows these two powerful flavor agents to penetrate deep into the pork, resulting in every single shred being perfectly seasoned from the inside out.

The true brilliance of this recipe lies in its unwavering commitment to simplicity and its foolproof method. There is no searing, no chopping, and no complicated steps—just three ingredients placed in a slow cooker and forgotten for the better part of a day. The extended cook time on low is not a suggestion but the key to the dish’s success; it gently breaks down the tough collagen in the pork shoulder, transforming it into a melt-in-your-mouth texture that is effortlessly shreddable with just two forks. The final, optional step of broiling the shredded pork provides a delightful contrast of crispy, caramelized edges against the otherwise succulent and moist meat. This Kalua Pig is incredibly versatile, serving as the perfect centerpiece for a tropical-themed party, a delicious filling for tacos or sliders, or simply served over a bed of rice with a side of fresh pineapple for a complete and deeply satisfying meal.

Why You’ll Love This Recipe:

  • Ultimate Simplicity: With only three ingredients and a “set it and forget it” method, this is one of the easiest, most hands-off recipes you will ever make.
  • Authentic Luau Flavor: It captures the essential smoky, salty, and savory taste of traditional Hawaiian Kalua pork without requiring a pit in your backyard.
  • Exceptionally Tender and Juicy: The long, slow cooking process guarantees pork that is fall-apart tender and incredibly moist.
  • Incredibly Versatile: Use the shredded pork for tacos, rice bowls, sandwiches, salads, or as a main course with classic Hawaiian sides like macaroni salad and rice.

Ingredients:

  • 5 pounds boneless pork shoulder (Boston butt)
  • 1 tablespoon Alaea sea salt (Hawaiian Red Salt)
  • 1 tablespoon liquid smoke

Instructions:

Step 1: Prepare the Pork
Using a fork or the tip of a sharp knife, pierce the pork shoulder deeply all over its surface. This creates channels for the salt and liquid smoke to penetrate the meat, ensuring it is flavorful throughout.

Step 2: Season Generously
Rub the Alaea sea salt evenly over the entire surface of the pork shoulder, pressing it into the meat and the pierced holes.

Step 3: Assemble in the Slow Cooker
Place the seasoned pork shoulder directly into the bowl of your slow cooker. Drizzle the liquid smoke evenly over the top of the pork.

Step 4: Slow Cook to Perfection
Cover the slow cooker with the lid and cook on the LOW setting for 14-16 hours. Do not open the lid during cooking. The pork is done when it is extremely tender and easily pulls apart with a fork.

Step 5: Shred the Pork
Carefully transfer the pork shoulder to a large bowl or cutting board. Using two forks, shred the meat, discarding any large pieces of excess fat. The meat will release a significant amount of flavorful juices.

Step 6: Crisp (Optional) and Serve
For an optional crispy texture, spread the shredded pork in a single layer on a baking sheet. Place it under a preheated broiler for 3-5 minutes, watching closely, until the edges are slightly crisped and caramelized. Moisten the pork with some of the reserved cooking juices from the slow cooker before serving.

Tips:

  • Do Not Substitute the Salt: Alaea sea salt is integral to the authentic flavor. If you absolutely cannot find it, use 1 ½ tablespoons of a high-quality coarse sea salt, but the flavor profile will be different.
  • Trust the Long Cook Time: The 14-16 hour window on low is ideal for breaking down the connective tissue without drying out the meat. Cooking on high is not recommended, as it will not yield the same tender result.
  • Do Not Add Liquid: It may seem counterintuitive, but the pork will release more than enough of its own juices to create a braising liquid. Adding extra water or broth will dilute the intense, concentrated flavor.
  • Save the Juices: After shredding, mix some of the incredible cooking liquid back into the pork to keep it moist and flavorful.

Storage Options:

  • Refrigerator: Store the cooled pork and its juices in an airtight container in the refrigerator for up to 4 days.
  • Freezer: This pork freezes exceptionally well. Portion it with some of its juices into freezer-safe bags or containers. It will keep for up to 3 months. Thaw in the refrigerator before reheating.
  • Reheating: Reheat gently in a skillet over medium-low heat with a splash of its juices, or in the microwave, covered, until heated through.