Best Chili Cheese Dogs

0

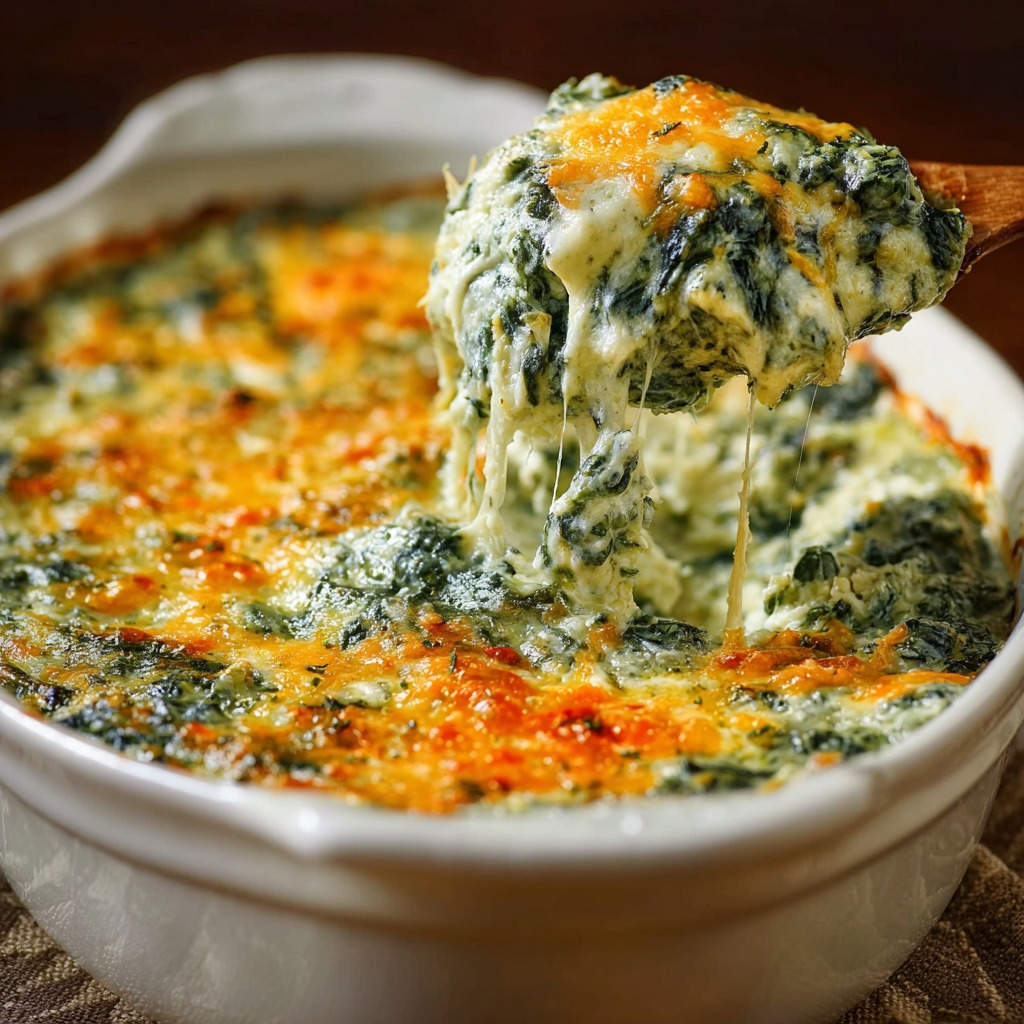
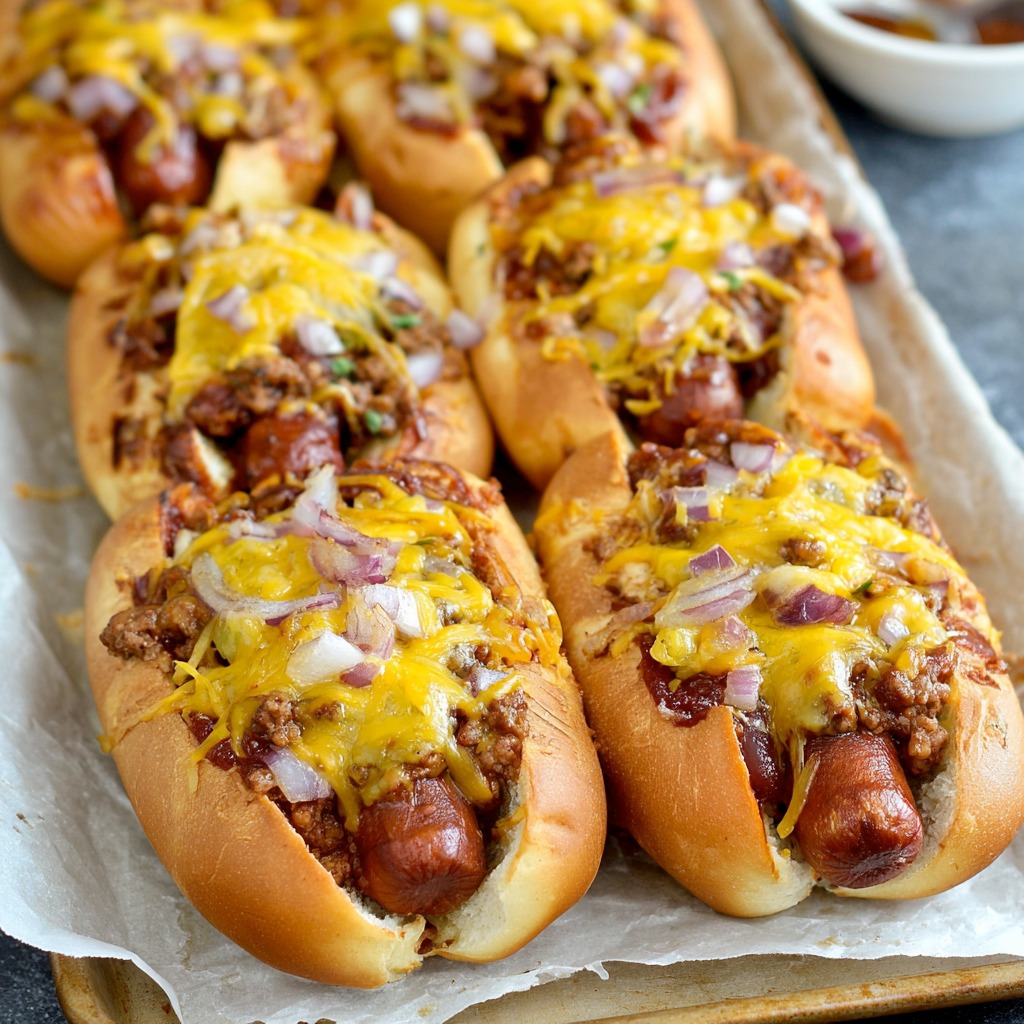
The Best Chili Cheese Dogs are a spectacular, indulgent reimagining of the classic ballpark snack, transforming it into a loaded, oven-baked masterpiece that celebrates the glorious messiness of American comfort food. This recipe elevates the humble hot dog through a triple-layer technique of flavor and texture: first, grilling the franks to achieve a smoky, lightly charred snap; second, toasting the buns under the broiler for a sturdy, buttery crispness that can withstand the toppings; and finally, baking the assembled dogs to meld the elements into a cohesive, molten delight. The soul of the dish lies in a generous ladling of robust, homemade chili—simmered with ground beef, beans, and spices—which seeps into the bun and blankets the hot dog in savory, meaty richness. A double-cheese blanket of sharp cheddar and creamy Monterey Jack melts into and over the chili, creating a gooey, irresistible cap that binds everything together.

The brilliance of this recipe is in its strategic assembly and baking method, which ensures every component is perfectly heated and integrated without becoming soggy. By adding a base layer of cheese directly to the toasted bun before the chili, you create a protective, flavorful barrier. The final bake in a hot oven doesn’t just melt the top cheese; it warms the chili through, gently toasts the bun further, and allows all the flavors to marry. The finishing sprinkle of raw, crunchy onion provides a essential fresh bite that cuts through the richness. Served immediately, these chili cheese dogs are an unforgettable handheld feast—simultaneously messy, hearty, and utterly satisfying, perfect for game day, cookouts, or any occasion that calls for unabashed, crowd-pleasing deliciousness.

Why You’ll Love This Recipe:

  • The Ultimate Loaded Experience: Combines a grilled dog, toasted bun, hearty chili, melted cheese, and fresh toppings for the perfect bite every time.
  • Strategic Baking Method: The oven bake ensures the chili is piping hot, the cheese is perfectly melted, and the bun stays structured instead of soggy.
  • Customizable to Perfection: Use your favorite homemade or high-quality canned chili, switch up the cheeses, and add your preferred condiments.
  • Feeds a Hungry Crowd: Easy to assemble in bulk on a sheet pan, making it the perfect centerpiece for parties and game day gatherings.
  • Nostalgic Comfort Food, Elevated: Takes the classic concession stand favorite and makes it bigger, better, and more satisfying for a home-cooked feast.

Ingredients:

For the Dogs & Buns:
8 bun-length, high-quality hot dogs (preferably uncured beef franks)
8 hot dog buns (fresh, soft, but sturdy)
2 tablespoons melted butter (for brushing buns, optional)

For the Chili & Cheese:
2 2/3 cups (about 21 oz) homemade beef chili or high-quality canned chili, warmed
1 cup (about 100g) shredded sharp cheddar cheese
1 cup (about 100g) shredded Monterey Jack cheese

For Garnish & Condiments:
1/2 cup finely chopped red or yellow onion
Yellow mustard, ketchup, spicy brown mustard, pickle relish (all optional)

Instructions:

Step 1: Grill the Hot Dogs
Preheat a gas grill to medium-high heat (about 425°F / 220°C). Grill the hot dogs, turning occasionally, for 6-8 minutes until they are heated through and have light grill marks. Alternatively, you can pan-sear them in a skillet. Set aside.

Step 2: Toast the Buns
Position an oven rack 6 inches below the broiler and preheat the broiler to HIGH. Line a large, rimmed baking sheet with parchment paper. Place the hot dog buns on the sheet, cut sides up. If desired, brush the insides lightly with melted butter. Broil for 1-2 minutes, watching closely and rotating the pan as needed, until the cut surfaces are golden brown and toasted. Remove from oven. Leave the oven on and reduce the temperature to 375°F (190°C).

Step 3: Assemble the Dogs
Sprinkle half of the total shredded cheese (about 1 cup combined) evenly inside the toasted buns. Place one grilled hot dog in each bun. Add a thin stripe of mustard directly on the dog if using. Spoon about 1/3 cup of warm chili evenly over each hot dog, spreading it to cover. Top generously with the remaining shredded cheese, dividing it among the 8 dogs.

Step 4: Bake to Melted Perfection
Place the baking sheet with the assembled chili cheese dogs in the preheated 375°F (190°C) oven. Bake for 10-15 minutes, or until the cheese is fully melted, bubbly, and the edges of the buns are crisp.

Step 5: Garnish and Serve
Remove from the oven. Immediately top each dog with a sprinkle of chopped onion and any other desired fresh toppings (like jalapeños or pickles). Serve immediately while hot and gooey.

Tips:

  • Chili Choice is Key: A thick, hearty homemade chili with beans and ground beef works best. If using canned, choose a “no bean” or “thick” variety and consider simmering it to reduce excess liquid.
  • Prevent Soggy Buns: Toasting the buns under the broiler first is a non-negotiable step for creating a moisture-resistant barrier.
  • Don’t Overload: While tempting, using too much chili can make the bun fall apart. A heaping 1/3 cup per dog is usually perfect.
  • Cheese Blend: The combination of cheddar for sharpness and Monterey Jack for meltability is ideal. For extra kick, use Pepper Jack cheese.
  • Make Ahead: You can grill the dogs, toast the buns, and warm the chili ahead of time. Assemble and bake just before serving for the best texture.

Storage Options:

  • Not Recommended for Storage: These are best enjoyed immediately after baking. The bun will become soggy upon storage.
  • Component Prep: The individual components (grilled dogs, toasted buns, warm chili) can be prepared and stored separately for quick assembly before a gathering.
  • Reheating Leftovers (If You Must): Reheat leftover assembled dogs on a wire rack set over a baking sheet in a 350°F (175°C) oven for 10-12 minutes to help re-crisp the bun. The texture will not be the same as fresh.

The Best Chili Cheese Dogs are a celebration of hearty, hands-on eating. They take a simple concept and execute it with thoughtful technique to create a messy, memorable, and supremely satisfying meal that’s guaranteed to be the highlight of any casual feast.

Easy Orange Chicken Recipe

0

Easy Orange Chicken is a masterful recreation of the beloved takeout classic, delivering the perfect balance of crispy, golden-brown chicken coated in a glossy, sweet, tangy, and subtly spicy orange sauce—all achieved with straightforward techniques in your own kitchen. This recipe demystifies the process by using a simple yet effective coating of egg whites and cornstarch, which fries up into an incredibly light, crackly crust that clings tenaciously to each juicy piece of chicken. The magic truly shines in the homemade sauce, a vibrant symphony of fresh orange juice and zest, brown sugar, rice vinegar, soy sauce, and aromatic ginger and garlic. A touch of chili paste (like sambal oelek) provides a customizable heat that cuts through the sweetness, creating a complex flavor profile far superior to any bottled version.

The brilliance of this recipe lies in its two-step method that guarantees texture and flavor perfection. Frying the chicken in batches ensures each piece cooks evenly and achieves maximum crispiness without steaming. The sauce is then built in a separate pan, allowing the flavors to meld and thicken to a luxurious, glaze-like consistency before the crispy chicken is tossed in at the last moment. This crucial step preserves the crunch of the coating. Finished with a confetti of green onions, orange zest, and red pepper flakes, the dish is as visually stunning as it is delicious. It’s a weeknight-friendly recipe that feels like a special occasion, proving you can achieve restaurant-quality results with accessible ingredients and a little culinary confidence.

Why You’ll Love This Recipe:

  • Better-Than-Takeout Flavor: A homemade sauce with fresh orange and ginger delivers a brighter, more complex taste than any delivery.
  • Perfectly Crispy Chicken: The cornstarch and egg white coating fries up into an incredibly light, shatteringly crisp exterior.
  • Customizable Heat Level: Easily control the spice by adjusting the amount of chili paste to suit your preference.
  • Quick & Approachable Cooking: Uses simple techniques and pans you already own for a surprisingly achievable result.
  • Family-Friendly Favorite: The sweet, tangy sauce and crispy chicken are a guaranteed hit with both kids and adults.

Ingredients:

For the Chicken:
4 boneless, skinless chicken breasts (about 1.5 lbs / 680g), cut into 1-inch bite-sized pieces
3 large egg whites, lightly whisked
3 tablespoons cornstarch
1 teaspoon kosher salt
½ teaspoon white pepper
Vegetable or canola oil, for frying (about 1-2 inches deep)

For the Orange Sauce:
1 cup fresh orange juice (from about 3 oranges)
2 tablespoons orange juice, reserved for slurry
⅓ cup packed light brown sugar
2 tablespoons unseasoned rice vinegar
1 tablespoon soy sauce (or tamari)
1 tablespoon fresh ginger, finely grated (or ¼ teaspoon ground ginger)
1 tablespoon chili paste (like sambal oelek), adjust to taste
¼ teaspoon garlic powder
1 tablespoon cornstarch

For Garnish & Finish:
2 green onions, thinly sliced
1 tablespoon fresh orange zest
1-2 pinches red pepper flakes
Kosher salt and freshly ground black pepper, to taste
Orange slices, for serving
Cooked white rice, for serving

Instructions:

Step 1: Coat the Chicken
Pat the chicken pieces very dry with paper towels. In a large bowl, whisk together the egg whites, 3 tablespoons cornstarch, salt, and white pepper until smooth. Add the chicken pieces and toss until every piece is evenly and thoroughly coated.

Step 2: Fry the Chicken
In a large, heavy-bottomed pot or Dutch oven, heat 1-2 inches of oil over medium-high heat to 350°F (175°C). Working in batches to avoid crowding, carefully add the coated chicken pieces in a single layer. Fry for 4-5 minutes, turning occasionally, until deeply golden brown, crispy, and cooked through. Transfer to a wire rack set over a baking sheet or a paper towel-lined plate to drain. Repeat with remaining chicken.

Step 3: Make the Orange Sauce
While the chicken fries, make the sauce. In a medium saucepan or large skillet, whisk together 1 cup orange juice, brown sugar, rice vinegar, soy sauce, grated ginger, chili paste, and garlic powder. Bring to a simmer over medium heat, stirring to dissolve the sugar.

Step 4: Thicken the Sauce
In a small bowl, make a slurry by whisking the remaining 1 tablespoon of cornstarch with the 2 tablespoons of reserved orange juice until completely smooth. While whisking the simmering sauce, slowly stream in the cornstarch slurry. Continue to simmer, whisking constantly, for 1-2 minutes until the sauce has thickened to a glossy, syrup-like consistency that will coat the back of a spoon. Remove from heat.

Step 5: Combine and Serve
Add all of the crispy fried chicken to the saucepan with the sauce. Gently toss and fold until each piece is evenly coated. Return the pan to low heat for just 1 minute to ensure everything is hot, tossing constantly.

Step 6: Garnish and Serve Immediately
Transfer the orange chicken to a serving platter. Immediately garnish with sliced green onions, orange zest, and a pinch of red pepper flakes. Season with a final pinch of salt and pepper if desired. Serve hot over steamed rice with orange slices on the side.

Tips:

  • Consistent Chicken Size: Cut the chicken into uniform pieces for even cooking.
  • Maintain Oil Temperature: Use a thermometer and allow the oil to return to 350°F between batches. Too-cool oil makes greasy chicken; too-hot oil burns the coating.
  • Fresh Orange Juice is Key: Bottled juice lacks the bright, vibrant flavor of freshly squeezed. The zest is equally important for aroma.
  • Taste the Sauce: Before adding the chicken, taste the sauce and adjust sweetness (more sugar), tang (more vinegar), or heat (more chili paste) to your liking.
  • Serve Promptly: For the crispiest texture, serve as soon as the chicken is coated. The sauce will soften the coating over time.

Storage Options:

  • Refrigerator: Store leftover chicken and sauce separately in airtight containers for up to 3 days. The chicken will lose its crispness.
  • Reheating: To help recrisp, reheat the chicken on a wire rack set over a baking sheet in a 375°F (190°C) oven for 10-12 minutes. Warm the sauce separately in a saucepan and toss together just before serving.
  • Freezing: Not recommended, as the fried coating will become very soggy upon thawing and reheating.
  • Meal Prep: You can make the sauce up to 3 days in advance. The chicken is best fried fresh.

Easy Orange Chicken is a vibrant, flavorful, and incredibly rewarding dish to master at home. It brings the joy of a favorite restaurant meal into your kitchen, offering a perfect combination of texture and taste that will have everyone asking for seconds.

Johnny Marzetti Casserole

0

Johnny Marzetti Casserole is a glorious, hearty monument to American comfort food, a dish born from community kitchens and potluck traditions that delivers unmatched satisfaction in every forkful. This recipe elevates the classic midwestern baked pasta by building layers of robust flavor, starting with a savory foundation of ground beef and Italian sausage that provides a rich, meaty depth. The magic deepens with the addition of earthy cremini mushrooms, sweet onions, and vibrant bell peppers, all sautéed in the rendered meat fats until tender and caramelized. This aromatic medley is then simmered in a simple yet potent tomato sauce, infused with garlic, thyme, and marjoram, creating a chunky, rustic ragù that clings perfectly to every twist of corkscrew rotini pasta. Baked under a generous, bubbling blanket of both sharp cheddar and Italian cheese blends, the casserole emerges as a unified, golden-brown masterpiece of melted cheese and savory goodness.

The brilliance of this recipe lies in its harmonious balance and crowd-pleasing simplicity. It is a complete, one-dish meal that masterfully combines protein, vegetables, pasta, and cheese into a comforting, cohesive whole. The use of two cheeses—sharp cheddar for a tangy punch and a melty Italian blend for gooey richness—creates a complex, irresistible topping. Unlike many baked pastas that can become dry or heavy, this version maintains a perfect sauciness, ensuring each bite is moist and flavorful. It’s the quintessential feed-a-crowd dish: forgiving to make, easy to transport, and guaranteed to elicit contented sighs around the dinner table. Johnny Marzetti is more than a casserole; it’s a edible piece of culinary heritage, offering warmth, abundance, and the deeply comforting promise of a meal made with care.

Why You’ll Love This Recipe:

  • Ultimate Comfort Food: A hearty, cheesy, and deeply satisfying baked pasta that is the definition of family-friendly comfort.
  • Feeds a Crowd Effortlessly: Perfect for potlucks, game day, or large family dinners, with easy scaling and minimal fuss.
  • Flavor-Packed Meat Sauce: The combination of beef, Italian sausage, and sautéed vegetables creates a far more complex and delicious sauce than plain ground beef.
  • Perfect Make-Ahead Meal: Can be assembled a day in advance and baked when needed, and the flavors improve as they sit.
  • Crowd-Pleasing Cheesy Goodness: A double-cheese topping that delivers both sharp flavor and perfect meltiness.

Ingredients:

For the Pasta & Meat Base:
12 ounces (340g) rotini pasta
1 lb lean ground beef
½ lb ground Italian sausage (mild or hot)
8 ounces cremini mushrooms, sliced
1 medium yellow onion, sliced
1 medium red bell pepper, diced
4 cloves garlic, minced
1 teaspoon dried thyme
½ teaspoon dried marjoram

For the Sauce & Assembly:
1 (15-ounce) can tomato sauce
1 (15-ounce) can diced tomatoes, undrained
2 cups (8 oz / 226g) shredded sharp cheddar cheese
1 ½ cups (6 oz / 170g) shredded Italian cheese blend (mozzarella, provolone, Asiago, etc.)
Kosher salt and freshly ground black pepper, to taste
Non-stick cooking spray or olive oil for greasing

Instructions:

Step 1: Preheat and Prep
Preheat your oven to 350°F (175°C). Lightly grease a 9×13-inch baking dish with non-stick spray or olive oil.

Step 2: Cook the Pasta
Bring a large pot of generously salted water to a boil. Cook the rotini according to package directions until just al dente (it will cook further in the oven). Drain well and set aside.

Step 3: Brown the Meats and Vegetables
While the pasta cooks, in a large skillet or Dutch oven over medium-high heat, cook the ground beef and Italian sausage, breaking it up with a spoon. When the meat is about halfway browned (after 4-5 minutes), add the sliced mushrooms, onion, and bell pepper. Continue cooking, stirring occasionally, until the meat is fully browned and the vegetables have softened, about 6-8 more minutes.

Step 4: Build the Sauce
Reduce the heat to low. Add the minced garlic, thyme, and marjoram to the skillet and cook, stirring constantly, for 1 minute until fragrant. Stir in the tomato sauce and diced tomatoes with their juices. Season the mixture generously with salt and pepper. Bring to a simmer and let it cook for 5 minutes to allow the flavors to meld.

Step 5: Combine and Assemble
In the prepared baking dish, combine the drained pasta and the meat sauce. Stir until the pasta is evenly coated. Spread the mixture into an even layer. Sprinkle the shredded cheddar cheese evenly over the top, followed by the Italian cheese blend.

Step 6: Bake
Bake, uncovered, for 20-25 minutes, or until the cheese is completely melted, bubbly, and just beginning to turn golden in spots.

Step 7: Rest and Serve
Remove from the oven and let the casserole rest for 5-10 minutes before serving. This allows it to set slightly for cleaner portions.

Tips:

  • Don’t Overcook the Pasta: Cook it to al dente, as it will absorb moisture and soften further in the sauce during baking.
  • Drain Excess Fat: If your meat mixture seems very greasy after browning, you can drain off some excess fat before adding the garlic and tomatoes for a less oily final dish.
  • Customize the Vegetables: Add a cup of frozen corn, diced zucchini, or sliced olives when you add the tomatoes for extra flavor and nutrition.
  • Cheese Flexibility: Feel free to use all cheddar, all Italian blend, or add a cup of ricotta dolloped over the sauce before topping with the shredded cheeses.
  • Make it Spicy: Use hot Italian sausage and add a pinch of red pepper flakes with the garlic for a kick.

Storage Options:

  • Refrigerator: Store leftover casserole, covered tightly, in the refrigerator for up to 4 days.
  • Reheating: Reheat individual portions in the microwave. For larger amounts, reheat, covered with foil, in a 325°F (165°C) oven for 20-25 minutes, or until heated through.
  • Freezing: Assemble the casserole but do not bake. Wrap the dish tightly in plastic wrap and foil. Freeze for up to 2 months. Thaw overnight in the refrigerator and bake as directed, adding 10-15 minutes to the baking time.
  • Make-Ahead: You can assemble the entire casserole up to 24 hours in advance. Cover and refrigerate. Bake as directed, adding 5-10 minutes to the bake time since it will be cold.

Johnny Marzetti Casserole is the epitome of hearty, no-fuss, family-pleasing cooking. It takes simple, accessible ingredients and weaves them into a cheesy, savory, and utterly comforting masterpiece that promises to become a requested favorite in your home for years to come.

Salisbury Steak with Garlic Mashed Potatoes and Mushroom Onion Gravy

0

Salisbury Steak with Garlic Mashed Potatoes and Mushroom Onion Gravy is the ultimate homage to classic American diner comfort food, elevated to a nourishing, soul-satisfying homemade feast. This recipe masterfully transforms humble ground beef into succulent, flavor-packed patties, using a panade of breadcrumbs and grated onion to ensure they remain incredibly tender and juicy. The magic unfolds in a single skillet, where the seared patties leave behind a glorious fond—the browned, flavorful bits that become the foundation for a rich, velvety mushroom and onion gravy. This gravy is a masterclass in simplicity and depth, built by sautéing mushrooms in butter, creating a roux with flour right in the same pan, and deglazing with beef broth to capture every ounce of savory essence. The patties then finish cooking gently in this bubbling gravy, allowing them to absorb its deep, umami-rich flavors.

The true brilliance of this dish lies in its harmonious pairing with creamy, robust Garlic Mashed Potatoes. The potatoes, mashed with roasted garlic and butter, provide the perfect, comforting canvas to soak up the luxurious gravy. Each component—the savory steak, the earthy mushroom gravy, and the creamy potatoes—is designed to complement the others, creating a cohesive and deeply nostalgic meal that feels both familiar and special. It’s a complete, one-skillet wonder (plus a pot for potatoes) that delivers the hearty, satisfying experience of a restaurant-quality comfort food dinner with the warmth and care of a home-cooked meal, proving that the classics endure for a reason.

Why You’ll Love This Recipe:

  • Ultimate Comfort Food: Delivers the deeply satisfying, nostalgic flavor of a classic diner-style Salisbury steak dinner made from scratch.
  • One-Skillet Wonder (for the Steak & Gravy): The patties are seared and the gravy is built in the same pan, maximizing flavor and minimizing cleanup.
  • Unbelievably Tender Patties: The grated onion and breadcrumb mixture keeps the ground beef patties moist and tender, never dry or tough.
  • Rich, Savory Homemade Gravy: A from-scratch mushroom and onion gravy that is far superior to any packet, with deep, meaty flavor.
  • Complete, Cohesive Meal: The creamy garlic mashed potatoes are the perfect vehicle for the savory steak and gravy, making a balanced and hearty plate.

Ingredients:

For the Salisbury Steak Patties:
1 lb lean ground beef (90/10)
1/3 cup plain breadcrumbs
1 small yellow onion, finely grated (including juices)
1 large egg, lightly beaten
1 teaspoon kosher salt
1/2 teaspoon freshly ground black pepper
1 tablespoon olive oil

For the Mushroom & Onion Gravy:
2 tablespoons unsalted butter
8 oz cremini or white mushrooms, thinly sliced
2 tablespoons all-purpose flour
2 cups low-sodium beef broth
1 teaspoon Worcestershire sauce
1/2 teaspoon kosher salt, or to taste
1/4 teaspoon freshly ground black pepper, or to taste
1 tablespoon fresh parsley, chopped (for garnish)

For the Garlic Mashed Potatoes:
2 lbs Yukon Gold potatoes, peeled and quartered
4 cloves garlic, peeled
4 tablespoons unsalted butter
1/2 cup whole milk or half-and-half, warmed
1/2 teaspoon kosher salt, or to taste
1/4 teaspoon white pepper

Instructions:

Step 1: Make the Mashed Potatoes
Place peeled, quartered potatoes and whole garlic cloves in a large pot. Cover with cold, salted water by 1 inch. Bring to a boil, then reduce heat and simmer for 15-20 minutes until potatoes are fork-tender. Drain well. Return potatoes and garlic to the hot pot and let steam dry for 1 minute. Add butter, warm milk, salt, and white pepper. Mash to your desired consistency. Cover and keep warm.

Step 2: Prepare the Salisbury Steak Patties
In a large bowl, combine the breadcrumbs, grated onion (with all its juices), beaten egg, salt, and pepper. Add the ground beef. Using your hands, mix gently until just combined—do not overwork. Divide into 4 equal portions and shape into oval patties, about ¾-inch thick.

Step 3: Sear the Patties
Heat olive oil in a large skillet (preferably cast iron or stainless steel) over medium-high heat. Add the patties and sear for 3-4 minutes per side, until a deep brown crust forms. They will not be cooked through. Transfer patties to a plate.

Step 4: Build the Gravy
Reduce heat to medium. Add butter to the skillet. Once melted, add the sliced mushrooms. Cook, stirring occasionally, for 5-6 minutes until they have released their liquid and are browned. Sprinkle the flour over the mushrooms and cook, stirring constantly, for 1-2 minutes to form a golden roux.

Step 5: Simmer and Finish
Gradually whisk in the beef broth and Worcestershire sauce, scraping up any browned bits from the bottom of the pan. Bring to a simmer. Return the seared patties and any accumulated juices to the skillet, nestling them into the gravy. Reduce heat to low, cover, and simmer gently for 10-12 minutes, until the patties are cooked through and the gravy has thickened.

Step 6: Season and Serve
Taste the gravy and adjust seasoning with salt and pepper. Stir in half the chopped parsley. Spoon a generous mound of garlic mashed potatoes onto each plate. Top with a Salisbury steak patty and ladle the mushroom gravy over everything. Garnish with remaining parsley.

Tips:

  • Grate the Onion: Grating the onion (rather than dicing) incorporates its juice and fine pulp into the patty mixture, which acts as a tenderizer and adds moisture.
  • Don’t Overmix the Beef: Handle the meat as little as possible when forming patties to ensure a tender texture, not a dense, meatloaf-like one.
  • Get a Good Sear: A proper sear on the patties creates flavor (the fond) that is essential for the gravy. Don’t move them until they release easily from the pan.
  • Gravy Thickness: For a thicker gravy, let it simmer uncovered for a few extra minutes after the patties are cooked. For a thinner gravy, add a splash more broth.
  • Deglaze Thoroughly: When adding the broth, whisk vigorously to dissolve all the flour and browned bits from the pan—this is where the flavor lives.

Storage Options:

  • Refrigerator: Store leftover patties, gravy, and mashed potatoes in separate airtight containers in the refrigerator for up to 4 days.
  • Reheating: Reheat gently in a covered skillet over low heat with a splash of broth or water to loosen the gravy. Mashed potatoes can be reheated in the microwave with a splash of milk.
  • Freezing: The cooked Salisbury steak patties and gravy (without potatoes) freeze well together for up to 3 months. Thaw overnight in the refrigerator and reheat gently on the stovetop.
  • Make-Ahead: You can prepare the patty mixture up to a day in advance, cover, and refrigerate. The mashed potatoes can also be made a day ahead and reheated with a little extra milk.

Salisbury Steak with Garlic Mashed Potatoes and Mushroom Onion Gravy is a timeless, hearty, and deeply comforting meal that turns simple ingredients into a celebratory dinner. It’s a testament to the power of classic cooking techniques and a recipe that promises to deliver satisfaction with every single bite.

Chicago-Style Bakery Apple Slices

0

Chicago-Style Bakery Apple Slices are a legendary Midwestern treat, a glorious hybrid of a buttery sugar cookie, a spiced apple pie, and a crumbly streusel topping, all baked into one irresistible, portable slab. This recipe captures the essence of classic corner-bakery indulgence, featuring a unique shortbread-like crust that doubles as its own crumb topping. The magic begins with a single dough, rich with cold butter and brown sugar, which is divided: two-thirds are pressed into a pan to form a sturdy, sweet foundation, while the remainder is reserved to become the iconic craggy, golden crumble on top. This ingenious method ensures perfect textural harmony and consistent flavor in every layer. The heart of the slice is a generous mound of tart apples—like Granny Smith—tossed with warm cinnamon and nutmeg, whose juices thicken with cornstarch as they bake, creating a lush, cohesive filling that holds its shape when cut.

The true brilliance of this recipe lies in its structural integrity and nostalgic flavor profile. Unlike a loose fruit pie, these slices are designed to be picked up and eaten out of hand, thanks to the sturdy crust and the thick, jammy apple layer that sets perfectly as it cools. The optional vanilla glaze, drizzled in classic bakery-crosshatch fashion, adds a final touch of sweetness and a professional finish that makes them utterly unmistakable. As they cool, the flavors meld, and the texture firms up, yielding a perfectly neat square that offers a symphony of contrasts: tender-yet-crisp crumble, soft spiced apples, and a firm, buttery base. It’s a recipe that delivers the deep satisfaction of apple pie with the convenience and shareable joy of a bar cookie, making it a guaranteed showstopper for potlucks, bake sales, or any autumn gathering.

Why You’ll Love This Recipe:

  • Iconic Bakery-Style Texture & Flavor: Perfectly captures the beloved texture of a firm, handheld apple slice with a buttery crust and spiced filling.
  • One Dough, Two Layers: The same simple dough forms both the perfect base and the crumbly topping, simplifying the process without sacrificing complexity.
  • Portable & Shareable: Neat, sturdy squares are ideal for packing in lunches, taking to gatherings, or gifting.
  • Make-Ahead Friendly: Tastes even better the next day and holds its texture beautifully, making it perfect for preparing ahead.
  • Crowd-Pleasing Comfort: A universally adored dessert that combines the best elements of apple pie and a crumble bar.

Ingredients:

For the Crust & Crumble Topping:
2 ½ cups (312g) all-purpose flour, spooned and leveled
¾ cup (150g) granulated sugar
¾ cup (150g) packed light brown sugar
1 teaspoon baking powder
½ teaspoon fine sea salt
1 cup (2 sticks / 226g) cold unsalted butter, cubed
1 large egg, lightly beaten
1 teaspoon pure vanilla extract

For the Apple Filling:
6 cups (about 700g) peeled, cored, and thinly sliced apples (Granny Smith or a mix with Honeycrisp)
½ cup (100g) granulated sugar
¼ cup (50g) packed light brown sugar
2 tablespoons (18g) cornstarch
1 ½ teaspoons ground cinnamon
¼ teaspoon ground nutmeg
1 tablespoon fresh lemon juice
1 teaspoon pure vanilla extract

For the Classic Glaze (Optional):
1 cup (120g) powdered sugar, sifted
2–3 tablespoons milk or cream
½ teaspoon pure vanilla extract

Instructions:

Step 1: Preheat and Prepare Pan
Preheat your oven to 350°F (175°C). Line a 9×13-inch metal baking pan with parchment paper, leaving an overhang on the two long sides for easy removal. Grease any exposed parts of the pan.

Step 2: Make the Cookie Dough Base
In a large bowl, whisk together the flour, both sugars, baking powder, and salt. Using a pastry cutter, two forks, or your fingertips, cut in the cold butter cubes until the mixture resembles coarse, pea-sized crumbs. Stir in the beaten egg and vanilla extract with a fork until a soft, crumbly dough comes together. It will be moist but not sticky.

Step 3: Press the Crust
Transfer about two-thirds (roughly 3 ½ cups) of the dough mixture into the prepared pan. Press it very firmly and evenly into the bottom to form a solid crust layer. Use the bottom of a measuring cup to help compact it.

Step 4: Prepare the Apple Filling
In another large bowl, combine the sliced apples, both sugars, cornstarch, cinnamon, nutmeg, lemon juice, and vanilla. Toss vigorously until the apples are evenly and thoroughly coated. Let the mixture sit for 5 minutes, then toss again.

Step 5: Assemble the Slices
Spread the apple mixture evenly over the pressed crust, leaving behind any excess liquid that hasn’t been absorbed (this prevents a soggy crust). Take the remaining one-third of the dough and crumble it evenly with your fingers over the top of the apples, creating a varied, pebbly texture.

Step 6: Bake
Bake in the preheated oven for 45 to 55 minutes, or until the topping is deep golden brown and the filling is visibly bubbling thickly around the edges.

Step 7: Cool Completely (Crucial Step)
Place the pan on a wire rack and allow it to cool completely, for at least 2 hours and preferably 3-4 hours. This is essential for the filling to set and the bars to be sliced cleanly.

Step 8: Glaze and Slice
Once completely cool, lift the entire slab out of the pan using the parchment paper. For the glaze, whisk the powdered sugar, 2 tablespoons of milk, and vanilla until smooth. Add more milk, a teaspoon at a time, until a thick but pourable consistency is reached. Drizzle in lines over the slab. Let the glaze set for 15 minutes, then use a sharp knife to cut into squares or rectangles.

Tips:

  • Apple Choice is Key: Use firm, tart apples like Granny Smith for structure and flavor. Mixing in 1-2 Honeycrisp or Braeburn apples adds pleasant sweetness and complexity.
  • Press the Crust Firmly: A well-compacted crust is the foundation. It should feel solid when pressed; this prevents crumbling when sliced.
  • Slice Apples Thinly and Evenly: Aim for ¼-inch thick slices for even cooking and a cohesive filling.
  • Don’t Skip the Cooling Time: Slicing while warm will result in a messy, runny filling. Patience is required for perfect bakery-style squares.
  • Thicken the Filling: If your apples are very juicy, you can increase the cornstarch by ½ tablespoon to ensure a firm set.

Storage Options:

  • Room Temperature: Store glazed or unglazed slices in a single layer in an airtight container at cool room temperature for up to 2 days.
  • Refrigerator: For longer storage, keep in the refrigerator for up to 5 days. The texture remains excellent.
  • Freezing: Freeze unglazed, fully cooled slices on a parchment-lined tray until solid, then transfer to a freezer bag or container. Freeze for up to 3 months. Thaw overnight in the refrigerator and glaze before serving, if desired.
  • Make-Ahead: The entire slab can be baked, cooled, and stored (unglazed) at room temperature for 1 day or refrigerated for 2 days before glazing and serving.

Chicago-Style Bakery Apple Slices are a masterpiece of nostalgic baking. They deliver the soul-warming comfort of homemade apple pie in a uniquely sturdy, shareable, and utterly delicious form that is sure to become a cherished recipe in your collection.

Creamy Chipotle Chicken Soup

0

Creamy Chipotle Chicken Soup is a bold, vibrant fusion of comfort and spice, a dish that masterfully layers smoky, earthy chipotle heat with the rich, soothing creaminess of cheese and heavy cream. This recipe is a robust, one-pot wonder that begins with a colorful, aromatic base of sautéed bell peppers, onions, and jalapeño, building a foundational sweetness and subtle heat. Into this base, whole chicken breasts are gently poached in a deeply seasoned broth of Rotel tomatoes, spicy tomato sauce, and the secret weapon—adobo sauce from canned chipotles. This smoky, complex sauce permeates every element of the soup, creating a rich, flavorful bath that cooks the chicken to succulent tenderness while infusing the broth with its distinctive character. The result is a soup with a remarkable depth that feels both hearty and sophisticated.

The true brilliance of this recipe lies in its transformative finish and perfect balance. After shredding the tender, spice-infused chicken and returning it to the pot, the soup undergoes its final, luxurious metamorphosis. The addition of heavy whipping cream and sharp cheddar cheese, stirred in off the heat, creates a velvety, cohesive emulsion that tames the chipotle’s fire without dulling its vibrant flavor, wrapping the spices in a blanket of creamy richness. This soup is endlessly customizable, inviting a confetti of fresh garnishes—cool sour cream, creamy avocado, bright cilantro, and a squeeze of lime—that allow each diner to create their perfect, balanced bowl. It’s a complete, satisfying meal that delivers restaurant-level complexity with straightforward, comforting ease.

Why You’ll Love This Recipe:

  • Deep, Smoky-Spicy Flavor: The adobo sauce provides an irreplaceable, complex smokiness that elevates this soup far beyond ordinary chicken soup.
  • Creamy & Comforting Texture: The blend of heavy cream and melted cheddar creates a luxuriously smooth, velvety broth that’s incredibly satisfying.
  • Easy One-Pot Meal: Everything cooks in a single Dutch oven, from sautéing vegetables to poaching chicken, making cleanup a breeze.
  • Fully Customizable Heat: Control the spice level by adjusting the jalapeño and adobo sauce to suit your preference, from mild to fiery.
  • Perfect for Garnishing: A fun, interactive meal where everyone can top their bowl with their favorite fresh ingredients for a perfect finish.

Ingredients:

For the Soup Base:
1 tablespoon olive oil
1 cup yellow onion, chopped
2 cups bell pepper (any color), chopped
1 jalapeño pepper, seeded and finely diced
3 cloves garlic, finely minced

For the Spice Blend:
1 tablespoon chili powder
2 teaspoons smoked paprika
2 teaspoons ground cumin
2 teaspoons garlic powder
2 teaspoons onion powder
1 teaspoon kosher salt

For the Braising Liquid & Protein:
2 large boneless, skinless chicken breasts (about 1.5 lbs total)
2 (10-ounce) cans Rotel (diced tomatoes with green chilies), undrained
1 (8-ounce) can spicy tomato sauce
3 cups low-sodium chicken broth
1.5 tablespoons adobo sauce (from a can of chipotle peppers in adobo)

For the Creamy Finish:
1/2 cup heavy whipping cream
2 cups (8 oz) shredded sharp cheddar cheese

For Garnish (Optional):
Sour cream
Diced avocado
Fresh cilantro, chopped
Lime wedges
Tortilla strips

Instructions:

Step 1: Sauté the Aromatics
In a large Dutch oven or heavy-bottomed pot, heat the olive oil over medium heat. Add the chopped onion, bell pepper, and jalapeño. Sauté for 6-8 minutes, until the vegetables have softened.

Step 2: Bloom the Spices
Add the minced garlic and cook for 30 seconds until fragrant. Add all the dried spices (chili powder, smoked paprika, cumin, garlic powder, onion powder, and salt). Stir constantly for 1 minute to toast the spices and unlock their full flavor.

Step 3: Braise the Chicken
Add the whole chicken breasts to the pot. Pour in the undrained Rotel, spicy tomato sauce, chicken broth, and adobo sauce. Stir to combine and ensure the chicken is submerged. Bring the mixture to a simmer over medium-high heat.

Step 4: Simmer to Cook Through
Once simmering, reduce the heat to low, cover the pot with a lid, and let it cook gently for 20-25 minutes, or until the chicken is cooked through and tender.

Step 5: Shred the Chicken
Using tongs, remove the chicken breasts to a clean plate or cutting board. Use two forks to shred the chicken into bite-sized pieces. Return all the shredded chicken to the pot.

Step 6: Add Cream and Cheese
Turn off the heat. Stir in the heavy whipping cream. Then, add the shredded cheddar cheese one handful at a time, stirring until fully melted and incorporated before adding the next. The residual heat is enough to melt the cheese without curdling the cream.

Step 7: Adjust and Serve
Taste the soup and adjust seasoning with additional salt if needed. Ladle into bowls and serve immediately with your chosen garnishes.

Tips:

  • Adobo Sauce is Key: This is the flavor soul of the soup. Start with 1.5 tablespoons and adjust upward if you love more heat and smoke. For more punch, mince 1-2 chipotle peppers from the can and add them with the sauce.
  • Shred Your Own Cheese: Pre-shredded cheese contains anti-caking agents that can make your soup grainy. For the smoothest texture, shred a block of cheddar yourself.
  • Control the Heat: For a milder soup, omit the jalapeño seeds and ribs. For more heat, leave them in or add an extra jalapeño.
  • Don’t Boil After Adding Dairy: Once the cream and cheese are added, avoid bringing the soup back to a boil, as this can cause the dairy to separate.
  • Chicken Thighs Alternative: For even more flavor and juiciness, substitute boneless, skinless chicken thighs. They may require a slightly longer cooking time.

Storage Options:

  • Refrigerator: Store cooled soup in an airtight container in the refrigerator for up to 4 days. The soup will thicken when cold.
  • Reheating: Reheat gently on the stovetop over low heat, stirring frequently. Do not boil. If the soup has thickened too much, add a splash of chicken broth or milk to loosen it.
  • Freezing: This soup freezes reasonably well, but the texture of the dairy may change slightly. Freeze for up to 2 months. Thaw overnight in the refrigerator and reheat gently, stirring well to recombine.
  • Meal Prep: This soup is perfect for weekly lunches. Portion into individual containers with garnishes packed separately.

Creamy Chipotle Chicken Soup is a triumph of bold flavors and comforting textures. It’s a uniquely satisfying dish that wraps you in warmth and spice, proving that the most memorable meals are often those that dare to be both fiery and gentle.

Coconut Rum Pie

0

Coconut Rum Pie is a sublime tropical escape in dessert form, a pie that masterfully balances rich, creamy custard with the heady, aromatic notes of rum and toasted coconut. This recipe elevates the classic custard pie into an extraordinary treat, where a single layer of sweetened shredded coconut resting at the bottom of the crust becomes delicately toasted during baking, creating a fragrant, chewy foundation. The filling is a luscious emulsion of eggs, coconut cream, sugar, and butter, elevated with a generous pour of dark or spiced rum and a hint of coconut extract. As it bakes, this mixture transforms into a perfectly set, velvety custard that is firm yet yielding, sweet but nuanced, with the rum’s warmth weaving through every bite without overwhelming the delicate coconut essence.

The brilliance of this pie lies in its elegant simplicity and the sophisticated flavor profile it achieves with minimal effort. It requires no pre-cooking of the filling; a simple whisk-and-pour technique allows the ingredients to harmonize in the oven. The rum doesn’t just add flavor—it cuts the inherent sweetness and adds a complex, adult depth that distinguishes this pie from ordinary coconut confections. The final result, especially when garnished with a dollop of freshly whipped cream and a sprinkle of toasted coconut, is a stunning centerpiece dessert that feels both indulgent and refined. It’s the perfect finale for a summer gathering or a cozy holiday meal, offering a taste of the islands with every silky, fragrant slice.

Why You’ll Love This Recipe:

  • Incredibly Creamy & Rich Texture: The custard filling sets to a smooth, velvety consistency that melts in your mouth.
  • Sophisticated Tropical Flavor: The perfect harmony of sweet coconut and warm, aromatic rum creates a uniquely adult and delicious dessert.
  • Surprisingly Simple to Make: A straightforward, no-cook filling comes together in minutes with just a whisk and a bowl.
  • Elegant & Impressive Presentation: This pie looks as beautiful as it tastes, making it perfect for special occasions and entertaining.
  • Make-Ahead Perfection: Can be baked a day in advance, allowing the flavors to meld and making it a stress-free choice for hosts.

Ingredients:

For the Filling:
1 unbaked 9-inch deep-dish pie crust (homemade or refrigerated)
3/4 cup (about 60g) sweetened shredded coconut
3/4 cup (150g) granulated sugar
1/2 cup (1 stick / 113g) unsalted butter, melted and slightly cooled
1/2 cup (120ml) whole milk
3 large eggs, at room temperature
1/4 cup (60ml) coconut cream (not cream of coconut)*
1/4 cup (60ml) dark rum or spiced rum (like Captain Morgan)
1 teaspoon pure vanilla extract
1/2 teaspoon coconut extract (optional but recommended)
1/4 teaspoon fine sea salt

For Serving (Optional):
Sweetened whipped cream
Toasted coconut flakes

Instructions:

Step 1: Preheat and Prepare Crust
Preheat your oven to 350°F (175°C). Place the unbaked pie crust in a standard 9-inch pie plate, crimping the edges as desired. Place the pie plate on a rimmed baking sheet (this makes handling easier and catches any potential drips).

Step 2: Add the Coconut Layer
Sprinkle the 3/4 cup of shredded coconut evenly over the bottom of the pie crust, creating a thin, uniform layer.

Step 3: Make the Custard Filling
In a large mixing bowl, whisk together the granulated sugar and melted butter until combined. Whisk in the milk, followed by the eggs, one at a time, ensuring each is fully incorporated before adding the next. Add the coconut cream, rum, vanilla extract, coconut extract, and salt. Whisk vigorously until the mixture is completely smooth, homogenous, and slightly frothy.

Step 4: Assemble and Bake
Slowly and carefully pour the custard filling over the coconut layer in the pie crust. The coconut will float up slightly, which is fine.

Step 5: Bake to Perfection
Place the baking sheet with the pie in the preheated oven. Bake for 40-50 minutes. The pie is done when the edges are puffed and set, the center jiggles only slightly like Jell-O when gently shaken, and the top is a uniform light golden brown. A toothpick inserted about 2 inches from the edge should come out clean.

Step 6: Cool Completely
Remove the pie from the oven and transfer it (on the baking sheet) to a wire cooling rack. Let it cool completely at room temperature for at least 3 hours. The filling will finish setting as it cools. For best results, refrigerate for 1-2 hours before slicing.

Step 7: Garnish and Serve
If desired, garnish slices with a dollop of whipped cream and a sprinkle of toasted coconut. Use a sharp, thin-bladed knife dipped in hot water for clean slices.

Tips:

  • Coconut Cream vs. Cream of Coconut: Ensure you use coconut cream, which is unsweetened and very thick, often found in a can. Do not use “Cream of Coconut,” which is sweetened and used for cocktails like piña coladas.
  • Room Temperature Ingredients: Using room-temperature eggs and milk helps them incorporate smoothly into the melted butter, preventing the butter from solidifying into small lumps.
  • Don’t Overbake: The center should still have a slight jiggle when you remove it from the oven; it will set fully as it cools. Overbaking will cause cracking and a rubbery texture.
  • Toasting Coconut for Garnish: Spread sweetened shredded coconut on a baking sheet and toast at 350°F for 5-8 minutes, stirring once, until golden brown. Watch closely as it burns easily.
  • Rum Note: The alcohol cooks off, leaving only the flavor. For a non-alcoholic version, substitute an additional 1/4 cup of coconut cream and 1/2 teaspoon of rum extract.

Storage Options:

  • Refrigerator: Cover the cooled pie tightly with plastic wrap or store in an airtight container. It will keep in the refrigerator for up to 4 days.
  • Freezing: This pie freezes well. Wrap the completely cooled pie tightly in plastic wrap, then in foil. Freeze for up to 2 months. Thaw overnight in the refrigerator before serving.
  • Make-Ahead: This is an ideal make-ahead dessert. Bake and cool completely the day before you need it. Store covered in the refrigerator until ready to serve.

Coconut Rum Pie is a decadent, flavor-packed dessert that delivers a taste of paradise with an elegant twist. It’s surprisingly simple to create yet impressively complex in flavor, making it a guaranteed showstopper for any table.

Quick and Easy Broccoli Cheddar Soup

0

Quick and Easy Broccoli Cheddar Soup is a masterful rendition of the beloved classic, delivering the rich, creamy, and deeply comforting flavors of a slow-simmered soup in a fraction of the time. This recipe skillfully builds a robust foundation by starting with a traditional roux—butter and flour cooked to a pale blonde—which guarantees a velvety, lump-free base that beautifully supports the sharp cheddar without separating. The aromatic sauté of onions and garlic adds a sweet, savory depth, while a whisper of nutmeg, an inspired and traditional touch, unlocks a warm, complex background note that elevates the entire pot. The vegetables are simmered just to tender-crisp perfection, ensuring the broccoli retains its vibrant color and fresh bite, offering a satisfying textural contrast to the luxurious, creamy broth.

The brilliance of this soup lies in its flawless technique and efficient timeline, making it an achievable weeknight triumph. By incorporating the cheese and cream off the direct heat, the recipe protects the dairy from curdling, allowing the cheddar to melt into silky, cohesive ribbons rather than a greasy pool. The final garnish of crispy bacon adds a necessary salty, smoky crunch that cuts through the richness, creating a perfect, balanced spoonful. This soup is the epitome of cozy sophistication—it’s substantial enough to be a meal on its own with a crusty bread roll, yet elegant in its simplicity. It proves that with a handful of quality ingredients and careful, simple steps, you can create a restaurant-quality comfort food staple right in your own kitchen, any night of the week.

Why You’ll Love This Recipe:

  • Creamy, Restaurant-Quality Texture: The roux-based method ensures a luxuriously smooth, velvety broth that clings perfectly to the vegetables.
  • Quick Weeknight Wonder: From start to finish in under 45 minutes, this soup delivers deep flavor without hours of simmering.
  • Perfectly Balanced Flavors: The sharp cheddar, sweet vegetables, and hint of nutmeg create a sophisticated and deeply satisfying taste profile.
  • Hearty & Satisfying Meal: Packed with protein, vegetables, and rich dairy, it’s a complete, comforting meal in a bowl.
  • Customizable & Forgiving: Easily adapt with cauliflower, different cheeses, or a splash of hot sauce for a personal twist.

Ingredients:

For the Soup Base:
4 tablespoons (1/2 stick / 57g) unsalted butter
1 medium yellow onion, finely chopped
3 cloves garlic, minced
1/4 cup (31g) all-purpose flour
4 cups (946ml) low-sodium chicken or vegetable broth
1/2 teaspoon kosher salt, plus more to taste
1/2 teaspoon freshly ground black pepper
1/4 teaspoon ground nutmeg (highly recommended)

For the Vegetables & Finish:
2 medium carrots, peeled and diced into small pieces
3 cups (about 1 large head) broccoli florets, cut into bite-sized pieces
2 cups (8 oz / 226g) shredded sharp cheddar cheese
1 cup (240ml) heavy cream or half-and-half

For Garnish:
3 slices thick-cut bacon, cooked until crisp and crumbled
Extra shredded cheddar cheese

Instructions:

Step 1: Build the Flavor Base
In a large Dutch oven or heavy-bottomed pot, melt the butter over medium heat. Add the chopped onion and cook, stirring occasionally, for 5-7 minutes until softened and translucent. Reduce the heat to medium-low. Add the minced garlic and cook, stirring constantly, for 1 minute until fragrant.

Step 2: Create the Roux
Sprinkle the flour over the onion and garlic mixture. Cook, stirring constantly with a wooden spoon, for 2 full minutes. This cooks the raw flour taste and forms the thickening base for your soup.

Step 3: Whisk in the Broth
Gradually pour in the chicken broth while whisking constantly to prevent any lumps from forming. Add the salt, pepper, and nutmeg. Increase the heat to medium-high and bring the mixture to a gentle boil, whisking frequently.

Step 4: Simmer the Vegetables
Once boiling, reduce the heat to maintain a steady simmer. Add the diced carrots. Simmer, uncovered, for 10 minutes. Then, add the broccoli florets and continue to simmer for an additional 5-7 minutes, or until both the carrots and broccoli are just tender.

Step 5: Finish with Cream and Cheese
Remove the pot from the heat. Important: Let the soup cool for 1-2 minutes off the heat. Gradually begin adding the shredded cheddar, a handful at a time, stirring until fully melted before adding the next. Once all cheese is incorporated, slowly stir in the heavy cream.

Step 6: Final Seasoning and Serve
Taste the soup and adjust seasoning with additional salt and pepper if needed. If the soup is too thick, you can thin it with a splash of extra broth or milk. Ladle into bowls and garnish generously with crumbled bacon and a pinch of extra shredded cheddar. Serve immediately.

Tips:

  • Shred Your Own Cheese: Pre-packaged shredded cheese contains anti-caking agents that can make your soup grainy. For the smoothest melt, shred a block of sharp cheddar yourself.
  • Control the Heat: Adding the cheese and cream off the direct heat is crucial to prevent the dairy from separating or curdling.
  • Don’t Overcook the Broccoli: Add it towards the end of cooking to preserve its bright green color and pleasant texture.
  • The Nutmeg Secret: Don’t skip the nutmeg! It’s a classic pairing with creamy cheese sauces and adds a subtle, warm complexity that makes the soup taste authentic.
  • Thickness Preference: For a thicker soup, let it simmer uncovered for a few extra minutes after adding the vegetables. For a thinner soup, add more broth when adding the cream.

Storage Options:

  • Refrigerator: Store cooled soup in an airtight container in the refrigerator for up to 3-4 days. The soup will thicken considerably when cold.
  • Reheating: Reheat gently on the stovetop over low heat, stirring frequently. Do not boil. Add a splash of broth or milk to return it to your desired consistency. Microwave reheating can be uneven and may cause separation.
  • Freezing: This soup does not freeze well due to the dairy content, which can separate and become grainy upon thawing and reheating.
  • Make-Ahead: You can prepare the soup base (through Step 4, cooking the vegetables) up to a day in advance. Cool, cover, and refrigerate. When ready to serve, reheat the base gently, then proceed with adding the cheese and cream off the heat.

Quick and Easy Broccoli Cheddar Soup is the ultimate cozy culinary hug. It transforms simple, wholesome ingredients into a creamy, cheesy, and utterly satisfying masterpiece with minimal effort, proving that the best comfort food doesn’t have to be complicated.

Southern Ham and Brown Beans

0

Southern Ham and Brown Beans is the very soul of rustic, nourishing comfort food—a humble dish that, through patience and simplicity, achieves a depth of flavor and satisfaction that belies its modest ingredients. This recipe is a testament to the magic of slow cooking, where dried pinto beans transform from hard, earthy pellets into creamy, tender morsels, all while absorbing the rich, smoky essence of a ham hock or bone. The process begins with a ceremonial soak, an act of preparation that rehydrates the beans and ensures even cooking. Simmered for hours with nothing more than chopped onion, garlic, a bay leaf, and the precious ham bone, the pot develops a complex, savory broth that is both light and profoundly meaty. The smoked paprika, while optional, is a whisper of genius, echoing the smokiness of the ham and adding a layer of warmth that ties the entire pot together.

The brilliance of this dish lies in its elegant economy and the profound connection it fosters to traditional, home-cooked meals. It is a recipe of transformation, where water, beans, and a bony piece of ham evolve into a hearty, complete meal that nourishes both body and spirit. The final act of shredding the tender ham from the bone and stirring it back into the pot is a reward for the wait, distributing salty, savory nuggets throughout. Served steaming in a bowl, perhaps with a crumble of cornbread stirred right in, it is a meal that offers grounding, warmth, and a deep sense of contentment. It’s a dish that teaches patience, celebrates resourcefulness, and delivers a timeless, soul-satisfying bowl of pure comfort that feels like a welcome embrace.

Why You’ll Love This Recipe:

  • Deep, Soul-Satisfying Comfort: Offers the ultimate in hearty, warming, and nostalgic flavor that feels like a hug in a bowl.
  • Incredibly Economical & Resourceful: Transforms an inexpensive bag of beans and a leftover ham bone into a magnificent, generous meal.
  • Effortless, Hands-Off Cooking: Whether simmered on the stovetop or left in a slow cooker, the pot does all the work, filling your home with a heavenly aroma.
  • Perfect Make-Ahead Meal: Tastes even better the next day as the flavors continue to meld, making it ideal for meal prep or easy leftovers.
  • Nourishing & Wholesome: Packed with protein, fiber, and nutrients from simple, whole ingredients.

Ingredients:

For the Beans & Broth:
1 pound (about 2 ¼ cups) dried pinto beans or “brown beans,” rinsed and sorted
8 cups (2 quarts) cold water, plus more as needed
1 – 1 ½ pounds meaty ham hock, ham bone, or 2 cups diced leftover ham

For the Aromatics & Seasoning:
1 medium yellow onion, chopped
2 cloves garlic, minced
1 teaspoon kosher salt, plus more to taste
½ teaspoon freshly ground black pepper
½ teaspoon smoked paprika (highly recommended)
1 dried bay leaf

Instructions:

Step 1: Soak the Beans (Choose Your Method)
Overnight Soak: Place the rinsed beans in a large bowl or pot. Cover with at least 3 inches of cold water. Let soak at room temperature for 8-12 hours. Drain and rinse before cooking.
Quick Soak: In a large pot, combine the rinsed beans and enough water to cover by 2 inches. Bring to a rapid boil for 2 minutes. Remove from heat, cover, and let stand for 1 hour. Drain and rinse.

Step 2: Combine and Cook
In a large Dutch oven or heavy-bottomed pot, add the soaked (or unsoaked) beans, 8 cups of fresh cold water, the ham hock or bone, chopped onion, minced garlic, salt, pepper, smoked paprika, and bay leaf.

Step 3: Simmer to Tenderness
Stovetop Method: Bring the pot to a boil over high heat. Immediately reduce the heat to low, maintaining the gentlest possible simmer. Cover partially with a lid. Cook for 2 to 3 hours, stirring occasionally and checking that the beans remain submerged (add hot water as needed). The beans are done when they are completely tender and creamy inside.
Slow Cooker Method: Transfer everything to a 6-quart slow cooker. Cook on LOW for 7-8 hours or on HIGH for 4-5 hours, until beans are tender.

Step 4: Finish the Dish
Once the beans are tender, carefully remove the ham hock or bone and place it on a cutting board to cool slightly. Discard the bay leaf. If using a bone, shred all the meat from it using two forks. Return the shredded meat to the pot. If using diced leftover ham, simply stir it in now to warm through.

Step 5: Adjust and Serve
Taste the broth and beans. Adjust the seasoning with additional salt and pepper as needed. For a thicker broth, you can mash a small portion of the beans against the side of the pot with a spoon and stir. Ladle the hot beans and broth into deep bowls.

Tips:

  • Don’t Add Salt Too Early: If using an unsoaked “quick cook” method, wait to add salt until the beans are beginning to soften to avoid toughening the skins.
  • The Ham is Key: A smoked ham hock or bone from a baked ham provides incomparable flavor. For a lighter version, use a smoked turkey leg or wing.
  • Low and Slow Simmer: A true, gentle simmer is crucial. A rolling boil will cause the beans to break apart and the broth to become cloudy.
  • Thickness Preference: The broth will naturally thicken as it cools. For an even thicker, creamier consistency, use a potato masher to lightly mash some of the beans right in the pot before serving.
  • Acidic Ingredients: Avoid adding tomatoes, vinegar, or other acids until the beans are fully tender, as they can prevent the beans from softening.

Storage Options:

  • Refrigerator: Cool completely and store in an airtight container in the refrigerator for up to 5 days. The flavors improve dramatically.
  • Reheating: Reheat gently on the stovetop over medium-low heat, adding a splash of water if the beans have thickened too much. They can also be reheated in the microwave.
  • Freezing: This soup freezes exceptionally well for up to 3 months. Portion into freezer-safe containers, leaving room for expansion. Thaw overnight in the refrigerator before reheating.
  • Meal Prep: This is the ultimate make-ahead meal. Make a large batch on the weekend for easy, comforting lunches and dinners all week.

Southern Ham and Brown Beans is more than a recipe; it is a tradition—a slow-simmered pot of sustenance, history, and heart. It’s a dish that asks for little, gives much, and remains one of the most truly comforting meals you will ever make.

Trisha Yearwood’s Spinach Casserole

0

Trisha Yearwood’s Spinach Casserole is a legendary side dish that masterfully transforms frozen spinach into a rich, creamy, and irresistibly cheesy celebration of comfort food. This recipe, beloved for its straightforward simplicity and decadent flavor, proves that the most memorable dishes often come from humble beginnings. The magic starts with thoroughly draining the spinach—a crucial step that prevents a watery casserole and concentrates its earthy flavor. This spinach is then enveloped in a luxuriously creamy binder of sour cream and mayonnaise, which provides a tangy, velvety base that melds perfectly with the sharpness of cheddar and the salty, nutty punch of Parmesan. The addition of finely chopped onion and garlic powder adds a savory depth that elevates the entire mixture from simple to sublime, creating a cohesive filling that is both robust and comforting.

The brilliance of this casserole lies in its effortless assembly and universally appealing taste. It requires no pre-cooking of ingredients, just a simple mix-and-bake method that yields consistently spectacular results. As it bakes, the top becomes lightly golden and bubbly, while the melted butter drizzle forms a delicate, flavorful crust that adds the perfect finishing touch. The final product emerges from the oven as a warm, creamy, and deeply savory dish that strikes the ideal balance between indulgence and vegetable-forward eating. It’s the perfect companion to holiday roasts, weeknight chicken, or baked ham, offering a taste of down-home Southern hospitality that is as reliable as it is delicious. This casserole doesn’t just ask for a place at the table; it earns a standing ovation.

Why You’ll Love This Recipe:

  • Ultra-Creamy & Cheesy: A decadent, rich texture and flavor that makes spinach utterly irresistible for even the pickiest eaters.
  • Incredibly Simple to Make: No fancy techniques—just mix, spread, and bake for a foolproof side dish every time.
  • Perfect Make-Ahead Dish: Can be assembled hours in advance and refrigerated until ready to bake, making it a stress-free choice for entertaining.
  • Crowd-Pleasing Comfort Food: A beloved, classic side that complements virtually any main course and is always a hit at potlucks and family gatherings.
  • Versatile & Customizable: Easily adapt by adding artichokes, water chestnuts for crunch, or swapping in different cheeses like Monterey Jack or Gruyère.

Ingredients:

For the Casserole Base:
2 (10 oz / 280 g) packages frozen chopped spinach, thoroughly thawed
½ cup (120 ml) full-fat sour cream
½ cup (120 ml) mayonnaise
1 cup (about 100 g) shredded sharp cheddar cheese
½ cup (about 50 g) grated Parmesan cheese
¼ cup (about 30 g) finely chopped yellow onion
½ teaspoon garlic powder
½ teaspoon kosher salt
¼ teaspoon freshly ground black pepper
¼ teaspoon paprika (optional, for color and mild warmth)

For the Topping:
2 tablespoons (30 g) unsalted butter, melted

Instructions:

Step 1: Prepare the Spinach
Preheat your oven to 350°F (180°C). Lightly grease an 8×8-inch or similar 2-quart baking dish. Place the thawed spinach in a clean, thin kitchen towel or several layers of cheesecloth. Twist the towel tightly over the sink and squeeze with all your might to remove every possible drop of excess water. This step is critical for a non-watery casserole.

Step 2: Combine All Ingredients
In a large mixing bowl, place the very dry, squeezed spinach. Use a fork to break it up and separate the clumps. Add the sour cream, mayonnaise, shredded cheddar, grated Parmesan, chopped onion, garlic powder, salt, pepper, and optional paprika.

Step 3: Mix and Assemble
Stir the mixture vigorously until all ingredients are evenly and thoroughly combined into a cohesive, creamy mass. Transfer the mixture to the prepared baking dish. Using a spatula, press and spread it into a smooth, even layer.

Step 4: Add the Butter Topping
Drizzle the melted butter evenly over the entire surface of the spinach mixture.

Step 5: Bake
Bake, uncovered, in the preheated oven for 30-35 minutes. The casserole is done when it is heated through, the edges are bubbling gently, and the top is set with light golden spots.

Step 6: Rest and Serve
Remove the casserole from the oven and let it rest on a wire rack for 5-10 minutes. This allows it to set slightly for cleaner serving. Serve warm.

Tips:

  • Squeeze the Spinach DRY: This cannot be overstated. Inadequate draining is the number one reason for a runny casserole. Take the time to wring out every bit of moisture.
  • Use Full-Fat Dairy: For the best flavor and creamiest texture, use full-fat sour cream and mayonnaise. Light versions may release more water.
  • Finely Chop the Onion: A fine chop ensures the onion blends seamlessly into the creamy base without creating distracting crunchy pieces.
  • Taste Before Baking: After mixing, you can taste a small amount (it’s all cooked ingredients) and adjust the salt and pepper to your liking.
  • For a Golden Brown Top: If you prefer a deeper color, switch the oven to broil for the final 1-2 minutes, watching closely to prevent burning.

Storage Options:

  • Refrigerator: Store leftover casserole, covered tightly with plastic wrap or in an airtight container, in the refrigerator for up to 4 days.
  • Reheating: Reheat individual portions in the microwave. For larger portions, reheat in a covered oven-safe dish at 325°F (165°C) for 15-20 minutes until hot throughout.
  • Freezing: You can freeze the unbaked casserole. Assemble in a freezer-safe baking dish, wrap tightly in plastic and foil, and freeze for up to 2 months. Thaw overnight in the refrigerator before baking as directed, possibly adding a few extra minutes to the bake time. Note that the texture of the thawed, baked casserole may be slightly more watery.
  • Make-Ahead: Assemble the casserole completely (through Step 4), cover, and refrigerate for up to 24 hours before baking. You may need to add 5-10 minutes to the bake time since it will be cold.

Trisha Yearwood’s Spinach Casserole is a timeless treasure of a recipe. It turns a simple vegetable into a creamy, cheesy, crave-worthy side dish that has earned its place on countless family tables for good reason. It’s a testament to the power of a few good ingredients combined with care, resulting in pure, unpretentious, and deeply satisfying comfort food.