Pumpkin Cheesecake Bars

0

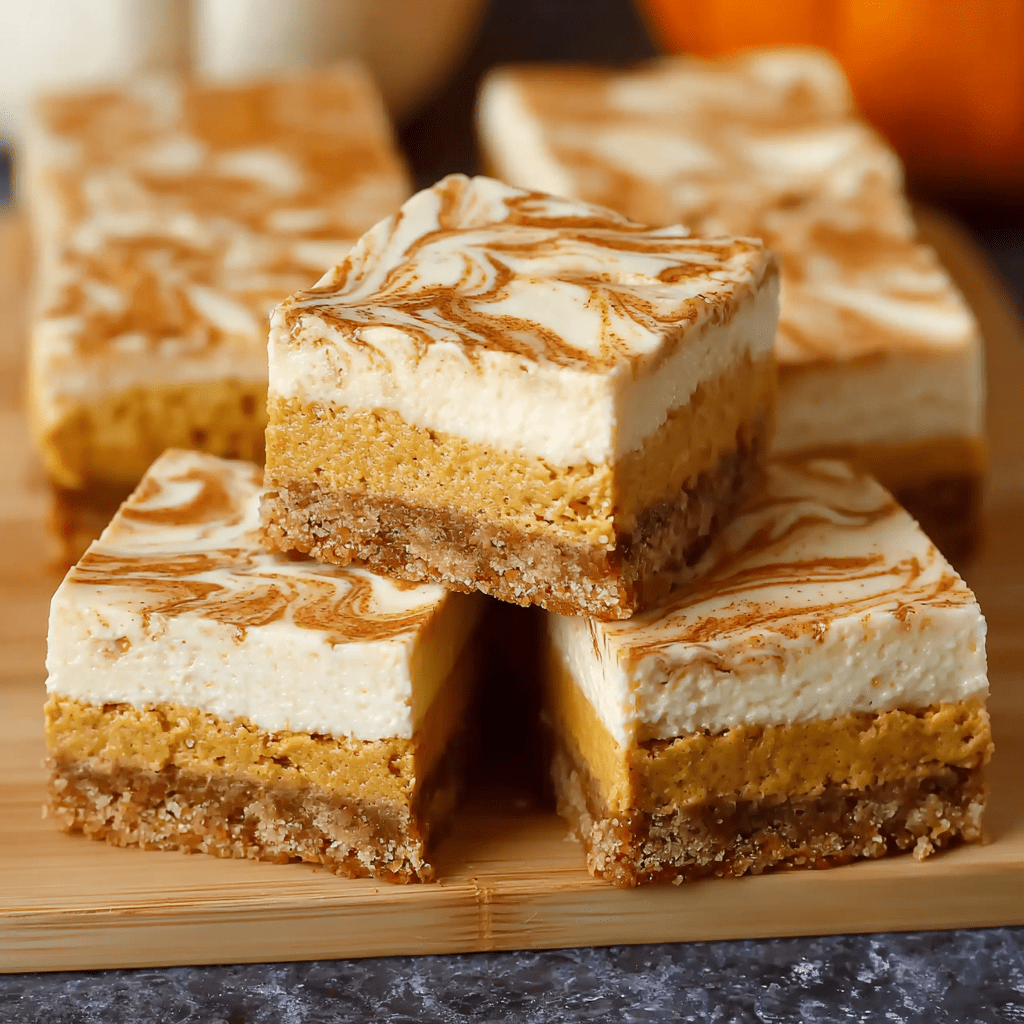
Pumpkin Cheesecake Bars are the quintessential fall dessert, masterfully combining the rich, tangy creaminess of classic cheesecake with the warm, spiced comfort of pumpkin pie. This recipe elevates the humble bar into an elegant, layered treat that is perfectly suited for holiday gatherings, potlucks, or any autumn celebration. The foundation is a buttery, sweet graham cracker crust that provides a delightful crunch against the velvety filling. The filling itself is a work of art—a beautiful swirl of pure, vanilla-scented cheesecake and spiced pumpkin batter that creates a marbled effect, ensuring every bite is a harmonious blend of both flavors. Unlike a full-sized cheesecake, these bars are simpler to make, require no water bath, and are incredibly easy to serve, making them a foolproof option for bakers of all levels.

The process of creating these bars is as satisfying as the final result. By starting with a pre-baked crust, you guarantee a crisp base that won’t become soggy. The key to a luxuriously smooth filling lies in the preparation: ensuring all ingredients, from the cream cheese to the eggs and sour cream, are at room temperature prevents a lumpy batter and encourages a perfectly even bake. The gentle swirling of the two batters is a creative step that transforms them from simple bars into a visually stunning dessert. The final product is a bar that is firm yet impossibly creamy, with the bright, spiced notes of pumpkin cutting through the decadent richness of the cheesecake. Chilling them thoroughly is the final, crucial step that allows the flavors to meld and the texture to set into a sliceable, irresistible masterpiece.

Why You’ll Love This Recipe:

  • Perfect Flavor Harmony: Experience the best of both worlds with a flawless balance of tangy cheesecake and warmly spiced pumpkin in every marbled bite.
  • Easier than a Whole Cheesecake: With no water bath required and a straightforward swirling technique, this bar form is more approachable and less fussy than baking a full cheesecake.
  • Ideal for a Crowd: Baked in a 9×13-inch pan, this recipe yields plenty of servings, making it the perfect dessert to bring to any fall party or holiday feast.
  • Make-Ahead Marvel: These bars need to chill for several hours, making them an excellent do-ahead dessert that reduces day-of stress.
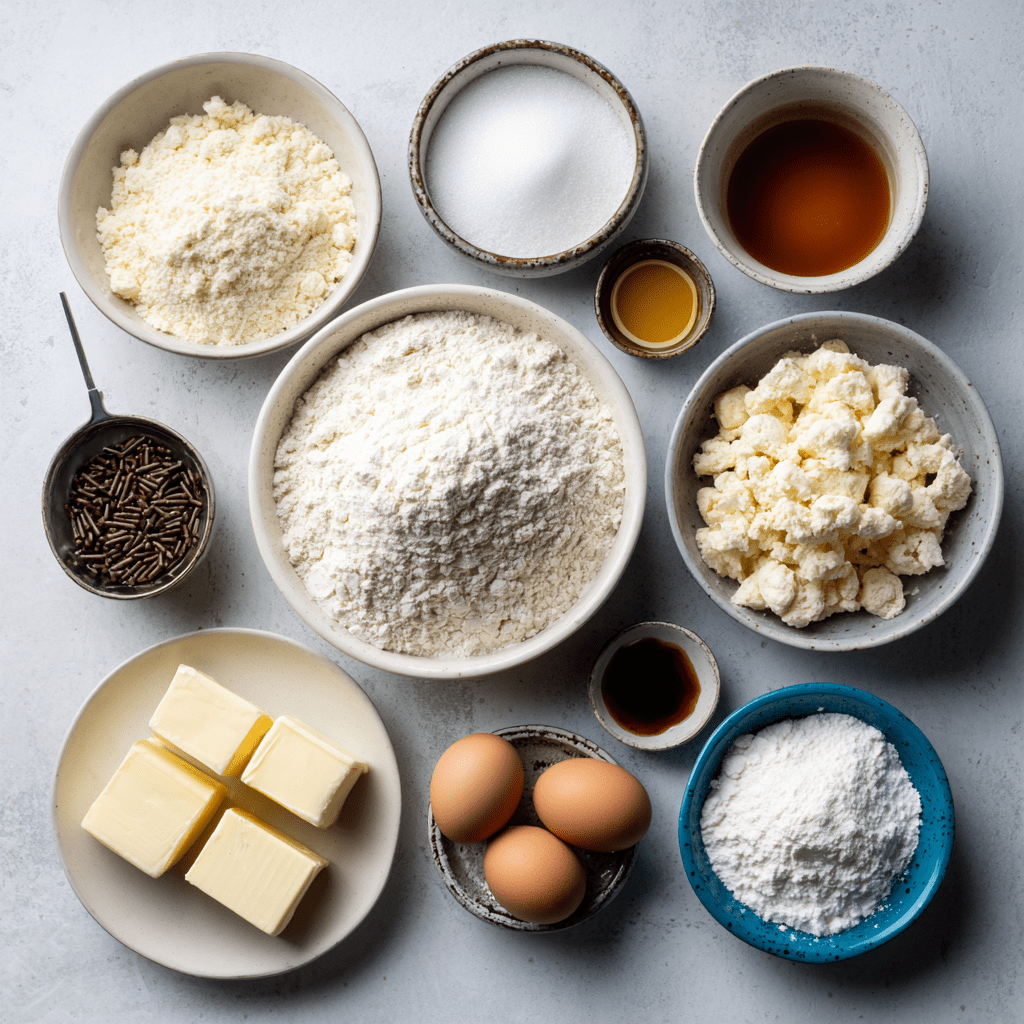
Ingredients:

Graham Cracker Crust

  • 1½ cups crushed graham cracker crumbs
  • 7 tablespoons butter, melted (unsalted or salted)
  • 2 tablespoons granulated sugar

Pumpkin Cheesecake Filling

  • ¾ cup pumpkin puree (not pumpkin pie filling)
  • 1¼ teaspoon pumpkin pie spice
  • 24 ounces cream cheese, softened to room temperature (3 standard blocks)
  • 1 cup granulated sugar
  • ¼ cup sour cream, room temperature
  • 3 large eggs, room temperature
  • 1½ teaspoons vanilla extract

Instructions:

Step 1: Prepare the Pan and Preheat Oven

  • Preheat your oven to 350°F (175°C). Spray a 9×13-inch metal baking pan thoroughly with nonstick baking spray. Line the pan by placing a sheet of parchment paper that covers the bottom and has at least a two-inch overhang on the two longer sides. This will create “handles” to lift the entire slab of bars out for clean and easy slicing.

Step 2: Make the Graham Cracker Crust

  • In a medium bowl, combine the graham cracker crumbs, melted butter, and 2 tablespoons of granulated sugar. Stir with a fork until the mixture resembles wet sand and all the crumbs are moistened. Transfer the mixture to the prepared pan and press it down firmly and evenly into the bottom. Bake for 8-10 minutes until fragrant and slightly darkened. Remove from the oven and set aside to cool slightly. Reduce the oven temperature to 325°F (163°C).

Step 3: Prepare the Pumpkin Base

  • In a medium bowl, place the ¾ cup of pumpkin puree and the 1¼ teaspoons of pumpkin pie spice. Stir together until the spice is fully incorporated into the pumpkin. Set this mixture aside.

Step 4: Make the Cheesecake Batter

  • In the bowl of a stand mixer fitted with the paddle attachment (or using a large bowl and a hand mixer), beat the softened cream cheese on medium speed until it is completely smooth, creamy, and free of any lumps. Scrape down the bowl and beater. Add the 1 cup of granulated sugar and beat on medium speed until the sugar is fully incorporated and the mixture is smooth, stopping to scrape down the bowl again.

Step 5: Incorporate Remaining Wet Ingredients

  • Reduce the mixer speed to low. Add the room-temperature sour cream and vanilla extract, mixing just until combined. Add the room-temperature eggs one at a time, mixing on low speed until each egg is just incorporated before adding the next. Be careful not to overmix at this stage. Once the last egg is mixed in, stop the mixer. The batter should be smooth and glossy.

Step 6: Create the Marbled Filling

  • Gently stir about half of the plain cheesecake batter into the bowl with the pumpkin puree. Fold it in until just combined and no white streaks remain; be careful not to overmix. You now have two batters: one plain cheesecake and one pumpkin cheesecake.

Step 7: Layer and Swirl

  • Using two spoons or a small cookie scoop, alternate adding dollops of the plain cheesecake batter and the pumpkin cheesecake batter all over the pre-baked graham cracker crust. Once all the batter is used, take a thin knife, a skewer, or a chopstick and gently swirl it through the dollops in a figure-eight motion to create a marbled effect. Be careful not to over-swirl, as this will muddle the colors, and avoid dragging the tool too deep, which could disrupt the crust.

Step 8: Bake to Perfection

  • Carefully place the pan in the preheated 325°F (163°C) oven. Bake for 30-35 minutes. The bars are done when the edges are set and puffed, and the center has a very slight jiggle when you gently shake the pan. The center will firm up as it cools.

Step 9: Cool and Chill Thoroughly

  • Remove the pan from the oven and place it on a wire rack. Allow the bars to cool completely at room temperature for at least 1 hour. Then, cover the pan with plastic wrap or foil and transfer it to the refrigerator to chill for a minimum of 4 hours, though overnight is ideal for the cleanest slices and best flavor.

Tips:

  • Room Temperature is Crucial: Using room temperature cream cheese, eggs, and sour cream is non-negotiable for a smooth, lump-free, and perfectly textured filling.
  • Don’t Overmix: Once the eggs are added, mix on low speed and only until combined. Overmixing incorporates too much air and can cause the cheesecake to crack.
  • Use Pure Pumpkin: Be sure to use 100% pure pumpkin puree, not “pumpkin pie filling,” which already has sugar and spices added.
  • Clean Slices: For picture-perfect slices, wipe your knife clean between each cut. Dipping the knife in hot water and drying it off works even better.

Storage Options:

  • Refrigerator: Store the bars in an airtight container in the refrigerator for up to 5 days.
  • Freezer: These bars freeze exceptionally well. Place the cooled and chilled bars (individually or the whole slab) on a parchment-lined baking sheet to freeze solid, then wrap tightly in plastic wrap and foil or place in a freezer bag. They can be frozen for up to 2 months. Thaw overnight in the refrigerator before serving.

Pumpkin Cheesecake Bars are a celebration of autumn in a perfectly portable, decadent form. Their stunning marbled appearance and sublime creamy texture make them a dessert that is sure to impress and become a seasonal favorite for years to come. Enjoy!

Slow Cooker Minister’s Delight

0

Slow Cooker Minister’s Delight is the epitome of humble, comforting desserts that feel like a warm embrace. This classic recipe, often passed down through generations, earns its charming name from its reputed popularity in church communities and its ability to serve a crowd with minimal effort. It’s a stunningly simple dessert that transforms basic pantry staples—a box of cake mix and a can of pie filling—into a magical, self-layering treat. The slow cooker does all the work, gently baking the dessert until the bottom is a bubbling, fruity compote and the top is a golden, crumbly, cake-like crust. It’s the perfect solution for when you need a hands-off, crowd-pleasing dessert that requires no baking skills and delivers maximum comfort and flavor.

The beauty of this dessert lies in its brilliant simplicity and the delightful contrast of textures. As it cooks low and slow, the butter melts and percolates down through the dry cake mix, hydrating it just enough to create a tender, cobbler-style topping while allowing the fruit below to become jammy and intense. Unlike an oven-baked cobbler, the slow cooker environment ensures the fruit becomes incredibly lush without any risk of burning. It’s an incredibly versatile canvas; while the classic combination is yellow cake and cherry pie filling, the possibilities are endless, allowing you to adapt it to any season or preference. Coming home to the sweet, comforting aroma of this dessert wafting through your kitchen is an experience in itself, promising a cozy end to any meal.

Why You’ll Love This Recipe:

  • Ultimate Simplicity: With just four core ingredients and a “dump-and-go” method, this is one of the easiest desserts you will ever make.
  • Hands-Off Cooking: The slow cooker does all the work, freeing up your oven and your time. It’s perfect for busy days, potlucks, or when you simply don’t want to fuss in the kitchen.
  • Heavenly Texture Contrast: Enjoy the perfect combination of a warm, soft, gooey fruit base and a sweet, crumbly, buttery topping in every single spoonful.
  • Endlessly Customizable: Easily adapt the flavors by using different cake mix and pie filling combinations to create a new dessert experience every time.

Ingredients:

  • 1 box (15.25 oz) yellow cake mix
  • 1 can (21 oz) cherry pie filling
  • 1/2 cup (1 stick) unsalted butter, cold and thinly sliced
  • Non-stick cooking spray

Optional Add-ins:

  • 1/2 teaspoon ground cinnamon or nutmeg
  • 1/4 cup chopped pecans or walnuts

Instructions:

Step 1: Prepare the Slow Cooker

  • Thoroughly spray the insert of your slow cooker with non-stick cooking spray. This is a critical step to prevent the fruit sugars from sticking and to allow for easy serving and cleanup.

Step 2: Spread the Fruit Layer

  • Pour the entire can of cherry pie filling into the prepared slow cooker. Use a spatula or the back of a spoon to spread it into a smooth, even layer that covers the bottom completely.

Step 3: Add the Dry Cake Mix

  • Sprinkle the entire box of dry yellow cake mix directly over the cherry pie filling. Spread it evenly with your fingers or by gently shaking the slow cooker. Do not stir the cake mix into the fruit. The layers must remain separate for the dessert to form correctly.

Step 4: Top with Butter Slices

  • Arrange the thin, cold slices of butter as evenly as possible over the entire surface of the dry cake mix. The goal is to cover most of the powder, as the melting butter is what will create the delicious, golden topping. If you are using any optional spices or nuts, sprinkle them evenly over the top now.

Step 5: Cook Low and Slow

  • Place the lid securely on the slow cooker and set it to the LOW heat setting. Cook for 3 to 4 hours. The dessert is done when the topping is golden brown, the edges are bubbly, and the center is set. Avoid lifting the lid during cooking, as it releases heat and steam.

Step 6: Serve Warm

  • Once cooked, turn off the slow cooker. Let the dessert sit for about 10-15 minutes to cool slightly before serving. Scoop into bowls and serve warm, ideally with a scoop of vanilla ice cream or a dollop of whipped cream.

Tips:

  • No Peeking: Resisting the urge to lift the lid is key to proper cooking time and texture. The slow cooker needs that trapped heat and moisture to work its magic.
  • Even Butter Coverage: Taking the time to distribute the butter slices evenly across the cake mix ensures there are no dry, powdery spots in the finished dessert.
  • Flavor Variations: Get creative! Try devil’s food cake mix with cherry pie filling for a Black Forest twist, or spice cake mix with apple pie filling for a fall-themed delight.
  • High-Heat Shortcut: If you are short on time, you can cook this on the HIGH setting for about 1.5 to 2 hours, but the low-and-slow method yields a superior texture.

Storage Options:

  • Refrigerator: Store any leftovers, once completely cooled, in an airtight container in the refrigerator for up to 4 days.
  • Reheating: Reheat individual portions in the microwave for 30-60 seconds. For a larger portion, reheat in a covered oven-safe dish at 300°F (150°C) for 15-20 minutes to help re-crisp the top.
  • Freezing: This dessert can be frozen for up to 2 months in an airtight container. Thaw overnight in the refrigerator before reheating. Note that the topping may soften upon thawing.

Slow Cooker Minister’s Delight is a testament to the fact that the most beloved recipes are often the simplest. It’s a warm, generous, and effortlessly delicious dessert that brings people together, proving you don’t need complicated techniques to create something truly wonderful.

Classic Meatballs and Gravy

0

There are few dishes in the culinary canon that offer the same profound sense of comfort and satisfaction as Classic Meatballs and Gravy. This is not a dish of delicate flavors or fleeting trends; it is a hearty, robust, and deeply savory meal that speaks to the soul. The magic begins with homemade meatballs, tender and flavorful, achieved through a careful balance of ground beef, aromatic onions and garlic, and just the right binders to keep them succulent. They are first seared to create a beautiful, caramelized crust, a step that is non-negotiable as it builds a foundation of rich flavor not just for the meatballs themselves, but for the entire dish. This initial browning creates those coveted fond—the little browned bits left in the pan—which become the very heart of the luxurious gravy.

The gravy in this recipe is the star that brings everything together. It is not an afterthought but a purpose-built sauce, crafted in the same skillet used to brown the meatballs, ensuring no flavor is left behind. By sautéing sliced onions until they are soft and sweet, then building a simple roux with butter and flour directly around them, we create a gravy with immense body and character. The addition of beef broth transforms this base into a silky, deeply savory sauce that the meatballs then finish cooking in, allowing them to become incredibly tender while infusing the gravy with their meaty essence. Served over a bed of creamy mashed potatoes or buttery egg noodles, this dish is the very definition of a comforting, home-cooked meal that feels like a warm embrace on a plate.

Why You’ll Love This Recipe:

  • Deep, Layered Flavors: The process of browning the meatballs and building the gravy in the same pan creates a complex, savory depth that cannot be achieved any other way.
  • The Ultimate Comfort Food: This is a hearty, satisfying, and nostalgic dish that is perfect for a cozy family dinner and is guaranteed to please even the pickiest of eaters.
  • Surprisingly Straightforward: While the process has several steps, each one is simple and teaches fundamental cooking techniques like pan-searing and making a roux-based gravy.
  • Perfect for Make-Ahead: Both the meatballs and the gravy reheat beautifully, making this an excellent candidate for meal prepping or for serving a crowd without stress.

Ingredients:

Meatballs

  • 1½ lbs ground beef (80/20 blend is ideal for flavor and juiciness)
  • ¼ cup finely minced yellow onion
  • 2 cloves garlic, minced
  • ½ cup Italian or plain breadcrumbs
  • 1 large egg
  • 2 teaspoons Worcestershire Sauce
  • ½ teaspoon kosher salt
  • ¼ teaspoon freshly ground black pepper
  • 3 tablespoons olive oil (for browning)

Meatball Gravy

  • ¼ cup butter
  • 1 medium yellow onion, quartered and cut into half-inch slices
  • ½ teaspoon garlic powder
  • 3 tablespoons all-purpose flour
  • 2 cups low-sodium beef broth
  • salt and freshly ground black pepper, to taste
  • chopped fresh thyme (for garnish)

Instructions:

Step 1: Combine Meatball Ingredients

  • In a large mixing bowl, gently combine the ground beef, finely minced yellow onion, minced garlic, breadcrumbs, egg, Worcestershire sauce, kosher salt, and black pepper. Use your hands or a fork to mix until the ingredients are just incorporated. The key here is to be gentle; overmixing will result in tough, dense meatballs.

Step 2: Form and Chill the Meatballs

  • Using a 1½-tablespoon cookie scoop or a spoon, portion out the meat mixture. Gently roll each portion between your palms to form a smooth ball. Placing the formed meatballs on a baking sheet lined with parchment paper. Once all are formed, transfer the baking sheet to the refrigerator and let the meatballs chill, uncovered, for at least 30 minutes. This crucial step helps them firm up, which prevents them from falling apart during the browning process.

Step 3: Brown the Meatballs

  • Heat 2 tablespoons of the olive oil in a large skillet over medium to medium-high heat. Once the oil is shimmering, carefully add the first batch of meatballs, being sure not to crowd the pan. Crowding will steam the meatballs instead of browning them. Cook for 1-2 minutes per side, just until they develop a deep, brown crust. They do not need to be cooked through at this point. Remove the browned meatballs to a clean plate and cover loosely with foil to keep warm. Add the remaining oil and repeat with the next batch.

Step 4: Sauté the Onions

  • Reduce the heat to medium. Add the ¼ cup of butter to the same skillet, allowing it to melt and foam. Add the sliced yellow onions and cook, stirring occasionally, for 7 to 10 minutes. You are looking for the onions to become soft, translucent, and to take on a light golden-brown color on the edges.

Step 5: Create the Roux

  • Sprinkle the cooked onions with the ½ teaspoon of garlic powder and the 3 tablespoons of all-purpose flour. Stir constantly to coat the onions and cook the flour for about 2 minutes over medium-low heat. This cooks out the raw flour taste and creates the base (a roux) for your gravy.

Step 6: Deglaze and Simmer the Gravy

  • Slowly pour in the 2 cups of low-sodium beef broth while stirring constantly with a whisk or wooden spoon. This will immediately thicken the mixture. Use your spoon to scrape up all the browned fond from the bottom of the pan—this is pure flavor. Bring the gravy to a gentle simmer and let it cook for 3-5 minutes until it has thickened to a gravy-like consistency. Season with salt and freshly ground black pepper to taste.

Step 7: Finish Cooking the Meatballs

  • Carefully add the browned meatballs back into the skillet, along with any juices that have accumulated on the plate. Submerge them in the gravy. Reduce the heat to low, cover the skillet, and let the meatballs simmer gently in the gravy for 8-10 minutes. This allows them to finish cooking through and become incredibly tender while flavoring the gravy.

Step 8: Garnish and Serve

  • Once the meatballs are cooked through (an internal temperature of 165°F is ideal), remove the skillet from the heat. Sprinkle generously with chopped fresh thyme for a fragrant, herbal note. Serve immediately, spooning the meatballs and plenty of rich onion gravy over a bed of mashed potatoes, rice, or egg noodles.

Tips:

  • Don’t Skip the Chill: Chilling the formed meatballs is the single most important step for preventing them from falling apart in the pan. It solidifies the fat, ensuring they hold their shape.
  • The Power of Fond: Those dark bits left in the pan after browning are flavor gold. Ensure you scrape them all up when adding the beef broth to build the most flavorful gravy possible.
  • Avoid Overcooking the Meatballs: The initial browning is just to create a crust. The final simmer in the gravy is where they gently cook through to perfection, keeping them juicy.
  • Customize Your Meatballs: Feel free to use a blend of ground meats, such as half beef and half pork, for an even more complex flavor. A pinch of red pepper flakes added to the meatball mix can introduce a subtle heat.

Storage Options:

  • Refrigerator: Allow the meatballs and gravy to cool completely before transferring them to an airtight container. They will keep in the refrigerator for up to 3-4 days.
  • Freezer: This dish freezes exceptionally well. Place cooled meatballs and gravy in a freezer-safe container or heavy-duty zip-top bag. They can be frozen for up to 3 months. Thaw overnight in the refrigerator before reheating.
  • Reheating: Reheat gently in a covered skillet over low heat, adding a small splash of beef broth or water if the gravy has thickened too much. They can also be reheated in the microwave, stirring occasionally to ensure even heating.

Classic Meatballs and Gravy is a testament to the power of simple, well-executed techniques. It is a humble yet profoundly satisfying dish that turns basic ingredients into a memorable meal, proving that true comfort food is built on a foundation of patience, care, and deep, savory flavor. Enjoy!

Classic Vanilla Butter Cookies

0

The Classic Vanilla Butter Cookie is the epitome of timeless baking, a delicate and sophisticated treat that has graced cookie tins and dessert tables for generations. These cookies are celebrated for their sublime, melt-in-your-mouth texture that comes from a high ratio of quality butter to flour, creating a crumbly, tender bite that simply dissolves on the tongue. Their flavor is a pure and simple celebration of butter and vanilla, unadulterated by overwhelming spices or mix-ins, making them the perfect canvas for creative decoration or a humble companion to a cup of afternoon tea. The process of piping these cookies into elegant swirls or rosettes is a ritual in itself, transforming simple ingredients into edible works of art that are as beautiful as they are delicious.

While they may appear elegant and complex, these butter cookies are surprisingly accessible for bakers of all skill levels. The recipe relies on foundational creaming and piping techniques, offering a wonderful opportunity to hone one’s baking skills. The key to their perfect texture lies in the patience required for chilling the dough, which ensures the cookies hold their intricate shape during baking and achieve that signature lightness. Whether left plain, dipped in rich chocolate, or adorned with colorful sprinkles, these cookies are incredibly versatile. They are the quintessential holiday cookie, a lovely addition to a wedding or baby shower dessert spread, or simply a rewarding project for a quiet weekend, promising a result that is both impressive and deeply satisfying to create from scratch.

Why You’ll Love This Recipe:

  • Perfect Texture: Experience the quintessential shortbread-like texture—crisp on the outside, tender and crumbly on the inside, literally melting in your mouth with every bite.
  • Elegant and Versatile: Their simple, buttery flavor makes them the perfect base for endless decoration. Dip them in chocolate, drizzle with icing, or leave them classic and plain.
  • The Art of Baking: Piping these cookies is a joyful and therapeutic process, resulting in stunning, professionally-looking treats that are sure to impress.
  • Make-Ahead Friendly: The dough can be made days in advance and stored in the refrigerator or freezer, allowing you to bake fresh cookies whenever the mood strikes.

Ingredients:

  • 2¼ cups all-purpose flour (spooned and leveled for accuracy)
  • ¼ teaspoon salt (to enhance the flavor of the butter)
  • 1 cup unsalted butter, softened to room temperature (this is the star of the show)
  • ¾ cup granulated sugar (for sweetness and structure)
  • 2 teaspoons pure vanilla extract (for aromatic warmth)
  • 1 large egg, room temperature (to bind the ingredients)
  • 2-3 teaspoons milk (if needed, to adjust the dough consistency)
  • white chocolate chips, optional (for decorating)
  • semi-sweet chocolate chips, optional (for decorating)
  • coconut oil, optional (to thin melted chocolate for dipping)
  • assorted sprinkles (for a festive finish)

Instructions:

Step 1: Combine Dry Ingredients

  • In a medium-sized bowl, place the 2¼ cups of all-purpose flour and the ¼ teaspoon of salt. Use a whisk to combine them thoroughly for about 30 seconds. This aerates the flour and ensures the salt is evenly distributed, which will create a consistent texture in your finished cookies. Set this bowl aside.

Step 2: Cream Butter and Sugar

  • In the bowl of a stand mixer fitted with the paddle attachment, or in a large bowl using a hand mixer, combine the softened, unsalted butter and the granulated sugar. Beat on medium speed for approximately 2 minutes. The mixture is ready when it becomes noticeably paler in color, has a fluffy texture, and is smooth, with the sugar granules mostly dissolved into the butter.

Step 3: Incorporate Wet Ingredients

  • To the creamed butter and sugar, add the 2 teaspoons of vanilla extract and the single room-temperature egg. Beat on medium speed for one full minute, pausing to scrape down the sides and bottom of the bowl with a rubber spatula to ensure everything is perfectly combined. The mixture may look slightly curdled at this point, which is completely normal and will resolve once the flour is added.

Step 4: Add Dry Ingredients

  • Reduce the mixer speed to low. Gradually add the reserved flour and salt mixture to the wet ingredients. Mix only until the flour streaks have just disappeared and the dough begins to clump around the paddle. It is crucial not to overmix at this stage, as overworking the dough can develop the gluten in the flour and lead to tough cookies.

Step 5: Evaluate Dough Consistency

  • This is the most critical step for successful piping. Assess the dough’s texture. It should be soft but firm enough to hold a shape. To test it, fit a piping bag with a large open star tip (such as an Ateco 826 or 827) and fill it with a portion of the dough. If the dough pipes easily and holds a defined swirl, it is perfect. If it feels too stiff and difficult to squeeze, add one teaspoon of milk and mix it in by hand. Re-test and continue adding milk one teaspoon at a time only until the dough becomes pipeable.

Step 6: Pipe and Chill

  • Line your cookie sheets with parchment paper. Pipe the dough into 1.5 to 2-inch swirls, spacing them about 2½ inches apart on the sheets to allow for slight spreading. Once a sheet is full, place it, uncovered, in the refrigerator for 30-40 minutes. This chilling period is non-negotiable, as it solidifies the butter and ensures the cookies will maintain their beautiful piped shape in the oven.

Step 7: Bake to Perfection

  • While the cookies are chilling, preheat your oven to 350°F (175°C). Bake the chilled cookies one sheet at a time in the center of the preheated oven for 12-15 minutes. They are done when the edges are set and have a very light golden brown color. The centers may still seem soft, but they will firm up as they cool.

Step 8: Cool Completely

  • Remove the baking sheet from the oven and let the cookies rest on the hot sheet for exactly 5 minutes. This allows them to set up enough to be moved without breaking. Then, using a spatula, carefully transfer them to wire cooling racks to cool completely before any decoration is attempted.

Step 9: Decorate (Optional)

  • If you wish to decorate, place your optional chocolate chips in a microwave-safe bowl with a small amount of coconut oil (about 1 teaspoon per cup of chips). Heat in 20-second increments, stirring thoroughly each time, until smooth and fluid. Dip the completely cooled cookies into the chocolate or drizzle it over the top, then immediately add sprinkles before the chocolate sets.

Tips:

  • Butter Temperature is Key: Your butter should be softened to the point where you can easily make an indentation with your finger, but it should not be shiny or melty. True room-temperature butter is essential for proper creaming and aeration.
  • Avoid Overmixing: Once the flour is added, mix only until the dough comes together. Overmixed dough will be tough and may not pipe well.
  • Consistent Piping: For evenly baked cookies, try to pipe them all to the same size and thickness. If your hand gets tired while piping, simply place the filled piping bag in the refrigerator for a few minutes to re-firm the dough.
  • Chilling is Mandatory: Do not skip or shorten the chilling time. It is the secret to cookies that are both beautifully shaped and perfectly textured.

Storage Options:

  • Airtight Container at Room Temperature: Store fully cooled, undecorated cookies in an airtight container at room temperature for up to 1 week.
  • Freezing Dough: The piped, unbaked cookie shapes can be frozen solid on a baking sheet, then transferred to a freezer bag. Bake directly from frozen, adding 1-2 minutes to the baking time.
  • Freezing Baked Cookies: Fully baked and cooled cookies can be frozen in an airtight container for up to 3 months. Thaw at room temperature.
  • Decorated Cookies: Cookies dipped in chocolate should be stored in a single layer or with parchment between layers in a cool, dry place.

Classic Vanilla Butter Cookies are more than just a confection; they are a baking tradition. Their delicate texture, rich buttery flavor, and elegant appearance make them a perennial favorite that never goes out of style. Enjoy the process of creating, baking, and sharing these little pieces of edible artistry

Ragtag Candies

0

Ragtag Candies are the ultimate no-fuss, crowd-pleasing treat, a delightful concoction that celebrates the beautiful harmony of contrasting textures and flavors. This recipe is a masterclass in simplicity, transforming a handful of commonplace pantry staples into an addictive snack that is simultaneously sweet, salty, crunchy, and creamy. Unlike finicky tempered chocolates or precise baked goods, this recipe is forgiving and fast, making it the perfect project for novice cooks, busy parents, or anyone seeking a quick and satisfying culinary win. The name itself evokes a charming, thrown-together quality, but the final product is a perfectly balanced cluster that feels both whimsical and thoughtfully crafted. It’s the kind of treat that disappears from a party platter in minutes and sparks requests for the recipe from every guest.

The true genius of Ragtag Candies lies in their versatility and universal appeal. They require no special equipment beyond a microwave and a bowl, and the entire process from start to finish can be completed in well under thirty minutes. This makes them an ideal last-minute gift, a fun activity to do with children, or a simple solution for potlucks and bake sales. The combination of crisp cereal, salty pretzels, and rich peanuts bound together by sweet white chocolate creates a symphony in every bite, satisfying multiple cravings at once. They are unpretentious, deeply satisfying, and proof that the most beloved recipes often come not from complex techniques, but from a clever and delicious combination of simple, high-quality ingredients.

Why You’ll Love This Recipe:

  • Textural Paradise: Experience the incredible contrast of crunchy cereal, crispy pretzels, and firm peanuts all smoothed together by creamy, melted white chocolate.
  • Effortlessly Simple: With no baking required and a simple melting method, this is one of the easiest candy recipes you will ever make, with virtually no room for error.
  • Infinitely Customizable: The ingredient list is a template. Swap out the peanuts for almonds, the pretzels for popcorn, or add dried fruit—the possibilities are endless.
  • Perfect for Any Occasion: Whether it’s a holiday gift, a school event, a movie night snack, or a party favor, these candies are always a hit with both kids and adults.

Ingredients:

  • 1 (12 oz) bag white chocolate chips (high-quality chips melt better and provide a superior coating)
  • 4 cups rice krispie cereal (this provides the classic light, airy crunch)
  • 3 cups pretzel sticks, slightly crushed (they add a crucial salty, sturdy crunch)
  • 1 ½ cups roasted, salted peanuts (the salty, savory element that balances the sweet chocolate)

Instructions:

Step 1: Prepare the Baking Sheet

  • Begin by lining a standard-sized baking sheet with parchment paper or a silicone baking mat. This is a critical step, as it prevents the candies from sticking and allows for easy removal once set. Set the prepared sheet aside while you work on the other components.

Step 2: Combine the Dry Ingredients

  • Take a large mixing bowl—larger than you think you need to allow for easy stirring later. Add the 4 cups of Rice Krispie cereal, the 3 cups of slightly crushed pretzel sticks, and the 1 ½ cups of roasted peanuts. Use a spoon or your hands to toss these dry ingredients together gently, ensuring they are evenly distributed throughout the mixture. This ensures every cluster will have a bit of everything.

Step 3: Melt the White Chocolate

  • Pour the entire 12-ounce bag of white chocolate chips into a medium, microwave-safe bowl. Microwave on high for 30 seconds. Remove the bowl (it may be warm) and stir thoroughly. Return it to the microwave for another 30 seconds and stir again. At this point, the chocolate should be nearly melted. Continue heating in 15-second increments, stirring vigorously after each, until the chocolate is completely smooth and fluid. Be careful not to overheat, as white chocolate is prone to seizing and becoming grainy.

Step 4: Combine Chocolate and Dry Mix

  • Pour the smoothly melted white chocolate directly over the cereal, pretzel, and peanut mixture in the large bowl. Using a sturdy spatula, begin to fold and stir the ingredients together. Work quickly but gently, turning the mixture from the bottom up to ensure every component gets a thorough and even coating of the luxurious white chocolate.

Step 5: Form the Candy Sheet

  • Immediately transfer the coated mixture onto your waiting parchment-lined baking sheet. Use the spatula or your hands (lightly greased with cooking spray to prevent sticking) to press the mixture down into a relatively even layer. You can make it as thick or as thin as you prefer, but a uniform thickness of about an inch will help it set consistently.

Step 6: Allow to Set

  • Leave the baking sheet in a cool, dry area to allow the white chocolate to fully harden. This process can take 1 to 2 hours at room temperature. For a faster set, you can place the entire sheet in the refrigerator for about 20-30 minutes. The candy is ready when the chocolate is firm to the touch and no longer glossy or soft.

Step 7: Break and Store

  • Once the large slab is completely set, lift the parchment paper to remove it from the baking sheet. Then, using your hands, break the slab into rustic, irregularly-sized pieces—this “ragged” look is part of their charm! Alternatively, you can use a knife to cut them into neater squares if desired.

Tips:

  • Prevent Seizing: Ensure all your bowls and utensils are completely dry. Even a small drop of water can cause the white chocolate to seize and become clumpy.
  • Customization is Key: Feel free to create your own signature mix. Try using milk or dark chocolate chips instead. Add in ½ cup of mini M&M’s for color, or swap the peanuts for other nuts like pecans or almonds. A sprinkle of flaky sea salt over the top before it sets elevates the sweet-and-salty profile.
  • Crushing Pretzels: To crush the pretzel sticks, place them in a zip-top bag and use a rolling pin or the bottom of a heavy pan to break them into small, bite-sized pieces. You want a variety of sizes for the best texture.
  • Working Quickly: White chocolate begins to set as it cools, so it’s important to work with efficiency once it’s melted. Have your dry mix ready to go before you even start melting the chocolate.

Storage Options:

  • Airtight Container: Store the completely set Ragtag Candy pieces in an airtight container at room temperature. They will stay fresh and maintain their crisp texture for up to 1 week. Do not refrigerate for long-term storage, as this can introduce moisture and make the cereal stale.
  • Single Layer: For the best results, place a sheet of parchment paper between layers in the container to prevent the pieces from sticking together.
  • Gifting: These candies package beautifully in cellophane bags tied with a ribbon or in decorative tins, making for a wonderfully homemade and thoughtful gift.

Ragtag Candies are a testament to the idea that the whole can be greater than the sum of its parts. This effortlessly simple recipe yields a treat that is irresistibly crunchy, perfectly balanced between sweet and salty, and guaranteed to bring joy to anyone who tries it. Enjoy the process of creating these delightful clusters and the even greater pleasure of sharing them!

Homemade Creamy Irish Cream Liqueur

0

Homemade Creamy Irish Cream Liqueur is a decadent and surprisingly simple creation that far surpasses anything you can find on a store shelf. This luxurious drink combines the smooth, oaky warmth of Irish whiskey with the rich, velvety embrace of cream and sweetened condensed milk, elevated by hints of chocolate, coffee, and vanilla. The beauty of crafting it yourself lies in the ability to control the quality of every ingredient and tailor the flavor profile to your exact preference, resulting in a liqueur that is uniquely and personally yours. It’s an enchanting project for a cozy afternoon, transforming your kitchen into a personal distillery and promising a reward that is both impressive and deeply satisfying.
Beyond its incredible taste, this homemade liqueur makes for a thoughtful and heartfelt gift. Bottled elegantly, it conveys a level of care and personal touch that a purchased item simply cannot match. The process itself is remarkably straightforward, requiring no cooking and taking mere minutes from start to finish. Unlike many complex liqueurs, this recipe is accessible to anyone with a blender, demystifying the art of cordial making. Its versatility is another key asset; enjoy it neat over ice, as the star ingredient in a Baileys-laced coffee, or drizzled over ice cream for an indulgent dessert. This recipe isn’t just about making a drink; it’s about creating an experience, a jar of liquid comfort ready to be shared and savored.

Why You’ll Love This Recipe:

  • Unbeatable Freshness: The flavor of freshly made Irish cream, with its vibrant notes of real cream and whiskey, is profoundly superior to the stabilized, store-bought versions.
  • Incredibly Simple Process: With no cooking required and a process that is essentially “dump and blend,” you can have a professional-quality liqueur ready in under 10 minutes of active work.
  • Fully Customizable: You are the master of your blend. Adjust the whiskey for strength, the coffee for depth, or the chocolate for richness to create your perfect bottle.
  • Perfect for Gifting: Beautifully bottled, this liqueur becomes a cherished homemade present for holidays, hostess gifts, or any special occasion, showing you went the extra mile.

Ingredients:

For One Batch (Makes About 3 Bottles):

  • 1 cup (240 ml) heavy cream (use a high-quality, fresh cream for best results)
  • 1 (14 oz / 400 g) can sweetened condensed milk (this provides the signature sweetness and body)
  • 1 ½ cups (360 ml) Irish whiskey (such as Jameson; a smooth, blended whiskey works perfectly)
  • 2 tablespoons chocolate syrup (or 2 teaspoons cocoa powder mixed with 1 tablespoon sugar)
  • 2 teaspoons instant coffee or espresso powder (enhances the chocolate and adds a robust backbone)
  • 1 teaspoon pure vanilla extract (use the real thing for the best flavor)
  • ½ teaspoon almond extract (optional, for a subtle, nutty flavor that complements the other notes)

Instructions:

Step 1: Prepare Your Equipment

  • Before you begin, it is crucial to ensure all your equipment is impeccably clean and completely dry. Any residual moisture or contaminants can affect the liqueur’s shelf life. Gather glass bottles or jars with airtight seals. Sterilize them by washing in hot, soapy water and rinsing thoroughly, or by running them through a dishwasher cycle. Having a funnel and a blender at the ready will make the process seamless.

Step 2: Blend the Ingredients

  • Place your blender jar on the base. To it, add the heavy cream, the entire can of sweetened condensed milk, the Irish whiskey, chocolate syrup, instant coffee, vanilla extract, and the optional almond extract. Secure the lid tightly. Begin blending on the lowest speed possible for 20–30 seconds. The goal is to simply combine the ingredients until the mixture is smooth and homogenous, not to whip it. Over-blending can incorporate too much air, cause excessive frothing, or in a worst-case scenario, start to separate the cream.

Step 3: Taste and Adjust

  • Once blended, stop the motor and use a spoon to taste your creation. This is your moment to perfect the recipe. If you desire a more pronounced coffee kick, add another half teaspoon of instant coffee and blend for just 5 more seconds to incorporate. If you want it richer and more chocolate-forward, add another tablespoon of chocolate syrup. Remember that the flavors will continue to meld and mellow slightly as they chill, so adjustments should be subtle.

Step 4: Bottle the Liqueur

  • Set your sterilized bottles on a stable surface. Using a clean funnel, carefully pour the creamy liqueur from the blender into the bottles. Leave a small amount of headspace at the top to allow for easy shaking later. Wipe the rims of the bottles clean with a damp cloth to ensure a perfect seal, then cap or stopper them tightly immediately.

Step 5: Chill and Serve

  • Place the sealed bottles in the refrigerator for a minimum of 2 hours before you plan to serve or taste. This chilling period is essential for the flavors to marry and develop a harmonious profile, and it allows the liqueur to become thoroughly cold. The ingredients may separate slightly upon standing; this is completely normal. Simply shake the bottle gently for 10-15 seconds before each use to re-emulsify the mixture and restore its creamy consistency. Serve chilled in a small liqueur glass, over ice, or in your favorite coffee.

Tips:

  • Whiskey Wisdom: While a good-quality Irish whiskey is recommended, you don’t need to use a top-shelf, aged single pot still whiskey. A reliable, smooth blended whiskey like Jameson, Tullamore D.E.W., or Bushmills is ideal and cost-effective.
  • Preventing Crystallization: If you use the cocoa powder and sugar alternative instead of chocolate syrup, ensure you blend it for the full 30 seconds to ensure the sugar and cocoa are fully dissolved into the liquid.
  • Dairy-Free Adaptation: For a dairy-free version, you can experiment with full-fat canned coconut milk (well-shaken) in place of the heavy cream and a vegan sweetened condensed coconut milk alternative. The flavor profile will be different but still delicious.
  • Spice It Up: For a festive twist, consider adding a tiny pinch of cinnamon or a drop of orange extract during the blending process to create a seasonal variation.

Storage Options:

  • Refrigerator: Due to the fresh dairy content, this liqueur MUST be stored in the refrigerator at all times. When stored in a tightly sealed bottle, it will keep for up to 2 months. Always check for any off smells or signs of spoilage before consuming if it has been stored for a long period.
  • Freezing: Freezing is not recommended, as it can cause the emulsion to break and the texture to become grainy upon thawing.
  • For Gifting: When gifting, be sure to attach a tag with the name of the liqueur, the date it was made, and clear storage instructions: “Keep Refrigerated” and “Shake Well Before Use.”

Homemade Creamy Irish Cream Liqueur is more than just a delightful spirit; it is a testament to the joy of creating something beautiful and delicious with your own hands. Its rich, complex, and comforting flavor is a true celebration in a glass, perfect for quiet moments of reflection or for sharing laughter with good company. Sláinte

Christmas Red Jam

0

Christmas Red Jam is a festive, jewel-toned spread that captures the essence of the holiday season in every spoonful. This vibrant jam combines the tart brilliance of cranberries with the sweet, sunny flavor of strawberries, creating a complex fruit profile that’s perfectly balanced by warm winter spices. The slow cooker method is the secret to its deep, developed flavor—the long, gentle cooking allows the fruits to break down completely while the spices meld together into a harmonious background note that enhances rather than overwhelms the fruit. What makes this jam truly special is how the cranberries’ natural pectin provides the perfect set without any additional thickeners, resulting in a spreadable consistency that’s neither too firm nor too runny. The deep ruby color makes it as beautiful on a holiday cheese board as it is slathered on morning toast, embodying the visual and flavorful spirit of Christmas.

The magic of this jam lies in its patient, hands-off preparation and the chemical reaction that occurs during the slow cooking process. The initial high heat helps the fruits release their juices, which then combine with the brown sugar to create a rich syrup that slowly concentrates over the cooking time. The spices—cinnamon, nutmeg, cloves, and ginger—bloom in this hot environment, releasing their essential oils and infusing the entire mixture with warmth and complexity. The instruction not to stir or open the lid is crucial, as it maintains a consistent temperature and allows the natural pectin in the cranberries to work its thickening magic without interruption. The final blending step can be adjusted to your preference: pulse briefly for a chunkier jam with fruit pieces, or blend longer for a perfectly smooth spread. As the jam cools, the pectin continues to set, resulting in the ideal spreading consistency that makes this such a versatile condiment for everything from breakfast to dessert.

Why You’ll Love This Recipe:
Festive Flavor: The perfect balance of tart, sweet, and warm spices
Natural Thickening: Cranberries provide pectin for perfect set without additives
Slow Cooker Simplicity: Hands-off cooking develops deep flavor effortlessly
Versatile Uses: Perfect for gifts, breakfast, cheese boards, or dessert toppings

Ingredients:
• 6 cups (24 oz) fresh cranberries
• 16 oz fresh strawberries, hulled and halved
• 2 cups packed brown sugar
• 1½ teaspoons ground cinnamon
• 1 teaspoon ground nutmeg
• ½ teaspoon ground cloves
• ¼ teaspoon ground ginger

Instructions:

Step 1: Combine Ingredients
• Place cranberries, strawberries, brown sugar, cinnamon, nutmeg, cloves, and ginger in the slow cooker.
• Stir thoroughly until fruits are evenly coated with sugar and spices.

Step 2: Slow Cook
• Cover and cook on HIGH for 4 hours without opening the lid or stirring.
• The mixture will become bubbly and the fruits will break down completely.

Step 3: Blend to Desired Consistency
• Carefully transfer the hot mixture to a blender (or use an immersion blender directly in the slow cooker).
• Pulse until you achieve your preferred texture—less for chunkier jam, more for smoother spread.

Step 4: Cool and Thicken
• Allow the jam to cool completely at room temperature, during which it will thicken significantly.
• Transfer to clean jars or airtight containers for storage.

Tips:
Don’t Peek: Resisting the urge to stir ensures proper thickening and flavor development
Texture Control: Blend less for rustic jam with fruit pieces, more for smooth spread
Sugar Adjustment: Taste after cooking and add more sugar if desired while jam is still warm
Gift Giving: Package in decorative jars for beautiful homemade holiday gifts

Storage Options:
Refrigerator: Store in airtight containers for up to 3 weeks
Freezing: Freeze for up to 6 months in freezer-safe containers
Canning: Process in a water bath canner for 10 minutes for shelf-stable storage

Christmas Red Jam is the ultimate holiday condiment that brings festive cheer to every meal. Its beautiful color, warm spices, and perfect sweet-tart balance make it a versatile addition to your seasonal cooking and gift-giving traditions.

Crispy Parmesan Roasted Potatoes

0

Crispy Parmesan Roasted Potatoes are a revelation in side dish simplicity, transforming humble baby potatoes into golden, cheesy perfection with an irresistible crunch. These potatoes achieve their spectacular texture through a clever technique: roasting them cut-side down on a hot baking sheet, which creates a beautifully browned, crispy crust that contrasts wonderfully with the fluffy, tender interiors. The Parmesan cheese and Italian seasoning form a savory, aromatic coating that caramelizes in the oven, creating a flavorful crust that adheres perfectly to each potato half. What makes these potatoes truly exceptional is how the Parmesan melts into a delicate, lacy crispness around the edges while the seasonings infuse every bite with garlicky, herbal notes. This dish proves that with the right method, ordinary ingredients can become extraordinary with minimal effort.

The success of these potatoes lies in understanding the science of roasting. Starting with dry potatoes ensures proper crisping, while the initial coating of oil helps conduct heat evenly and promotes browning. The Parmesan cheese serves double duty—it adds its distinctive salty, nutty flavor while also contributing to the Maillard reaction that creates that beautiful golden crust. Placing the potatoes cut-side down is the secret to achieving maximum surface contact with the hot pan, which is essential for developing that satisfying crunch. The high oven temperature quickly sears the exterior while slowly cooking the interiors to creamy perfection. These potatoes are incredibly versatile, equally at home alongside a weeknight roast chicken as they are gracing a holiday dinner table. The final garnish of fresh parsley adds a burst of color and freshness that cuts through the richness, making each bite perfectly balanced.

Why You’ll Love This Recipe:
Perfect Texture: Incredibly crispy exterior with a fluffy, tender interior
Savory Flavor: Parmesan and Italian seasoning create a deliciously seasoned crust
Easy Preparation: Simple technique with spectacular results
Versatile Side: Complements everything from casual meals to fancy dinners

Ingredients:
• 1½ lbs baby potatoes, halved lengthwise
• 2 tablespoons olive oil
• ½ teaspoon garlic powder
• ½ teaspoon onion powder
• 1 teaspoon Italian seasoning
• ½ teaspoon salt
• ¼ teaspoon black pepper
• ⅓ cup grated Parmesan cheese, plus extra for garnish
• Fresh parsley, chopped, for garnish

Instructions:

Step 1: Preheat and Prepare
• Preheat oven to 400°F (200°C). Line a baking sheet with parchment paper or lightly grease it.

Step 2: Create Seasoning Mix
• In a small bowl, combine garlic powder, onion powder, Italian seasoning, salt, black pepper, and grated Parmesan cheese.

Step 3: Coat Potatoes
• In a large bowl, toss the halved potatoes with olive oil until evenly coated.
• Sprinkle the Parmesan seasoning mixture over the potatoes and toss again until all pieces are well coated.

Step 4: Arrange for Maximum Crispiness
• Place the potatoes cut-side down on the prepared baking sheet, pressing gently to ensure full surface contact.
• Make sure the potatoes aren’t crowded to allow for proper air circulation.

Step 5: Roast to Perfection
• Roast for 35-40 minutes, or until the bottoms are deeply golden and crispy, and the centers are fork-tender.
• For extra crispiness, you can broil for the final 1-2 minutes (watch carefully).

Step 6: Serve
• Remove from oven and let cool slightly.
• Garnish with additional Parmesan cheese and fresh parsley before serving.

Tips:
Uniform Sizing: Choose similarly sized potatoes for even cooking
Dry Potatoes: Pat potatoes dry before coating for better crisping
Don’t Crowd: Leave space between potatoes for proper air circulation
Press Firmly: Ensuring good pan contact is key to crispy bottoms

Storage Options:
Refrigerator: Store in an airtight container for up to 4 days
Reheating: Re-crisp in air fryer or oven at 400°F for 5-7 minutes
Freezing: Not recommended as texture will become mealy

Crispy Parmesan Roasted Potatoes are the ultimate side dish that consistently delivers spectacular results with minimal effort. Their perfect combination of crispy texture and savory flavor makes them a guaranteed crowd-pleaser that will become a regular in your recipe rotation.

Pineapple Chicken

0

Pineapple Chicken is a vibrant, sweet-and-savory stir-fry that brings tropical flair to your dinner table with its colorful presentation and irresistible flavor combination. This recipe features tender pieces of chicken coated in a crispy cornstarch crust, then tossed with crisp bell peppers, sweet pineapple chunks, and a glossy, perfectly balanced sauce. The sauce is the true star—a harmonious blend of pineapple juice, soy sauce, brown sugar, and rice vinegar that thickens to a luxurious consistency while coating every ingredient in a sweet-tangy glaze. What makes this dish exceptional is its textural contrast: the crispy chicken, the crunchy vegetables, and the juicy pineapple create a symphony of textures that keeps every bite interesting. The fresh ginger and garlic provide an aromatic foundation that elevates the entire dish beyond typical takeout versions.

The technique behind this Pineapple Chicken ensures each component shines while coming together in a cohesive final dish. Coating the chicken in cornstarch before frying creates a delicate, crispy exterior that later soaks up the sauce without becoming soggy. Cooking the components in stages—chicken first, then vegetables, then sauce—prevents overcrowding and ensures everything cooks to perfection. The vegetables maintain a pleasant crunch that contrasts beautifully with the tender chicken and soft pineapple. The sauce thickens at the end, allowing you to control the consistency and ensure it clings perfectly to each ingredient. This method may seem involved, but it’s what separates mediocre stir-fry from restaurant-quality results. Served over steamed rice, this Pineapple Chicken delivers a taste of the tropics with the satisfying comfort of a well-executed stir-fry.

Why You’ll Love This Recipe:
Perfect Flavor Balance: Sweet pineapple and savory soy sauce create an irresistible combination
Textural Variety: Crispy chicken, crunchy vegetables, and juicy pineapple
Vibrant Presentation: Colorful peppers and pineapple make this dish visually appealing
Better Than Takeout: Fresh ingredients and controlled sweetness surpass restaurant versions

Ingredients:

Sauce:
• ¾ cup pineapple juice
• 2 tablespoons low-sodium soy sauce
• 2 tablespoons brown sugar
• 2 tablespoons ketchup
• 1 tablespoon rice vinegar
• 2 teaspoons cornstarch

Chicken and Vegetables:
• 1½ lbs. boneless, skinless chicken breasts or thighs, cut into bite-size pieces
• ⅓ cup cornstarch
• ½ teaspoon kosher salt
• ¼ teaspoon fresh ground black pepper
• 3-4 tablespoons vegetable oil, divided
• 1 medium onion, chopped
• 1 yellow bell pepper, chopped
• 1 red bell pepper, chopped
• 1 cup fresh or canned pineapple chunks
• 2 cloves garlic, minced
• 1 tablespoon grated ginger or ginger paste
• 2 green onions, thinly sliced

Instructions:

Step 1: Prepare Sauce
• In a medium bowl, whisk together pineapple juice, soy sauce, brown sugar, ketchup, rice vinegar, and cornstarch until smooth. Set aside.

Step 2: Coat and Cook Chicken
• In a large zip-top bag, combine cornstarch, salt, and pepper. Add chicken pieces and shake to coat evenly.
• Heat 2-3 tablespoons oil in a large skillet over medium heat. Working in batches, cook chicken until golden brown and cooked through, about 4-5 minutes per side. Transfer to a paper towel-lined plate.

Step 3: Cook Vegetables and Pineapple
• Heat 1 tablespoon oil in the same skillet over medium-high heat. Add onion and cook for 2 minutes.
• Add bell peppers and pineapple chunks, cooking for 2-3 minutes until slightly softened but still crisp. Transfer to a plate.

Step 4: Create and Thicken Sauce
• Reduce heat to low and add 1 teaspoon oil to the skillet. Add garlic and ginger, cooking for 1 minute until fragrant.
• Whisk the sauce mixture again and add to the skillet. Cook, stirring constantly, until the sauce thickens and becomes glossy.

Step 5: Combine and Serve
• Return chicken, vegetables, and pineapple to the skillet. Toss gently to coat with the sauce and heat through.
• Garnish with sliced green onions and serve immediately over steamed rice.

Tips:
Dry Chicken: Pat chicken pieces dry before coating for better browning
Don’t Crowd the Pan: Cook chicken in batches to ensure proper crisping
Fresh Pineapple: Use fresh pineapple when available for superior flavor and texture
Sauce Consistency: If sauce becomes too thick, thin with a tablespoon of water or additional pineapple juice

Storage Options:
Refrigerator: Store in an airtight container for up to 3 days
Reheating: Reheat gently on stovetop to maintain texture
Freezing: Not recommended as the crispy coating will become soft upon thawing

Pineapple Chicken is the ultimate sweet-and-savory dish that brings restaurant-quality flavors to your home kitchen. Its perfect balance of textures and vibrant colors make it a meal that’s as pleasing to the eye as it is to the palate, guaranteed to become a family favorite.

Creamed Spinach Pasta

0

Creamed Spinach Pasta is the ultimate comfort food fusion, marrying the rich, velvety texture of classic creamed spinach with the satisfying heartiness of pasta. This recipe transforms simple ingredients into an elegant yet approachable dish where tender pasta coils are enveloped in a luxuriously smooth béchamel-based sauce, generously studded with vibrant spinach. The sauce begins with a traditional roux—butter and flour cooked to golden perfection—which then becomes the foundation for a creamy milk base elevated by the warm, aromatic notes of nutmeg and a subtle kick of cayenne. The spinach, whether fresh or frozen, wilts into the sauce, contributing its distinctive earthy flavor and beautiful green hue. This dish represents the perfect balance between sophistication and comfort, offering restaurant-quality results with home-kitchen simplicity.

What makes this pasta exceptional is its technical precision and thoughtful layering of flavors. The initial step of cooking the pasta just shy of al dente ensures it reaches perfect texture when finished in the sauce, while the reserved starchy pasta water becomes a crucial ingredient for adjusting the sauce’s consistency. The roux must be cooked long enough to eliminate the raw flour taste but not so long that it browns, maintaining the sauce’s pale, creamy color. The addition of nutmeg—a classic partner to spinach—enhances the vegetable’s natural sweetness without dominating, while the cayenne provides just enough warmth to complement the richness without registering as spicy. As the pasta finishes cooking in the sauce, it absorbs the creamy goodness while releasing starch that further thickens and binds everything together. The result is a cohesive dish where sauce and pasta become one, each element enhancing the other in a perfect marriage of texture and flavor.

Why You’ll Love This Recipe:
Creamy Comfort: Luxurious, velvety sauce that clings perfectly to every noodle
Elegant Simplicity: Sophisticated enough for company but easy enough for weeknights
Versatile Base: Easily adapted with additional proteins or vegetables
Perfect Texture: The ideal balance between creamy sauce and al dente pasta

Ingredients:
• ½ lb dried pasta (spaghetti, rotelle, fusilli, campanelle, or rigatoni)
• 4 tablespoons unsalted butter
• 1 small white onion, finely diced
• 2 cloves garlic, minced
• 3 tablespoons all-purpose flour
• 2 cups whole milk
• ½ teaspoon ground nutmeg
• ⅛ teaspoon cayenne powder
• 250 grams frozen spinach, thawed and thoroughly drained (or 8 cups fresh spinach)
• Kosher salt and freshly cracked black pepper, to taste
• 1-1½ cups reserved pasta water

Instructions:

Step 1: Cook Pasta
• Bring a large pot of generously salted water to a rolling boil. Add pasta and cook for 1-2 minutes less than package directions for al dente (approximately 7-8 minutes).
• Reserve 1-1½ cups of starchy pasta water before draining. Set pasta aside.

Step 2: Create Flavor Base
• In a large skillet, melt butter over medium heat. Add diced onion and sauté until soft and translucent, 4-5 minutes.
• Add garlic and cook until fragrant, about 1 minute.

Step 3: Make the Roux
• Sprinkle flour over the onion mixture and cook, stirring constantly, for 1-2 minutes until the raw flour smell disappears but the mixture hasn’t browned.

Step 4: Develop the Sauce
• Gradually whisk in milk, ensuring no lumps form. Add nutmeg and cayenne. Season with salt and pepper.
• Bring to a gentle simmer and cook, stirring often, for 1 minute until slightly thickened.

Step 5: Incorporate Spinach
• Stir in the drained spinach and mix until evenly combined and heated through.

Step 6: Combine Pasta and Sauce
• Add the cooked pasta to the skillet, tossing to coat in the sauce.
• If the sauce is too thick, gradually add reserved pasta water until desired consistency is reached.

Step 7: Final Adjustments
• Taste and adjust seasoning with additional salt and pepper if needed.
• Serve immediately while hot.

Tips:
Thoroughly Drain Spinach: Squeeze frozen spinach firmly to remove excess water and prevent a watery sauce
Pasta Water Gold: The starchy pasta water helps emulsify the sauce and helps it cling to noodles
Don’t Overcook Pasta: Remember it will cook further when combined with the sauce
Fresh Spinach Option: If using fresh spinach, add it after the milk has thickened and stir until wilted

Storage Options:
Refrigerator: Store in an airtight container for up to 3 days
Reheating: Gently reheat on stove with a splash of milk or water to refresh sauce consistency
Freezing: Not recommended as the dairy-based sauce may separate upon thawing

Creamed Spinach Pasta is the ultimate comfort dish that transforms humble ingredients into something truly special. Its creamy elegance and satisfying heartiness make it equally suited for a quick family dinner or an impressive meal for guests.