Amish Sour Cream Cornbread

0

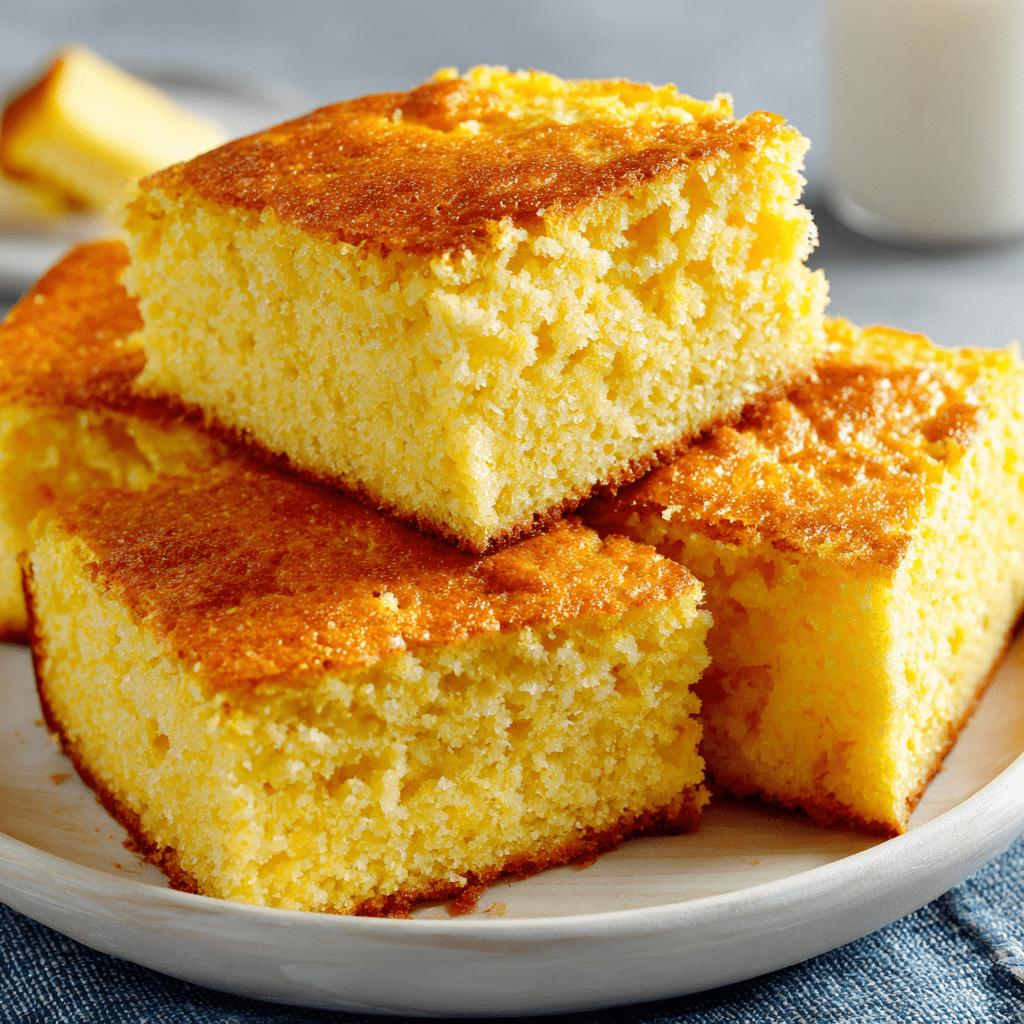
Amish Sour Cream Cornbread is a testament to the simple, wholesome, and profoundly satisfying nature of Amish cooking. This recipe moves beyond the often-divisive realm of dry or crumbly cornbread, delivering a final product that is exceptionally moist, tender, and rich with a perfect balance of sweet and savory flavors. The secret weapon, as the name implies, is the generous use of sour cream, which imparts a subtle tang and a luxuriously dense, cake-like crumb that is simply unforgettable. Unlike its Southern counterpart, this Northern-style cornbread embraces a touch of sugar, resulting in a versatile bread that can gracefully transition from a side dish for a hearty bowl of chili to a slightly sweet treat enjoyed with a pat of butter and a drizzle of honey.

This cornbread’s beauty lies in its effortless simplicity and foolproof method. The batter comes together in minutes with just two bowls and a whisk, requiring no special equipment or advanced baking skills. The combination of cornmeal and all-purpose flour creates a ideal texture—substantial enough to hold its shape but soft and never gritty. As it bakes, your kitchen will fill with a warm, buttery aroma that promises comfort. The final result is a square of cornbread with a delightfully crisp, golden-brown crust that gives way to a soft, creamy, and incredibly moist interior. It’s a humble yet perfect bread that exemplifies how a few basic pantry staples can be transformed into something truly special and beloved by all.

Why You’ll Love This Recipe:

• Unbelievably Moist & Tender: The sour cream and melted butter guarantee a rich, dense crumb that stays moist for days.
• Perfect Flavor Balance: With just the right amount of sugar, it strikes a perfect harmony between slightly sweet and savory, making it incredibly versatile.
• Effortlessly Simple: This is a one-bowl, no-mixer recipe that comes together in under 10 minutes, making it perfect for beginners and busy cooks alike.
• Crowd-Pleasing Comfort Food: Its universally appealing flavor and texture make it a guaranteed hit at potlucks, barbecues, and family dinner tables.

Ingredients:

  • 1 cup yellow cornmeal
  • 1 cup all-purpose flour
  • 1/4 cup granulated sugar
  • 1 tablespoon baking powder
  • 1/2 teaspoon salt
  • 1 cup sour cream (full-fat is recommended for best results)
  • 1/2 cup whole milk (or 2%)
  • 1/4 cup unsalted butter, melted and slightly cooled
  • 2 large eggs, at room temperature

Instructions:

Step 1: Preheat the Oven and Prepare the Pan
• Preheat your oven to 400°F (200°C). This high heat is essential for creating a beautifully crisp crust. Generously grease an 8-inch square baking dish with butter, shortening, or non-stick cooking spray.

Step 2: Combine the Dry Ingredients
• In a large mixing bowl, add the cornmeal, all-purpose flour, granulated sugar, baking powder, and salt. Whisk these dry ingredients together thoroughly until they are completely uniform in color and well combined. This ensures the baking powder and salt are evenly distributed for a consistent rise and flavor.

Step 3: Combine the Wet Ingredients
• In a separate medium bowl, combine the sour cream, milk, slightly cooled melted butter, and eggs. Whisk them together until the mixture is smooth, well-blended, and uniform. It’s important that the melted butter is not piping hot to avoid accidentally cooking the eggs.

Step 4: Mix Wet and Dry Ingredients
• Pour the wet ingredient mixture into the bowl with the dry ingredients. Using a spatula or wooden spoon, gently fold and stir the two together. Mix until the ingredients are just combined and there are no more visible dry streaks of flour. It is crucial not to overmix; a few small lumps in the batter are perfectly fine and will prevent the cornbread from becoming tough.

Step 5: Transfer to Pan and Bake
• Pour the thick batter into the prepared greased baking dish. Use the spatula to spread it evenly into all four corners and smooth the top into a uniform layer.

Step 6: Bake to Golden Perfection
• Immediately place the dish in the preheated oven. Bake for 20–25 minutes. The cornbread is done when the top is a deep golden brown, the edges have pulled away slightly from the sides of the pan, and a toothpick or cake tester inserted directly into the center comes out clean or with a few moist crumbs attached.

Step 7: Cool and Serve
• Remove the cornbread from the oven and place the pan on a wire cooling rack. Allow it to cool in the pan for at least 15-20 minutes before slicing. This resting period allows the structure to set, making it much easier to cut into clean squares. Serve warm.

Tips:

• Room Temperature Ingredients: Using room temperature eggs, milk, and sour cream helps them emulsify better with the melted butter, creating a smoother batter and a more even rise.
• Do Not Overmix: This is the most important rule for tender cornbread. Overmixing develops the gluten in the flour, leading to a tough, dense texture. Mix until just combined.
• Pan Choice: For extra crispy edges, you can use a preheated 10-inch cast-iron skillet instead of a baking dish. Add the batter to the hot, greased skillet for a fantastic crust.
• Add-Ins: Feel free to fold in 1 cup of fresh corn kernels, shredded cheddar cheese, or finely diced jalapeños into the batter for a flavorful twist.

Storage Options:

• Room Temperature: Once completely cool, store leftover cornbread in an airtight container or wrapped tightly in aluminum foil at room temperature for up to 2 days.
• Refrigerator: For longer storage, keep it in the refrigerator for up to 5 days. The sour cream helps it retain moisture beautifully.
• Freezer: This cornbread freezes excellently. Wrap individual squares or the entire loaf tightly in plastic wrap and then foil. Freeze for up to 3 months. Thaw at room temperature or warm directly in a 350°F (175°C) oven.
• Reheating: Reheat slices in a toaster oven or a conventional oven at 350°F (175°C) for 5-10 minutes to restore the crisp crust. The microwave will soften it.

Amish Sour Cream Cornbread is the ultimate humble comfort food, a reliably perfect recipe that delivers unparalleled moisture and flavor with breathtaking simplicity. It’s a timeless classic that will quickly become your go-to recipe for the perfect slice of cornbread. Enjoy!

Cheesy Scalloped Zucchini

0

Cheesy Scalloped Zucchini is a brilliantly quick and decadent side dish that reimagines the comforting, creamy goodness of traditional scalloped potatoes into a low-carb, vegetable-forward masterpiece. This recipe transforms humble zucchini into an elegant and irresistible gratin by leveraging the intense, direct heat of the broiler. Unlike classic baked casseroles that require a long stint in the oven, this method achieves a perfect contrast of textures in under 15 minutes: tender-yet-firm zucchini slices smothered in a rich, thyme-and-garlic-infused cream sauce, all topped with a gloriously golden, crispy crust of melted Gruyère cheese and buttery panko breadcrumbs. It’s the ultimate solution for when you need a sophisticated side dish that doesn’t compromise on flavor but is short on time.

The magic of this dish lies in its simplicity and powerful flavor combination. The initial broil of the zucchini drives off excess moisture, preventing a watery sauce and concentrating the squash’s natural sweetness. The sauce, while simple, is a powerhouse—the flour thickens the cream seamlessly, the Parmesan cheese adds a salty, umami depth, and the dried thyme and garlic powder provide an aromatic foundation that feels both rustic and refined. Topped with nutty, excellent-melting Gruyère and the unmatched crunch of panko, each bite offers a perfect harmony of soft, creamy, and crisp. This dish is a versatile accompaniment that pairs beautifully with everything from roasted chicken and grilled steak to seared fish, proving that eating your vegetables can be the most exciting part of the meal.

Why You’ll Love This Recipe:

• Lightning Fast: Ready from start to finish in less than 15 minutes, making it perfect for busy weeknights.
• Low-Carb & Keto-Friendly: A delicious and satisfying alternative to potato-based gratins for those watching their carbohydrate intake.
• Exceptional Textures: Achieves a perfect balance of tender zucchini, creamy sauce, and a crispy, cheesy topping.
• Elegant and Impressive: The beautiful golden-brown finish and sophisticated flavors make it worthy of a dinner party.

Ingredients:

  • Unsalted butter, softened, as needed for greasing
  • 1 lb zucchini (about 2-3 medium), thinly sliced into ¼-inch rounds
  • 2/3 cup heavy cream
  • 1 teaspoon dried thyme
  • 1/2 teaspoon garlic powder
  • 1/2 cup Parmigiano-Reggiano cheese, freshly grated
  • 1 1/2 tablespoons all-purpose flour
  • 1/2 cup Gruyere cheese, freshly grated
  • 1/3 cup panko breadcrumbs
  • Kosher salt and freshly ground black pepper, to taste

Instructions:

Step 1: Preheat the Broiler
• Position an oven rack so that it is about 6 inches from the broiler element. Preheat the broiler to high heat. This ensures the top element is intensely hot and ready to quickly brown and crisp the topping.

Step 2: Prepare the Baking Dish
• Take a shallow 9×13-inch baking dish or a rimmed sheet pan and generously grease it with the softened butter. This prevents the zucchini from sticking and adds a rich, buttery flavor to the bottom layer.

Step 3: Season and First Broil of Zucchini
• Place the thinly sliced zucchini in the prepared dish. Season generously with kosher salt and black pepper. Toss to coat evenly, then arrange them in a relatively single layer. Place the dish under the preheated broiler and broil for approximately 4 minutes, just until the zucchini is beginning to soften and release some of its moisture. This step is crucial for preventing a watery final dish.

Step 4: Prepare the Cream Mixture
• While the zucchini is under the broiler, prepare the sauce. In a small bowl, whisk together the heavy cream, dried thyme, garlic powder, freshly grated Parmigiano-Reggiano, and all-purpose flour. Whisk until the mixture is completely smooth and the flour has no lumps.

Step 5: Assemble the Gratin
• Carefully remove the baking dish from the oven. The zucchini will be hot. Pour the cream mixture evenly over the par-cooked zucchini, ensuring it seeps down between the slices. Sprinkle the freshly grated Gruyere cheese evenly over the top, followed by the panko breadcrumbs.

Step 6: Final Broil
• Return the assembled dish to the oven, under the broiler. Broil for 4-5 minutes, but watch it closely after the 3-minute mark. It is done when the top is a deep golden brown, the cheese is fully melted and bubbly, and the panko crumbs are crispy.

Step 7: Cool and Serve
• Remove the dish from the oven. Let it rest for 1-2 minutes before serving. This allows the creamy sauce to thicken slightly. Serve immediately while the topping is still crisp and the dish is hot.

Tips:

• Uniform Slicing: Use a mandoline or a sharp knife to slice the zucchini into uniform ¼-inch thick rounds. This ensures they all cook at the same rate.
• Freshly Grated Cheese is Key: Pre-shredded cheese contains anti-caking agents that prevent it from melting as smoothly. For the best sauce and topping, grate your Parmigiano-Reggiano and Gruyere from a block.
• Don’t Walk Away from the Broiler: The broiler can go from perfectly golden to burnt very quickly. Keep a close eye on the dish during the final broiling step.
• Add Fresh Herbs: For a burst of freshness, garnish the finished dish with a sprinkle of chopped fresh parsley or chives.

Storage Options:

• Not Ideal for Storage: This dish is best enjoyed immediately after cooking. The crispy topping will soften upon storage due to the moisture from the zucchini and sauce.
• Reheating (If Necessary): If you have leftovers, reheat them in a toaster oven or conventional oven at 375°F (190°C) for 5-10 minutes to try and recrisp the top. The microwave will make the topping very soft.

Cheesy Scalloped Zucchini is a testament to how a few simple ingredients and a clever cooking method can create a side dish that is far greater than the sum of its parts. It’s a quick, luxurious, and unforgettable way to enjoy summer’s most abundant squash. Enjoy

Glazed Apple Slab Pie

0

Glazed Apple Slab Pie is the ultimate dessert for feeding a crowd, a magnificent and rustic take on the classic apple pie that is as beautiful as it is delicious. This recipe leverages the convenience of store-bought puff pastry to create a stunning, large-format dessert with flaky, buttery layers that shatter with every bite, encasing a warmly spiced, sweet-tart apple filling. The “slab” style is not only easier to assemble than a traditional lattice-topped pie but also results in perfectly portioned squares that are ideal for parties, potlucks, or holiday gatherings. The final drizzle of a simple vanilla glaze adds a touch of sweetness and a beautiful finished look that makes it truly irresistible.

The genius of this dessert lies in its perfect balance of texture and flavor. The puff pastry bakes up into countless delicate, airy layers that provide a light and crisp contrast to the soft, jammy apple filling within. Using a combination of tart and sweet apples, along with warm spices like cinnamon and nutmeg, creates a filling that is deeply aromatic and complex. The addition of lemon juice brightens the entire dish, preventing it from being overly sweet. Topped with a glossy, sweet vanilla glaze that seeps into the steam vents, each square is a perfect individual serving of comfort and joy. This pie is the perfect solution when you need an impressive, crowd-pleasing dessert without the fuss of intricate pie crust work.

Why You’ll Love This Recipe:

• Feeds a Crowd: This rectangular pie is designed to be sliced into numerous servings, making it perfect for parties and large family dinners.
• Simpler Than Pie: Using puff pastry eliminates the need for making and rolling out a finicky pie dough, streamlining the entire process.
• Incredible Textures: Enjoy the fantastic contrast between the super flaky, buttery pastry and the soft, tender spiced apples.
• Make-Ahead Friendly: The pie can be assembled ahead of time and baked just before your event, and the glaze can be added at the last minute.

Ingredients:

For the pie:

  • 2 sheets puff pastry (thawed according to package instructions)
  • 5 cups thinly sliced apples (a mix of Granny Smith and Honeycrisp is ideal)
  • ½ cup granulated sugar
  • ¼ cup packed brown sugar
  • ¼ cup all-purpose flour
  • 1 teaspoon ground cinnamon
  • ¼ teaspoon ground nutmeg
  • 1 tablespoon fresh lemon juice
  • 1 egg, beaten (for egg wash)
  • Coarse sugar, for sprinkling (optional)

For the glaze:

  • 1 cup powdered sugar (confectioners’ sugar), sifted
  • 2–3 tablespoons milk (or cream)
  • ½ teaspoon vanilla extract
  • A pinch of salt

Instructions:

Step 1: Preheat the Oven and Prepare the Pan
• Preheat your oven to 400°F (200°C). This high heat is crucial for getting the puff pastry to rise properly and become golden and flaky. Lightly grease a 10×15-inch jelly roll pan or a large, rimmed baking sheet.

Step 2: Prepare the Apple Filling
• In a large mixing bowl, combine the thinly sliced apples, granulated sugar, brown sugar, all-purpose flour, ground cinnamon, ground nutmeg, and fresh lemon juice. Toss everything together until the apple slices are evenly and thoroughly coated. The flour will help thicken the juices released during baking.

Step 3: Assemble the Pastry Base
• On a lightly floured surface, gently roll out one sheet of puff pastry just enough to smooth out any folds. Carefully transfer and lay it into the bottom of your prepared pan, pressing it gently into the corners and up the sides slightly. If the pastry cracks, simply press it back together.

Step 4: Add the Apple Filling
• Spread the prepared apple filling evenly over the pastry base, ensuring it reaches all four corners. Pat it down into a relatively even layer.

Step 5: Top and Seal the Pie
• Roll out the second sheet of puff pastry to match the size of the pan. Carefully place it over the apple filling. Gently press the edges of the top and bottom pastry sheets together to seal. You can crimp them with a fork for a decorative touch. Using a sharp knife, cut several small slits (about 4-5) in the top layer of pastry. This allows steam to escape during baking, preventing the pie from becoming soggy.

Step 6: Apply the Egg Wash
• Brush the entire top surface of the pastry with the beaten egg. For an extra sparkly and crunchy top, sprinkle lightly with coarse sugar at this stage.

Step 7: Bake to Golden Perfection
• Place the pan in the preheated oven and bake for 35-40 minutes, or until the pastry is puffed and a deep golden brown color and the apple filling is bubbly around the edges.

Step 8: Prepare the Glaze
• While the pie is cooling, prepare the glaze. In a small bowl, whisk together the sifted powdered sugar, 2 tablespoons of milk, vanilla extract, and a tiny pinch of salt. Whisk until completely smooth. If the glaze is too thick to drizzle, add more milk, one teaspoon at a time, until you reach your desired consistency.

Step 9: Glaze and Serve
• Allow the pie to cool in the pan on a wire rack for at least 20-30 minutes. This allows the filling to set slightly, making it easier to slice. Drizzle the vanilla glaze over the slightly warm pie. Slice into squares or rectangles and serve warm or at room temperature.

Tips:

• Thaw Puff Pastry Properly: The best way to thaw puff pastry is in the refrigerator overnight. If you’re short on time, leave it on the counter for about 40 minutes. It should be pliable but still cold to the touch.
• Prevent Soggy Bottoms: For an even crispier bottom crust, you can pre-bake the bottom pastry layer for 5 minutes before adding the filling. Let it cool slightly before proceeding.
• Apple Selection: Using a mix of apples provides the best flavor and texture. Granny Smith offers tartness and structure, while Honeycrisp or Fuji add sweetness and soften beautifully.
• Even Slicing: For even cooking, ensure your apple slices are uniformly thin, about ¼-inch thick.

Storage Options:

• Room Temperature: Once glazed, the pie can be kept, covered loosely with foil or plastic wrap, at room temperature for up to 2 days.
• Refrigerator: For longer storage, keep the pie (un-glazed is best) in an airtight container in the refrigerator for up to 4 days. The pastry will lose its crispness but will still taste delicious.
• Reheating: Reheat individual squares in a 350°F (175°C) oven or toaster oven for 5-10 minutes to re-crisp the pastry.
• Freezing: You can freeze the unbaked pie. Assemble it completely, but do not apply the egg wash. Wrap tightly in plastic wrap and foil and freeze for up to 2 months. Bake from frozen, adding 10-15 minutes to the baking time, and brush with egg wash before baking.

Glazed Apple Slab Pie is a spectacular, hassle-free dessert that delivers all the homestyle comfort of apple pie in a format designed for sharing. Its flaky layers, spiced filling, and sweet glaze create a unforgettable treat that will have everyone coming back for seconds. Enjoy

Creamy Seafood Salad with Imitation Crab

0

Creamy Seafood Salad with Imitation Crab is a delightfully simple, refreshing, and budget-friendly dish that delivers the taste of a luxurious seafood salad without the high cost or complex preparation. This recipe transforms flaky, sweet imitation crab meat into a creamy, crunchy, and tangy salad that is incredibly versatile. The magic lies in the harmonious blend of a rich, zesty dressing—a combination of creamy mayonnaise, bright lemon juice, and sharp Dijon mustard—with the fresh, crisp textures of celery, red onion, and sweet corn. It’s a classic preparation that feels both nostalgic and effortlessly elegant, perfect for a quick lunch, a light dinner, or as a standout dish at your next potluck or picnic.

What makes this salad truly special is its ability to be customized to your personal taste and its make-ahead convenience. The optional addition of fresh dill introduces a lovely, aromatic layer that complements the sweet crab perfectly. Chilling the salad for at least 30 minutes is a non-negotiable step that allows the flavors to deeply meld together, softening the sharpness of the onion and letting the creamy dressing permeate every shred of crab. Served on a crisp bed of lettuce, in a sandwich, or with crackers, this salad is a testament to how a few humble ingredients can be combined to create something truly satisfying and delicious. It’s a no-cook recipe that requires minimal effort for maximum reward.

Why You’ll Love This Recipe:

• Quick and Easy: Requires no cooking and comes together in just 10 minutes of active prep time, making it perfect for busy days.
• Budget-Friendly: Imitation crab (surimi) is an affordable alternative to real crab that provides a similar sweet, seafood flavor and flaky texture.
• Incredibly Versatile: Enjoy it as a lettuce wrap, a sandwich or sub filling, stuffed in a tomato or avocado, or simply with crackers.
• Make-Ahead Perfect: This salad actually tastes better after chilling, making it an ideal prepare-ahead option for meals and gatherings.

Ingredients:

  • 1 pound imitation crab meat (surimi), shredded or chopped
  • 1 cup mayonnaise (best quality recommended)
  • 1 tablespoon fresh lemon juice
  • 1 teaspoon Dijon mustard
  • 1/2 cup celery, finely chopped
  • 1/4 cup red onion, finely chopped
  • 1/2 cup sweet corn kernels (canned, drained, or thawed from frozen)
  • 1 tablespoon fresh dill, chopped (optional, but highly recommended)
  • salt and freshly ground black pepper, to taste
  • lettuce leaves (Butter, Romaine, or Iceberg), for serving

Instructions:

Step 1: Prepare the Dressing Base
• In a large mixing bowl, combine the mayonnaise, fresh lemon juice, and Dijon mustard. Whisk these ingredients together until the mixture is completely smooth and homogenous. This forms the flavorful, tangy base for your salad.

Step 2: Add the Imitation Crab
• Add the shredded or chopped imitation crab meat to the bowl with the dressing. Using a rubber spatula or a large spoon, gently fold the crab into the dressing. Be careful not to break up the crab too much; you want to maintain its flaky texture while ensuring it is evenly coated.

Step 3: Incorporate Vegetables and Herbs
• Add the finely chopped celery, red onion, and sweet corn kernels to the bowl. If you are using the fresh dill, add it at this stage. Gently stir all the ingredients together until they are evenly distributed and well combined with the creamy dressing.

Step 4: Season to Taste
• Taste the salad. Season with salt and a generous amount of freshly ground black pepper according to your preference. Remember that the imitation crab and mayonnaise already contain some salt, so it’s best to add a little at a time and taste as you go.

Step 5: Chill to Meld Flavors
• Cover the bowl tightly with plastic wrap or transfer the salad to an airtight container. Refrigerate for at least 30 minutes, though 1-2 hours is ideal. This chilling time is crucial as it allows the flavors to blend together beautifully and the vegetables to slightly soften and release their flavors into the dressing.

Step 6: Serve and Enjoy
• Just before serving, give the salad a quick stir. Line a serving platter or individual plates with crisp, clean lettuce leaves. Spoon the chilled seafood salad onto the lettuce leaves for a refreshing, crunchy presentation.

Tips:

• Texture is Key: For the best texture, shred the imitation crab meat by hand along its natural grain rather than dicing it into small cubes. This mimics the flaky texture of real crab more closely.
• Soak the Onions (Optional): If you find raw red onion too pungent, you can soak the chopped pieces in a bowl of cold water for 10 minutes before adding them to the salad. This will mellow their flavor significantly.
• Customize Your Add-Ins: Feel free to get creative! Other fantastic additions include chopped hard-boiled eggs, diced avocado (add right before serving), Old Bay seasoning, capers, or even a dash of hot sauce for a little spice.
• Draining Corn: If using canned or frozen corn, be sure to drain it thoroughly or pat it dry with a paper towel to prevent excess water from diluting your creamy dressing.

Storage Options:

• Refrigerator: This salad stores exceptionally well. Keep it in an airtight container in the refrigerator for up to 3 days. The flavors will continue to develop over time.
• Freezing: Freezing is not recommended. The mayonnaise-based dressing will separate and become watery upon thawing, and the vegetables will lose their crisp texture.

Creamy Seafood Salad with Imitation Crab is a timeless, foolproof recipe that proves simplicity often leads to the most satisfying results. It’s a cool, creamy, and crunchy delight that is sure to become a go-to recipe in your repertoire. Enjoy

Marry Me Chicken Soup

0

Marry Me Chicken Soup transforms the iconic, proposal-worthy flavors of the famous Marry Me Chicken dish into a comforting, spoonable soup that is perfect for any occasion. This recipe takes all the essential elements—tender chicken, savory sun-dried tomatoes, garlic, and a creamy, Parmesan-infused broth—and simmers them together with pasta and fresh spinach to create a deeply satisfying and complete meal in a bowl. It’s the ultimate comfort food with a touch of elegance, offering the same irresistibly creamy and flavorful experience that made the original dish so beloved, but in a cozy, heartwarming format that is ideal for a chilly evening or when you need a culinary hug.

The genius of this soup lies in its layered building of flavors. By first browning the chicken, you create a fond—those delicious browned bits at the bottom of the pot—that forms a rich foundation for the broth. The sun-dried tomatoes and red pepper flakes provide a sweet, tangy, and subtly spicy backbone, which is then deepened by the umami of tomato paste and chicken broth. Finally, the addition of heavy cream and freshly grated Parmesan cheese at the very end creates a luxuriously smooth and velvety broth that clings to every piece of pasta and spinach leaf. It’s a robust, restaurant-quality soup that is surprisingly straightforward to make, promising to warm you from the inside out and quite possibly win over anyone’s heart.

Why You’ll Love This Recipe:

• All the Famous Flavor: Captures the legendary taste of the viral Marry Me Chicken in a comforting, easy-to-eat soup form.
• Complete Meal in One Pot: Packed with protein, carbs, and vegetables, this soup is a hearty and balanced dinner on its own.
• Creamy & Dreamy Texture: The combination of heavy cream and Parmesan creates an unbelievably rich and silky broth that is utterly addictive.
• Impressive Yet Simple: This soup looks and tastes like you spent all day in the kitchen, but it comes together in under an hour with simple steps.

Ingredients:

  • 2 tablespoons olive oil, divided
  • 1½ lbs boneless, skinless chicken breasts, cut into 1-inch bite-sized pieces
  • 1 small yellow onion, finely chopped
  • 3 cloves garlic, minced
  • ⅔ cup julienne-cut sun-dried tomatoes, drained (if oil-packed)
  • 1 teaspoon Italian seasoning
  • ¼ teaspoon red pepper flakes (adjust to taste)
  • 6 cups low-sodium chicken broth
  • 3 tablespoons tomato paste
  • 1½ cups uncooked medium shell pasta (or other small shape like orecchiette)
  • 1 cup heavy cream (or half-and-half for a slightly lighter version)
  • ⅔ cup freshly grated Parmesan cheese, plus more for garnish
  • 3-4 cups fresh baby spinach
  • salt, to taste
  • freshly ground black pepper, to taste
  • Fresh basil or parsley, for garnish (optional)

Instructions:

Step 1: Brown the Chicken
• In a large Dutch oven or heavy-bottomed pot, heat 1½ tablespoons of the olive oil over medium heat. Pat the chicken pieces dry and season generously with salt and pepper. Add the chicken to the hot pot in a single layer, working in batches if necessary to avoid steaming. Cook for 3-4 minutes per side, until golden brown and cooked through. Remove the chicken to a clean plate and set aside. Do not clean the pot.

Step 2: Sauté the Aromatics
• If the pot seems dry, add the remaining ½ tablespoon of olive oil. Add the chopped onion and cook for 4-5 minutes, stirring occasionally, until softened and translucent.

Step 3: Build the Flavor Base
• Reduce the heat to low. Add the minced garlic, sun-dried tomatoes, Italian seasoning, and red pepper flakes. Cook for 1 minute, stirring constantly, until the garlic is fragrant. This toasts the spices and releases their oils.

Step 4: Create the Broth
• Add the tomato paste and stir for 30 seconds to cook off its raw flavor. Pour in the chicken broth, using a wooden spoon to scrape up all the browned bits (the fond) from the bottom of the pot. This is crucial for flavor. Increase the heat to high and bring the broth to a boil.

Step 5: Cook the Pasta
• Once boiling, stir in the uncooked shell pasta. Reduce the heat to a gentle simmer and cook according to package directions for al dente, usually about 8-10 minutes, or until the pasta is just tender but still has a slight bite.

Step 6: Combine and Warm Through
• Once the pasta is cooked, stir the browned chicken pieces (and any accumulated juices) back into the pot. Let it warm through for 1-2 minutes.

Step 7: Finish with Cream, Cheese, and Spinach
• Crucial step: Remove the Dutch oven from the heat entirely. This prevents the dairy from curdling. Stir in the heavy cream and the grated Parmesan cheese until the cheese is fully melted and the broth is smooth and creamy. Finally, add the fresh baby spinach and stir until it has just wilted, which will take only a minute in the hot soup.

Step 8: Season and Serve
• Taste the soup and season with additional salt and freshly ground black pepper as needed. The amount of salt required will depend on the saltiness of your broth and Parmesan. Ladle into bowls and garnish with more grated Parmesan and a sprinkle of fresh basil or parsley if desired.

Tips:

• Grate Your Own Parmesan: Pre-grated Parmesan often contains anti-caking agents that can make your soup grainy instead of smooth. For the best melting and texture, grate a block of Parmesan cheese yourself.
• Don’t Skip the Fond: Those browned bits left after cooking the chicken are packed with flavor. Deglazing the pot with the broth ensures you capture every bit of it.
• Pasta Note: If you plan on having leftovers, consider cooking the pasta separately and adding it to each bowl when serving. This prevents the pasta from absorbing all the broth and becoming mushy as the soup sits.
• Cream Curdling: Taking the pot off the heat before adding the cream and cheese is the best way to ensure a silky, non-curdled soup.

Storage Options:

• Refrigerator: Store leftovers in an airtight container in the refrigerator for up to 3 days. The pasta will continue to absorb liquid, so you may need to add a splash of broth or water when reheating.
• Reheating: Gently reheat on the stovetop over low heat, stirring frequently. Do not boil, as this can cause the cream to separate.
• Freezing: This soup does not freeze well due to the dairy content. The cream and cheese are likely to separate and become grainy upon thawing.

Marry Me Chicken Soup is a soul-warming, flavor-packed masterpiece that is guaranteed to become an instant classic in your home. It’s the perfect bowl of comfort, romance, and deliciousness that lives up to its legendary name. Enjoy

Slow Cooker Apricot Dijon Spiral Ham

0

Slow Cooker Apricot Dijon Spiral Ham is the ultimate solution for a spectacular, fuss-free holiday centerpiece or a special Sunday dinner. This recipe takes the convenience of a pre-sliced spiral ham and elevates it to extraordinary heights with a sweet, tangy, and deeply flavorful glaze that slowly caramelizes as it cooks. The slow cooker is the perfect vessel for this task, gently reheating the ham without ever risking dryness, while simultaneously allowing the flavors of the glaze to penetrate every single slice. The result is an incredibly juicy, tender ham that is bursting with a complex flavor profile, making it appear as though you spent hours laboring over the oven.

The genius of this dish lies in the balance of its simple glaze. Sweet apricot preserves and brown sugar meld perfectly with the sharp, tangy punch of Dijon mustard and apple cider vinegar, creating a sauce that is neither cloyingly sweet nor overly pungent. The addition of warm ground cloves and black pepper adds a subtle, spicy depth that complements the smoky saltiness of the ham beautifully. As the ham slow cooks, this glaze reduces into a sticky, glossy coating that seals in the ham’s natural juices and forms a delectable crust on the edges of each spiral slice. This method guarantees a moist, flavorful ham with minimal effort and maximum reward, freeing up your oven for all the other essential dishes.

Why You’ll Love This Recipe:

• Effortless Elegance: Achieve a stunning, gourmet-quality ham without any of the stress or oven-space juggling typical of a big meal.
• Perfectly Moist & Tender: The slow cooker gently reheats the ham, ensuring it remains incredibly juicy and never dries out.
• Complex, Balanced Glaze: The combination of apricot, Dijon, and spice creates a sophisticated sweet-and-savory glaze that will have everyone asking for the recipe.
• Set It and Forget It: After a quick five-minute prep, the slow cooker does all the work, allowing you to focus on other things or simply relax.

Ingredients:

  • 1 spiral-cut ham (8–10 pounds)
  • 1 cup apricot preserves
  • 1/2 cup Dijon mustard
  • 1/2 cup packed brown sugar (light or dark)
  • 1/4 cup apple cider vinegar
  • 1 teaspoon ground cloves
  • 1/2 teaspoon freshly ground black pepper

Instructions:

Step 1: Position the Ham in the Slow Cooker
• Unwrap the spiral-cut ham and place it cut-side down into the bowl of a large (6-quart or larger) slow cooker. The pre-sliced spirals should be facing upwards. Ensuring the ham is flat and stable prevents it from shifting during cooking.

Step 2: Prepare the Glaze
• In a medium bowl, combine the apricot preserves, Dijon mustard, packed brown sugar, apple cider vinegar, ground cloves, and black pepper. Whisk vigorously until all the ingredients are completely smooth and well incorporated into a thick, homogenous glaze.

Step 3: Apply the Glaze
• Using a spoon or a silicone brush, pour and spread the apricot Dijon glaze evenly over the entire surface of the ham. Take care to get the glaze in between the slices where possible, as this will flavor the ham from the inside out.

Step 4: Slow Cook to Perfection
• Place the lid securely on the slow cooker. Set the appliance to the LOW heat setting. Cook for 4–5 hours. Every hour, carefully remove the lid and use a baster or a spoon to collect the juices from the bottom of the pot and redistribute them over the top of the ham. This basting process builds layers of flavor and creates a beautiful caramelized finish.

Step 5: Check for Doneness
• The ham is done when it is thoroughly heated. A meat thermometer inserted into the thickest part of the ham (without touching the bone) should read at least 140°F (60°C). The edges will be beautifully caramelized.

Step 6: Rest and Serve
• Using sturdy tongs and a large carving fork (or two large forks), carefully transfer the hot ham to a large serving platter. It will be very tender. Allow it to rest for 10-15 minutes before serving. This allows the juices to redistribute throughout the meat. Skim any excess fat from the glaze remaining in the slow cooker, then drizzle this reduced, flavorful sauce over the sliced ham when serving.

Tips:

• No Need for Liquid: Do not add any water or broth to the slow cooker. The ham will release its own juices as it cooks, which will mix with the glaze to create the basting liquid and eventual serving sauce.
• Glaze Adaptations: Feel free to experiment with the glaze. Orange marmalade can be used in place of apricot preserves for a different citrus note. A tablespoon of soy sauce can also be added for a touch of umami depth.
• Pre-Trimming: Some hams have a thick layer of external fat. If yours does, you can trim it down to about a 1/4-inch layer to allow the glaze to better penetrate the meat.
• Crisping the Top (Optional): For an extra-textural finish, place the glazed ham under a broiler for 2-3 minutes after it’s done in the slow cooker. Watch it closely to prevent burning.

Storage Options:

• Refrigerator: Store any leftover ham in an airtight container for up to 4 days. The glaze and ham should be stored together.
• Freezer: Leftover ham freezes excellently. Portion it into freezer-safe bags or containers, ensuring it’s covered with some of the glaze, and freeze for up to 2 months. Thaw in the refrigerator overnight before reheating.
• Reheating: Reheat slices in a covered skillet with a splash of water over low heat, or in the microwave covered with a damp paper towel to retain moisture.

Slow Cooker Apricot Dijon Spiral Ham is a guaranteed showstopper that simplifies your cooking process without compromising on flavor or presentation. It is the ultimate trick for a stress-free, deliciously impressive meal that celebrates the art of effortless cooking. Enjoy

Decadently Rich Fudgy Brownies

0

Decadently Rich Fudgy Brownies are the ultimate chocolate indulgence, a dessert that defines what a perfect homemade brownie should be. These brownies feature an intensely chocolatey, dense, and moist interior with a delicate, paper-thin crackly crust on top. The recipe achieves this coveted fudgy texture through a precise balance of melted butter, cocoa powder, and a higher fat-to-flour ratio, ensuring a rich, melt-in-your-mouth experience that is far superior to any boxed mix. Each bite is a deep, complex symphony of chocolate, punctuated by pockets of melted chocolate chips that provide bursts of extra flavor and texture.

This particular recipe is elevated by two secret ingredients: instant coffee and sea salt. The instant coffee doesn’t impart a coffee flavor but acts as a flavor enhancer, deepening and amplifying the richness of the chocolate without being detectable. The sea salt, both in the batter and likely sprinkled on top, cuts through the sweetness and highlights the cocoa’s natural bitterness, creating a more sophisticated and balanced dessert. Unlike cakey brownies, these are unapologetically rich and dense, designed for the true chocolate lover who believes a brownie should be an intense and satisfying experience, best enjoyed with a cold glass of milk.

Why You’ll Love This Recipe:

• Perfect Fudgy Texture: These brownies are the epitome of fudgy—dense, moist, and incredibly rich, with that signature shiny, crackly top.
• Deep Chocolate Flavor: Using both high-quality cocoa powder and semisweet chocolate chips creates a multi-layered, intense chocolate experience.
• Elevated with Secret Ingredients: A hint of instant coffee and sea salt work behind the scenes to amplify the chocolate flavor and balance the sweetness.
• Simple to Make: The recipe uses a straightforward mixing method with no need for a mixer for the dry ingredients, making it easy to whip up any time a chocolate craving strikes.

Ingredients:

  • 1 cup all-purpose flour
  • ¾ teaspoon sea salt, plus more for sprinkling
  • 2 teaspoons instant coffee or espresso powder
  • ¾ cup unsweetened baking cocoa (natural or Dutch-process)
  • 3 large eggs, at room temperature
  • 1½ cups granulated sugar
  • 2 teaspoons vanilla extract
  • 1 cup (2 sticks) unsalted butter, melted and slightly cooled
  • 1 cup semisweet chocolate chips, plus more for the top

Instructions:

Step 1: Prepare the Pan and Oven
• Preheat your oven to 350°F (175°C). Take an 8×8-inch metal baking pan and generously butter the bottom and sides. Line the pan with a strip of parchment paper, leaving an overhang on two opposite sides. This “sling” will make it incredibly easy to lift the entire batch of brownies out for clean slicing later. Butter the parchment paper as well.

Step 2: Combine the Dry Ingredients
• In a medium bowl, sift together the all-purpose flour, ¾ teaspoon sea salt, instant coffee powder, and unsweetened cocoa powder. Sifting is crucial here to eliminate any lumps in the cocoa and to ensure the ingredients are evenly distributed for a uniform texture.

Step 3: Whisk the Wet Ingredients
• In a separate large bowl, combine the eggs, granulated sugar, and vanilla extract. Using a handheld electric mixer fitted with the whisk attachment, beat on medium-low speed for exactly 1 minute. The goal is to combine them until they are pale and slightly thickened, but not to incorporate too much air. With the mixer running on low speed, slowly drizzle in the slightly cooled melted butter until the mixture is smooth and glossy.

Step 4: Combine Wet and Dry Mixtures
• Switch to a sturdy spatula or spoon. Add the sifted dry ingredients to the wet ingredients. Gently fold and stir the mixture just until the last traces of flour disappear. Do not overmix; overmixing will develop gluten in the flour and lead to cakey, tough brownies. The batter will be very thick and shiny.

Step 5: Add Chocolate Chips
• Fold in the 1 cup of semisweet chocolate chips until they are evenly distributed throughout the thick batter.

Step 6: Transfer to Pan and Bake
• Spread the thick batter into the prepared parchment-lined pan. Use an offset spatula or the back of your spoon to push the batter into an even layer, ensuring it reaches all corners. For an extra bakery-style touch, sprinkle a few additional chocolate chips and a pinch of flaky sea salt over the top.

Step 7: Bake to Fudgy Perfection
• Place the pan in the preheated oven and bake for 30-35 minutes. The brownies are done when the edges look set and have pulled away slightly from the pan, and the center appears set but still has a slight, subtle jiggle. To test, insert a toothpick into the center; it should come out with a few moist crumbs and maybe a streak of wet batter, but not clean. A clean toothpick means they are overbaked.

Step 8: Cool Completely
• This is the hardest but most important step: allow the brownies to cool completely in the pan placed on a wire rack for at least 2 hours, or preferably until room temperature. This cooling period allows them to finish setting up, ensuring their signature fudgy texture. Once cool, use the parchment paper sling to lift the entire block out onto a cutting board before slicing into squares.

Tips:

• Do Not Overbake: The key to fudgy, not cakey, brownies is slightly underbaking them. Trust the jiggle test and the moist crumbs on the toothpick.
• Quality of Cocoa: The flavor of your brownies hinges on the quality of your cocoa powder. Use a brand you love for the best results.
• Room Temperature Eggs: Using room temperature eggs allows them to emulsify better with the butter and sugar, creating a smoother, more cohesive batter.
• Metal Pan vs. Glass: A metal pan is recommended as it heats up quickly and promotes those crisp edges. If using a glass dish, you may need to add a few minutes to the baking time.

Storage Options:

• Room Temperature: Keep leftover brownies in an airtight container at room temperature for up to 4 days. They often taste even better the next day as the flavors continue to meld.
• Freezer: These brownies freeze exceptionally well. Wrap individual squares tightly in plastic wrap and place them in a freezer-safe bag or container. Freeze for up to 3 months. Thaw at room temperature for an hour or pop them in the microwave for a quick warm treat.

Decadently Rich Fudgy Brownies are the holy grail of chocolate desserts—simple in their ingredients yet profound in their impact. They promise and deliver an uncompromisingly rich, fudgy, and deeply satisfying experience that will make you never return to a boxed mix again. Enjoy!

Pizza Dip

0

If you love pizza (and who doesn’t?), then this Pizza Dip is about to become your new favorite party appetizer. It’s everything you adore about a cheesy, gooey pizza but in dip form — perfect for scooping up with breadsticks, toasted baguette slices, or even crunchy veggies. With a creamy base made from cream cheese and sour cream, a rich layer of pizza sauce, and plenty of melty mozzarella and Parmesan, this dip is basically pizza without the crust.

What makes it even better? The toppings! Pepperoni and crispy bacon give it that classic pizza flavor we all crave, while fresh herbs sprinkled on top add the perfect finishing touch. Whether you’re hosting a game day party, a family gathering, or just treating yourself on a Friday night, this dip is guaranteed to disappear fast. Serve it straight from the oven and watch as everyone dives in for seconds (and thirds).

Why You’ll Love This Recipe:

• All the flavors of pizza in a fun, shareable dip.

• Perfect for parties, game nights, or family snacking.

• Super versatile — add your favorite pizza toppings!

• Easy to make ahead and bake just before serving.

Ingredients:

  • 8 ounces cream cheese, softened
  • 2 cups mozzarella cheese, divided
  • ½ cup sour cream
  • ½ teaspoon dried basil
  • ½ teaspoon dried oregano
  • ½ teaspoon kosher salt
  • ½ teaspoon freshly ground black pepper
  • ⅛ teaspoon red pepper flakes
  • 1 cup pizza sauce or marinara sauce
  • ¼ cup grated Parmesan cheese
  • 15–20 pepperoni slices or ¼ cup mini pepperoni
  • 3 slices crispy cooked bacon, chopped

Instructions:

  1. Preheat oven to 375°F (190°C).
  2. In a mixing bowl, use an electric mixer to blend cream cheese, ¾ cup mozzarella, sour cream, basil, oregano, salt, pepper, and red pepper flakes until smooth. Spread into the bottom of a 9-inch pie dish or baking pan.
  3. Spread pizza sauce evenly over the cream cheese layer. Top with Parmesan, remaining mozzarella, pepperoni, and bacon.
  4. Bake for 20–25 minutes, until the cheese is fully melted and bubbly.
  5. Let cool for 3–5 minutes, garnish with fresh parsley or basil, and serve with toasted French bread, breadsticks, or rolls.

Tips:

  • Add your favorite toppings: mushrooms, olives, sausage, or green peppers.
  • For a lighter version, use light cream cheese and reduced-fat mozzarella.
  • Want extra gooeyness? Sprinkle an extra handful of mozzarella on top before baking.

Storage and Reheating:

  • Store leftovers in an airtight container in the fridge for up to 3 days.
  • Reheat in the oven at 350°F until warmed through or microwave in short bursts.
  • Not freezer-friendly — the cream cheese base doesn’t thaw well.

Chicken Alfredo Bake

0

There’s just something about a baked pasta dish that feels like pure comfort food — warm, cheesy, and made to share. This Chicken Alfredo Bake takes everything you love about classic fettuccine alfredo and turns it into a hearty, oven-baked casserole that’s perfect for weeknight dinners or even a cozy Sunday meal. It’s creamy, cheesy, and full of tender chicken, all wrapped up with pasta that’s cooked just right. The best part? It’s baked under a gooey layer of mozzarella and Parmesan that turns golden and bubbly in the oven.

This recipe is not only delicious but also a crowd-pleaser. It’s rich enough to feel indulgent but still simple enough to make on a busy evening. You can even make it ahead and pop it into the oven when you’re ready, which makes it perfect for entertaining or meal prepping. Pair it with a crisp green salad and garlic bread, and you’ve got yourself a meal that rivals any Italian restaurant.

Why You’ll Love This Recipe:

• Creamy, cheesy, and comforting — the ultimate pasta bake.

• Easy to make with pantry staples and leftover chicken.

• Perfect for family dinners, potlucks, or meal prep.

• Freezer-friendly and great for make-ahead meals.

Ingredients:

  • 12 ounces cavatappi or penne pasta
  • 5 tablespoons butter
  • 3 garlic cloves, minced
  • 1 teaspoon Italian seasoning
  • 2 cups heavy cream
  • ½ teaspoon salt
  • ½ teaspoon freshly ground black pepper
  • 2 cups grated Parmesan, divided
  • 4 ounces cream cheese, cut into small cubes
  • 2 ½ cups diced cooked chicken breast or thighs
  • 2 cups shredded mozzarella cheese
  • Chopped fresh parsley, for garnish

Instructions:

  1. Preheat the oven to 350°F (175°C). Grease a 9×13-inch casserole dish.
  2. In a large skillet, melt the butter over medium-low heat. Add garlic and Italian seasoning; cook for 1 minute, stirring constantly. Stir in the heavy cream and simmer gently until slightly thickened (do not boil).
  3. Meanwhile, cook the pasta in a large pot of salted boiling water until al dente. Drain well.
  4. Whisk salt and black pepper into the cream mixture. Reduce heat to low and whisk in 1 ½ cups Parmesan a little at a time until smooth. Add cream cheese and stir until melted and creamy.
  5. In the prepared baking dish, combine cooked pasta, Alfredo sauce, and chicken. Mix well, spread evenly, and top with mozzarella and remaining Parmesan.
  6. Bake uncovered for 20–25 minutes, until the cheese is melted and bubbling. Garnish with parsley before serving.

Tips:

  • Swap chicken for cooked shrimp or even rotisserie chicken for an easy shortcut.
  • Add steamed broccoli or spinach to sneak in extra veggies.
  • Use half-and-half instead of heavy cream for a lighter version.

Storage and Reheating:

  • Store leftovers in an airtight container in the refrigerator for up to 4 days.
  • Reheat in the oven at 325°F, covered with foil, until warmed through, or microwave in 30-second bursts.
  • Freeze unbaked casserole (tightly wrapped) for up to 2 months. Thaw overnight in the fridge and bake as directed.

Pumpkin Cream Cheese Swirl Muffins

0

These pumpkin cream cheese swirl muffins are the perfect cozy treat to welcome in fall (or to make any time you’re craving those warm, spiced flavors). They’re moist, fluffy, and full of rich pumpkin spice, with a sweet, creamy swirl of cheesecake-like filling that makes each bite extra special. The combination of tender pumpkin muffin and tangy cream cheese topping feels indulgent, yet they’re surprisingly easy to make — no mixer required for the muffin batter!

Whether you serve them warm from the oven with a cup of coffee or pack them up for a fall picnic, these muffins are guaranteed to disappear fast. They also make a great addition to a holiday breakfast spread or bake sale lineup, thanks to their beautiful swirled tops that look as good as they taste. And here’s the best part: they freeze well, so you can always have a stash on hand for those pumpkin cravings that pop up year-round.

Why You’ll Love This Recipe:

• Moist, tender pumpkin muffins with warm spices.

• Rich, tangy cream cheese swirl that tastes like cheesecake.

• Easy to make with simple pantry ingredients.

• Freezer-friendly for make-ahead treats.

Ingredients:

Muffin:

  • 1 ¾ cups all-purpose flour
  • 1 tablespoon pumpkin spice
  • 1 teaspoon baking soda
  • ½ teaspoon salt
  • 1 (15 oz) can pumpkin puree
  • 1 cup granulated sugar
  • ½ cup packed brown sugar
  • 2 large eggs
  • ½ cup vegetable oil (or melted, cooled butter)
  • 1 tablespoon vanilla extract

Cream Cheese Swirl:

  • 8 oz cream cheese, room temperature
  • ¼ cup granulated sugar
  • 1 large egg yolk, room temperature
  • 2 teaspoons vanilla extract

Instructions:

  1. Preheat oven to 375°F (190°C). Line a muffin pan with paper baking cups and set aside.
  2. In a medium bowl, whisk together flour, pumpkin spice, baking soda, and salt. Set aside.
  3. In a large bowl, whisk pumpkin puree, granulated sugar, and brown sugar. Beat in eggs, vegetable oil, and vanilla until smooth.
  4. Slowly whisk the dry ingredients into the wet mixture just until no lumps remain. Fill muffin cups about ¾ full.
  5. In another medium bowl, beat cream cheese until smooth. Add sugar, egg yolk, and vanilla, and beat until fully combined.
  6. Spoon about 1 tablespoon of cream cheese mixture on top of each muffin. Use a toothpick to gently swirl it into the batter (or leave as a dollop if you prefer).
  7. Bake for 18–20 minutes, or until a toothpick inserted in the pumpkin portion comes out with just a few moist crumbs.
  8. Cool for 10 minutes in the pan before serving, or let cool completely before storing.

Tips:

  • For extra flavor, sprinkle a little cinnamon sugar on top before baking.
  • Be careful not to over-swirl the cream cheese; a few swirls create the prettiest marbled effect.
  • You can substitute homemade pumpkin puree — just make sure it’s thick and not watery.

Storage and Reheating:

  • Store muffins in an airtight container in the refrigerator for up to 5 days.
  • Freeze cooled muffins for up to 2 months; thaw overnight in the fridge.
  • To reheat, warm in the microwave for 10–15 seconds to bring back that fresh-from-the-oven texture.