Philly Cheesesteak Egg Rolls

0

These Philly Cheesesteak Egg Rolls are the perfect fusion of a classic American sandwich and a beloved Asian appetizer. By combining the savory flavors of a cheesesteak with the crispy, golden exterior of an egg roll, this recipe offers a unique twist that’s sure to be a hit at any gathering. Each bite delivers the juicy goodness of seasoned beef, melted cheese, and tender vegetables wrapped in a crunchy shell.

The secret to these egg rolls lies in the preparation of the beef and the assembly of the rolls, ensuring that each one is packed with flavor and crisps up perfectly. It’s an exciting way to enjoy the essence of a Philly cheesesteak in a fun, finger-food format.

Why You’ll Love This Recipe:

  • Fusion Flair: Combines the hearty elements of a Philly cheesesteak with the delightful crispiness of an egg roll.
  • Party Perfect: Ideal for parties, these egg rolls are a surefire crowd-pleaser that can be prepared ahead of time.
  • Customizable: Easy to adapt with different cheeses or added ingredients like mushrooms or jalapeños for extra kick.

Ingredients:

  • 1 pound ground beef
  • 1/2 teaspoon salt
  • 1/2 teaspoon pepper
  • 1 tablespoon Worcestershire sauce
  • 2 tablespoons butter
  • 1 yellow onion, chopped
  • 1/2 green bell pepper, chopped
  • 12 slices American Cheese
  • 24 egg roll wrappers
  • Small bowl of water
  • Canola oil, for frying

Instructions:

Step 1: Brown the Beef
Start by browning the beef in the skillet. Aim for minimal breakage of the meat to achieve a nice brown sear. After searing, stir in salt, pepper, and Worcestershire sauce gently, then remove from the pan.

Step 2: Sauté Vegetables
In the same pan, melt the butter and add chopped onions and green bell pepper. Cook until browned and caramelized. Then, add the meat back into the pan and combine. Remove from heat and allow to cool slightly.

Step 3: Prepare the Wrappers
While the mixture cools, lay out the egg roll wrappers on a flat surface. Place half a slice of American cheese on each wrapper, followed by about three tablespoons of the meat mixture.

Step 4: Wrap
Starting from the bottom left, pull the corner over the meat, then fold the two sides in. Wet the edges with water to help seal and roll tightly.

Step 5: Fry
Heat canola oil in a pan (about an inch deep) to 350°F (175°C). Fry 3-4 egg rolls at a time until golden brown, then remove and drain on a cooling rack or paper bags.

Storage Options:

  • Refrigerator: Keep in an airtight container for up to 3 days. Reheat in an oven or toaster oven to maintain crispiness.
  • Freezer: Freeze before frying for up to 1 month. Fry from frozen, adjusting cooking time as necessary.

Tips:

  • Even Cooking: Ensure each egg roll is sealed well to prevent bursting and uneven frying.
  • Cheese Varieties: Experiment with different types of cheese like provolone or cheddar for varied flavors.
  • Serving Suggestion: Serve with a side of spicy ketchup or sriracha mayo for dipping.

The Truth Behind the Red Liquid in Rare Steaks

0

For enthusiasts of a well-cooked steak, nothing is more appealing than the sight of a rare, juicy cut. However, this visual delight might cause discomfort for others due to a widespread misconception: the belief that the red liquid seeping from a rare steak is blood. This notion often leads to concerns that the meat is undercooked or potentially harmful. Yet, the reality is quite the opposite, and it’s important to understand what this red juice actually is.

Unveiling the Red Juice: It’s Not Blood!

What you notice in a rare steak is not blood, but a blend of water and a protein called myoglobin. Myoglobin resides within the muscle tissues and is responsible for the red to pinkish hue seen in uncooked and undercooked meats. As the steak cooks, the heat causes myoglobin to release both water and pigment, lending the meat its tempting juiciness and vibrant color.

Understanding Meat’s Composition

Typically, meat consists of water, protein, and fat. Cooking affects these elements differently based on the applied heat and method. The protein myoglobin, found abundantly in muscle tissue, significantly influences the meat’s color and overall appearance.

Role and Characteristics of Myoglobin

Myoglobin, a protein stored in animal muscle fibers, is crucial for oxygen storage needed during physical activity. Similar to hemoglobin—responsible for oxygen transport in blood—myoglobin’s iron content binds to oxygen, providing it with a distinctive red color.

The concentration of myoglobin in meat varies by the type of animal, its age, and how active it was, explaining why meats like beef and lamb appear darker than chicken or pork.

Demystifying the Myth of Blood in Steak

It’s essential to clarify that the liquid seen in cooked steak isn’t blood. The slaughtering process involves draining most of the blood. The “juices” that emerge during cooking are primarily a mixture of water and myoglobin.

Why the Misunderstanding?

The confusion often arises because both blood and myoglobin share a red hue due to their iron content. However, their functions differ significantly. Myoglobin’s role is confined to oxygen storage within the muscles.

Myoglobin’s Behavior When Heated

As steak cooks, myoglobin undergoes several changes:

  • Raw State: Myoglobin gives raw meat a deep red or purple appearance.
  • Rare to Medium-Rare: Heating to 120-130°F causes myoglobin to release water, seen as the characteristic red or pink juice.
  • Medium to Well-Done: Higher temperatures lead to iron oxidation within myoglobin, changing the color to a brownish tint and often resulting in a drier texture.

Myoglobin Content and Meat Types

  • Beef: High myoglobin levels contribute to its deep red raw color.
  • Lamb: Also red, though slightly less myoglobin than beef.
  • Pork: Considered red meat but lighter due to lower myoglobin levels.
  • Poultry: Minimal myoglobin makes chicken and turkey appear paler.

Safety and Culinary Enjoyment of Rare Steaks

The red juice in rare steaks, rich in myoglobin, is perfectly safe to consume. It indicates that the steak retains its tenderness and moisture, enhancing both its flavor and nutritional value. Myoglobin itself is a source of iron, essential for healthy oxygen transport in the blood.

Tips for Perfectly Cooked Steaks

  • Select the Right Cut: Opt for cuts like ribeye or sirloin to enjoy flavorful juices.
  • Monitor Cooking Temperatures: Achieve desired doneness with a meat thermometer; rare steaks typically reach 120-130°F.
  • Rest the Steak: Allow the steak to rest post-cooking to let juices redistribute, ensuring a flavorful experience.

Confidence in Steak Consumption

Understanding that the red liquid in rare steaks is myoglobin allows you to enjoy your meal without reservations. This knowledge dispels any misconceptions about its safety, letting you appreciate the rich flavors and nutrients of a well-prepared steak.

Classic Tomato Sandwich

0

Savor the simplicity of summer with this Classic Tomato Sandwich, a timeless treat that highlights the beauty of ripe tomatoes paired with the tang of mayonnaise and the crisp freshness of white bread. This recipe is a homage to Southern cuisine, where such sandwiches are a staple during tomato season. It’s all about the quality of the ingredients—juicy beefsteak tomatoes, creamy Duke’s mayo, and the right seasonings make all the difference.

Why You’ll Love This Recipe:

  • Simple Ingredients: With just a few components, each of high quality, this sandwich lets the flavors shine.
  • Quick to Prepare: Takes only minutes to assemble, perfect for a quick lunch or a lazy summer dinner.
  • Versatile: Easy to customize with additional toppings like basil, bacon, or cheese if desired.

Ingredients:

  • 4 slices white bread
  • 1 large beefsteak tomato
  • 2-4 tablespoons Duke’s mayonnaise, to taste
  • Kosher salt, to taste
  • Cracked black pepper, to taste

Instructions:

Prepare the Tomato:

    • Start by washing the beefsteak tomato. Slice it into medium-thick slices, aiming for uniformity to ensure each bite of sandwich is perfect.

    Spread the Mayo:

      • Lay out the slices of white bread on a clean surface. Spread Duke’s mayonnaise generously on each slice. The mayo not only adds flavor but also helps to create a barrier that prevents the bread from getting soggy.

      Assemble the Sandwich:

        • Place the sliced tomatoes evenly over two of the bread slices.
        • Sprinkle each with a generous amount of kosher salt and cracked black pepper, to taste. This step is crucial as it enhances the natural flavors of the tomato.

        Close and Serve:

          • Top the tomatoes with the remaining slices of bread, mayo side down, to complete the sandwiches.
          • Press down gently on each sandwich to ensure everything stays together.

          Enjoy:

            • Cut the sandwiches in half if desired, and serve immediately for the best taste experience.

            Tips:

            • Bread Choice: While white bread is traditional, feel free to experiment with whole grain or sourdough for a different twist.
            • Extra Flavor: Add fresh basil leaves or a drizzle of balsamic glaze inside the sandwich for an extra layer of flavor.
            • Cheese Addition: A slice of mozzarella or cheddar can add a creamy texture and rich taste.

            Mandarin Orange Fluff Salad

            0

            Mandarin Orange Fluff Salad is a delightful, creamy dessert that combines sweet citrus flavors with fluffy whipped cream and marshmallows for a light and refreshing treat. This salad is perfect for gatherings, potlucks, or as a sweet end to a family meal. The addition of coconut and optional nuts adds a satisfying crunch that complements the soft texture of the marshmallows and the juicy mandarin oranges.

            Why You’ll Love This Recipe:

            • Effortlessly Easy: Simple to prepare with no cooking required, making it a great last-minute dessert option.
            • Versatile: Can be customized with different fruits or nuts according to your preference or what you have on hand.
            • Perfect for Any Occasion: Ideal for picnics, holiday gatherings, or as a sweet treat to enjoy any day of the week.

            Ingredients:

            • 2 cups whipped cream
            • 1 cup mini marshmallows
            • 1 can (11 oz) mandarin oranges, drained
            • 1/2 cup shredded coconut
            • 1/2 cup chopped nuts (optional, such as pecans or walnuts)
            • 1 cup vanilla yogurt
            • 1 package (3.4 oz) instant vanilla pudding mix
            • Additional whipped cream and mandarin orange segments for garnish

            Instructions:

            Prepare the Base:

              • In a large bowl, combine the vanilla yogurt and the instant vanilla pudding mix. Stir until well blended and smooth.

              Add Fruits and Marshmallows:

                • Gently fold in the whipped cream to keep the mixture light and fluffy.
                • Add the drained mandarin oranges, mini marshmallows, and shredded coconut to the bowl.
                • If using, fold in the chopped nuts to add a bit of crunch.

                Chill:

                  • Cover the bowl with plastic wrap and refrigerate for at least one hour. This chilling time allows the flavors to meld together and the pudding to set, creating a lush, creamy texture.

                  Serve:

                    • Before serving, give the salad a gentle stir to redistribute the ingredients evenly.
                    • Spoon the fluff salad into serving dishes and top each with a dollop of whipped cream and a few mandarin orange segments for a decorative and tasty touch.

                    Storage Options:

                    • Refrigerator: Keep the salad covered in the refrigerator and consume within 2-3 days for best freshness and texture.

                    Tips:

                    • For Best Results: Make sure all ingredients are well chilled before preparing to keep the salad cool and refreshing.
                    • Additional Fruits: Feel free to add other fruits like pineapple chunks or sliced grapes to introduce different textures and flavors.
                    • Dairy-Free Variation: Use coconut whipped cream and dairy-free yogurt to cater to those with dairy sensitivities.

                    This Mandarin Orange Fluff Salad is not only easy to make but also a joy to eat, offering a perfect blend of creamy, crunchy, sweet, and tangy elements. It’s sure to become a favorite among both kids and adults alike!

                    Hershey’s Syrup Brownies

                    0

                    Indulge in the ultimate chocolate experience with these Hershey’s Syrup Brownies. This recipe transforms simple, everyday ingredients into rich, decadent brownies that boast a deep chocolate flavor thanks to the liberal use of Hershey’s syrup. Whether you’re a seasoned baker or new to the kitchen, these brownies offer a straightforward approach to a classic treat that everyone can enjoy.

                    Why You’ll Love This Recipe:

                    • Rich Chocolate Flavor: The Hershey’s syrup provides a smooth and deep chocolate taste that is irresistibly decadent.
                    • Easy to Make: Simple steps and common ingredients make this recipe accessible for all baking levels.
                    • Customizable: Add nuts for added texture or keep them classic with just the chocolate.

                    Ingredients:

                    • Brownie:
                    • 1/2 cup butter (no substitutes, melt in microwave)
                    • 1 cup granulated sugar
                    • 4 eggs
                    • 1 teaspoon vanilla extract
                    • 1 cup flour
                    • 1 (16 ounce) can Hershey’s syrup
                    • 1 cup chopped nuts (optional)
                    • Icing:
                    • 3 cups confectioners’ sugar
                    • 1/2 cup butter, melted (no substitutes)
                    • 4 tablespoons cocoa
                    • 4 tablespoons milk
                    • 1 teaspoon vanilla extract

                    Instructions:

                    Preheat the Oven:

                      • Preheat your oven to 350°F (175°C). Grease the bottom of a 10×15 inch baking pan.

                      Prepare the Brownie Batter:

                        • After melting the butter in the microwave, cream together the melted butter and granulated sugar in a large mixing bowl.
                        • Add eggs one at a time, beating well after each addition.
                        • Stir in the vanilla extract.
                        • Gradually mix in the flour until well combined.
                        • Pour in the Hershey’s syrup and mix until the batter is smooth.
                        • If using, fold in the chopped nuts.

                        Bake:

                          • Pour the batter into the prepared pan. Spread evenly.
                          • Bake for 35-40 minutes, or until a toothpick inserted into the center comes out clean.

                          Prepare the Icing:

                            • As the brownies are finishing baking, prepare the icing. In a microwave-safe bowl, combine the melted butter, cocoa, and 1 tablespoon of milk. Microwave until boiling.
                            • In a separate bowl, beat the confectioners’ sugar with the hot cocoa mixture. Add the vanilla extract.
                            • Gradually add the remaining milk, a little at a time, until the icing reaches your desired consistency.

                            Finish:

                              • Let the brownies cool in the pan for about 5-10 minutes, then spread the icing over the warm brownies.
                              • If desired, sprinkle additional chopped nuts on top for garnish.
                              • Allow the brownies to cool completely in the pan. The icing will harden to a fudge-like consistency as it cools.

                              Serve:

                                • Once cooled, cut the brownies into squares and serve.

                                Storage Options:

                                • Room Temperature: Store the brownies in an airtight container at room temperature for up to 3 days.
                                • Refrigerator: For longer storage, keep them in the refrigerator for up to a week.

                                Tips:

                                • Nut Variations: Experiment with different types of nuts like walnuts, pecans, or almonds for varied texture and flavor.
                                • Serving Suggestion: Serve warm with a scoop of vanilla ice cream for an extra indulgent dessert.

                                Home Remedies for Flu Relief: Harnessing the Power of Honey, Lemon, Onion, Garlic, and Ginger

                                0

                                When flu season hits, many of us look for gentle, natural ways to soothe symptoms and speed up recovery. Remedies like honey, lemon juice, onion, garlic, and ginger are not only accessible but have been used traditionally to alleviate the discomfort associated with the flu. Here’s how these ingredients can help, along with a simple recipe to harness their benefits.

                                Benefits of Natural Ingredients

                                Honey is known for its soothing properties, making it perfect for sore throats. It has antibacterial capabilities that can help fight minor infections and boost the immune system. Lemon juice, high in vitamin C, supports the immune system and acts as a natural antioxidant, which is essential during a flu bout. Onions and garlic share similar properties; they both contain compounds like allicin that are known to have natural antibiotic effects. Lastly, grated ginger helps reduce inflammation, ease nausea, and can warm the body, which can be comforting when feeling under the weather.

                                How to Prepare the Remedy

                                Ingredients:

                                • 1 tablespoon of raw honey
                                • Juice of half a lemon
                                • 1 small onion, finely chopped
                                • 1 clove of garlic, minced
                                • 1-inch piece of ginger, grated

                                Instructions:

                                1. Mix the Ingredients: In a small bowl, combine the lemon juice, chopped onion, minced garlic, and grated ginger. Let the mixture sit for about 10 minutes to allow the flavors to meld and the natural juices to extract from the onion and garlic.
                                2. Strain and Sweeten: Strain the mixture to remove the solid pieces, squeezing as much liquid out as possible. Add the raw honey to the strained liquid and stir until well combined.
                                3. Warm Up: For added comfort, gently warm the mixture on the stove over low heat just until lukewarm. Avoid overheating to preserve the beneficial properties of the honey and lemon.

                                Storage Options

                                This remedy is best made fresh but can be stored in the refrigerator for up to 24 hours. If you need to make it ahead of time or have leftovers, store it in a clean, airtight container in the fridge. Remember to warm it slightly before use, as taking it cold can be less soothing.

                                Tips for Best Results

                                • Always Use Raw, Organic Ingredients: Maximizing the benefits of this remedy starts with the quality of your ingredients. Opt for organic and raw versions to ensure they are free from pesticides and retain their full medicinal properties.
                                • Adjust to Taste: The potency of garlic and onion can be strong. Start with small amounts and adjust according to your taste and tolerance.
                                • Consistency is Key: For best results, take a tablespoon of this mixture every few hours during the day. It’s not only about treating the symptoms once they appear but helping your body consistently fight back.
                                • Consult Your Doctor: These remedies are meant to support—not replace—advice from healthcare professionals. Always check with your doctor, especially if you have underlying health conditions or are on medication.

                                Natural remedies like honey, lemon, onion, garlic, and ginger offer a comforting alternative to over-the-counter treatments. They harness the power of nature to help you navigate through the flu season a little more easily, giving your body the support it needs to recover while soothing some of the most bothersome symptoms.

                                Classic Chicken Adobo

                                0

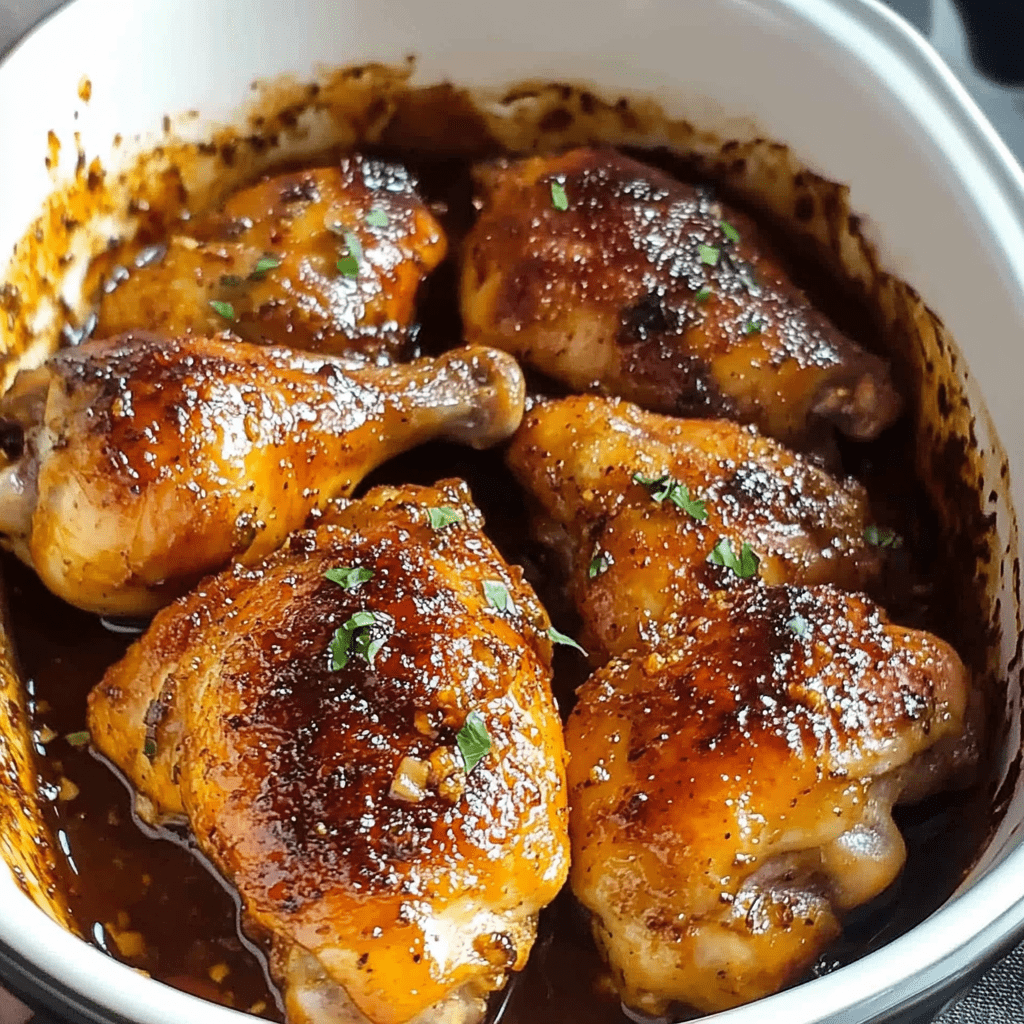
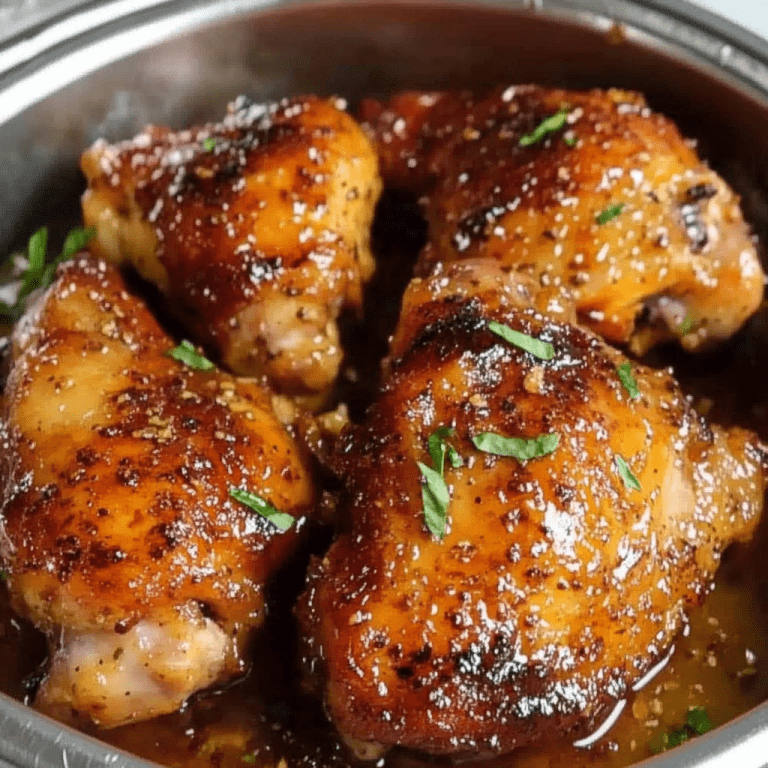
                                Chicken Adobo is a quintessential Filipino dish known for its rich, tangy, and savory flavor profile, a staple in any Filipino household. This recipe captures the essence of traditional Filipino cooking by simmering chicken in a marinade of soy sauce, vinegar, garlic, peppercorns, and bay leaves, creating a dish that’s bursting with flavor. It’s a simple yet hearty meal that’s both easy to prepare and incredibly satisfying, perfect for family dinners or when you need a comforting meal.

                                The magic of Chicken Adobo lies in its ability to transform basic ingredients into a deeply flavorful dish that improves with time, often tasting even better the next day. Whether you’re new to Filipino cuisine or a seasoned pro, this Chicken Adobo recipe is sure to impress.

                                Why You’ll Love This Recipe:

                                • Deeply Flavorful: The combination of soy sauce and vinegar creates a deliciously tangy and savory sauce that’s uniquely Filipino.
                                • Easy to Make: With minimal prep and simple cooking techniques, this dish is approachable for cooks of all skill levels.
                                • Versatile: Serve it with steamed rice for a fulfilling meal, or shred the chicken for use in tacos, sandwiches, or salads.

                                Ingredients:

                                • 1/4 cup soy sauce
                                • 1/2 cup white Filipino cane vinegar, or distilled white vinegar
                                • 6-8 cloves garlic, smashed with the side of a knife and peeled
                                • 1 teaspoon whole black peppercorns
                                • 2 bay leaves
                                • 6 skin-on bone-in chicken thighs

                                Instructions:

                                1. Combine Ingredients: Place the soy sauce, vinegar, garlic, black peppercorns, and bay leaves in a large, nonreactive sauté pan.
                                2. Add Chicken: Nestle the chicken thighs, skin side down, into the pan.
                                3. Simmer: Bring the liquid to a boil over high heat. Then, cover and simmer over low heat for 20 minutes.
                                4. Turn Chicken: Turn the chicken over, cover again, and simmer for an additional 10 minutes.
                                5. Reduce Sauce: Uncover the pan and increase the heat to high, bringing the sauce back to a boil. Continue boiling the sauce, uncovered, while occasionally turning and basting the chicken, until it reduces by half and thickens slightly, about 5–7 minutes.
                                6. Serve: Serve the chicken hot with steamed white rice, using the reduced sauce as a delicious glaze or gravy.

                                Storage Options:

                                • Refrigerator: Store leftovers in an airtight container for up to 3-4 days.
                                • Freezer: Freeze in a sealed container for up to 1 month. Thaw in the refrigerator overnight and reheat on the stove or in the microwave.

                                Tips:

                                • Vinegar Variety: Experiment with different types of vinegar for varying acidity and sweetness levels.
                                • Enhancing Flavor: For a richer taste, marinate the chicken in the soy sauce and vinegar mixture overnight before cooking.
                                • Serving Suggestions: Pair with a side of pickled vegetables or a simple cucumber salad to balance the richness of the adobo.

                                Cheesy Bacon Skillet Potatoes

                                0

                                Bring comfort food to your table with these Cheesy Bacon Skillet Potatoes. This dish combines crispy bacon, tender potatoes, and creamy cheddar cheese, all cooked to perfection in one skillet for maximum flavor and minimal cleanup. It’s a hearty and satisfying side that can also stand as a main dish for a casual meal. This recipe highlights the smoky depth of smoked paprika, the richness of bacon, and the heartiness of potatoes, making it a crowd-pleaser for any occasion.

                                Why You’ll Love This Recipe:

                                • One-Pan Wonder: Everything cooks in one skillet, which means less washing up and more enjoying your meal.
                                • Flavorful and Hearty: The combination of bacon, cheese, and potatoes offers a comforting and filling experience.
                                • Versatile: Perfect as a side dish, or add a fried egg on top for a delicious breakfast option.

                                Ingredients:

                                • 1.5 pounds small potatoes, halved (or quartered if large)
                                • 6 slices of thick-cut bacon, chopped
                                • 1 medium onion, diced
                                • 2 cloves garlic, minced
                                • 1 teaspoon smoked paprika
                                • 1/2 teaspoon salt
                                • 1/2 teaspoon black pepper
                                • 1 cup shredded cheddar cheese
                                • 1/4 cup cream or milk
                                • Fresh chives or parsley for garnish

                                Equipment:

                                • Large skillet (preferably cast iron)
                                • Slotted spoon
                                • Cheese grater
                                • Knife and cutting board

                                Instructions:

                                Cook the Bacon:

                                  • In a large skillet over medium heat, cook the chopped bacon until crispy. Remove the bacon with a slotted spoon and set aside on paper towels to drain, leaving the bacon fat in the skillet.

                                  Sauté the Vegetables:

                                    • In the same skillet, using the bacon fat, add the diced onion and cook until translucent. Add the minced garlic and cook for an additional minute until fragrant.
                                    • Sprinkle in the smoked paprika, salt, and pepper, stirring to combine.

                                    Cook the Potatoes:

                                      • Add the halved potatoes to the skillet, stirring to coat them in the bacon fat and seasonings. Cook over medium-high heat for about 10-15 minutes, turning occasionally, until the potatoes are golden and fork-tender.

                                      Add Cheese and Bacon:

                                        • Reduce the heat to low. Drizzle cream or milk over the potatoes and sprinkle the shredded cheddar cheese evenly on top.
                                        • Scatter the crispy bacon pieces over the cheese. Cover the skillet with a lid or aluminum foil and let sit for 2-3 minutes until the cheese is melted and bubbly.

                                        Garnish and Serve:

                                          • Garnish with chopped chives or parsley before serving directly from the skillet for a rustic presentation.

                                          Storage Options:

                                          • Refrigerator: Store any leftovers in an airtight container in the refrigerator for up to 3 days. Reheat in the microwave or back in a skillet over medium heat.
                                          • Freezer: This dish is best enjoyed fresh, as the potatoes and cheese may change texture when frozen and thawed.

                                          Tips:

                                          • Potato Selection: Choose potatoes that hold their shape well when cooked, like baby potatoes or fingerlings.
                                          • Additional Flavors: Consider adding a splash of hot sauce or mustard to the cream for an extra layer of flavor.
                                          • Serving Suggestions: Serve as a side with grilled meats or add a fried egg on top for a complete meal.

                                          Iowa Party Bites

                                          0

                                          Iowa Party Bites offer a delightful twist on traditional party snacks, combining the crispiness of tortilla chips with a creamy, cheesy topping that’s bursting with flavor. This simple yet delicious appetizer is perfect for gatherings, parties, or as a fun addition to your game day spread. The combination of sweet corn and mild green chiles with a mix of cheeses creates a savory filling that complements the crunchy scoops perfectly.

                                          These bites are quick to prepare and sure to be a hit with guests of all ages. They’re customizable too, allowing you to adjust the heat level or add different ingredients according to your preferences. Whether served at a casual get-together or during a special celebration, these bites are designed to be enjoyed by everyone who tries them.

                                          Why You’ll Love This Recipe:

                                          • Quick and Easy: Ready in under 30 minutes, these bites are straightforward to make with minimal preparation.
                                          • Crowd-Pleaser: The irresistible combination of flavors makes these perfect for pleasing a crowd.
                                          • Versatile: Easily adjust the recipe to include your favorite ingredients or whatever you have on hand.

                                          Ingredients:

                                          • 1 (10 oz) package of Tostitos Scoops Tortilla Chips
                                          • 1 (8 oz) block cream cheese, softened
                                          • 8 oz shredded mozzarella cheese
                                          • 1 egg
                                          • 1 (15 oz) can sweet corn, drained
                                          • 1 (4 oz) can green chiles, mild or medium
                                          • 1 teaspoon garlic powder
                                          • 1 teaspoon salt
                                          • ½ teaspoon black pepper
                                          • ½ cup grated Parmesan cheese, for topping

                                          Instructions:

                                          1. Preheat Oven: Set your oven to 425 degrees F (220 degrees C). Prepare two large baking sheets by lightly greasing them or lining them with parchment paper.
                                          2. Arrange Chips: Place the Tostitos Scoops tortilla chips on the prepared baking sheets, cup side up, making sure they are tightly arranged.
                                          3. Prepare the Filling: In a large bowl, combine the softened cream cheese, mozzarella cheese, egg, drained sweet corn, green chiles, garlic powder, salt, and black pepper. Mix well until all the ingredients are fully incorporated.
                                          4. Fill the Chips: Scoop about 1 tablespoon of the filling into each tortilla chip scoop.
                                          5. Add Cheese Topping: Sprinkle grated Parmesan cheese over the filled chips.
                                          6. Bake: Place the baking sheets in the preheated oven and bake for 13-15 minutes, or until the tops begin to brown and the cheese is bubbling.
                                          7. Serve: Remove from the oven and serve the Iowa Party Bites warm. Enjoy the melty, cheesy goodness with your guests!

                                          Storage Options:

                                          • Refrigerator: If you have leftovers, they can be stored in an airtight container in the refrigerator for up to 2 days. Reheat in the oven or microwave before serving.
                                          • Freezer: Not recommended for freezing as the texture of the chips may become soggy upon thawing.

                                          Tips:

                                          • Add Ons: For an extra kick, add diced jalapeños to the cheese mixture or top with a small dollop of salsa before serving.
                                          • Cheese Variations: Feel free to experiment with different types of cheese, such as pepper jack for a spicier flavor or a blend of cheddar and Monterey Jack.
                                          • Serving Suggestion: Serve alongside a variety of dips like guacamole, salsa, or sour cream for dipping.

                                          Best Ever NO BAKE Cookies

                                          0

                                          No bake cookies are a delightful treat that combines convenience with deliciousness. Perfect for those moments when you crave something sweet but either lack the time for traditional baking or simply don’t want to heat up the kitchen. These cookies are a blend of chocolatey goodness, rich peanut butter, and hearty oats, creating a satisfying texture and flavor that’s hard to resist. Ideal for last-minute guests, after-school snacks, or a quick dessert, no bake cookies are as fun to make as they are to eat.

                                          This recipe offers a fantastic way to whip up a batch of cookies without turning on the oven, using simple ingredients and just a few steps. It’s particularly great for involving kids in the kitchen, as they can easily participate in mixing and shaping the cookies, all while making cherished memories.

                                          Why You’ll Love This Recipe:

                                          • Quick and Easy: Ready in just a few minutes with no oven required, making it perfect for quick snacking or unexpected guests.
                                          • Rich and Flavorful: The combination of cocoa, peanut butter, and vanilla delivers a rich and indulgent taste.
                                          • Versatile: Easily adaptable with additions like nuts, chocolate chips, or dried fruit to suit your taste.

                                          Ingredients:

                                          • 1/2 cup butter or margarine
                                          • 2 cups sugar
                                          • 1/2 cup milk
                                          • 4 tablespoons cocoa powder
                                          • 1/2 cup creamy peanut butter (or chunky, for a more textured cookie)
                                          • 2 teaspoons vanilla extract
                                          • 3 to 3 1/2 cups quick-cooking oats (not old-fashioned oats)

                                          Instructions:

                                          1. Prepare Your Workspace: Line your counter or baking sheets with wax paper to prepare for dropping the cookies.
                                          2. Combine the Ingredients: In a 4-quart saucepan, combine the butter, sugar, milk, and cocoa powder.
                                          3. Bring to a Boil: Place the saucepan over medium heat and stir constantly. Bring the mixture to a rolling boil, then allow it to boil for 30 to 40 seconds.
                                          4. Add Peanut Butter and Vanilla: Remove the saucepan from the heat. Stir in the peanut butter until melted and fully incorporated, then add the vanilla extract.
                                          5. Mix in the Oats: Gradually add the oats, stirring until the oats are evenly coated with the chocolate-peanut butter mixture.
                                          6. Form the Cookies: Drop spoonfuls of the mixture onto the prepared wax paper using a tablespoon or cookie scoop.
                                          7. Cool and Set: Allow the cookies to cool and set at room temperature for about 20 to 30 minutes.

                                          Storage Options:

                                          • Room Temperature: Store in an airtight container at room temperature for up to a week.
                                          • Refrigerator: For a firmer texture, you can also store them in the refrigerator.

                                          Tips:

                                          • Consistency Adjustments: If the mixture seems too dry, add a little more milk; if it’s too wet, add a few more oats.
                                          • Flavor Twists: Customize your cookies by adding chocolate chips, coconut flakes, or even a dash of cinnamon for a unique twist.
                                          • Peanut Butter Substitutes: For those with nut allergies, consider using sunflower seed butter or another nut-free alternative.