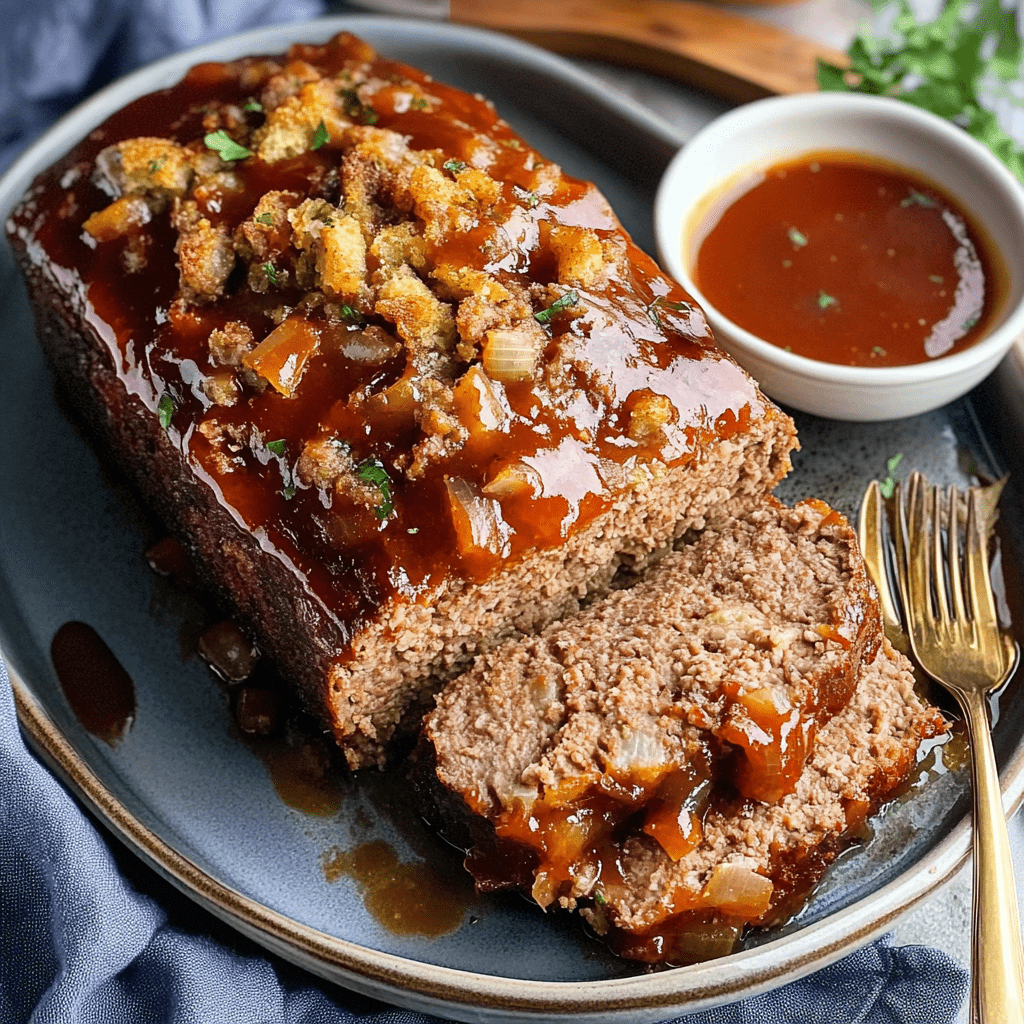
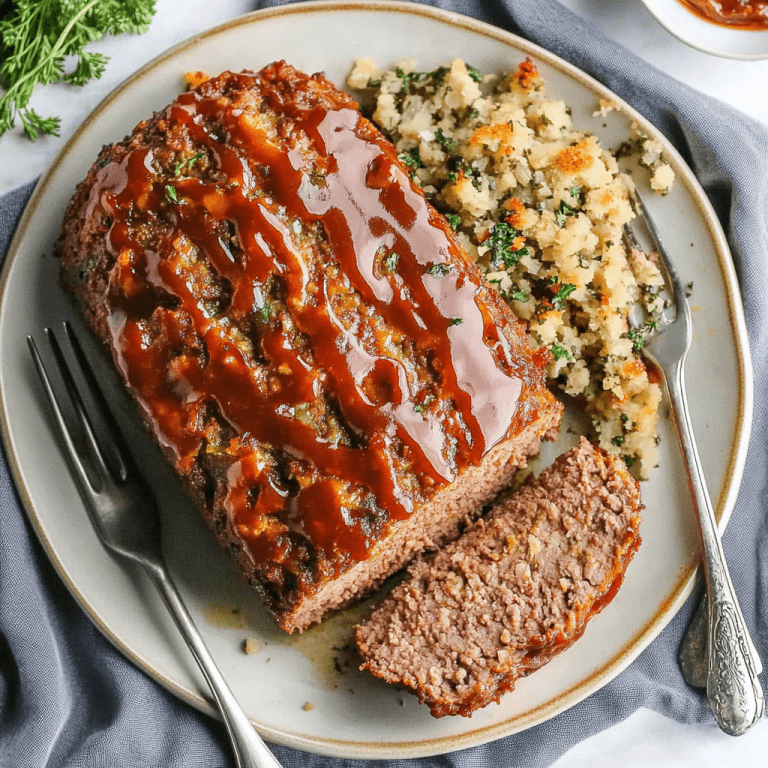
Homemade Meatloaf with Stovetop Stuffing

0

This Homemade Meatloaf with Stovetop Stuffing is a comforting, family-friendly recipe that simplifies the classic dish with a flavorful twist. Using Stovetop stuffing mix as a base, this meatloaf is quick to prepare and packed with savory flavors. Topped with a tangy ketchup glaze, it’s the ultimate crowd-pleaser, perfect for weeknight dinners or Sunday suppers.

The stuffing mix not only adds seasoning but also acts as a binder, ensuring the meatloaf is tender and moist. Paired with classic sides like mashed potatoes or roasted vegetables, this dish brings warmth and nostalgia to your table.

Why You’ll Love This Recipe

Quick and Easy: Minimal ingredients and steps make this recipe a breeze.

Moist and Flavorful: The stuffing mix adds both seasoning and moisture.

Family Favorite: A classic dish with a comforting twist.
Ingredients

• 1 package Stovetop stuffing mix (flavor of your choice)

• 1 pound lean ground beef

• ½ cup ketchup

• ¼ cup water

• 2 eggs, lightly beaten

Instructions

Step 1: Preheat the Oven

1. Preheat your oven to 350°F (175°C).

2. Grease a 9×13-inch baking pan or line a baking sheet with parchment paper.

Step 2: Prepare the Egg and Water Mixture

1. In a large mixing bowl, whisk together the lightly beaten eggs and water until combined.

Step 3: Mix in the Stuffing

1. Add the Stovetop stuffing mix to the egg and water mixture.

2. Stir well until the stuffing absorbs the liquid and forms a cohesive mixture.

Step 4: Incorporate the Ground Beef

1. Add the ground beef to the bowl with the stuffing mixture.

2. Use your hands to gently mix until just combined. Be careful not to overwork the meat to ensure a tender texture.

Step 5: Shape the Meatloaf

1. Transfer the mixture to your prepared baking pan or sheet.

2. Shape the mixture into a loaf if using a sheet. Smooth the top with a spatula or spoon.

Step 6: Add the Ketchup Glaze

1. Spread the ketchup evenly over the top of the meatloaf.

2. For added depth of flavor, you can mix a teaspoon of brown sugar into the ketchup before spreading.

Step 7: Bake the Meatloaf

1. Place the pan or sheet in the oven and bake for 1 hour.

2. Check for doneness using a meat thermometer; the internal temperature should reach 160°F (71°C).

Step 8: Rest and Slice

1. Remove the meatloaf from the oven and let it rest for 5–10 minutes to allow the juices to redistribute.

2. Slice with a sharp knife for clean, even portions.

Step 9: Serve and Enjoy

1. Serve warm with your favorite sides, such as mashed potatoes, roasted vegetables, or a crisp salad.

2. Optionally, drizzle additional ketchup or serve with a tangy barbecue sauce for extra flavor.

Tips

Customize the Flavor: Use flavored stuffing mixes (like savory herb or chicken) to add variety.

Avoid Overmixing: Gentle handling of the meat mixture ensures a tender meatloaf.

Optional Add-ins: Enhance the dish with diced onions, bell peppers, or shredded cheese mixed into the meatloaf.

Storage Options

Refrigeration: Store leftover meatloaf in an airtight container in the fridge for up to 3 days. Reheat in the oven or microwave.

Freezing: Wrap slices individually in foil and freeze in a freezer-safe bag for up to 2 months. Thaw in the refrigerator and reheat in the oven.

Homemade Meatloaf with Stovetop Stuffing is a simple yet hearty dish that’s sure to become a family favorite. Its rich flavor, moist texture, and ease of preparation make it a go-to recipe for busy weeknights or special occasions. Serve it up and enjoy a comforting classic with a modern twist!

Italian Stromboli

0

Italian Stromboli is a savory, rolled pizza that’s bursting with flavor in every slice. With layers of spicy pepperoni, hearty Italian sausage, and gooey mozzarella cheese wrapped in golden pizza dough, this recipe is perfect for weeknight dinners, game day snacks, or casual gatherings. Served with extra marinara or pizza sauce for dipping, it’s a hit with both kids and adults.

This dish is quick and simple to make, thanks to store-bought pizza dough and a handful of classic Italian ingredients. The rolled format not only makes it visually appealing but also easy to slice and serve.

Why You’ll Love This Recipe

Packed with Flavor: Classic pizza toppings rolled into a crispy crust.

Quick and Easy: Uses refrigerated dough for convenience.

Customizable: Add your favorite fillings like veggies or extra cheese.

Ingredients

• 1 (11-ounce) can thin crust refrigerated pizza dough

• ⅓ cup pizza sauce, plus extra for dipping

• ½ cup sliced pepperoni (about 2.5 ounces)

• 1 cup cooked, crumbled ground Italian sausage

• 2 cups shredded mozzarella cheese

Instructions

Step 1: Preheat the Oven and Prepare the Dough

1. Preheat your oven to 400°F (200°C).

2. Line a large baking sheet with parchment paper. Open the can of pizza dough and stretch it out thinly and evenly over the parchment paper.

Step 2: Add the Toppings

1. Spread ⅓ cup of pizza sauce evenly over the dough, leaving a small border around the edges.

2. Layer the pepperoni slices, followed by the cooked Italian sausage, and then the shredded mozzarella cheese.

Step 3: Roll the Stromboli

1. Starting from one long side, carefully roll the dough into a jelly roll shape, ensuring the toppings stay in place.

2. Position the roll in the middle of the parchment paper with the seam on the bottom to seal it.

Step 4: Prepare for Baking

1. Use a sharp knife to cut several diagonal slits across the top of the dough. This allows steam to escape and prevents the Stromboli from puffing up too much.

Step 5: Bake to Perfection

1. Place the baking sheet in the preheated oven and bake for 15-20 minutes, or until the crust is a deep golden brown.

2. Remove from the oven and let it cool for 5 minutes before slicing.

Step 6: Serve and Enjoy

1. Slice the Stromboli into 1-2 inch pieces.

2. Serve warm with extra pizza sauce or marinara for dipping.

Tips

Prevent Sogginess: Ensure the Italian sausage is well-drained after cooking to avoid excess moisture.

Add Variations: Include your favorite toppings like mushrooms, olives, spinach, or bell peppers for extra flavor.

Crispier Crust: Brush the top with olive oil and sprinkle with Italian seasoning or grated Parmesan cheese before baking.

Storage Options

Refrigeration: Store leftovers in an airtight container in the fridge for up to 3 days. Reheat in the oven or air fryer for best results.

Freezing: Wrap individual slices in foil or plastic wrap and freeze in a freezer-safe bag for up to 2 months. Reheat directly from frozen in the oven.

Italian Stromboli is a crowd-pleasing dish that combines the best parts of pizza in a convenient, handheld roll. It’s versatile, satisfying, and packed with bold Italian flavors. Try it as an appetizer, main course, or snack—you won’t be disappointed!

Crescent Rolls Cheesecake Casserole

0

Crescent Rolls Cheesecake Casserole is an irresistible dessert that marries the buttery, flaky layers of crescent rolls with a rich and creamy cheesecake filling. Topped with a buttery cinnamon-sugar crust, this simple yet indulgent recipe is perfect for any occasion, from family dinners to potlucks or celebrations.

This casserole is easy to prepare and delivers a perfect balance of textures—crispy, golden layers on the outside with a luscious, sweet cream cheese filling in the center. It’s a dessert that’s sure to delight everyone at the table!

Why You’ll Love This Recipe

Simple Ingredients: Uses pantry staples for a quick and easy dessert.

Rich and Creamy: The cheesecake filling adds a luxurious texture.

Versatile: Perfect for breakfast, brunch, or dessert.

Ingredients

• 2 cans (8 oz each) refrigerated crescent roll dough

• 2 packages (8 oz each) cream cheese, softened

• 1 cup granulated sugar

• 1 teaspoon vanilla extract

• ¼ cup unsalted butter, melted

• ¼ cup granulated sugar, for garnish

• 1 teaspoon ground cinnamon

Instructions

Step 1: Preheat and Prepare the Pan

1. Preheat your oven to 350°F (175°C).

2. Lightly grease a 9×13-inch baking dish to prevent sticking.

Step 2: Form the Bottom Layer

1. Unroll one can of crescent roll dough and press it into the bottom of the prepared baking dish.

2. Seal the seams to create an even, solid layer.

Step 3: Make the Cheesecake Filling

1. In a medium mixing bowl, beat the softened cream cheese, 1 cup of granulated sugar, and vanilla extract until smooth and creamy.

2. Spread the cheesecake filling evenly over the bottom dough layer.

Step 4: Add the Top Layer

1. Unroll the second can of crescent roll dough and carefully lay it over the cream cheese mixture.

2. Press gently to seal the edges and seams.

Step 5: Add the Topping

1. Drizzle the melted butter evenly over the top dough layer.

2. In a small bowl, mix ¼ cup of granulated sugar with 1 teaspoon of ground cinnamon.

3. Sprinkle the cinnamon-sugar mixture generously over the butter.

Step 6: Bake and Serve

1. Bake in the preheated oven for 30-35 minutes, or until the top is golden brown and crisp.

2. Remove from the oven and let cool slightly before slicing into squares.

Tips

Room Temperature Cream Cheese: Ensure the cream cheese is softened to avoid lumps in the filling.

Seal the Seams: Press the seams of the crescent roll dough firmly to prevent leaks during baking.

Customize the Flavor: Add a touch of lemon zest or almond extract to the cream cheese filling for a twist.

Storage Options

Refrigeration: Store leftovers in an airtight container in the fridge for up to 4 days. Serve chilled or reheat in the oven.

Freezing: Freeze individual portions wrapped in plastic wrap and stored in a freezer-safe bag for up to 2 months. Thaw in the fridge overnight before serving.

Crescent Rolls Cheesecake Casserole is a delightful blend of buttery, flaky crust and creamy, tangy cheesecake filling. Its ease of preparation and crowd-pleasing flavor make it a recipe you’ll come back to again and again. Enjoy this decadent casserole warm or chilled, and watch it disappear from the table in no time!

Cheesy Baked Onion Stacks

0

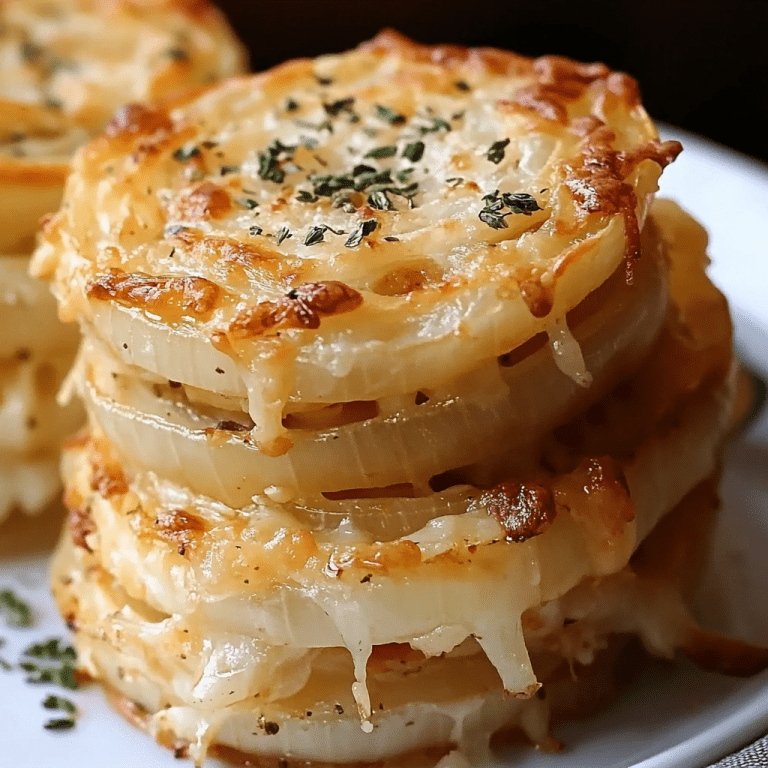
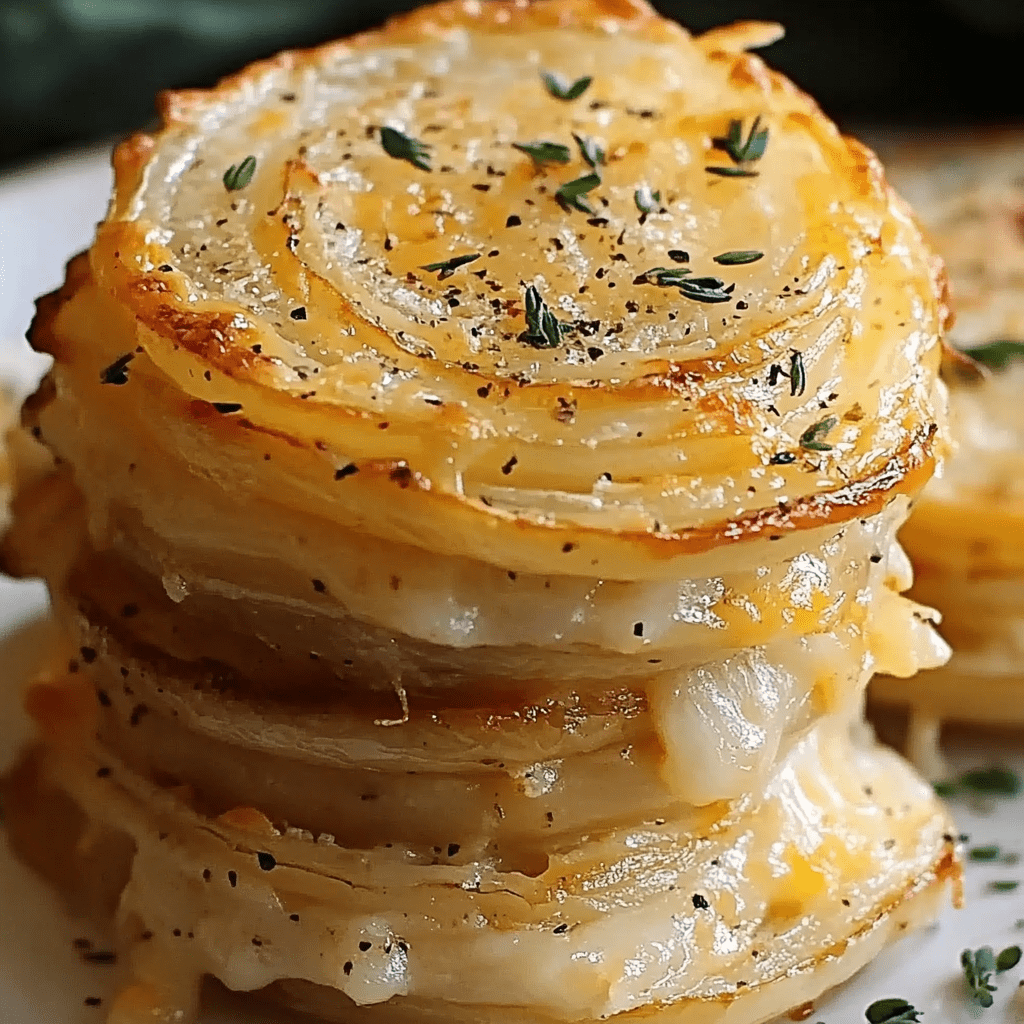
Cheesy Baked Onion Stacks are a savory, indulgent side dish or appetizer that combine the natural sweetness of roasted onions with gooey, golden-brown melted cheese. With layers of onion rings seasoned to perfection and topped with your favorite shredded cheese, this dish is simple yet packed with flavor.

The recipe is versatile, allowing you to customize the cheese and seasonings to suit your preferences. Whether served as a snack, a side for grilled meats, or a vegetarian option for a dinner spread, these cheesy onion stacks are sure to impress.

Why You’ll Love This Recipe

Easy and Delicious: Minimal ingredients and steps for maximum flavor.

Cheesy Goodness: Melted cheese turns sweet onions into an irresistible treat.

Customizable: Choose your favorite cheeses and seasonings.

Ingredients

• 3 large onions, peeled and sliced into ½-inch thick rings

• 2 cups shredded cheese (mozzarella, cheddar, or a mix)

• 1 teaspoon garlic powder

• 1 teaspoon Italian seasoning

• 2 tablespoons olive oil

• Salt and black pepper, to taste

• 2 tablespoons chopped parsley, for garnish

Instructions

Step 1: Prepare the Onions

1. Preheat your oven to 375°F (190°C).

2. Line a baking tray with parchment paper or lightly grease it with olive oil.

3. Separate the sliced onions into individual rings and set aside.

Step 2: Season the Onions

1. Place the onion rings in a large bowl.

2. Drizzle the olive oil over the rings.

3. Sprinkle with garlic powder, Italian seasoning, salt, and black pepper. Toss gently to coat evenly.

Step 3: Assemble the Stacks

1. Arrange the largest onion rings on the prepared baking tray.

2. Place smaller onion rings inside the larger ones to form stacks, with 2–3 layers per stack.

Step 4: Add the Cheese

1. Generously top each onion stack with shredded cheese, covering them completely.

2. The cheese will melt into a golden, bubbly crust as the onions bake.

Step 5: Bake to Perfection

1. Transfer the baking tray to the preheated oven.

2. Bake for 20–25 minutes, or until the cheese is melted, bubbly, and slightly golden brown.

Step 6: Garnish and Serve

1. Remove the onion stacks from the oven and allow them to cool for a few minutes.

2. Sprinkle chopped parsley over the top for added flavor and a pop of color.

Tips

Even Slices: Slice the onions evenly for uniform cooking.

Cheese Selection: Use a mix of cheeses like Parmesan and Gruyere for extra flavor.

Crispier Texture: Broil the onion stacks for 1–2 minutes at the end for a crispier cheese topping.

Storage Options

Refrigeration: Store leftovers in an airtight container in the fridge for up to 2 days. Reheat in the oven for best results.

Freezing: Not recommended as the texture of the onions may become soggy upon thawing.

Cheesy Baked Onion Stacks are the perfect combination of simplicity and decadence. Their crispy, cheesy topping and tender, flavorful onions make them a crowd-pleaser for any occasion. Serve them warm and enjoy every gooey, savory bite!

Asian Chicken Cranberry Salad

0

This Asian Chicken Cranberry Salad is a vibrant, flavorful dish that combines fresh coleslaw mix, juicy rotisserie chicken, and a medley of sweet, savory, and tangy ingredients. Perfect as a main course or side dish, it’s a wonderful balance of textures and flavors, highlighted by a rich sesame-ginger dressing.

The toasted almonds or cashews add a delightful crunch, while the dried cranberries and mandarin oranges bring a burst of sweetness. The soy sauce and balsamic dressing ties everything together with its zesty, umami flavor. Ideal for potlucks, weeknight dinners, or meal prep, this salad is as versatile as it is delicious.

Why You’ll Love This Recipe

Burst of Flavors: Sweet, tangy, and savory in every bite.

Crunchy and Fresh: A perfect mix of textures from nuts, sesame sticks, and crisp coleslaw.

Quick and Easy: Rotisserie chicken makes it a breeze to prepare.

Ingredients

For the Salad:

• 12 cups coleslaw mix (about 2 small bags)

• 4 cups rotisserie chicken, finely chopped

• 1 ½ cups toasted sliced almonds (or cashews)

• 1 ½ cups dried cranberries

• ¾ cup red onion, finely diced

• 1 cup sesame sticks (optional)

• 1 ½ cups chopped fresh cilantro

• 1-2 small cans mandarin oranges, drained

• ¼ cup black sesame seeds (or regular sesame seeds)

For the Dressing:

• 1 cup extra-virgin olive oil

• ½ cup balsamic vinegar

• 4 tablespoons low-sodium soy sauce

• 3-4 cloves garlic, chopped

• 4 tablespoons honey (or brown sugar)

• 4 tablespoons minced ginger

• 2 teaspoons toasted sesame oil

• 3 tablespoons water

Instructions

Step 1: Prepare the Salad

1. In a large mixing bowl, layer the coleslaw mix as the base.

2. Add the chopped rotisserie chicken, toasted almonds or cashews, dried cranberries, diced red onion, and sesame sticks if desired.

3. Sprinkle the chopped cilantro evenly over the mixture.

4. Gently fold in the mandarin oranges for a pop of sweetness.

Step 2: Make the Dressing

1. In a blender, combine the olive oil, balsamic vinegar, soy sauce, garlic, honey, ginger, and toasted sesame oil.

2. Add 3 tablespoons of water to thin the dressing slightly. Blend until smooth and emulsified.

Step 3: Combine and Serve

1. Lightly pour the prepared dressing over the salad, adjusting the amount to your preferred level of moistness.

2. Toss gently to combine all the ingredients, ensuring an even coating of the dressing.

3. Sprinkle sesame seeds over the salad as a garnish before serving.

Tips

Fresh Herbs: Use freshly chopped cilantro for the best flavor and vibrant color.

Customize Ingredients: Swap out dried cranberries for raisins or add thinly sliced bell peppers for extra crunch.

Make Ahead: Assemble the salad and dressing separately, then toss together just before serving to keep it crisp.

Storage Options

Refrigeration: Store leftover salad in an airtight container in the fridge for up to 2 days. Keep the dressing separate to maintain crispness.

Meal Prep: Prep the ingredients and store them separately. Combine just before serving for maximum freshness.

This Asian Chicken Cranberry Salad is a delightful mix of flavors and textures, perfect for any occasion. Whether served as a main course or a side dish, it’s sure to impress with its vibrant presentation and bold taste. Enjoy a bowlful of this salad for a healthy, satisfying meal!

Yum Yum Cake – Old Southern Recipe(Pineapple Cake)

0

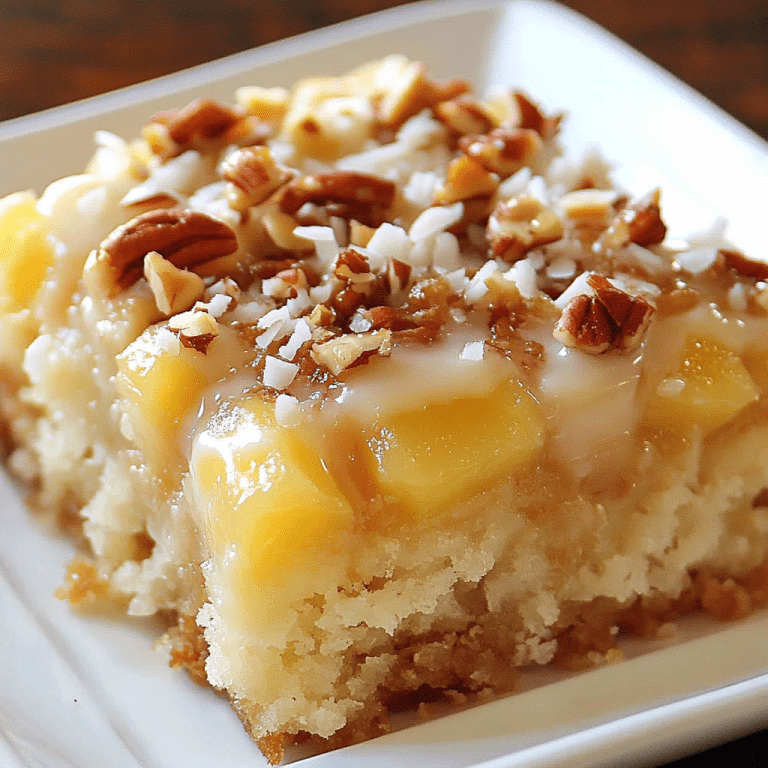
Yum Yum Cake is a delightful, nostalgic Southern dessert that’s easy to make and packed with flavor. The combination of a moist pineapple cake and a decadent coconut-pecan icing creates a treat that lives up to its name. This recipe is a perfect go-to for family gatherings, potlucks, or whenever you’re craving a slice of sweet, old-fashioned comfort.

The simplicity of this cake makes it a joy to bake. With pantry staples like self-rising flour and sugar, and the tropical sweetness of pineapple and coconut, it comes together quickly and leaves your kitchen smelling divine. The warm icing, poured over the cake right out of the oven, soaks into every bite, ensuring rich flavor and a tender texture.

Why You’ll Love This Recipe

Easy to Make: No special equipment or complicated steps—just mix, bake, and ice.

Classic Southern Flavors: The pineapple, coconut, and pecan combination is irresistible.

Perfect for Any Occasion: Whether it’s a family dinner or a holiday gathering, this cake is always a hit.

Ingredients

For the Cake:

• 2 cups self-rising flour

• 2 eggs

• 2 cups sugar

• 2 teaspoons baking soda

• 2 cups crushed pineapple (drained)

For the Icing:

• 1 cup sugar

• 1 stick margarine (or butter)

• 1 small can Pet milk (5 oz evaporated milk)

• 1 cup shredded coconut

• 1 teaspoon vanilla extract

• 1 cup chopped pecans

Instructions

Step 1: Prepare the Cake Batter

1. Preheat your oven to 350°F (175°C). Grease a 9×13-inch baking pan to prevent sticking.

2. In a large mixing bowl, combine the self-rising flour, eggs, sugar, baking soda, and drained crushed pineapple. Mix until well blended.

Step 2: Bake the Cake

1. Pour the batter into the prepared baking pan, spreading it evenly.

2. Bake for 25 minutes, or until a toothpick inserted in the center comes out clean.

3. Remove the cake from the oven but leave it in the pan.

Step 3: Make the Icing

1. In a medium saucepan, combine the sugar, margarine, and evaporated milk.

2. Place over medium heat and stir constantly until the mixture comes to a boil. Boil for 2 minutes, continuing to stir.

3. Remove the saucepan from heat and stir in the coconut, vanilla extract, and chopped pecans.

Step 4: Ice the Cake

1. Pour the warm icing evenly over the still-warm cake. Use a spatula to spread it if needed, ensuring the entire surface is covered.

2. Let the cake cool slightly to allow the icing to soak in and set before serving.

Tips

Draining the Pineapple: Ensure the crushed pineapple is well-drained to avoid excess moisture in the cake.

Icing Consistency: Stir the icing constantly while boiling to prevent scorching.

Customization: Add a pinch of cinnamon or nutmeg to the batter for a warm spice note.

Storage Options

Room Temperature: Cover and store at room temperature for up to 2 days.

Refrigeration: Store in an airtight container in the fridge for up to 5 days.

Freezing: Wrap individual slices tightly in plastic wrap and freeze for up to 2 months. Thaw at room temperature before serving.

Yum Yum Cake is a testament to the charm of Southern baking: simple ingredients, straightforward steps, and a result that’s undeniably delicious. The moist cake paired with the rich, nutty icing is a combination that will have everyone asking for seconds. Enjoy the comfort and joy of this timeless recipe!

Sliced Baked Potatoes

0

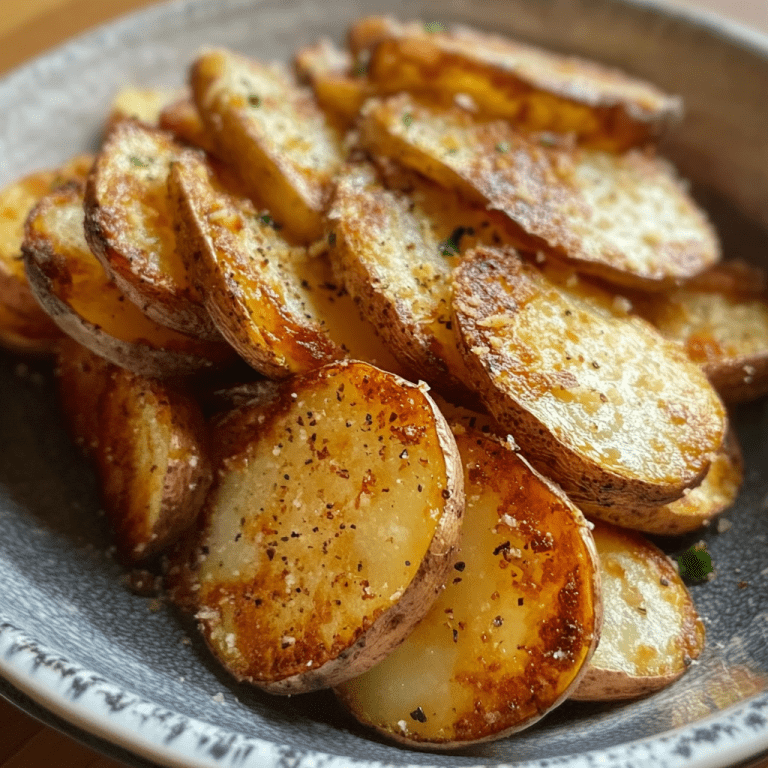
Sliced Baked Potatoes, often referred to as Hasselback-style potatoes, are a visually stunning and delicious side dish. Their unique presentation, with thin vertical slices, allows for even roasting and crispy edges while keeping the inside soft and tender. These potatoes are a perfect accompaniment to any meat entrée or can stand alone as a satisfying vegetarian option.

The beauty of this recipe lies in its simplicity and versatility. With just a handful of ingredients and a few steps, you can transform humble potatoes into a golden-brown, flavorful dish that’s sure to impress. Adjust the spices to suit your taste or add toppings like cheese, sour cream, or chives for a more indulgent version.

Why You’ll Love This Recipe

Crispy on the Outside, Soft on the Inside: The thin slices roast to perfection, creating a delightful contrast in texture.

Customizable: Adjust the seasoning or add toppings to make it your own.

Impressive Presentation: The sliced design makes these potatoes look as good as they taste.

Ingredients

• 4 medium Russet potatoes (or your preferred variety)

• ¼ teaspoon salt

• ⅛ teaspoon black pepper

• ⅛ teaspoon cayenne pepper (optional, for a kick)

• ⅛ teaspoon garlic powder

• ⅛ teaspoon paprika

• 4 to 6 tablespoons olive oil

Instructions

Step 1: Prepare the Potatoes

1. Wash and dry the potatoes thoroughly. Leave the skin on for added flavor and texture.

2. Slice the potatoes vertically from side to side, ensuring you don’t cut all the way through. Aim to slice only halfway down to create a fan-like effect. For crispier edges, try slicing at an angle.

Step 2: Preheat and Season

1. Preheat your oven to 400°F (200°C).

2. In a small bowl, mix together the salt, black pepper, cayenne pepper, garlic powder, and paprika.

Step 3: Add Olive Oil and Seasoning

1. Place the sliced potatoes on a parchment-lined baking tray.

2. Spritz or brush each potato generously with olive oil, ensuring it gets into the slices.

3. Sprinkle the seasoning mixture evenly over the potatoes, taking care to get some between the slices for maximum flavor.

Step 4: Bake to Perfection

1. Bake the potatoes in the preheated oven for 40-45 minutes, or until they’re golden brown and crispy on the outside.

2. Check for doneness by inserting a knife or skewer into the center of a potato—it should glide in easily.

Step 5: Serve and Enjoy

1. Remove the potatoes from the oven and let them cool slightly before serving.

2. Pair them with your favorite main dish, or top with sour cream, shredded cheese, or fresh herbs for an extra indulgent touch.

Tips

Even Slices: Use chopsticks or wooden spoons as guides when slicing to prevent cutting all the way through the potato.

Crispier Potatoes: Add an extra drizzle of olive oil midway through baking for a crispier texture.

Flavor Variations: Experiment with spices like rosemary, thyme, or Parmesan for a different flavor profile.

Storage Options

Refrigeration: Store leftover potatoes in an airtight container in the fridge for up to 3 days.

Reheating: Reheat in the oven at 375°F (190°C) for 10-15 minutes to restore their crispiness.

Freezing: These potatoes are best enjoyed fresh, but you can freeze them if necessary. Wrap them tightly in foil and freeze for up to 1 month. Reheat directly from frozen at 400°F (200°C) until heated through.

Sliced Baked Potatoes are a versatile and crowd-pleasing side dish that combines simplicity with elegance. Their crispy edges, tender interior, and customizable flavor make them a must-try recipe for any occasion. Whether you’re preparing a weeknight dinner or a festive feast, these potatoes are sure to be a hit!

Pecan Pie Bark

0

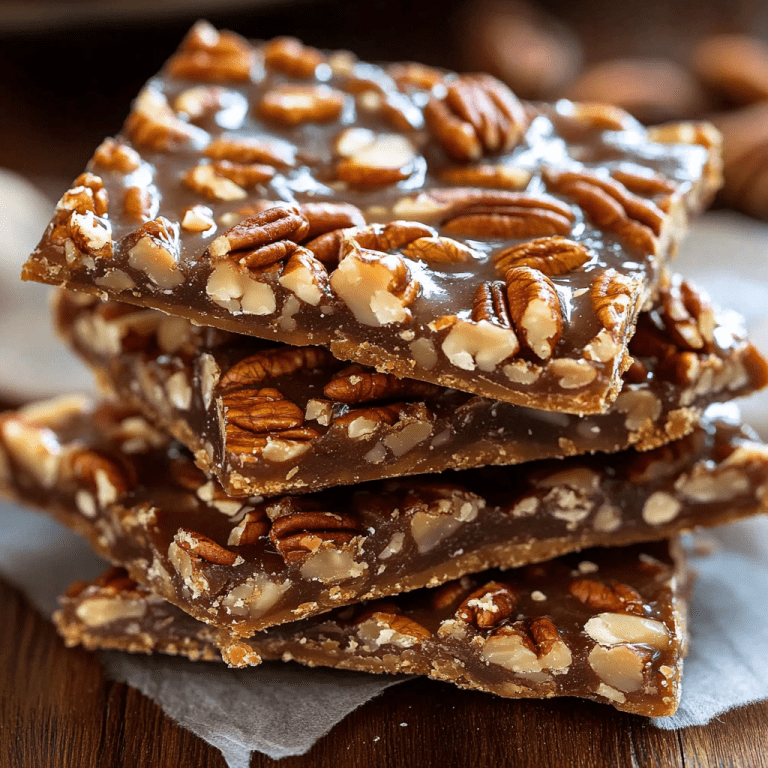
Pecan Pie Bark is a delectable treat that combines the rich, buttery flavors of pecan pie with the satisfying crunch of graham crackers. This quick and easy recipe is perfect for holiday gatherings, gifts, or simply indulging in a sweet snack. With just a handful of ingredients and minimal prep time, you can create a dessert that tastes like it came straight from a bakery.

What makes this bark so special is its caramelized topping made from butter, brown sugar, and pecans. As it bakes, the caramel seeps into the graham crackers, creating a delightful combination of textures and flavors. The addition of vanilla and a hint of salt rounds out the sweetness, making every bite irresistible.

Why You’ll Love This Recipe

Quick and Easy: Ready in under 30 minutes with simple ingredients.

Perfect for Sharing: A great treat for parties, holidays, or edible gifts.

Classic Pecan Pie Flavors: All the goodness of pecan pie without the hassle of a crust.

Ingredients

• 13 graham crackers

• 1 cup unsalted butter (2 sticks)

• 1 cup brown sugar

• 2 cups pecan halves, roughly chopped

• ¼ teaspoon salt

• 1 teaspoon vanilla extract

Instructions

Step 1: Prepare the Baking Sheet

1. Preheat your oven to 350°F (175°C).

2. Line a rimmed sheet pan with aluminum foil, extending the foil slightly over the edges for easy lifting. Lightly grease the foil with butter to prevent sticking.

Step 2: Arrange the Graham Crackers

1. Lay the graham crackers in a single layer on the prepared sheet pan. Break them as needed to fit the entire surface snugly.

Step 3: Make the Caramel Topping

1. In a medium saucepan, combine the butter, brown sugar, chopped pecans, and salt.

2. Heat over medium heat, stirring constantly, until the mixture comes to a boil.

3. Let it boil for 2 minutes while stirring to ensure a smooth caramel texture.

Step 4: Add the Vanilla

1. Remove the saucepan from heat and stir in the vanilla extract. Be careful as the mixture may bubble slightly.

Step 5: Assemble and Bake

1. Carefully pour the hot caramel mixture over the graham crackers, spreading it evenly with a spatula to cover every piece.

2. Place the sheet pan in the oven and bake for 10 minutes, or until the caramel is bubbly and golden brown.

Step 6: Cool and Serve

1. Remove the pan from the oven and let the bark cool completely in the pan. This allows the caramel to set.

2. Once cooled, lift the foil to remove the bark from the pan. Break it into bite-sized pieces and serve.

Tips

Watch the Caramel: Don’t walk away while the caramel is cooking—it can burn quickly.

Even Spreading: Use a silicone spatula to spread the caramel evenly over the graham crackers.

Enhance the Flavor: Sprinkle a pinch of sea salt over the bark before it cools for a sweet and salty twist.

Storage Options

Room Temperature: Store in an airtight container at room temperature for up to 1 week.

Freezing: Freeze in a freezer-safe container for up to 2 months. Let it come to room temperature before serving.

Pecan Pie Bark is a versatile dessert that’s as easy to make as it is delicious. With its buttery caramel and nutty pecan topping, it’s sure to become a favorite for any occasion. Whip up a batch today and watch it disappear!

Apple Butter

0

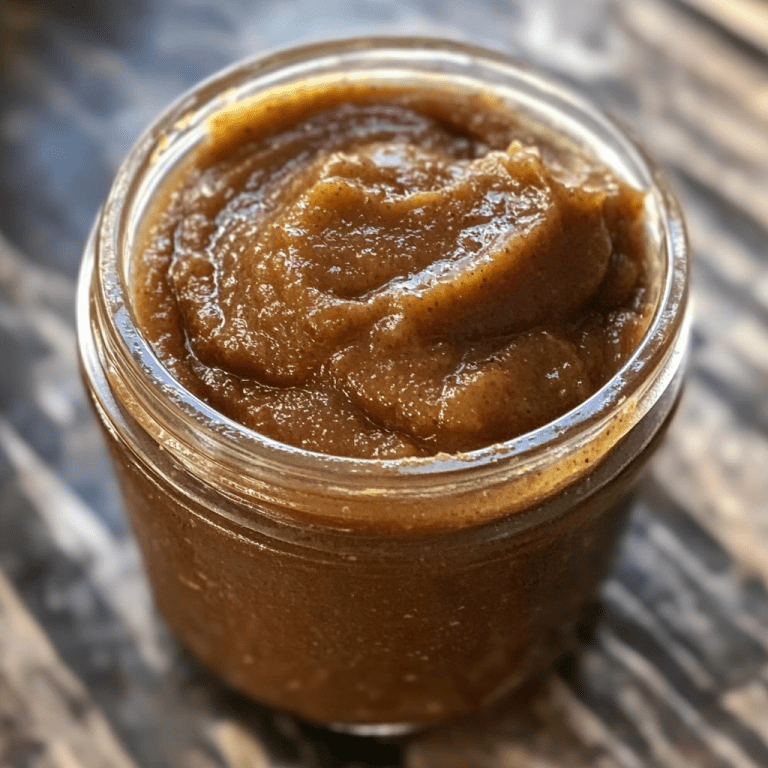
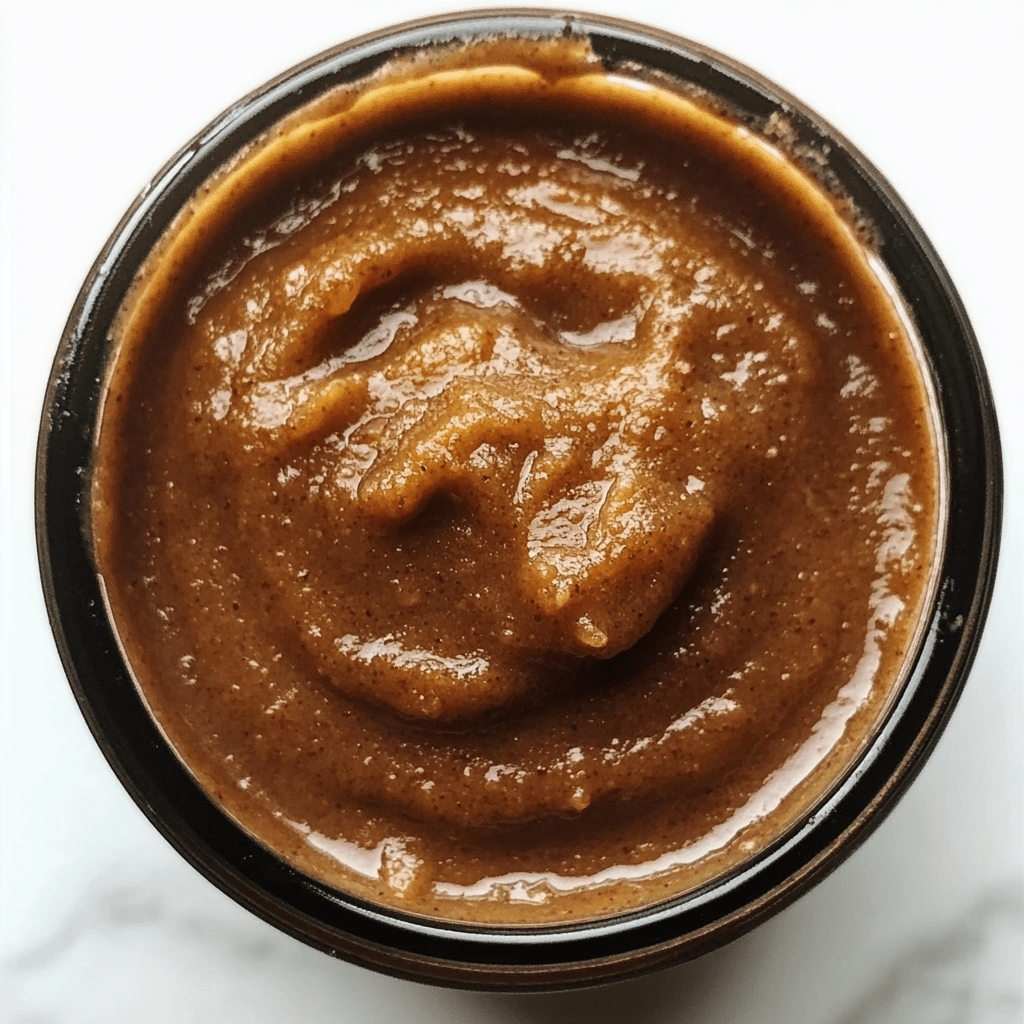
Apple Butter is a velvety, spiced fruit spread that captures the essence of fall. Made by slow-cooking apples with sugar and warm spices, this comforting condiment is perfect for spreading on toast, pairing with cheese, or stirring into oatmeal. Unlike regular jam or applesauce, Apple Butter has a deep, caramelized flavor and smooth texture that makes it irresistible.

What sets Apple Butter apart is the way it transforms humble apples into something extraordinary. By simmering for hours, the apples break down into a thick, flavorful spread that’s sweet, tangy, and fragrant with cinnamon and cloves. It’s a simple yet rewarding recipe that fills your home with the cozy aroma of autumn.

Why You’ll Love This Recipe

Rich, Spiced Flavor: The combination of cinnamon, cloves, and apples creates a warm, inviting taste.

Easy to Make: The slow cooker does all the work, requiring minimal effort.

Versatile: Use it as a spread, dip, or even an ingredient in baked goods.

Ingredients

• 5 ½ pounds apples, peeled, cored, and chopped

• 1 cup white sugar

• ½ cup brown sugar

• 2 teaspoons ground cinnamon

• 2 teaspoons vanilla extract (optional)

• ¼ teaspoon ground cloves

• ¼ teaspoon salt

Directions

Step 1: Prepare and Combine Ingredients

1. Place the peeled, cored, and chopped apples into your crock pot.

2. Add the white sugar, brown sugar, cinnamon, cloves, and salt to the apples. Stir everything together until well combined.

Step 2: Start Cooking on High

1. Cover the crock pot and cook the mixture on high heat for 1 hour. This initial stage helps to release the juices from the apples.

Step 3: Slow Cook on Low

1. Reduce the heat to low and continue cooking for 10-11 hours. Stir occasionally to ensure the mixture cooks evenly. The apple butter will thicken and turn a rich, dark brown.

Step 4: Final Hour of Cooking

1. Uncover the crock pot and let the apple butter cook on low for 1 additional hour.

2. For a smoother consistency, use a whisk to stir the apple butter during this final stage.

Step 5: Store the Apple Butter

1. Once the apple butter is done, spoon it into clean freezer-safe containers or jars.

2. Allow it to cool before covering and refrigerating or freezing.

Tips

Adjusting Sweetness: Taste the mixture during cooking and add more sugar if needed, but keep in mind that the natural sweetness of the apples intensifies as they cook.

Choosing Apples: Use a mix of tart and sweet apples (like Granny Smith and Fuji) for a balanced flavor.

Smoother Texture: If you prefer a silky texture, blend the apple butter with an immersion blender or food processor before storing.

Storage Options

Refrigeration: Store in airtight containers in the refrigerator for up to 2 weeks.

Freezing: Freeze in freezer-safe containers for up to 6 months. Thaw in the refrigerator before using.

Apple Butter is a timeless recipe that brings comfort to any season. Its deep, spiced flavors and velvety texture make it a perfect addition to your breakfast table or a thoughtful gift for loved ones. Whether you spread it on warm bread, swirl it into yogurt, or simply enjoy it by the spoonful, this Apple Butter will surely become a staple in your kitchen.

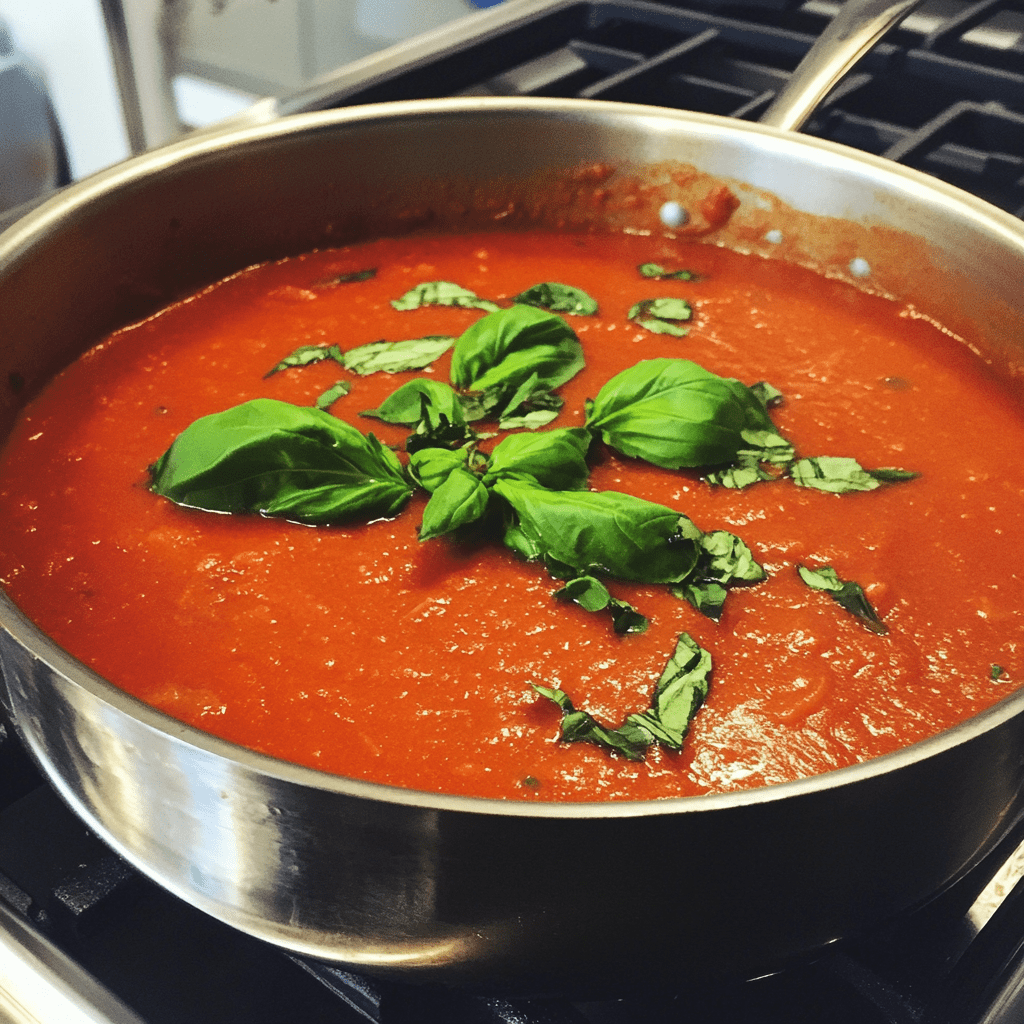
 Discover the chef’s secret: the shocking result when adding baking soda to tomato sauce

0

Tomato sauce is a staple in many cuisines around the world, revered for its rich flavor and versatility. Whether you’re preparing a classic Italian pasta dish, a comforting pizza, or a flavorful base for soups and stews, a well-made tomato sauce can elevate your culinary creations to new heights. However, achieving the perfect balance of flavors and textures in tomato sauce can sometimes be a challenge, especially when dealing with the natural acidity of tomatoes. One surprising yet effective solution that chefs and home cooks alike have discovered is the addition of baking soda to tomato sauce. This simple trick can transform your sauce, making it smoother, more vibrant, and less acidic. In this article, we’ll delve into the science behind this technique and provide a detailed guide on how to incorporate baking soda into your tomato sauce for optimal results.

Why Add Baking Soda to Tomato Sauce?

1. Neutralizes Acidity

Tomatoes, especially when ripe, contain high levels of natural acids, which can make tomato sauce taste overly tangy or sour. Adding a small amount of baking soda to the sauce helps neutralize this acidity, resulting in a smoother, more balanced flavor. This is particularly useful when working with highly acidic tomato varieties or when the sauce is intended for dishes that benefit from a milder taste.

2. Enhances Color

The vibrant red color of tomatoes is one of their most appealing attributes, but sometimes the color can appear dull or brownish, especially after prolonged cooking. Baking soda interacts with the tomatoes to enhance their natural red hue, making the sauce look more appetizing and visually appealing.

3. Softens Texture

Baking soda helps break down the tougher fibers in tomatoes, leading to a smoother, silkier texture. This is ideal for sauces that need to be spread evenly, such as on pizzas or in delicate pasta dishes. A softer texture also makes the sauce more enjoyable to eat, without any stringy or fibrous bits.

4. Reduces Cooking Time

By breaking down cellular bonds and softening the ingredients more quickly, baking soda can significantly reduce the cooking time required to achieve a well-cooked, concentrated tomato sauce. This is a great time-saver when you’re in a hurry or when you want to quickly whip up a delicious meal.

Ingredients

To make a delicious tomato sauce with the benefits of baking soda, you’ll need the following ingredients:

2 tablespoons olive oil

1 medium onion, finely chopped

2 cloves garlic, minced

2 cans (28 oz each) crushed tomatoes

1 teaspoon salt

1 teaspoon sugar

1 teaspoon dried oregano

1/2 teaspoon dried basil

1/4 teaspoon red pepper flakes (optional)

1/4 teaspoon baking soda

Freshly ground black pepper to taste

1/4 cup chopped fresh basil (optional)

Grated Parmesan cheese for serving (optional)

Instructions

Step 1: Prepare Your Ingredients

Before you start cooking, make sure all your ingredients are prepped and ready to go. Finely chop the onion and mince the garlic. Having everything prepared in advance will make the cooking process smoother and more efficient.

Step 2: Sauté the Aromatics

Heat the Olive Oil: In a large saucepan or Dutch oven, heat the olive oil over medium heat until it shimmers.

Add the Onion: Add the finely chopped onion to the pan and sauté for about 5 minutes, or until the onion is soft and translucent. Stir occasionally to prevent burning.

Add the Garlic: Stir in the minced garlic and cook for an additional 1-2 minutes, or until the garlic is fragrant. Be careful not to let the garlic burn, as it can become bitter.

Step 3: Combine Tomatoes and Seasonings

Add the Crushed Tomatoes: Pour the crushed tomatoes into the pan with the sautéed onions and garlic. Stir to combine.

Season the Sauce: Add the salt, sugar, dried oregano, dried basil, and red pepper flakes (if using) to the tomato mixture. Stir well to ensure all the seasonings are evenly distributed.

Step 4: Incorporate Baking Soda

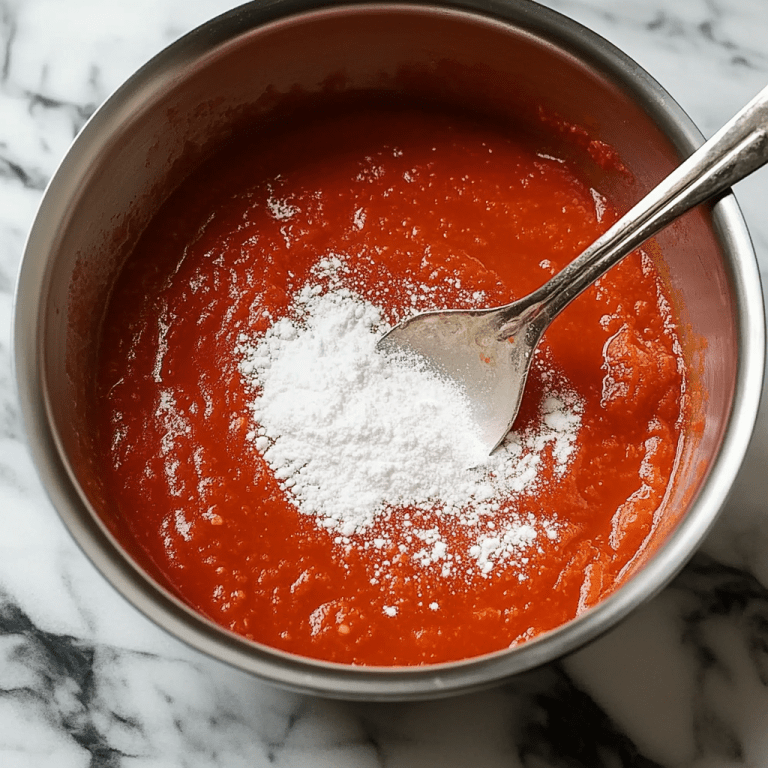
Add Baking Soda: Sprinkle the baking soda over the tomato sauce. You will notice that the sauce will start to bubble and foam slightly. This is a normal reaction as the baking soda neutralizes the acidity of the tomatoes.

Stir the Sauce: Stir the sauce thoroughly to incorporate the baking soda evenly. Continue to cook the sauce over medium heat, allowing it to simmer gently. The foaming will subside after a few minutes.

Step 5: Simmer and Adjust

Simmer the Sauce: Reduce the heat to low and let the sauce simmer for about 20-30 minutes, stirring occasionally. This allows the flavors to meld and the sauce to thicken. If the sauce becomes too thick, you can add a small amount of water or broth to reach your desired consistency.

Taste and Adjust Seasonings: Taste the sauce and adjust the seasonings as needed. Add freshly ground black pepper to taste. If the sauce is still too acidic, you can add a pinch more baking soda, but be careful not to overdo it.

Step 6: Finishing Touches

Add Fresh Basil (Optional): If using fresh basil, stir it into the sauce just before serving. This adds a burst of fresh flavor and a lovely aroma.

Serve: Serve the tomato sauce over your favorite pasta, or use it as a base for pizza, lasagna, or any other dish that calls for tomato sauce. Top with grated Parmesan cheese if desired.

Variations and Substitutions

Meat Lovers: For a heartier sauce, add cooked ground beef, Italian sausage, or meatballs to the tomato sauce.

Vegetarian Delight: Add diced vegetables such as bell peppers, zucchini, or mushrooms to the sauce for extra flavor and nutrition.

Herb Infusion: Experiment with different herbs like thyme, rosemary, or bay leaves to customize the flavor profile of your sauce.

Wine Addition: For an added depth of flavor, deglaze the pan with a splash of red wine before adding the crushed tomatoes.

Conclusion

Adding baking soda to tomato sauce may seem unconventional, but it offers several benefits that can enhance the flavor, color, and texture of your sauce. This simple trick helps neutralize the acidity of tomatoes, making the sauce smoother and more balanced. It also improves the color, softens the texture, and can even reduce cooking time. By following the detailed steps and tips provided in this guide, you can create a delicious, homemade tomato sauce that will impress your family and friends. Whether you’re a seasoned cook or a kitchen novice, this technique is sure to elevate your tomato sauce to new heights. Enjoy the improved flavor and quality of your sauce, and delight in the compliments you’ll receive from those lucky enough to taste it!