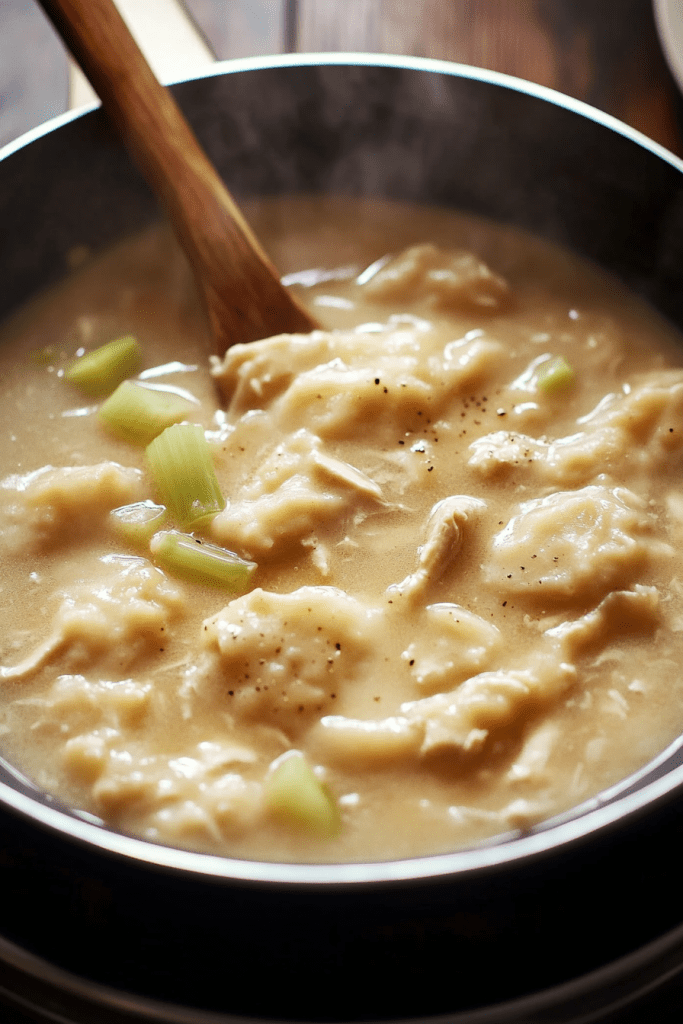
Sweet Potato Pie with a Butter Glaze

0

This Sweet Potato Pie combines the natural sweetness of cooked, mashed sweet potatoes with a buttery glaze for a dessert that’s comforting, rich, and utterly delicious. The smooth and creamy filling is balanced by a flaky pie crust, while the optional glaze adds a glossy finish and a subtle crunch from the walnuts. Whether you make it with or without the glaze, this pie is a must-try for any dessert lover.

Why You’ll Love This Recipe:

Comforting and Sweet: The creamy texture of the sweet potatoes, combined with the subtle notes of vanilla, make for a perfect fall-inspired dessert.

Simple Ingredients: With pantry staples like sugar, flour, and butter, this pie is easy to make without needing to hunt for specialty ingredients.

Optional Glaze: The butter glaze adds an extra layer of sweetness and texture, but the pie is just as delightful without it.

Ingredients:

  • Sweet potatoes: 2 cups, cooked and mashed (about 3 medium sweet potatoes)
  • Sugar: 1 1/2 cups
  • Flour: 2 tablespoons
  • Evaporated milk: 1 can (5 ounces), divided
  • Egg: 1, lightly beaten
  • Vanilla extract: 1 teaspoon
  • Pie crust: 1 unbaked 9-inch pie crust

For the Glaze:

  • Sugar: 1/2 cup
  • Flour: 2 1/4 teaspoons
  • Butter: 2 tablespoons, melted
  • Evaporated milk: 2 tablespoons (from the previous can)
  • Walnut pieces (optional): 1/4 cup

Step-by-Step Instructions:

Step 1: Prepare the Oven and Pie Crust
Preheat your oven to 375°F (190°C). Place the unbaked pie crust on a cookie sheet to catch any spills during baking. This also makes it easier to move the pie in and out of the oven later.

Step 2: Make the Sweet Potato Filling
In a large mixing bowl, combine 1 1/2 cups of sugar, 2 tablespoons of flour, and 3 ounces of the evaporated milk (remember to set aside 2 tablespoons for the glaze). Add the lightly beaten egg and 1 teaspoon of vanilla extract, mixing until everything is well incorporated.

Once the wet mixture is smooth, fold in 2 cups of cooked and mashed sweet potatoes. Stir gently until the sweet potatoes are fully combined with the rest of the ingredients. The filling should be smooth and creamy, with no large lumps.

Step 3: Pour the Filling into the Pie Crust
Carefully pour the sweet potato mixture into the unbaked pie shell, spreading it out evenly. Make sure the surface is smooth and level, as this will help the glaze sit evenly on top.

Step 4: Prepare the Butter Glaze
In a separate small bowl, mix together 1/2 cup of sugar and 2 1/4 teaspoons of flour. Stir in the 2 tablespoons of melted butter and the 2 tablespoons of evaporated milk that you set aside earlier. Whisk until the mixture is smooth and glossy.

Step 5: Glaze the Pie
Drizzle the glaze evenly over the sweet potato mixture, but be careful not to overdo it. The glaze should form a thin, glossy layer on top of the pie without sinking too deeply into the filling. If desired, sprinkle 1/4 cup of walnut pieces over the glaze for an added crunch and nutty flavor.

Step 6: Bake the Pie
Place the pie in the preheated oven and bake for about 1 hour, or until the crust is golden brown and a knife inserted near the center comes out clean. The filling should be set but still soft and creamy, while the glaze will have formed a slightly crisp, sugary layer on top.

Step 7: Cool and Serve
Once baked, remove the pie from the oven and let it cool on a wire rack. Allow the pie to cool completely before slicing and serving, as this helps the filling to set and makes for cleaner slices.

Storage Options:

Refrigeration: Store any leftover pie in an airtight container in the refrigerator for up to 4 days. To serve, you can enjoy it chilled or warm it up slightly in the microwave.

Freezing: If you’d like to save some pie for later, wrap individual slices tightly in plastic wrap, then place them in a freezer-safe container or bag. The pie can be frozen for up to 2 months. To thaw, leave the slices in the refrigerator overnight and warm in the microwave if desired.

Optional Tips:

  • If you’re worried about the pie being too sweet, feel free to skip the glaze entirely, especially if your sweet potatoes are naturally sweeter. The pie is delicious and rich enough on its own without it.
  • For a twist, you can replace the walnuts with pecans or leave out the nuts entirely.
  • Serve the pie with a dollop of whipped cream or a scoop of vanilla ice cream for an extra treat.

Final Thoughts:

This Sweet Potato Pie with a Butter Glaze is a classic comfort dessert that brings the warmth of sweet potatoes and the richness of a buttery crust together in perfect harmony. Whether you enjoy it with or without the glaze, this pie is a delightful treat for any occasion—especially during the fall and winter months. Enjoy!

Sausage and Cream Cheese Crescent Roll Bake

0

This easy-to-make casserole combines savory pork sausage crumbles with the creamy richness of cream cheese, all wrapped between buttery, flaky layers of crescent roll dough. Perfect for breakfast, brunch, or even a quick dinner, this dish is a comforting and crowd-pleasing option that’s sure to become a regular in your meal rotation.

Why You’ll Love This Recipe:

Simple and Quick: With just a few ingredients and minimal prep time, this recipe delivers maximum flavor with little effort.

Savory and Creamy: The combination of seasoned sausage and cream cheese creates a deliciously creamy filling that contrasts beautifully with the flaky crescent roll dough.

Versatile: Ideal for breakfast, brunch, or dinner, this casserole can be enjoyed anytime. It’s also perfect for feeding a crowd or meal prepping for the week.

Ingredients:

  • Crescent roll dough: 2 cans (8 ounces each)
  • Pork sausage crumbles: ~20 ounces
  • Cream cheese: 8 ounces

Step-by-Step Instructions:

Step 1: Preheat the Oven
Preheat your oven to 375°F (190°C) to ensure it’s ready when your casserole is assembled. Grease a 9×13-inch baking dish lightly with cooking spray or butter to prevent the crescent roll dough from sticking.

Step 2: Cook the Sausage
In a medium skillet, cook the pork sausage crumbles over medium heat. Stir frequently, breaking the sausage apart with a spatula as it cooks. Continue cooking until the sausage is browned and fully cooked through with no pink remaining. If your sausage has rendered a lot of fat, drain the excess grease from the skillet.

Step 3: Prepare the Creamy Filling
Reduce the heat to low and add the softened cream cheese to the cooked sausage in the skillet. Stir continuously until the cream cheese is fully melted and combined with the sausage, creating a smooth and creamy mixture. Once the filling is ready, remove the skillet from the heat and set it aside to cool slightly while you prepare the dough.

Step 4: Assemble the Bottom Layer
Unroll one of the cans of crescent roll dough and press it into the bottom of the prepared 9×13-inch baking dish. If you’re using pre-cut crescent rolls, pinch together the seams to form a single, even layer of dough that covers the entire bottom of the dish.

Step 5: Add the Sausage Mixture
Evenly spread the sausage and cream cheese mixture over the crescent roll dough in the baking dish. Make sure the filling is distributed across the surface so each bite of the casserole will have that delicious combination of flavors.

Step 6: Add the Top Layer
Open the second can of crescent roll dough and unroll it over the sausage mixture, creating a “top crust.” Just like with the bottom layer, pinch together any seams if necessary to create a smooth, unbroken sheet of dough.

Step 7: Bake the Casserole
Place the baking dish in the preheated oven and bake for 15-20 minutes. You’ll know the casserole is ready when the crescent roll dough has puffed up and turned a beautiful golden brown on top. Check the casserole around the 15-minute mark, and if the top is browning too quickly, you can loosely cover it with foil to prevent over-browning.

Step 8: Serve and Enjoy
Once the casserole is baked to golden perfection, remove it from the oven and allow it to cool for a few minutes before slicing and serving. This dish is delicious on its own but can also be served with a side of scrambled eggs, a fresh salad, or some crispy hash browns for a more complete meal.

Storage Options:

Refrigeration: Store any leftover Sausage and Cream Cheese Crescent Roll Bake in an airtight container in the refrigerator for up to 3 days. To reheat, simply warm a portion in the microwave or oven until heated through.

Freezing: This dish freezes well for future meals. Allow the casserole to cool completely before wrapping individual portions tightly in plastic wrap, then foil, and place them in a freezer-safe container or bag. Freeze for up to 2 months. To reheat, thaw the portions in the refrigerator overnight and warm them in the oven at 350°F (175°C) until heated through.

Serving Suggestions:

This casserole is incredibly versatile and can be served in a variety of ways depending on the meal or occasion:

  • Breakfast or Brunch: Serve with a side of scrambled eggs and fresh fruit for a complete breakfast or brunch spread.
  • Dinner: Pair with a simple salad or steamed vegetables for a hearty, savory dinner.
  • Snack: Slice into smaller pieces and serve as an easy snack or appetizer at parties or gatherings.

Whether you’re making this for a quick family breakfast or prepping for a potluck, this Sausage and Cream Cheese Crescent Roll Bake is sure to be a hit!

Cheesy Taco Cream Cheese Pasta

0

Dive into the ultimate comfort food fusion with this Cheesy Taco Cream Cheese Pasta. Combining the bold flavors of taco-seasoned beef with a rich, creamy cheese sauce, this dish is a hearty, flavorful meal that’s sure to become a family favorite. With just the right balance of spice from diced tomatoes and green chilies, and the indulgent creaminess of cheddar and cream cheese, this pasta dish takes weeknight dinners to the next level.

Why You’ll Love This Recipe:

Bold and Comforting Flavor: The savory taco-seasoned beef paired with a luxuriously creamy cheese sauce makes for a perfect blend of comfort and flavor.

Simple Ingredients, Big Taste: With just a few everyday ingredients, this recipe delivers a satisfying meal that’s rich, cheesy, and filling.

One-Pot Wonder: Aside from cooking the pasta, most of the magic happens in a single skillet, making cleanup a breeze.

Ingredients:

  • Ground beef: 1 lb
  • Taco seasoning: 1 package
  • Pasta shells or elbow macaroni: 1 lb
  • Butter: 2 tablespoons
  • Milk: 1 cup
  • Cream cheese (softened): 8 oz
  • Shredded cheddar cheese: 2 cups
  • Diced tomatoes with green chilies (drained): 1 can (10 oz)
  • Salt and pepper: To taste
  • Optional garnishes: Chopped cilantro, diced green onions, sour cream

Step-by-Step Instructions: Bringing It All Together

Step 1: Cook the Pasta
Start by boiling 1 lb of pasta shells or elbow macaroni in a large pot of salted water. Cook the pasta according to the package instructions until it reaches an al dente texture. This typically takes around 8-10 minutes, but be sure to check your pasta to ensure it doesn’t overcook. Once it’s done, drain the pasta and set it aside for later. Don’t worry if you sneak a bite or two—it’s hard to resist freshly cooked pasta!

Step 2: Brown the Beef
While the pasta is cooking, heat a large skillet over medium-high heat. Add 1 lb of ground beef and cook, breaking it apart with a spatula as it browns. Stir and cook the beef until there is no pink left, and the beef is fully cooked. Once done, drain any excess fat from the skillet.

Next, sprinkle in a package of taco seasoning, stirring it into the beef until fully coated. This step transforms the beef into that classic taco flavor we all know and love. Set the seasoned beef aside while you work on the cheese sauce.

Step 3: Make the Cheese Sauce
In the same large pot you used to cook the pasta, melt 2 tablespoons of butter over medium heat. Once the butter is fully melted and bubbling, slowly pour in 1 cup of milk, stirring constantly to avoid scalding.

Now, it’s time for the magic ingredient—cream cheese. Add 8 oz of softened cream cheese into the pot and whisk it into the milk. Stir continuously until the cream cheese has fully melted and you’re left with a smooth, creamy mixture. At this point, you’ll notice the sauce starting to come together.

Next, add in 2 cups of shredded cheddar cheese. Stir until the cheddar is melted into the cream cheese mixture, creating a luscious, cheesy sauce that you’ll want to dive into with a spoon. Resist the temptation and move on to the next step.

Step 4: Combine Everything
Now that your cheese sauce is ready, it’s time to bring everything together. Add the cooked pasta and seasoned ground beef to the cheese sauce. Stir to combine, ensuring that every piece of pasta and every bite of beef is coated in the rich, cheesy goodness.

Open and drain 1 can of diced tomatoes with green chilies, then stir it into the pasta mixture. The tomatoes and chilies add a bright, slightly spicy note that balances out the richness of the sauce. Stir everything together until the tomatoes are evenly distributed.

Taste the mixture and season with salt and pepper to taste. Let the pasta simmer for 2-3 minutes over low heat to allow all the flavors to meld together.

Step 5: Serve and Enjoy
Your Cheesy Taco Cream Cheese Pasta is now ready to serve! Spoon it into bowls and, if desired, garnish with chopped cilantro, diced green onions, or a dollop of sour cream to add a fresh and zesty finish.

Optional Sides:

This pasta dish is hearty and filling on its own, but if you’re looking to round out the meal, here are a few serving ideas:

  • Tortilla Chips: Serve alongside some crispy tortilla chips for added texture and crunch. You can even dip the chips into the cheesy pasta for an extra fun taco-pasta experience.
  • Green Salad: Balance the richness of the pasta with a light and refreshing green salad. A simple lettuce mix with a citrus vinaigrette would pair perfectly.
  • Mexican Rice or Beans: For a heartier meal, consider serving the pasta alongside Mexican rice or refried beans. These sides complement the taco-inspired flavors of the dish.

Storage Options:

If you have any leftovers (though they may disappear quickly!), here’s how to store them for later enjoyment:

Refrigeration: Store the leftover pasta in an airtight container and refrigerate for up to 3-4 days. To reheat, simply warm it in the microwave or on the stovetop, adding a splash of milk to keep the sauce creamy.

Freezing: This pasta also freezes well. Allow it to cool completely before transferring to a freezer-safe container. It can be frozen for up to 2 months. To reheat, thaw the pasta in the refrigerator overnight and then warm it on the stovetop or in the microwave. Again, adding a little milk will help bring the sauce back to its creamy consistency.

Final Thoughts:

Cheesy Taco Cream Cheese Pasta is the ultimate blend of two favorite comfort foods—tacos and pasta. The creamy cheese sauce, with the taco-flavored beef and the slight heat from the chilies, creates a dish that’s both satisfying and delicious. Whether you’re cooking for family, friends, or just yourself, this meal is sure to become a go-to recipe in your kitchen. Plus, with minimal prep and just a few simple ingredients, it’s a weeknight winner!

Enjoy your new favorite dinner with a side of fun and flavor!

Spicy Dumpling Soup

0

Delve into the invigorating warmth of Spicy Dumpling Soup, where tender dumplings swim in a rich, flavorful broth infused with bold spices and fresh vegetables. This comforting dish brings the heartiness of homemade dumplings together with the satisfying heat of a well-spiced soup, creating a perfect bowl for chilly evenings or whenever you need a bit of warmth and comfort.

Why You’ll Love This Recipe:

  • Robust Flavor: The spicy broth combined with tender dumplings offers a dynamic and satisfying flavor profile that will excite your taste buds.
  • Hearty and Nourishing: Packed with vegetables, protein, and hearty dumplings, this soup is as nourishing as it is delicious.
  • Customizable Heat: Adjust the level of spice to suit your taste, making it perfect for those who love a little or a lot of heat.

Ingredients:

For the Dumplings:

  • Ground meat (pork, chicken, or beef): 1 pound
  • Finely chopped green onions: 1/2 cup
  • Minced garlic: 2 cloves
  • Soy sauce: 2 tbsp
  • Sesame oil: 1 tbsp
  • Ground ginger: 1 tsp
  • Dumpling wrappers: 1 pack (about 40 wrappers)

For the Spicy Broth:

  • Chicken or vegetable broth: 6 cups
  • Soy sauce: 3 tbsp
  • Chili paste or Sriracha: 2 tbsp (adjust to taste)
  • Fresh ginger, thinly sliced: 1 inch piece
  • Garlic, minced: 3 cloves
  • Carrots, thinly sliced: 2 medium
  • Bok choy or spinach: 2 cups, roughly chopped
  • Mushrooms, sliced: 1 cup
  • Green onions, chopped: 1/2 cup
  • Sesame oil: 1 tbsp

Instructions:

Dumpling Preparation:

  1. In a large mixing bowl, combine the ground meat, green onions, minced garlic, soy sauce, sesame oil, and ground ginger. Mix until well combined.
  2. Place about 1 teaspoon of filling in the center of each dumpling wrapper. Moisten the edges with water, fold over, and press to seal. Set the prepared dumplings aside.

Spicy Broth Preparation:

  1. In a large pot, heat the sesame oil over medium heat. Add the minced garlic and sliced ginger, sautéing until fragrant, about 2 minutes.
  2. Add the chicken or vegetable broth, soy sauce, and chili paste or Sriracha. Bring the mixture to a boil, then reduce to a simmer.
  3. Stir in the carrots and mushrooms, simmering for about 5 minutes until they begin to soften.

Cooking the Dumplings:

  1. Carefully add the prepared dumplings to the simmering broth. Cook for 5-7 minutes, or until the dumplings are cooked through and float to the surface.
  2. Add the bok choy or spinach and cook for an additional 2 minutes, just until wilted.

Serving:

  1. Ladle the soup into bowls, ensuring each serving has a generous portion of dumplings and vegetables. Garnish with chopped green onions.
  2. Serve hot, enjoying the warming and spicy flavors.

Storage Options:

Store any leftover soup in an airtight container in the refrigerator for up to 3 days. The dumplings will continue to absorb the broth, so consider adding a little extra broth when reheating. This soup can also be frozen for up to 2 months—simply reheat gently on the stovetop when ready to enjoy.

Enjoy this Spicy Dumpling Soup as a flavorful and comforting meal, perfect for warming up on a cold day or whenever you’re craving something hearty and satisfying!

Garlic Bread Sloppy Joes

0

Garlic Bread Sloppy Joes are a fun and flavorful twist on the classic sloppy joe sandwich. Combining the rich, savory filling with the crunchy, buttery goodness of garlic bread, this dish is perfect for a family dinner or a casual get-together. It’s a quick and satisfying meal that everyone will love!

Why You’ll Love This Recipe

This recipe takes two beloved comfort foods—garlic bread and sloppy joes—and combines them into one mouthwatering dish. The crunchy garlic bread perfectly complements the hearty sloppy joe filling, and the melted cheese on top adds an extra layer of indulgence. It’s an easy, one-pan meal that’s perfect for busy weeknights or feeding a crowd. Plus, it’s customizable: you can adjust the seasoning or add extra toppings like jalapeños or pickles to suit your taste.

Ingredients

For the Bread:

  • 1 loaf of Italian bread
  • ½ cup unsalted butter, softened
  • 1 teaspoon garlic salt

For the Sloppy Joe Filling:

  • 1 pound ground beef
  • ¼ cup yellow onion, chopped
  • ½ teaspoon garlic powder
  • 1 teaspoon yellow mustard
  • ¾ cup ketchup
  • ½ teaspoon kosher salt
  • ¼ teaspoon black pepper
  • ½ cup water

For the Topping:

  • 1 cup shredded mozzarella cheese
  • 1 cup shredded sharp cheddar cheese
  • Chopped parsley for garnish

Instructions

Preparation:
Preheat your oven to 350°F (175°C). Line a baking sheet with parchment paper to prevent sticking and make cleanup easier.

Preparing the Bread:
Slice the Italian bread lengthwise into two halves, creating a perfect base for the sloppy joe filling. Place the halves cut side up on the prepared baking sheet. In a small bowl, combine the softened butter and garlic salt, mixing until smooth. Spread this garlic butter mixture evenly over the cut sides of the bread. The garlic butter will not only add flavor but also help the bread achieve a golden, crispy texture when baked. Set the bread aside while you prepare the sloppy joe filling.

Making the Sloppy Joe Filling:
In a medium nonstick skillet over medium heat, cook the ground beef and chopped onions until the beef is browned and no longer pink, about 8-10 minutes. Stir frequently to break up the beef into small pieces, ensuring even cooking. Once the beef is browned, drain any excess grease from the skillet to avoid a greasy filling. Stir in the garlic powder, mustard, ketchup, salt, pepper, and water. Mix thoroughly until all the ingredients are well combined and the sauce thickens slightly, about 2-3 minutes. This mixture should be rich and tangy, with just the right balance of sweetness and spice.

Assembling the Garlic Bread Sloppy Joes:
Spoon the prepared sloppy joe mixture evenly over the two halves of the bread. Be generous with the filling to ensure every bite is packed with flavor. Once the sloppy joe mixture is evenly spread, sprinkle the shredded mozzarella and sharp cheddar cheese over the top. The combination of these cheeses adds a deliciously gooey, melty texture that pairs perfectly with the savory filling and crispy bread.

Baking:
Place the assembled bread halves in the preheated oven and bake for 12-14 minutes, or until the cheese is fully melted and the bread is golden brown and crispy around the edges. The cheese should be bubbly and slightly browned, adding a nice contrast to the rich filling. Keep an eye on the bread towards the end of the baking time to ensure it doesn’t burn.

Serving:
Once the Garlic Bread Sloppy Joes are out of the oven, let them cool slightly before cutting them into slices. Garnish with freshly chopped parsley for a burst of color and a hint of freshness. The parsley not only adds a nice visual touch but also complements the rich flavors of the dish.

Storage Options

If you have any leftovers (which is rare because they’re so delicious!), you can store them in an airtight container in the refrigerator for up to 2 days. To reheat, place the slices in a preheated oven at 350°F (175°C) for about 10 minutes, or until warmed through. You can also reheat them in the microwave for a quicker option, but the bread may lose some of its crispiness.

Conclusion

These Garlic Bread Sloppy Joes are a fantastic way to elevate a classic comfort food. The combination of crispy garlic bread, savory sloppy joe filling, and melted cheese creates a dish that’s satisfying, easy to make, and perfect for any occasion. Whether you’re making them for a family dinner, a party, or just because, these sloppy joes are sure to become a new favorite in your recipe rotation. Enjoy the rich flavors and the fun twist on a classic with this easy-to-follow recipe.

Savory Beef and Vegetable Pie

0

This hearty Savory Beef and Vegetable Pie is a comforting and satisfying dish that brings together tender beef, flavorful vegetables, and a flaky, buttery crust. It’s perfect for a cozy dinner with family or a special meal to impress guests.

Why You’ll Love This Recipe

This pie is a complete meal in itself, packed with protein, vegetables, and rich, cheesy goodness. The combination of savory ground beef, vibrant vegetables, and creamy filling makes it a family favorite. The homemade crust adds a flaky texture that perfectly complements the hearty filling. Whether you’re serving it for a weeknight dinner or a special occasion, this pie is sure to please everyone at the table.

Ingredients

For the Crust:

  • 2 cups all-purpose flour
  • 1/2 cup cold unsalted butter, cubed
  • 1/4 cup cold vegetable shortening
  • 1/4 teaspoon salt
  • 5-7 tablespoons ice water

For the Filling:

  • 1 pound ground beef
  • 1 onion, finely chopped
  • 1 red bell pepper, diced
  • 2 cloves garlic, minced
  • 1 cup potatoes, peeled and diced
  • 1 cup frozen mixed vegetables (peas, carrots, corn)
  • 1 teaspoon dried thyme
  • 1 teaspoon paprika
  • Salt and pepper to taste
  • 1 cup shredded cheddar cheese
  • 1/2 cup shredded mozzarella cheese
  • 1/2 cup heavy cream
  • 1 tablespoon flour

Instructions

For the Crust:
In a large bowl, mix the flour and salt. Cut in the cold butter and shortening until the mixture resembles coarse crumbs. It’s important to keep the fats cold to ensure a flaky crust. Gradually add the ice water, one tablespoon at a time, mixing with a fork until the dough begins to come together. You may not need all the water; just add enough to bring the dough together. Divide the dough into two balls, flatten them into disks, wrap them in plastic wrap, and refrigerate for at least 30 minutes. This resting time allows the dough to firm up, making it easier to roll out later.

For the Filling:
Preheat your oven to 375°F (190°C). In a large skillet, cook the ground beef over medium heat until browned, breaking it up into small pieces as it cooks. Once browned, drain any excess fat to avoid a greasy filling. Add the chopped onion, red bell pepper, and garlic to the skillet. Cook until the vegetables are softened, about 5 minutes. The onion should become translucent, and the peppers should be tender. Stir in the diced potatoes, mixed vegetables, thyme, paprika, salt, and pepper. Cook for an additional 5 minutes, allowing the flavors to meld together. Sprinkle the flour over the mixture and stir to combine. This will help thicken the filling. Slowly pour in the heavy cream, stirring until the mixture thickens. Once the filling has thickened and is well mixed, remove it from heat and let it cool slightly. Cooling the filling a bit before adding it to the crust will prevent the crust from becoming soggy.

Assembling the Pie:
Roll out one of the dough disks on a lightly floured surface to fit into a 9-inch pie plate. Carefully transfer the dough to the pie plate, pressing it gently into the bottom and sides. Trim any excess dough hanging over the edges. Pour the slightly cooled filling into the pie crust, spreading it evenly to ensure every slice has a good mix of ingredients. Sprinkle the shredded cheddar and mozzarella cheese over the filling. The cheese adds a creamy, melty layer that ties the pie together. Roll out the second dough disk and place it over the filling. Trim any excess dough, then crimp the edges to seal the pie. Use a sharp knife to cut a few slits in the top crust to allow steam to escape during baking.

Baking:
Place the pie in the preheated oven and bake for 35-40 minutes, or until the crust is golden brown and the filling is bubbling. The top crust should be firm and flaky, and the cheese should be melted and slightly browned. If the edges of the crust begin to brown too quickly, cover them with aluminum foil to prevent burning. Once the pie is done, remove it from the oven and let it cool for 10-15 minutes before slicing. This cooling time allows the filling to set, making it easier to cut clean slices.

Storage Options

If you have any leftovers (which might be unlikely given how delicious this pie is), you can store them in the refrigerator for up to 3 days. To reheat, place slices in a preheated oven at 350°F (175°C) for about 10-15 minutes, or until heated through. The pie can also be frozen for up to 3 months. To freeze, wrap the pie tightly in plastic wrap, then in aluminum foil. When ready to eat, thaw the pie in the refrigerator overnight and reheat in the oven as directed above.

Conclusion

This Savory Beef and Vegetable Pie is a comforting dish that’s perfect for any meal. The combination of a buttery, flaky crust with a rich and hearty filling makes it a favorite among both kids and adults. It’s easy to make, and with simple ingredients, you can have a delicious homemade pie that’s sure to impress. Whether for a family dinner or a special gathering, this pie will leave everyone asking for seconds.

Toffee Pecan Dream Bars

0

These Toffee Pecan Dream Bars are a delightful treat that combines the rich flavors of buttery toffee, crunchy pecans, and a moist, tender crust. Perfect for any occasion, these bars are both decadent and easy to make, offering a satisfying dessert that will impress your friends and family.

Why You’ll Love This Recipe

These Toffee Pecan Dream Bars are an indulgent treat that combines several layers of flavors and textures. The buttery crust provides a solid foundation, while the rich, gooey center filled with toffee bits and pecans adds a delightful crunch. The bars are versatile and can be enjoyed at any time of the year, making them an excellent choice for holiday gatherings, potlucks, or as a special treat for yourself. The best part? They’re incredibly simple to prepare, even for beginner bakers.

Ingredients

  • 1 package of premium yellow or butter cake mix
  • 2 fresh eggs
  • 1 can of Eagle Brand Milk sweetened condensed milk
  • 1/2 cup of high-quality softened butter
  • 1 teaspoon of pure vanilla extract
  • 1 cup of freshly chopped pecans
  • 1/2 cup of Heath Milk Chocolate Toffee Bits

Instructions

Preparation:
Start by preheating your oven to 350°F (175°C). This ensures that the oven is at the right temperature by the time you’re ready to bake, which is crucial for even cooking.

Crust Formation:
In a large mixing bowl, combine the cake mix, one egg, and the softened butter. Use a fork or a pastry cutter to mix these ingredients together until they form a crumbly texture. It might take a few minutes to get the right consistency, but this step is essential for creating a firm and buttery crust. Once the mixture is crumbly, press it firmly into the bottom of a greased 9×13 inch baking pan. Ensure the crust is evenly spread and compacted, as this will serve as the foundation for the bars.

Toffee-Pecan Mixture:
In a separate bowl, blend the condensed milk, the remaining egg, and vanilla extract until smooth. This mixture is the heart of the dream bars, so make sure to mix it well until the ingredients are fully incorporated. After achieving a smooth mixture, fold in the chopped pecans and toffee bits. Make sure that the pecans and toffee bits are evenly distributed throughout the mixture for consistent flavor in every bite. Pour this rich and creamy mixture over the prepared crust, spreading it out evenly with a spatula to ensure it covers the entire surface.

Baking:
Place the baking pan in the preheated oven on the middle rack. Bake for approximately 30 minutes, or until the edges are golden brown and the center is just slightly jiggly. It’s important not to overbake, as the bars will continue to set as they cool. Overbaking could result in a dry, crumbly texture, so keep a close eye on them as the 30-minute mark approaches.

Cooling and Serving:
Once the bars are done baking, remove them from the oven and place the pan on a wire rack to cool completely. This cooling period allows the bars to set properly, making them easier to cut. It might be tempting to dive in while they’re still warm, but waiting for them to cool will ensure cleaner cuts and better texture. Once they’ve cooled to room temperature, slice the bars into squares or rectangles, depending on your preference. These bars are rich, so smaller pieces might be best for serving. Arrange them on a serving platter or store them for later enjoyment.

Storage Options

Toffee Pecan Dream Bars can be stored in an airtight container at room temperature for up to 3 days. If you prefer to keep them longer, they can be refrigerated for up to a week. To store them in the refrigerator, place the bars in a single layer in an airtight container. If you need to stack them, place a piece of parchment paper between layers to prevent sticking. For longer storage, these bars can be frozen for up to 3 months. To freeze, wrap each bar individually in plastic wrap, then place them in a freezer-safe bag or container. When you’re ready to enjoy them, simply thaw at room temperature or warm them slightly in the microwave for a gooey, fresh-out-of-the-oven experience.

Chicken and Rice Soup Recipe

0

There’s nothing quite like a bowl of Chicken and Rice Soup to soothe the soul. This recipe is a timeless classic, combining tender chicken, hearty rice, and a medley of vegetables in a comforting broth. It’s perfect for cold days, when you’re feeling under the weather, or whenever you need a quick and nourishing meal. With its simple ingredients and easy preparation, this soup is a staple that you’ll want to return to time and time again.

Why You’ll Love This Recipe

  • Comforting and Satisfying: This soup is like a warm hug in a bowl, offering comfort with every spoonful. The combination of chicken, rice, and vegetables creates a satisfying meal that will keep you full and content.
  • Easy to Make: With straightforward instructions and common ingredients, this recipe is perfect for both beginners and seasoned cooks.
  • Versatile: You can easily customize this soup by adding your favorite vegetables, swapping the type of rice, or adjusting the seasoning to suit your taste.

Ingredients

  • 1 tablespoon olive oil or butter
  • 1 medium onion, chopped
  • 2 cloves garlic, minced
  • 2 carrots, diced
  • 2 celery stalks, diced
  • 1 cup uncooked rice (white, brown, or basmati)
  • 6 cups chicken broth
  • 2 cups cooked chicken, shredded or diced
  • 1 teaspoon dried thyme
  • 1 teaspoon dried parsley
  • Salt and pepper to taste
  • Optional: 1 bay leaf for added flavor
  • Fresh parsley or cilantro, chopped (for garnish)
  • Juice of 1/2 lemon (optional, for a fresh flavor boost)

Instructions

Sauté the Vegetables:

  1. Heat the olive oil or butter in a large pot over medium heat. Once heated, add the chopped onion, carrots, and celery. Sauté for about 5 minutes until the vegetables are softened and the onion becomes translucent.
  2. Add the minced garlic and cook for an additional minute, stirring constantly to ensure the garlic doesn’t burn. The garlic should become fragrant, adding a rich aroma to the base of your soup.

Cook the Rice:

  1. Add the uncooked rice to the pot, stirring it around to coat each grain with the oil and to mix it evenly with the sautéed vegetables. This step helps the rice absorb more flavor as it cooks.
  2. Pour in the chicken broth, making sure to scrape up any browned bits from the bottom of the pot for added flavor. Add the dried thyme, dried parsley, and bay leaf if using. Stir to combine, and then bring the mixture to a boil.

Simmer the Soup:

  1. Once the soup reaches a boil, reduce the heat to low, cover the pot, and let the soup simmer gently for about 15-20 minutes. During this time, the rice will cook and absorb the broth, becoming tender and flavorful.

Add the Chicken:

  1. After the rice is fully cooked and tender, add the cooked chicken to the pot. Stir well to combine the chicken with the soup. Allow the chicken to heat through, which should take about 5 minutes. This step ensures that the chicken is warmed and its flavors meld with the soup.

Season and Serve:

  1. Taste the soup and adjust the seasoning as needed with salt and pepper. If you prefer a brighter flavor, squeeze in the juice of 1/2 a lemon and stir it through the soup.

Garnish and Enjoy:

  1. Ladle the soup into bowls and garnish with freshly chopped parsley or cilantro for a pop of color and freshness.
  2. Serve the soup hot, with crusty bread or crackers on the side for a complete and satisfying meal.

Storage Options

  • Refrigerator: Store any leftover soup in an airtight container in the refrigerator for up to 4 days. When reheating, you may need to add a little extra broth or water if the rice has absorbed too much liquid.
  • Freezer: To freeze, allow the soup to cool completely and then transfer it to a freezer-safe container. Freeze for up to 3 months. Thaw in the refrigerator overnight and reheat on the stove over low heat, adding extra broth if needed.

This Chicken and Rice Soup is a perfect example of how a few simple ingredients can come together to create something truly comforting and delicious. Whether you’re looking for a quick weeknight meal or something to make in advance for easy lunches, this soup is a reliable choice. Customize it to your liking and enjoy a warm, satisfying bowl whenever the craving strikes.

Oven-Baked Chicken Wings with Mustard Cream Sauce: Elevate Your Feast

0

Transform your usual finger food delight with Oven-Baked Chicken Wings slathered in a sumptuous Mustard Cream Sauce. This dish takes the beloved game-day snack to new heights with its creamy, tangy sauce that perfectly balances the smokiness of the crispy wings. Ideal for social gatherings or as a tantalizing main dish, these wings are sure to please everyone at the table.

Why You’ll Love This Dish

  • Crisp Perfection: Achieve that sought-after crispy skin through baking, avoiding the mess of deep frying.
  • Decadent Mustard Cream Sauce: A smooth sauce enriched with mustard brings a sophisticated flair, enhancing the wings with its creamy texture and sharp zest.
  • Simple and Straightforward: Easy ingredients and clear instructions make this a foolproof recipe for any home cook.

Ingredients

Chicken Wings:

  • 2 lbs (1 kg) chicken wings, tips removed, halved at the joints
  • 2 tablespoons olive oil
  • 1 teaspoon each of garlic powder, onion powder, and smoked paprika
  • Salt and pepper, to taste

Mustard Cream Sauce:

  • 2 tablespoons unsalted butter
  • 2 tablespoons all-purpose flour
  • 1 cup chicken broth
  • 1/2 cup heavy cream
  • 2 tablespoons Dijon mustard
  • 1 tablespoon whole grain mustard (optional)
  • Salt and pepper, to taste
  • Fresh parsley, chopped, for garnish

Instructions

Preparing the Wings:

  1. Heat your oven to 400°F (200°C).
  2. Toss the chicken wings in olive oil and season with garlic powder, onion powder, smoked paprika, salt, and pepper.
  3. Spread the wings on a parchment-lined baking sheet or a greased wire rack in a single layer.
  4. Bake for 40-45 minutes, turning once, until they are golden and crisp.

Creating the Mustard Cream Sauce:

  1. While the wings bake, start the sauce by melting butter in a saucepan over medium heat.
  2. Add flour, stirring continuously, until golden and bubbly to form a roux.
  3. Gradually add chicken broth and heavy cream, whisking until the sauce thickens.
  4. Mix in both mustards and season with salt and pepper. Keep the sauce warm off the heat.

Serving the Wings:

  1. Place the baked wings on a serving dish.
  2. Either pour the mustard cream sauce over the wings or serve it alongside as a dip.
  3. Sprinkle with chopped parsley for a fresh finish.

Storage Tips

  • Refrigerator: Keep wings and sauce in separate containers, refrigerated, for up to 3 days. Reheat wings in the oven to keep them crispy.
  • Freezer: Freeze wings and sauce separately for up to 2 months. Thaw in the fridge and reheat as above.

With their crispy texture and rich, flavorful sauce, these Oven-Baked Chicken Wings with Mustard Cream Sauce are a standout choice for any occasion, ensuring a memorable and delicious experience. Enjoy crafting this dish that’s sure to gather compliments and satisfy cravings.

Pecan Pie Brownie Bombs: A Delightful Fusion Treat

0

Dive into the delight of our Pecan Pie Brownie Bombs, a perfect blend of comforting brownie warmth and the sweet nuttiness of traditional pecan pie. Wrapped up in bite-sized portions, these bombs are a joyous celebration for any occasion or a cozy evening treat.

Why This Recipe is a Must-Try

  • Layered Flavor Sensation: Enjoy the lush chocolate of brownies combined with the classic, sweet crunch of pecan pie.
  • Ideal for Sharing: Crafted in small bites, these treats are perfect for sharing, allowing everyone a taste of indulgence without the commitment of a large dessert.
  • Easy Ingredients: Simple and familiar ingredients come together effortlessly, making this a go-to for those homemade dessert cravings.

Ingredients

Brownie Layer:

  • 1 box brownie mix (and ingredients listed on the box: eggs, oil, and water)
  • 1/4 cup all-purpose flour

Pecan Pie Filling:

  • 1 cup chopped pecans
  • 1/2 cup brown sugar, packed
  • 1/2 cup corn syrup
  • 1/4 cup unsalted butter, melted
  • 1 teaspoon vanilla extract
  • 2 large eggs

Assembly and Topping:

  • 1/2 cup semi-sweet chocolate chips
  • 1 tablespoon vegetable oil
  • Extra chopped pecans for garnish

Instructions

Brownie Batter Preparation:

  1. Start by heating your oven to 350°F (175°C). Mix the brownie ingredients as directed on the package, adding an extra 1/4 cup of flour to thicken the batter.

Creating the Pecan Pie Filling:

  1. In a bowl, mix the chopped pecans, brown sugar, corn syrup, melted butter, vanilla, and eggs until glossy and smooth, ensuring the sugar is fully dissolved.

Assembling the Bombs:

  1. Grease a mini muffin pan. Place about a tablespoon of brownie batter into each cup, followed by a teaspoon of pecan pie filling. Top with another tablespoon of brownie batter to seal the filling inside.

Baking Time:

  1. Bake for 20-25 minutes, or until the bombs are set and a toothpick comes out clean when inserted in the center.

Preparing the Topping:

  1. As the bombs cool, melt the chocolate chips with vegetable oil in the microwave in 30-second bursts, stirring until smooth.

Finishing Touches:

  1. Drizzle the melted chocolate over the cooled brownie bombs and sprinkle with extra pecans. Let the chocolate set before serving.

Storage Tips

  • Room Temperature: Store in an airtight container for up to 3 days.
  • Refrigerator: Keep refrigerated for up to a week in a sealed container.
  • Freezer: Freeze for up to a month and thaw at room temperature or in the fridge overnight.

Every bite of these Pecan Pie Brownie Bombs bursts with the crunch of pecans and the rich, chocolate depth of brownies, topped with a luxurious chocolate finish. They’re not just treats—they’re an experience, easy to make and even easier to love. Enjoy crafting and sharing these irresistible delights.