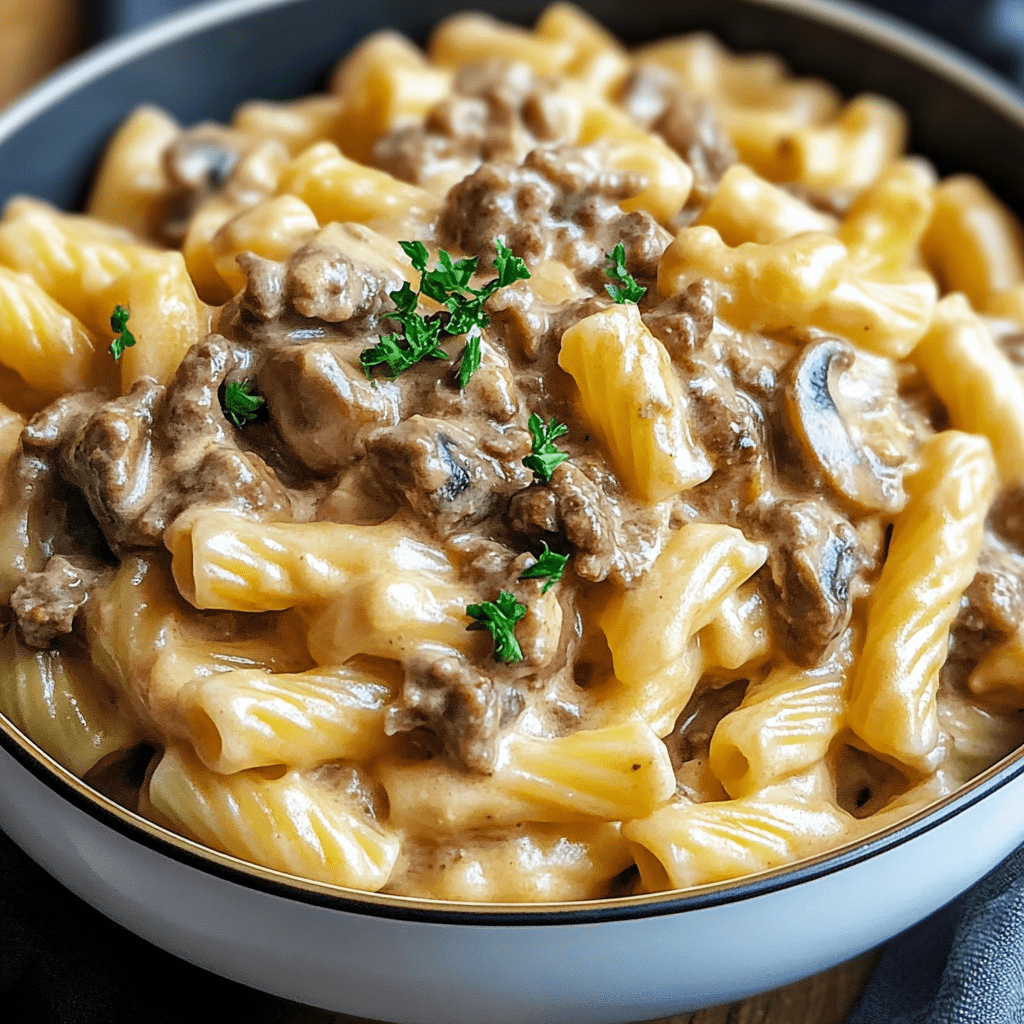
Step into a world of comforting flavors with this Creamy Beef and Mushroom Pasta. This dish, prepared in a slow cooker, merges the tenderness of beef with the earthy tones of mushrooms, enveloped in a creamy sauce. It’s an effortless yet sumptuous meal that promises to make any day feel special.
Why You’ll Love This Recipe:
Rich and Fulfilling: A deeply satisfying dish that fills you with warmth and flavor.
Simple Preparation: Just set your ingredients in the slow cooker and let it handle the rest.
Flexible and Adaptable: Perfect with any type of pasta and customizable with your preferred herbs.
Ingredients:
1 pound beef stew meat, cut into bite-sized pieces
Set Up the Beef: In the slow cooker, combine the beef stew meat, diced onion, and minced garlic.
Create the Sauce: In a bowl, mix the cream of mushroom soup, beef broth, heavy cream, basil, and oregano. Pour this over the beef, coating it thoroughly.
Slow Cooking: Adjust the slow cooker to low and cook for 6-8 hours, until the beef is tender and flavorful.
Pasta Time: About half an hour before serving, boil the pasta as directed until al dente. Drain and set aside.
Combine Ingredients: Add the pasta to the slow cooker. Mix in the Parmesan cheese and season with salt and pepper. Stir well to coat the pasta in the creamy sauce.
Final Cooking Stage: Keep cooking on low for another 10-15 minutes, letting the pasta soak up the sauce.
Ready to Serve: Dish out the creamy pasta steaming hot, garnished with fresh parsley if you like.
Storage Options:
Refrigerator: Keep leftovers in a sealed container in the fridge for up to 3 days.
Reheating: Gently reheat on the stove, adding a little beef broth or cream if needed to loosen the sauce.
Delight in the ease and richness of this slow-cooked Creamy Beef and Mushroom Pasta, a true comfort food masterpiece.
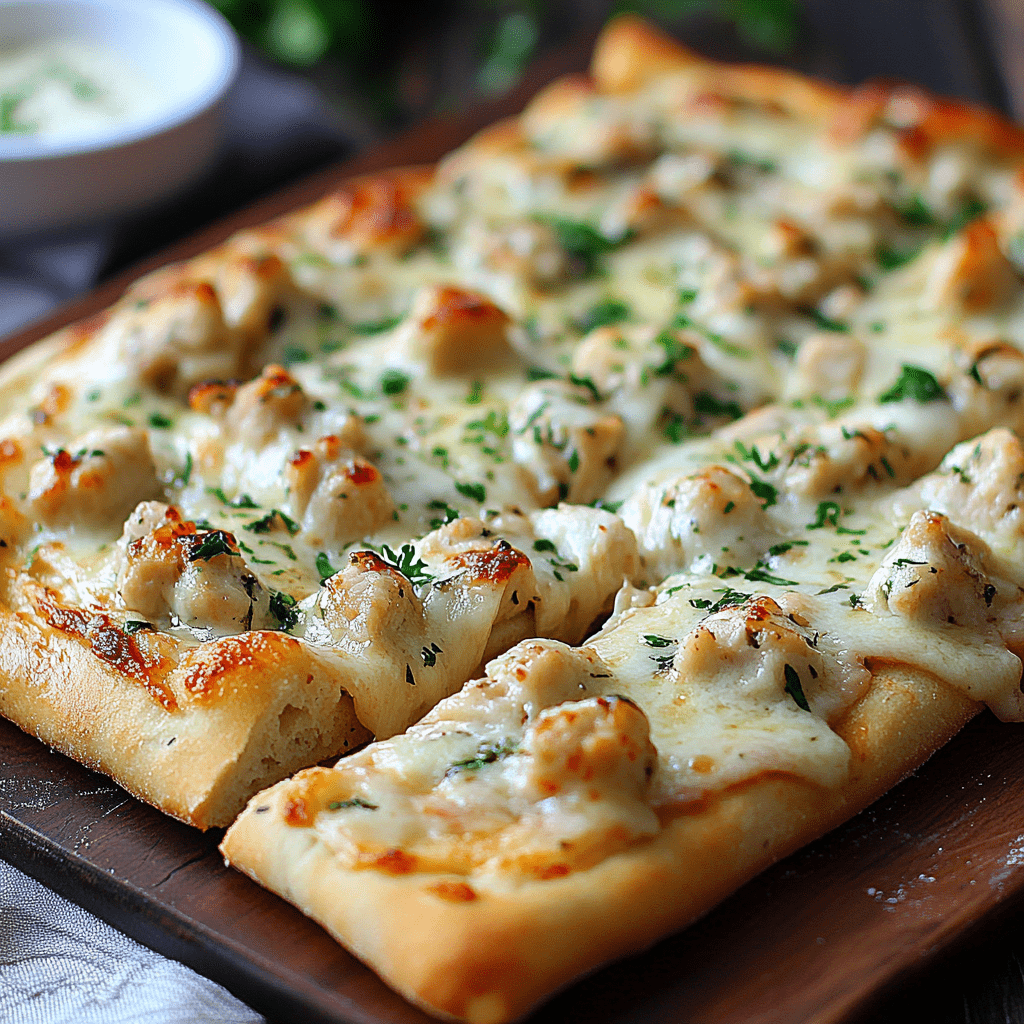
Dive into this mouthwatering fusion of garlic bread and chicken Alfredo pizza for a delightful twist on classic flavors. This recipe transforms a simple loaf of French or Italian bread into a crispy, garlicky pizza base, smothered in a creamy, homemade Alfredo sauce and topped with succulent chicken and melted cheeses. It’s the perfect quick dinner that combines the comfort of garlic bread with the indulgence of creamy Alfredo.
Why You’ll Love This Recipe:
Quick & Convenient: Utilizes simple ingredients for a quick-prep meal that’s great for busy evenings.
Family-Friendly: Loved by adults and kids alike, making it a perfect choice for family dinners.
Versatile: Easily adaptable with different toppings to suit everyone’s taste.
Ingredients:
For the Garlic Bread Base:
1 large loaf of French bread or Italian bread, halved lengthwise
4 tablespoons unsalted butter, melted
3 cloves garlic, minced
1 teaspoon dried parsley
1 teaspoon dried oregano
For the Alfredo Sauce:
2 tablespoons unsalted butter
2 cloves garlic, minced
1 cup heavy cream
1 cup grated Parmesan cheese
Salt and pepper to taste
For the Toppings:
1 1/2 cups cooked chicken breast, shredded or diced
1 cup shredded mozzarella cheese
1/2 cup shredded Parmesan cheese
Fresh parsley, chopped (optional, for garnish)
Instructions:
Prepare the Garlic Bread Base:
Preheat your oven to 400°F (200°C). Place the bread halves on a baking sheet.
In a small bowl, mix the melted butter, minced garlic, dried parsley, and dried oregano. Brush the mixture evenly over the cut sides of the bread.
Bake the bread for about 10 minutes, or until it begins to turn golden and crispy.
Make the Alfredo Sauce:
In a medium saucepan, melt the butter over medium heat. Add the minced garlic and sauté for about 1 minute, or until fragrant.
Stir in the heavy cream and bring the mixture to a simmer. Reduce the heat to low and gradually add the grated Parmesan cheese, stirring constantly until the sauce is smooth and thickened. Season with salt and pepper to taste.
Assemble the Pizza:
Spread the Alfredo sauce evenly over the toasted garlic bread halves.
Top with the cooked chicken, followed by the shredded mozzarella and Parmesan cheeses.
Bake:
Return the assembled pizzas to the oven and bake for another 10-15 minutes, or until the cheese is melted and bubbly.
Serve:
Remove from the oven and let cool slightly. Garnish with chopped fresh parsley if desired. Slice and serve.
Storage Options: Store leftovers in an airtight container in the refrigerator for up to 3 days. Reheat in the oven or microwave until heated through.
Enjoy this luscious Chicken Alfredo Garlic Bread Pizza as a delightful merger of two beloved dishes, perfect for any night of the week!
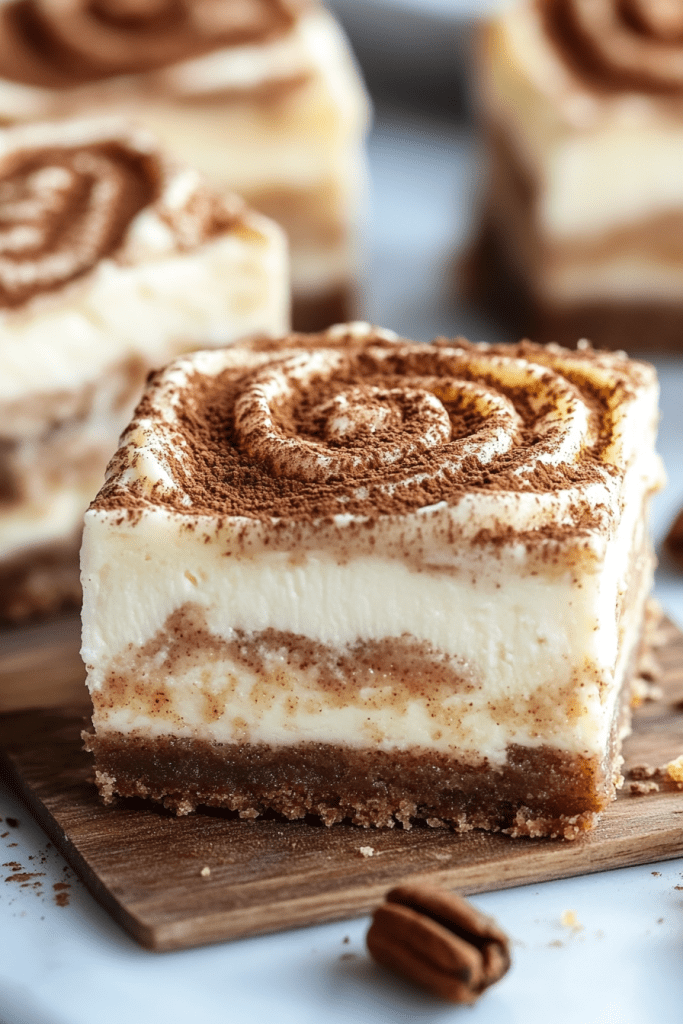
Blender Cinnamon Roll Cheesecake Bars are the ultimate fusion of two classic desserts: rich, creamy cheesecake and the warm, spiced flavors of cinnamon rolls. These bars are as decadent as they are easy to make, thanks to the simplicity of blending the filling and layering it with a buttery graham cracker crust and a cinnamon swirl. Perfect for holidays, potlucks, or an indulgent treat, these bars will become a go-to favorite for anyone who loves comforting flavors with a hint of sophistication.
The graham cracker crust provides a buttery, slightly crunchy base that complements the silky cheesecake filling. The cinnamon swirl, with its caramel-like richness, weaves through each layer, creating a delightful marbled effect that tastes as good as it looks.
Why You’ll Love This Recipe
• Easy to Make: Blending the filling makes preparation quick and mess-free.
• Perfect Combination: The creaminess of cheesecake meets the spiced sweetness of cinnamon rolls.
• Versatile: Great for dessert tables, gifting, or as a special treat for yourself.
• Crowd-Pleaser: A surefire hit with family and friends.
Ingredients
For the Crust:
• 1.5 cups graham cracker crumbs
• 1/4 cup brown sugar
• 6 tablespoons butter, melted
• 1 teaspoon cinnamon
For the Cheesecake Filling:
• 16 ounces cream cheese, softened (two 8 oz packages)
• 1/2 cup sour cream, at room temperature
• 2/3 cup sugar
• 2 large eggs, at room temperature
• 1 tablespoon vanilla extract
For the Cinnamon Swirl:
• 6 tablespoons butter, melted
• 1 cup dark brown sugar
• 1 teaspoon cinnamon
• 1/4 cup flour
Instructions
Prepare the Crust:
1. Preheat your oven to 350°F (175°C).
2. In a medium bowl, combine the graham cracker crumbs, brown sugar, melted butter, and cinnamon. Mix until the mixture resembles wet sand.
3. Press the mixture firmly into the bottom of an 8×8-inch baking dish lined with parchment paper.
4. Bake the crust for 8 minutes. Remove from the oven and let it cool completely.
Make the Cheesecake Filling:
1. Reduce the oven temperature to 325°F (165°C).
2. In a blender or food processor, combine the cream cheese, sugar, and vanilla extract. Blend until smooth.
3. Add the sour cream and blend again until fully incorporated.
4. Add the eggs one at a time, blending after each addition until the mixture is creamy and smooth.
Assemble the Cheesecake:
1. Pour half of the cheesecake filling over the cooled crust, spreading it evenly with a spatula.
2. Prepare the cinnamon swirl by mixing the melted butter, brown sugar, cinnamon, and flour in a small bowl until smooth.
3. Dot the first cheesecake layer with spoonfuls of the cinnamon mixture. Use a knife or skewer to gently swirl the cinnamon mixture into the cheesecake.
4. Pour the remaining cheesecake filling over the swirled layer, smoothing it out. Repeat the cinnamon swirl process on top.
Bake:
1. Bake the cheesecake at 325°F for 35-40 minutes, or until the center is set but still slightly jiggly when gently shaken.
2. Remove the cheesecake from the oven and allow it to cool to room temperature.
Chill:
1. Refrigerate the cheesecake for at least two hours to firm up before slicing into bars. For cleaner cuts, wipe the knife with a damp cloth between slices.
Tips
• Room Temperature Ingredients: Ensure the cream cheese, sour cream, and eggs are at room temperature for a smoother filling.
• Cinnamon Mixture: For a more pronounced swirl, use a skewer or toothpick to create intricate designs.
• Parchment Paper: Line the baking dish with parchment paper for easy removal and slicing.
• Serving Suggestions: Top with a drizzle of cream cheese glaze or whipped cream for added decadence.
Storage Options
• Refrigerator: Store in an airtight container for up to 5 days.
• Freezer: Freeze individual bars wrapped in plastic wrap for up to 3 months. Thaw overnight in the refrigerator before serving.
Blender Cinnamon Roll Cheesecake Bars are a show-stopping dessert that combines the best of two beloved classics. They’re easy to make, irresistibly delicious, and sure to impress at any gathering!
Chicken Cordon Bleu Casserole is a delightful twist on the classic dish, offering the same rich flavors in a comforting, easy-to-prepare format. Tender chicken is stuffed with ham and Swiss cheese, covered in a creamy sauce, and topped with golden breadcrumbs for a deliciously satisfying meal. Using a slow cooker ensures the chicken stays moist and tender, making this a perfect hands-off recipe for busy days.
This casserole is ideal for family dinners or entertaining guests, combining elegant flavors with the convenience of one-pot cooking. Serve it with a side of vegetables, rice, or mashed potatoes to complete the meal.
Why You’ll Love This Recipe
• Classic Flavors: Enjoy the rich, savory taste of traditional Chicken Cordon Bleu in a simpler form.
• Easy to Make: The slow cooker does most of the work, allowing you to focus on other tasks.
• Comforting and Delicious: Creamy sauce and crispy breadcrumbs make every bite irresistible.
• Perfect for Any Occasion: Great for weeknight meals or special gatherings.
1. Place each chicken breast between two sheets of plastic wrap or parchment paper.
2. Pound the chicken breasts to an even thickness using a meat mallet to ensure uniform cooking.
Assemble the Chicken Rolls:
1. Lay one slice of ham and one slice of Swiss cheese on top of each chicken breast.
2. Roll up the chicken tightly, securing the rolls with toothpicks if needed.
Arrange in Slow Cooker:
1. Place the prepared chicken rolls seam-side down in the bottom of your slow cooker.
Mix the Sauce:
1. In a medium bowl, whisk together the condensed cream of chicken soup and milk until smooth.
2. Pour this creamy mixture evenly over the chicken rolls in the slow cooker.
Add the Topping:
1. In a small bowl, mix the seasoned breadcrumbs with the melted butter until evenly coated.
2. Sprinkle the breadcrumb mixture over the chicken and sauce.
Cook:
1. Cover the slow cooker with its lid.
2. Set it to cook on low for 4-5 hours, or until the chicken is fully cooked and tender (internal temperature of 165°F or 74°C).
Final Touches:
1. Carefully remove the toothpicks from the chicken rolls before serving.
2. Taste and season the dish with salt and pepper if desired.
Tips
• Customize the Filling: Add a layer of Dijon mustard inside the rolls for extra flavor.
• Breadcrumb Alternatives: Use crushed crackers or panko for a different texture.
• Thicker Sauce: Stir in a bit of cornstarch mixed with water at the end of cooking if the sauce is too thin.
• Check for Doneness: Use a meat thermometer to ensure the chicken is fully cooked.
Storage Options
• Refrigerator: Store leftovers in an airtight container for up to 3 days. Reheat in the oven or microwave until heated through.
• Freezer: Freeze individual portions in freezer-safe containers for up to 3 months. Thaw overnight in the refrigerator before reheating.
Chicken Cordon Bleu Casserole brings the elegance of a classic dish to your table with minimal effort. Its creamy sauce, tender chicken, and crispy topping make it a comforting and satisfying meal that everyone will love.
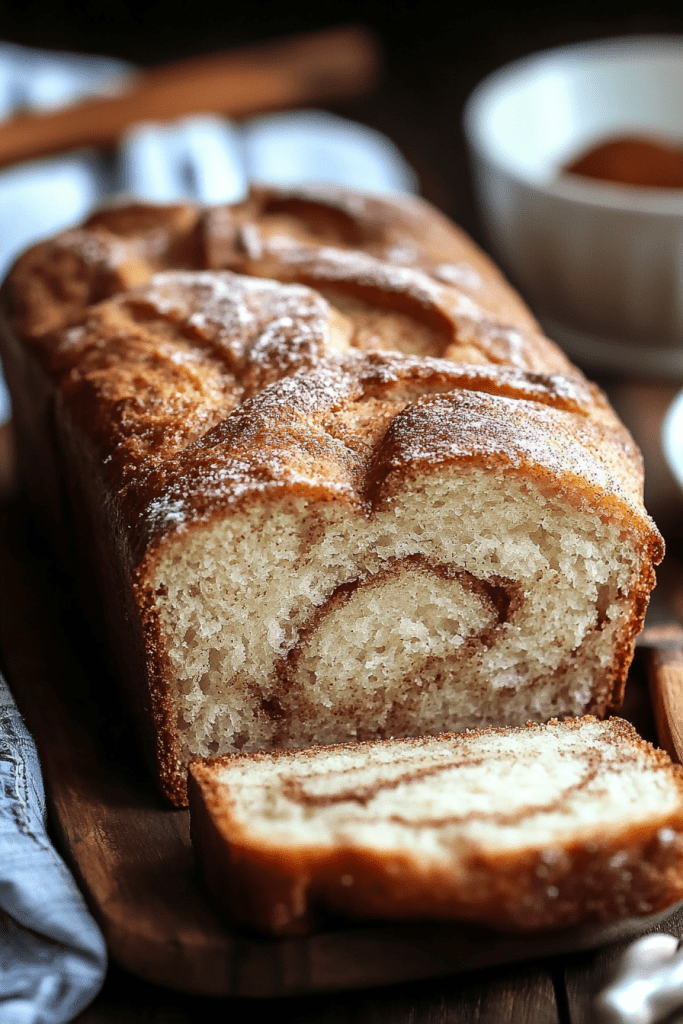
Cinnamon Sugar Bread is a delightful treat that combines the comforting flavors of cinnamon and sugar with a tender, buttery crumb. Perfect for breakfast, as an afternoon snack, or a dessert, this bread is sure to fill your home with the warm, inviting aroma of cinnamon as it bakes. The layers of cinnamon sugar create a beautifully marbled loaf that’s as stunning to slice as it is to eat.
This easy-to-make recipe uses pantry staples and comes together with minimal effort. The buttermilk ensures a moist texture, while the cinnamon sugar mixture adds a sweet and slightly crunchy topping. Whether enjoyed fresh out of the oven or toasted with butter the next day, this bread is a guaranteed crowd-pleaser.
Why You’ll Love This Recipe
• Warm and Cozy Flavors: The perfect blend of cinnamon and sugar adds a comforting sweetness.
• Moist and Tender: Buttermilk creates a soft texture that stays fresh for days.
• Easy to Make: Straightforward steps make this recipe approachable for any skill level.
• Versatile Treat: Great for breakfast, snacks, or dessert.
Ingredients
For the Bread:
• 2 cups granulated sugar
• 1 cup unsalted butter, softened
• 2 large eggs
• 2 cups buttermilk
• 4 cups all-purpose flour
• 2 teaspoons baking soda
For the Cinnamon Sugar Mixture:
• 2/3 cup granulated sugar
• 3 teaspoons ground cinnamon
Instructions
Cinnamon Sugar Preparation:
1. In a small mixing bowl, combine the granulated sugar and ground cinnamon.
2. Mix thoroughly to create a uniform blend and set aside for later use.
Batter Preparation:
1. In a large mixing bowl, cream together the softened butter, granulated sugar, and eggs using a hand or stand mixer. Mix until the texture is light and smooth.
2. Gradually incorporate the buttermilk, followed by the all-purpose flour and baking soda. Mix just until combined, ensuring a consistent and lump-free batter.
Loaf Pan Layering:
1. Grease two loaf pans thoroughly or line them with parchment paper for easy removal.
2. Evenly divide and pour half of the prepared batter into the two pans. Smooth the surface with a spatula.
3. Generously sprinkle the cinnamon sugar mixture over the batter in both pans, reserving about 1/4 of the mixture for the top layer.
Final Layering:
1. Pour the remaining batter into the pans, spreading it evenly over the cinnamon sugar layer.
2. Sprinkle the reserved cinnamon sugar mixture over the top of each loaf, creating a sweet, crunchy topping.
Baking:
1. Preheat your oven to 350°F (175°C).
2. Place the loaf pans on the center rack and bake for 45-50 minutes.
3. Check for doneness by inserting a skewer or toothpick into the center of each loaf. If it comes out clean, the bread is ready.
Cooling:
1. Remove the loaf pans from the oven and allow the bread to cool for at least 20 minutes.
2. Carefully remove the loaves from the pans and place them on a wire rack to cool completely before slicing.
Tips
• Even Layers: Use a spatula to smooth each layer for consistent marbling.
• Substitute for Buttermilk: If you don’t have buttermilk, make a substitute by mixing 2 cups of milk with 2 tablespoons of lemon juice or vinegar. Let it sit for 5 minutes before using.
• Storage: Wrap the cooled bread in plastic wrap or aluminum foil to keep it moist and fresh.
Storage Options
• Room Temperature: Store in an airtight container or wrap in foil for up to 3 days.
• Refrigerator: Extend freshness by refrigerating for up to a week. Bring to room temperature or warm before serving.
• Freezer: Freeze individual slices or whole loaves in freezer-safe bags for up to 3 months. Thaw overnight in the refrigerator or reheat directly in the oven.
Cinnamon Sugar Bread is a simple yet delightful recipe that’s perfect for any time of day. With its tender crumb and warm cinnamon sugar layers, this bread will quickly become a household favorite.
Crab-Stuffed Cheddar Bay Biscuits are a decadent twist on the classic cheddar biscuit, filled with a rich, savory crab mixture and topped with a tangy lemon butter glaze. These golden, flaky biscuits are perfect for special occasions, family dinners, or as an indulgent appetizer that will impress your guests.
The combination of lump crab meat, parmesan cheese, and buttery biscuit dough makes every bite a luxurious treat. The lemon butter brushed on top adds a bright, zesty finish that balances the rich flavors. This recipe is simple enough to make at home but delivers restaurant-quality results that everyone will love.
Why You’ll Love This Recipe
• Decadent Filling: The crab stuffing is creamy, flavorful, and perfectly complements the cheddar biscuits.
• Homemade Elegance: These biscuits feel fancy but are easy to prepare.
• Versatile: Ideal as a starter, side dish, or even the star of your meal.
Ingredients
For the Biscuits
• 1 package Cheddar Bay Biscuit Mix
• 1 tsp garlic powder
• 1 tsp Italian seasoning
For the Crab Filling
• 1 pound lump crab meat (fully cooked)
• ¼ tsp paprika
• ½ tsp onion powder
• ½ cup + extra mayonnaise (if needed)
• 1 tbsp mustard
• ½ sleeve Ritz crackers, crushed
• 1 cup grated parmesan cheese
For the Lemon Butter Glaze
• 2 tbsp melted butter
• 1 tsp fresh lemon juice
Instructions
Prepare the Biscuit Dough
1. Prepare the Cheddar Bay Biscuit Mix according to the package directions, adding garlic powder and Italian seasoning to the dough for extra flavor. Set aside.
Preheat and Prepare Muffin Tins
1. Preheat your oven to 375°F (190°C).
2. Spray two muffin tins with nonstick cooking spray to prevent sticking.
Make the Crab Filling
1. In a medium mixing bowl, combine the lump crab meat, paprika, onion powder, mustard, mayonnaise, and crushed Ritz crackers.
2. Add the grated parmesan cheese and stir until well combined.
3. Adjust the consistency with a little more mayonnaise if the mixture feels too dry.
Assemble the Stuffed Biscuits
1. Dust your hands with flour to prevent sticking. Scoop a small amount of biscuit dough and flatten it into a cup shape.
2. Place a scoop of the crab filling into the center of the dough.
3. Cover the filling with a small piece of biscuit dough, sealing the edges around the crab mixture to enclose it.
4. Place each stuffed biscuit into the prepared muffin tin.
Bake the Biscuits
1. Bake the biscuits in the preheated oven for 12-15 minutes, or until the tops are golden brown and the biscuits are cooked through.
Brush with Lemon Butter
1. In a small bowl, mix the melted butter with the fresh lemon juice.
2. Brush the lemon butter mixture over the hot biscuits as soon as they come out of the oven.
Serve and Enjoy
1. Serve the biscuits warm, garnished with a sprinkle of parsley or a wedge of lemon if desired.
Tips
• Use Fresh Crab: Lump crab meat works best, but canned crab can be a budget-friendly substitute. Just ensure it’s well-drained.
• Prevent Overstuffing: Use just enough crab filling to avoid it spilling out during baking.
• Add Extra Cheese: Sprinkle a little shredded cheddar on top before baking for an even cheesier finish.
• Make Ahead: Prepare the crab filling and biscuit dough separately, then assemble and bake when ready to serve.
Storage Options
• Refrigeration: Store leftover biscuits in an airtight container in the refrigerator for up to 3 days. Reheat in the oven at 350°F (175°C) to maintain their texture.
• Freezing: Freeze unbaked stuffed biscuits on a baking sheet until solid, then transfer to a freezer-safe container. Bake from frozen, adding 5-7 minutes to the baking time.
These Crab-Stuffed Cheddar Bay Biscuits with Lemon Butter are a showstopping addition to any table, combining the indulgence of a seafood feast with the comfort of warm, cheesy biscuits. Perfect for impressing your guests or treating yourself to a gourmet experience!
Berry Cream Cheese Truffles are the perfect blend of tangy, creamy, and sweet. These bite-sized delights feature a luscious cream cheese filling with a surprise burst of berry compote in the center, all wrapped in a smooth chocolate coating. Whether for special occasions, as a gift, or just as a decadent treat, these truffles will impress with their vibrant flavors and elegant presentation.
The berry filling adds a fresh, fruity twist to the creamy base, while the chocolate coating provides a satisfying crunch. With sprinkles or crushed nuts on top, these truffles are as beautiful as they are delicious.
Why You’ll Love This Recipe
• Burst of Berry Flavor: A tangy and fruity surprise awaits in the center.
• Creamy Texture: The cream cheese filling is rich and smooth.
• Customizable: Choose your favorite berries and decorations to make these truffles your own.
• Perfect for Any Occasion: Elegant enough for parties yet simple enough for a casual treat.
Ingredients
For the Filling:
• 1 cup (150g) mixed berries (fresh or frozen)
• 1/4 cup (50g) granulated sugar
• 1 tablespoon lemon juice
• 1 tablespoon cornstarch
• 1 tablespoon water
For the Cream Cheese Mixture:
• 8 oz (225g) cream cheese, softened
• 1/4 cup (60g) unsalted butter, softened
• 1 cup (125g) powdered sugar
• 1 teaspoon vanilla extract
For the Coating:
• White chocolate or candy melts, for dipping
• Sprinkles or crushed nuts, for decoration
Instructions
Prepare the Berry Filling:
1. Cook the Berries:
• Combine the mixed berries, sugar, and lemon juice in a medium saucepan.
• Cook over medium heat, stirring occasionally, until the berries break down and the mixture becomes saucy (about 5-7 minutes).
2. Thicken the Filling:
• In a small bowl, mix the cornstarch and water to create a slurry.
• Stir the slurry into the berry mixture, cooking until thickened (1-2 minutes).
• Remove from heat and let the filling cool completely.
Make the Cream Cheese Mixture:
1. Combine Ingredients:
• In a mixing bowl, beat the cream cheese and butter with an electric mixer until smooth and creamy.
• Gradually add the powdered sugar and vanilla extract, mixing until well combined.
Assemble the Truffles:
1. Form the Truffles:
• Scoop about 1 tablespoon of the cream cheese mixture and flatten it slightly in your hand.
• Add a small dollop of the cooled berry filling in the center.
• Carefully seal the edges of the cream cheese mixture around the berry filling and roll into a ball.
• Place the truffles on a parchment-lined tray.
2. Chill the Truffles:
• Refrigerate the truffles for at least 1 hour to firm up.
Coat the Truffles:
1. Melt the Chocolate:
• Melt the white chocolate or candy melts according to the package instructions.
2. Dip the Truffles:
• Using a fork or dipping tool, submerge each truffle into the melted chocolate, ensuring it’s fully coated.
• Let any excess chocolate drip off before placing the truffle back onto the parchment-lined tray.
3. Decorate:
• While the chocolate is still wet, sprinkle the truffles with nuts, sprinkles, or other decorations.
Final Preparation:
1. Chill Again:
• Place the coated truffles in the refrigerator until the chocolate sets and the truffles are firm.
Serve:
1. Enjoy:
• Serve the truffles chilled as a delightful dessert or gift.
Tips
• Berry Choices: Use strawberries, raspberries, blueberries, or a mix for a unique flavor.
• Coating Alternatives: Dark or milk chocolate can be used instead of white chocolate.
• Storage: Store truffles in an airtight container in the refrigerator for up to 5 days.
• Freezing: Freeze uncoated truffles for up to 1 month. Dip in chocolate after thawing for the best results.
Berry Cream Cheese Truffles are the perfect indulgence, offering a balance of creamy richness and fruity brightness in every bite. Share them with friends or savor them yourself—they’re irresistible either way!
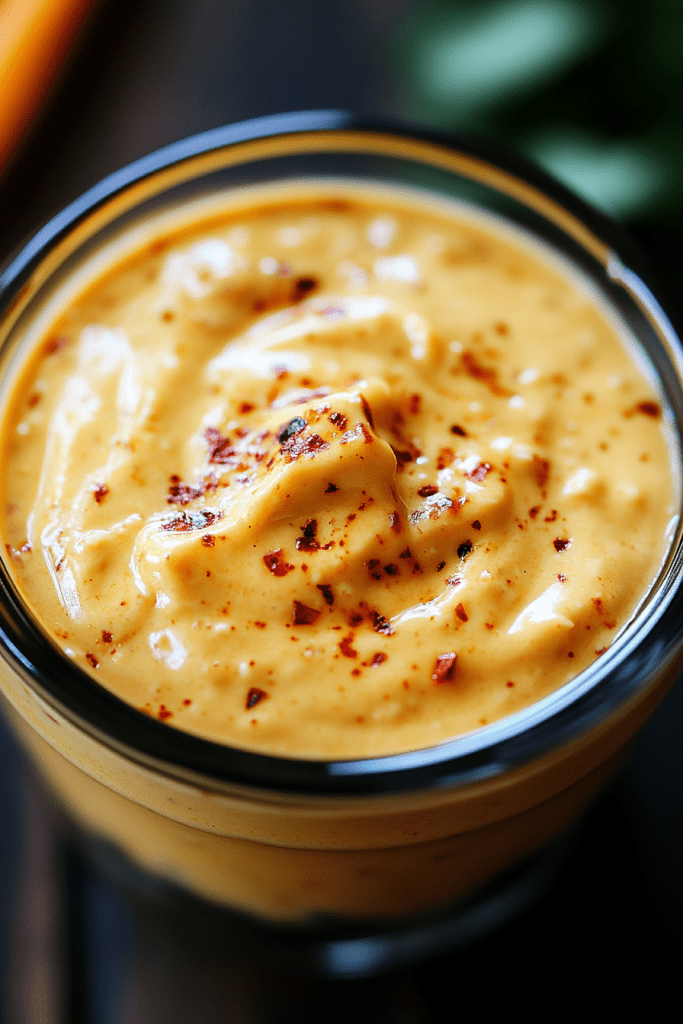
This Pimento Cheese Sauce is a bold and flavorful condiment that’s perfect for drizzling, dipping, or spreading. Combining the sweetness of roasted peppers with the creaminess of cheese and a tangy kick from cherry and chili sauces, it’s a versatile addition to any meal. Whether served as a dip for chips, a sauce for grilled meats, or a topping for baked potatoes, this sauce is guaranteed to elevate your dishes.
The roasted peppers bring a smoky, savory element that pairs beautifully with the creamy texture of the cheese. The VH® Cherry Sauce adds a subtle sweetness, while the chili sauce provides a gentle heat. Finally, the finely chopped green onions lend a fresh, zesty finish to this irresistible sauce.
Why You’ll Love This Recipe
• Bursting with Flavor: Sweet, smoky, and creamy with a hint of heat.
• Easy to Make: Simple steps for a sauce that tastes gourmet.
• Versatile: Perfect as a dip, sauce, or topping for a variety of dishes.
• Customizable: Adjust the heat and sweetness to your liking.
Ingredients
• 125 ml (½ cup) roasted and drained pepper
• 250 g (8 oz) cream cheese
• 125 ml (½ cup) VH® Cherry Sauce
• 2 mL (½ teaspoon) VH® Soy Sauce
• 3 tablespoons chili sauce
• 45 ml (3 tablespoons) finely chopped green onion
Instructions
Prepare the Roasted Peppers:
1. Roast and Drain Peppers:
• Roast the peppers on a grill or under a broiler until the skins are charred and the flesh is tender.
• Transfer the hot peppers to a bowl and cover them to steam for 5-10 minutes, which makes peeling easier.
2. Peel and Drain:
• Peel off the charred skins and discard the seeds.
• Drain any excess liquid to avoid thinning the sauce.
Blend the Base Ingredients:
1. Blend the Peppers:
• Add the roasted peppers to a blender and pulse until finely chopped.
2. Add the Cream Cheese:
• Incorporate the cream cheese into the blender. Blend until the mixture is smooth and creamy.
3. Incorporate the Sauces:
• Add VH® Cherry Sauce, VH® Soy Sauce, and chili sauce to the blender.
• Blend until all ingredients are thoroughly combined.
4. Adjust Thickness:
• If the sauce is too thick, add a small amount of water or additional cherry sauce to achieve your desired consistency.
Process the Green Onions:
1. Chop the Green Onions:
• Finely chop the green onions using a food processor or knife.
2. Combine with Sauce:
• Stir the green onions into the blended sauce, ensuring they are evenly distributed.
Tips
• Roasting Peppers: Use red bell peppers for a mild flavor or poblano peppers for a smokier taste.
• Thickness Adjustment: If the sauce is too thick, thin it out with a splash of milk, water, or more cherry sauce.
• Heat Level: Adjust the amount of chili sauce to control the spiciness of the sauce.
• Green Onions: For a milder onion flavor, sauté the green onions before adding them to the sauce.
Storage Options
• Refrigerator: Store the sauce in an airtight container for up to 5 days. Re-stir before serving.
• Freezer: Freeze the sauce in a sealed container for up to 2 months. Thaw in the refrigerator and whisk before use.
This Pimento Cheese Sauce is a quick and easy way to add a punch of flavor to your meals. Use it as a dip, spread, or drizzle and let its creamy, smoky, and tangy flavors shine!
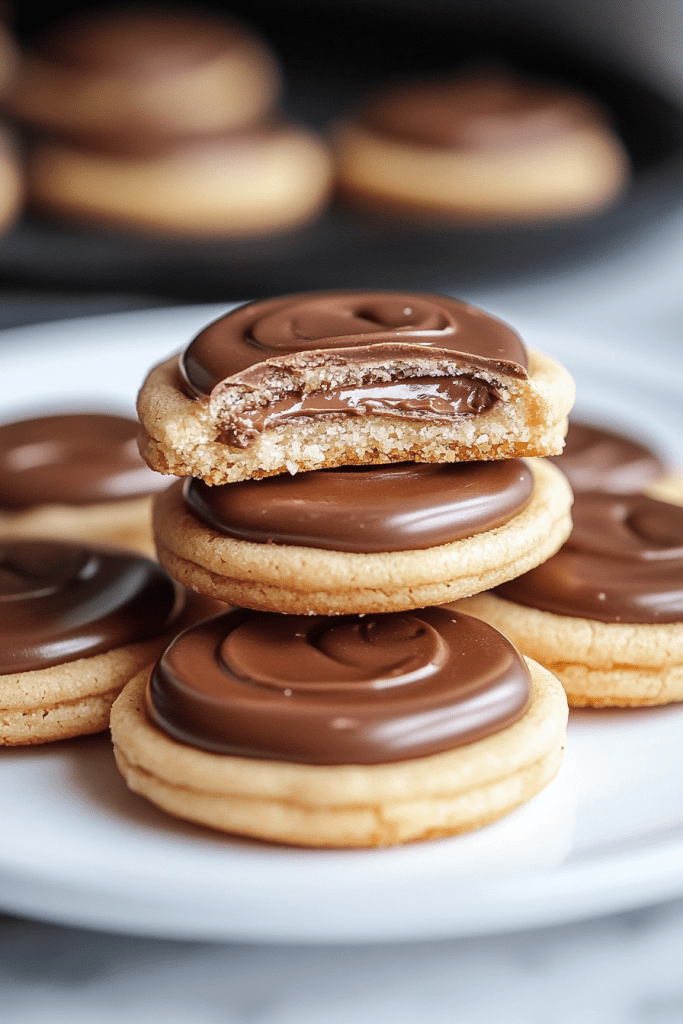
These Twix Cookies are a delightful treat that combines the buttery goodness of homemade cookies with the caramel and chocolate decadence of Twix bars. Soft and chewy, with a hidden Twix center in every bite, these cookies are a crowd-pleaser that will quickly become a favorite. Whether you’re baking for a party, a holiday, or just to satisfy a sweet tooth, these cookies deliver a perfect blend of textures and flavors.
The magic of this recipe lies in its simplicity and the surprise at the center of each cookie. The dough is easy to work with, wrapping snugly around the mini Twix bars to encase them completely. As the cookies bake, the Twix center softens, creating a gooey caramel-chocolate core surrounded by tender, buttery dough. These cookies are fun to make and even more fun to eat!
Why You’ll Love This Recipe
• Surprise Center: Each cookie hides a mini Twix bar for a gooey, chocolatey surprise.
• Buttery and Soft: The dough is rich and tender, providing the perfect texture.
• Simple Ingredients: No fancy ingredients required, just pantry staples and your favorite candy.
• Perfect for Any Occasion: Great for parties, holiday trays, or everyday indulgence.
Ingredients
• 1 cup unsalted butter, softened
• 1 cup granulated sugar
• 1/2 cup powdered sugar
• 2 teaspoons vanilla extract
• 2 large eggs
• 3 cups all-purpose flour
• 1/2 teaspoon salt
• 20-24 mini Twix bars, unwrapped and cut in half
Instructions
Prepare the Oven and Baking Sheet:
1. Preheat your oven to 350°F (175°C).
2. Line a baking sheet with parchment paper to prevent sticking.
Mix the Dough:
1. In a large bowl, cream the butter, granulated sugar, and powdered sugar together until the mixture is light and fluffy.
2. Add the vanilla extract and eggs, mixing until fully incorporated.
Combine Dry Ingredients:
1. In a separate bowl, whisk together the flour and salt.
2. Gradually add the dry mixture to the wet mixture, mixing until a smooth dough forms.
Form the Cookies:
1. Take about 1 tablespoon of dough and flatten it in your hand.
2. Place a halved mini Twix bar in the center of the dough.
3. Wrap the dough around the Twix, ensuring it is completely covered, and roll it into a ball.
4. Place the dough balls on the prepared baking sheet, spacing them about 2 inches apart to allow for spreading.
Bake:
1. Bake the cookies for 12-15 minutes, or until the edges are golden brown.
2. Allow the cookies to cool on the baking sheet for 3-5 minutes, then transfer them to a wire rack to cool completely.
Tips
• Chilling the Dough: If the dough feels too soft to work with, chill it in the refrigerator for 15-20 minutes before forming the cookies.
• Twix Alternatives: Swap out Twix for other mini candy bars like Snickers, Milky Way, or Kit Kat for variety.
• Even Baking: Rotate the baking sheet halfway through the bake time to ensure even cooking.
• Storage: Store cookies in an airtight container to keep them soft and fresh.
Storage Options
• Room Temperature: Store in an airtight container at room temperature for up to 4 days.
• Refrigerator: Extend freshness by refrigerating for up to 7 days. Bring to room temperature before serving.
• Freezer: Freeze unbaked dough balls for up to 3 months. Bake directly from frozen, adding an extra 1-2 minutes to the bake time.
These Twix Cookies are a delightful way to upgrade your cookie game with minimal effort. The combination of buttery dough and a gooey Twix center is irresistible—perfect for sharing or keeping all to yourself!
This decadent chocolate cake is the ultimate dessert for any chocolate lover. Moist and rich, it’s paired with a luxurious chocolate Swiss meringue buttercream that’s silky and not overly sweet. This cake is perfect for birthdays, celebrations, or any time you want to impress with a homemade dessert. The layers are deeply chocolatey, and the buttercream adds a smooth, creamy finish that melts in your mouth. Topped with chocolate curls or sprinkles, this cake is as beautiful as it is delicious.
The recipe uses simple ingredients but follows techniques that elevate it from an ordinary chocolate cake to a bakery-style masterpiece. The addition of hot water ensures the cake is moist, while the buttermilk provides a slight tanginess that complements the sweetness of the chocolate. The Swiss meringue buttercream, with its airy and smooth texture, adds a touch of elegance to this classic treat.
Why You’ll Love This Recipe
• Rich and Moist Layers: The perfect balance of tender crumb and deep chocolate flavor.
• Silky Buttercream: The Swiss meringue buttercream is creamy, smooth, and not overly sweet.
• Perfect for Any Occasion: A show-stopping dessert that’s easy to decorate and customize.
• Impressive Yet Simple: With a few key steps, you’ll have a bakery-quality cake at home.
Ingredients
For the Chocolate Cake:
• 2 cups all-purpose flour
• 2 cups granulated sugar
• 3/4 cup Dutch-processed cocoa powder, sifted
• 2 teaspoons baking soda
• 1 teaspoon baking powder
• 1 teaspoon salt
• 1/2 cup vegetable oil
• 1 cup buttermilk, room temperature
• 1 cup hot water
• 2 large eggs, room temperature
• 2 teaspoons vanilla extract
For the Chocolate Swiss Meringue Buttercream:
• 5 large egg whites
• 1 1/2 cups granulated sugar
• 1 1/2 cups unsalted butter, room temperature
• 8 ounces good quality dark chocolate, chopped, melted, and cooled
For Assembly:
• Chocolate curls or sprinkles for decoration
Instructions
Chocolate Cake:
1. Prepare the Pans
• Preheat your oven to 350°F (175°C). Grease two 8-inch round cake pans and dust them with cocoa powder. Line the bottoms with parchment paper for easy release.
2. Mix the Dry Ingredients
• In the bowl of a stand mixer fitted with a paddle attachment, combine the flour, sugar, cocoa powder, baking soda, baking powder, and salt.
3. Mix the Wet Ingredients
• In a medium bowl, whisk together the vegetable oil, buttermilk, eggs, and vanilla extract. Gradually add the hot water, whisking constantly to avoid cooking the eggs.
4. Combine Wet and Dry Mixtures
• Slowly pour the wet ingredients into the dry ingredients. Beat on medium speed for 2-3 minutes. The batter will be thin.
5. Bake
• Divide the batter evenly between the prepared pans. Bake for 45 minutes, or until a toothpick inserted in the center comes out mostly clean with a few moist crumbs.
6. Cool
• Allow the cakes to cool in the pans for 10 minutes. Turn them out onto a wire rack and let them cool completely.
Chocolate Swiss Meringue Buttercream:
1. Make the Meringue
• Combine the egg whites and sugar in the bowl of a stand mixer. Whisk until combined, then place the bowl over a double boiler. Whisk constantly until the mixture reaches 160°F (70°C) or is no longer grainy when rubbed between your fingers (about 3 minutes).
2. Whip the Meringue
• Transfer the bowl to the stand mixer and whip on medium-high speed until stiff peaks form and the meringue is cool to the touch, about 5-10 minutes.
3. Add the Butter
• Switch to the paddle attachment. Gradually add the cubed butter, mixing on medium speed until smooth.
4. Incorporate the Chocolate
• Add the melted, cooled chocolate and mix until fully incorporated.
Assembly:
1. Layer the Cake
• Place one layer of cake on a cake board or serving plate. Spread about 1 cup of buttercream evenly over the top.
2. Crumb Coat and Chill
• Add the second layer of cake. Apply a thin crumb coat of buttercream to trap any loose crumbs, then chill the cake in the refrigerator for 20 minutes.
3. Frost and Decorate
• Spread another cup of buttercream over the top and sides of the cake. Use an offset spatula to smooth the surface and create a swirl pattern on the top if desired.
• Use a piping bag fitted with a 1M tip to pipe decorative borders. Finish with chocolate curls or sprinkles for an elegant touch.
Tips
• Room Temperature Ingredients: Ensure the eggs, buttermilk, and butter are at room temperature for a smooth batter and buttercream.
• Parchment Paper: Lining the pans ensures the cakes release easily without sticking.
• Buttercream Texture: If the buttercream appears curdled, keep mixing—it will come together as the butter incorporates.
Storage Options
• Refrigerator: Store the cake in an airtight container for up to 5 days. Bring to room temperature before serving.
• Freezer: Wrap unfrosted cake layers tightly in plastic wrap and freeze for up to 3 months. Thaw overnight in the refrigerator before assembling.
This classic chocolate cake is a show-stopping dessert that will satisfy every chocolate craving. Enjoy the rich layers and silky buttercream!