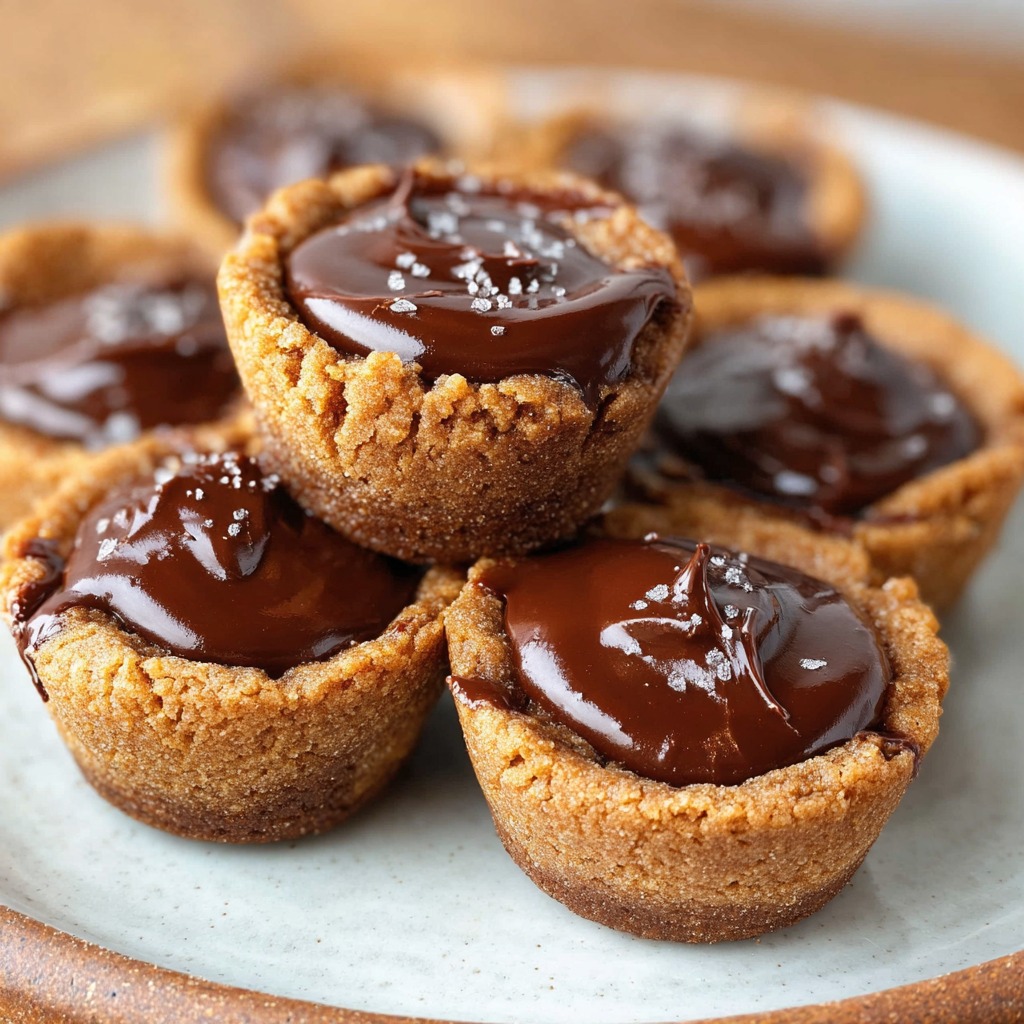
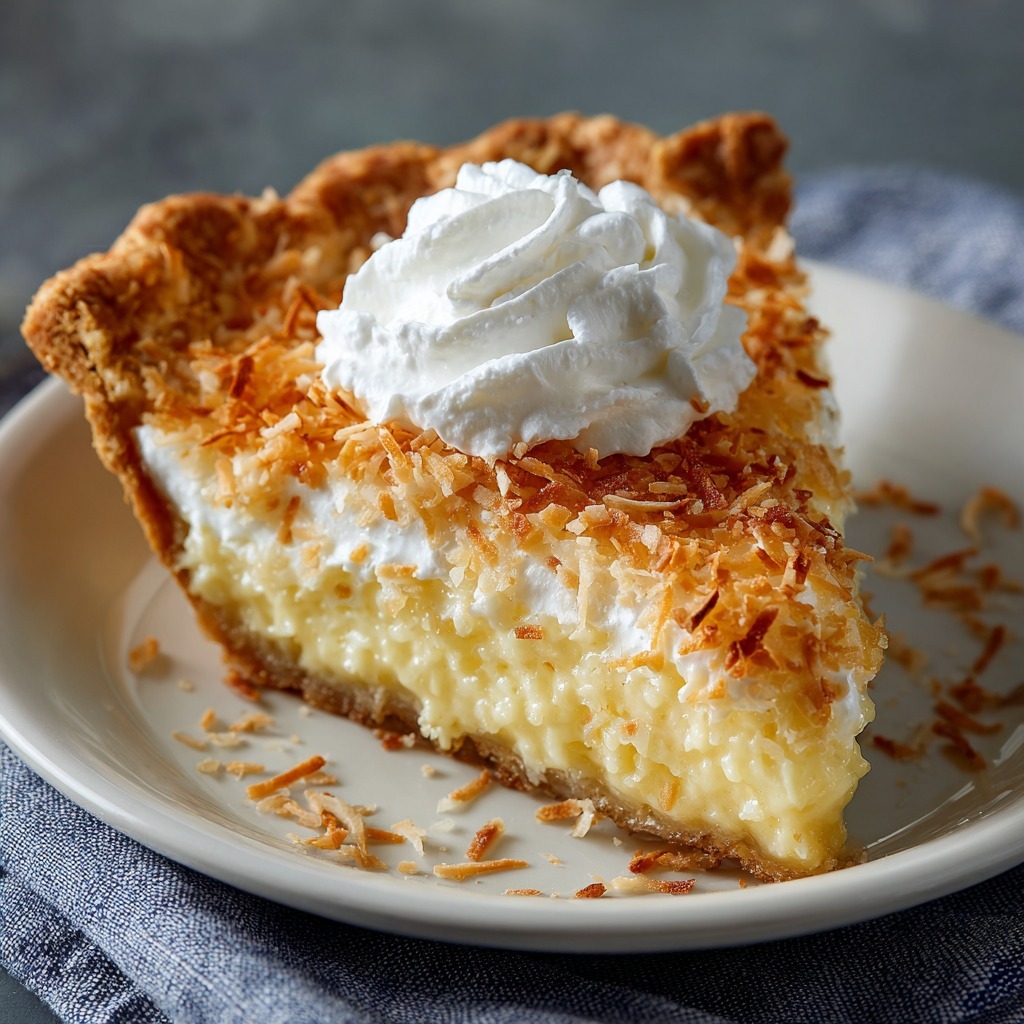
Easy Mexican Taco Lasagna

0

This Mexican Taco Lasagna is a fun and flavorful twist on traditional lasagna, layering seasoned ground beef, soft tortillas, salsa, and gooey melted cheese for a delicious, comforting meal. Unlike classic Italian lasagna, this dish swaps pasta for corn tortillas, creating a bold, Tex-Mex-inspired dinner that’s quick to assemble and packed with flavor.

The taco-seasoned beef and diced tomatoes bring a rich and slightly spicy filling, while the tortillas absorb all the savory goodness as they bake. Finished with salsa and melted Colby cheese, this casserole-style dish is perfect for weeknight dinners, game-day gatherings, or anytime you’re craving a hearty and satisfying meal. Serve it with sour cream, guacamole, or fresh cilantro for the ultimate taco experience in lasagna form.

Why You’ll Love This Recipe

Quick & Easy: Simple ingredients and minimal prep time.

Bold & Flavorful: Taco seasoning, salsa, and cheese create an irresistible bite.

Perfect for Families: A fun twist on tacos that serves a crowd.

Ingredients

• 1 lb lean ground beef

• 1 (1 oz) package taco seasoning mix (recommended: Old El Paso or Taco Bell)

• 1 (14 oz) can peeled and diced tomatoes with juice

• 6 soft corn tortillas (6-inch size)

• 1 cup your favorite salsa

• ½ cup shredded Colby cheese (or Mexican blend)

Instructions

Step 1: Preheat & Prepare the Ingredients

1. Preheat oven to 350°F (175°C).

2. In a deep cast-iron skillet over medium-high heat, cook the ground beef, breaking it up into small pieces as it browns.

3. Drain any excess grease.

Step 2: Season the Meat

1. Stir in the taco seasoning mix and diced tomatoes with juice.

2. Cook for 2-3 minutes, allowing the flavors to combine.

Step 3: Assemble the Taco Lasagna

1. Line a 9×13-inch baking dish with half of the tortillas.

2. Spoon the ground beef mixture evenly over the tortillas.

3. Place the remaining tortillas on top, creating a second layer.

4. Spread the salsa over the top layer of tortillas.

5. Sprinkle the shredded cheese evenly over everything.

Step 4: Bake & Serve

1. Bake at 350°F (175°C) for 20-30 minutes, or until the cheese is melted and bubbly.

2. Remove from the oven and let sit for 5 minutes before slicing.

3. Serve warm with sour cream, guacamole, or chopped cilantro.

Tips for Success

For extra layers, add black beans, corn, or sautéed onions between the layers.

Make it spicier by using hot salsa or adding chopped jalapeños.

Use flour tortillas instead of corn for a softer texture.

Storage Options

Refrigerate: Store leftovers in an airtight container for up to 3 days.

Reheat: Warm in the oven at 325°F (165°C) for 10-15 minutes.

Freeze: Wrap tightly and freeze for up to 2 months. Thaw overnight before reheating.

Italian Bake

0

This Italian Bake is a hearty, cheesy casserole packed with tender chicken, savory Italian sausage, and pasta coated in rich spaghetti sauce. It’s the perfect comfort meal for family dinners, potlucks, or meal prepping. The combination of gooey melted cheese, flavorful meats, and colorful bell peppers makes every bite irresistible.

One of the best things about this dish is its versatility—you can switch up the pasta, use different cheeses, or add extra vegetables for a more personalized touch. Since everything is pre-cooked before baking, the flavors meld together beautifully in the oven, resulting in a satisfying, cheesy, and bubbling Italian-inspired meal.

Why You’ll Love This Recipe

Loaded with Flavor: Chicken, sausage, and melted cheese create the ultimate comforting bite.

Perfect for Meal Prep: Makes a large batch that reheats well for leftovers.

Customizable: Use your favorite pasta, cheese blend, or veggies.

Ingredients

• 3 lbs chicken breasts, cooked and cut into bite-sized pieces

• 6 links Italian sausage, cooked and cut into bite-sized pieces

• 2 jars (or cans) spaghetti sauce (Hunt’s recommended)

• 1 lb pasta (penne, macaroni, shells, or your choice)

• 1 package pizza cheese blend (mozzarella, cheddar, and other cheeses)

• 1 onion, chopped

• 2 bell peppers (1 red and 1 green), cut into chunks

Instructions

Step 1: Preheat the Oven

1. Preheat your oven to 325°F (160°C).

Step 2: Cook the Meat

1. Cook the chicken breasts until fully cooked and no longer pink inside.

2. Let them cool slightly, then cut into bite-sized pieces.

3. In a skillet over medium heat, cook the Italian sausage links until browned and cooked through.

4. Let the sausages cool, then slice into bite-sized pieces.

Step 3: Cook the Pasta

1. Bring a large pot of water to a boil and cook the pasta until al dente, following the package instructions.

2. Drain the pasta and set it aside.

Step 4: Combine the Ingredients

1. In a large bowl, mix together the cooked pasta, chicken, sausage, chopped onion, and bell pepper chunks.

2. Pour in the spaghetti sauce and stir well to coat all the ingredients evenly.

Step 5: Assemble & Bake

1. Transfer the pasta mixture to a large, deep baking dish.

2. Spread it out evenly in the dish.

3. Sprinkle the shredded pizza cheese blend over the top, covering it completely.

4. Bake for 45 minutes, or until the cheese is melted, golden, and bubbly.

Step 6: Serve & Enjoy

1. Let the casserole rest for a few minutes before serving.

2. Serve warm with garlic bread or a side salad.

Tips for Success

Use different sausages for a milder or spicier flavor.

Add mushrooms, olives, or spinach for extra vegetables.

For a crispy cheese topping, broil the dish for 2-3 minutes at the end of baking.

Storage Options

Refrigerate: Store leftovers in an airtight container for up to 3 days.

Reheat: Warm in the oven at 350°F (175°C) for 15 minutes.

Freeze: Freeze before baking for up to 2 months. Thaw overnight in the fridge before baking.

Apple Pie Biscuits

0

These Apple Pie Biscuits are the perfect combination of warm, flaky biscuits and sweet, spiced apple pie filling. Coated in cinnamon-sugar and baked until golden, these biscuits taste like a cross between a classic apple pie and a pull-apart monkey bread. Finished with a drizzle of simple icing, they make a delicious breakfast treat or a cozy dessert for any occasion.

What makes this recipe special is its simplicity—using store-bought buttermilk biscuits and canned apple pie filling cuts down on prep time while still delivering homemade flavor. The brown sugar and cinnamon caramelize beautifully in the oven, creating a rich, buttery glaze. Serve these biscuits warm for a gooey, comforting bite that pairs perfectly with coffee or a scoop of vanilla ice cream.

Why You’ll Love This Recipe

Quick & Easy: Uses store-bought biscuits and apple pie filling for convenience.

Warm & Cozy Flavors: Cinnamon, nutmeg, and brown sugar create a rich, caramelized taste.

Perfect for Any Occasion: Great for breakfast, brunch, or dessert.

Ingredients

For the Biscuits:

• 1 can buttermilk biscuits

• 1 can apple pie filling

• ½ cup butter, melted

• ½ cup brown sugar

• 1 tbsp cinnamon

• ⅛ tsp nutmeg

• 1 tsp vanilla extract

For the Icing:

• ½ cup confectioners’ sugar

• 1 tbsp milk

Instructions

Step 1: Prep the Oven & Pan

1. Preheat your oven to 375°F (190°C).

2. Lightly grease a baking pan or skillet with butter or cooking spray.

Step 2: Coat the Biscuits

1. In a small bowl, mix together the brown sugar, cinnamon, and nutmeg.

2. Dip each biscuit in the melted butter, making sure all sides are coated.

3. Roll the buttered biscuits in the sugar mixture until fully covered.

4. Arrange the biscuits in the prepared pan.

Step 3: Prepare the Apple Filling

1. Chop the apple pie filling into smaller pieces.

2. Stir in vanilla extract for extra flavor.

3. Spoon the apple mixture over the biscuits.

Step 4: Assemble & Bake

1. Sprinkle the remaining sugar mixture over the top.

2. Drizzle the remaining melted butter evenly over the biscuits.

3. Bake for 35 minutes, or until the biscuits are golden brown and bubbly.

Step 5: Make the Icing & Serve

1. In a small bowl, whisk together confectioners’ sugar and milk until smooth.

2. Drizzle the icing over the warm biscuits.

3. Serve immediately and enjoy!

Tips for Success

Chop the apple filling finely for better distribution across the biscuits.

For extra texture, sprinkle chopped pecans or walnuts on top before baking.

Make it extra gooey by adding a drizzle of caramel sauce after baking.

Storage Options

Refrigerate: Store in an airtight container for up to 3 days.

Reheat: Warm in the oven at 325°F (165°C) for 5-7 minutes.

Freeze: Wrap individual biscuits and freeze for up to 1 month. Thaw before reheating.

Pineapple Bake

0

This Pineapple Bake is a sweet, warm, and comforting dish that blends the bright, tropical flavor of pineapple with a rich, custard-like texture. The combination of crushed pineapple, sugar, and vanilla creates a naturally sweet and tangy filling, while butter and cinnamon add a warm, caramelized topping. This dish is versatile enough to be served as a side dish at holiday gatherings or as a light dessert.

The best part about this recipe is its simplicity—just a handful of ingredients and a quick bake time make it easy to whip up anytime. Whether served warm straight from the oven or at room temperature, its soft, pudding-like consistency and golden-baked crust make it a delightful addition to any meal. Pair it with ham, roasted meats, or enjoy it on its own as a delicious tropical treat.

Why You’ll Love This Recipe

Simple & Quick: Just a few pantry staples and minimal prep time.

Sweet & Comforting: A perfect balance of tangy pineapple and warm cinnamon.

Versatile Dish: Great as a side dish or dessert.

Ingredients

• 1 (20 oz) can crushed pineapple with juice

• ¾ cup sugar

• 2 eggs

• 2 tbsp cornstarch

• 2 tsp vanilla extract

• 1 ½ tbsp butter, sliced into pats

• 1 tsp cinnamon

Instructions

Step 1: Prepare the Oven & Pan

1. Preheat your oven to 350°F (175°C).

2. Grease a 9×9-inch baking pan to prevent sticking.

Step 2: Mix the Ingredients

1. In a large bowl, whisk together crushed pineapple with juice, sugar, eggs, cornstarch, and vanilla extract until smooth and lump-free.

Step 3: Assemble & Bake

1. Pour the pineapple mixture into the prepared baking dish, spreading it evenly.

2. Dot the top with butter pats and sprinkle with cinnamon.

3. Bake for 45 minutes, or until the edges turn golden and the center is set.

4. A toothpick inserted in the middle should come out clean.

Step 4: Serve & Enjoy

1. Let cool slightly before serving.

2. Serve warm or at room temperature as a side dish or dessert.

Tips for Success

For extra texture, mix in chopped pecans or shredded coconut before baking.

To make it less sweet, reduce the sugar to ½ cup.

For a richer flavor, add a pinch of nutmeg or cloves to the topping.

Storage Options

Refrigerate: Store in an airtight container for up to 3 days.

Reheat: Warm in a 300°F (150°C) oven for 10 minutes.

Freeze: Not recommended, as the texture may change when thawed.

Sweet and Sour Meatballs

0

These Sweet and Sour Meatballs are a perfect combination of juicy, tender meatballs coated in a tangy, sticky sauce. The balance of sweet pineapple juice, rich brown sugar, and tart vinegar creates a bold flavor profile that pairs beautifully with rice or noodles. Whether served as an appetizer or a main dish, these meatballs are guaranteed to be a crowd-pleaser.

The homemade sauce is what sets this dish apart. Unlike store-bought versions, this sauce is fresh, vibrant, and easy to make with pantry staples. The meatballs stay juicy thanks to the milk and breadcrumbs, while garlic and onion powder add extra depth of flavor. Whether you’re preparing this for a family dinner or a party, it’s a simple yet impressive dish that comes together quickly.

Why You’ll Love This Recipe

Homemade Sauce: Fresh and flavorful with the perfect balance of sweet and tangy.

Juicy & Tender Meatballs: Moist and packed with flavor.

Great for Any Occasion: Serve as an appetizer or a main dish with rice or noodles.

Ingredients

For the Meatballs:

• 1 lb ground beef or pork

• ½ cup breadcrumbs

• ¼ cup milk

• 1 egg

• ½ tsp salt

• ¼ tsp black pepper

• ½ tsp garlic powder

• ½ tsp onion powder

For the Sauce:

• 1 cup pineapple juice

• ½ cup brown sugar

• ⅓ cup rice vinegar or apple cider vinegar

• 3 tbsp ketchup

• 1 tbsp soy sauce

• 2 tbsp cornstarch mixed with 2 tbsp water (slurry)

Instructions

Step 1: Prepare the Meatballs

1. In a large bowl, combine the ground meat, breadcrumbs, milk, egg, salt, pepper, garlic powder, and onion powder.

2. Mix until well combined, then form into 1-inch meatballs.

Step 2: Cook the Meatballs

1. Heat a large skillet over medium-high heat and add a bit of oil.

2. Cook the meatballs in batches, turning occasionally, until browned on all sides and cooked through (about 5-7 minutes per batch).

3. Remove the meatballs and set them aside.

Step 3: Make the Sweet and Sour Sauce

1. In a medium saucepan, combine pineapple juice, brown sugar, vinegar, ketchup, and soy sauce.

2. Bring the mixture to a simmer over medium heat.

3. Stir in the cornstarch slurry and continue stirring until the sauce thickens.

Step 4: Combine & Serve

1. Add the cooked meatballs to the sauce, tossing gently to coat.

2. Simmer for 5-10 minutes to let the flavors meld.

3. Serve warm over rice or noodles, garnished with green onions or sesame seeds.

Tips for Success

Use fresh pineapple juice for the best flavor.

For extra crispiness, bake or air-fry the meatballs before adding them to the sauce.

Want more veggies? Add bell peppers and onions to the sauce for extra texture.

Storage Options

Refrigerate: Store leftovers in an airtight container for up to 3 days.

Reheat: Warm in a skillet over low heat, adding a splash of water if needed.

Freeze: Freeze the cooked meatballs and sauce separately for up to 2 months. Thaw overnight before reheating.

Coconut Pineapple Piña Colada Pie

0

This Coconut Pineapple Piña Colada Pie brings the tropical flavors of a classic piña colada into a rich and creamy dessert. With a smooth, coconut-infused cream cheese filling and bursts of juicy pineapple, this pie delivers a refreshing and indulgent bite every time. The toasted coconut on top adds a hint of crunch, while the graham cracker crust provides a buttery, slightly sweet base that complements the tropical ingredients perfectly.

This no-bake (except for toasting the coconut) dessert is easy to make and perfect for summer gatherings, holidays, or any occasion that calls for something light and fruity. The flavors of coconut, pineapple, and a touch of rum extract make it taste like a vacation in every bite. Whether served as a chilled treat on a hot day or as a festive holiday dessert, this pie is guaranteed to impress.

Why You’ll Love This Recipe

Tropical & Refreshing: Bursting with coconut, pineapple, and a hint of rum flavor.

Creamy & Smooth: The cream cheese filling is rich and velvety.

No-Bake Filling: Only the coconut is toasted, making this an easy dessert.

Ingredients

Crust:

• 2 cups crushed graham crackers

• ½ cup butter, melted

Filling:

• 2 (8-ounce) packages cream cheese, softened

• 1 cup cream of coconut

• 1 teaspoon rum-flavored extract

• 1 (8-ounce) can crushed pineapple, drained

• ½ cup maraschino cherries, chopped

• ½ cup chopped pecans

• 1 (8-ounce) container frozen whipped topping, thawed

Topping:

• ½ cup shredded coconut (toasted)

Instructions

Step 1: Toast the Coconut

1. Preheat the oven to 350°F (175°C).

2. Spread shredded coconut evenly on a baking sheet.

3. Toast for 5 minutes, or until golden brown. Set aside to cool.

Step 2: Prepare the Crust

1. In a medium bowl, combine crushed graham crackers and melted butter.

2. Press the mixture firmly into the bottom and sides of a 9-inch pie pan.

3. Set aside while preparing the filling.

Step 3: Make the Filling

1. In a large mixing bowl, beat the softened cream cheese and cream of coconut until smooth and fluffy.

2. Stir in the rum-flavored extract for a tropical kick.

3. Gently fold in the whipped topping, drained pineapple, chopped cherries, and pecans.

Step 4: Assemble & Chill

1. Spread the filling evenly into the prepared graham cracker crust.

2. Sprinkle the toasted coconut over the top for texture and flavor.

3. Refrigerate for at least 4 hours (or overnight) before serving.

Tips for Success

Drain the pineapple well to prevent a watery filling.

For a firmer texture, chill the pie for at least 6 hours before serving.

Substitutions: Swap the rum extract for coconut extract if desired.

Storage Options

Refrigerate: Store in an airtight container for up to 3 days.

Freeze: Wrap tightly and freeze for up to 1 month. Thaw in the fridge before serving.

Cheesy Italian Sausage

0

This Cheesy Italian Sausage recipe is a simple yet flavorful dish that delivers a delicious combination of melted mozzarella and savory sausage, all baked in rich marinara sauce. It’s a low-carb, high-protein meal that requires minimal ingredients and effort, making it perfect for a quick dinner or a satisfying appetizer.

By stuffing Italian sausages with gooey mozzarella and baking them in marinara sauce, this dish creates a comforting, cheesy, and slightly smoky flavor. Whether served on its own, over pasta, or with a side of crusty garlic bread, it’s a dish that’s guaranteed to be a crowd-pleaser.

Why You’ll Love This Recipe

Simple & Quick: Only three ingredients and minimal prep time.

Cheesy & Savory: Mozzarella melts into the sausage, making every bite irresistible.

Versatile Dish: Serve over pasta, with a salad, or on its own.

Ingredients

• 6 Italian sausage links, uncooked

• 6 mozzarella cheese sticks

• 1 ½ cups marinara sauce

Instructions

Step 1: Prep the Dish

1. Preheat the oven to 350°F (175°C).

2. Lightly spray an 8×8-inch baking dish with nonstick cooking spray.

Step 2: Prepare the Sausages

1. Using a sharp knife, slice each Italian sausage lengthwise about halfway through, making sure not to cut all the way through.

2. Insert one mozzarella cheese stick into the slit of each sausage.

Step 3: Assemble & Bake

1. Place the stuffed sausages into the prepared baking dish.

2. Pour marinara sauce evenly over the sausages.

3. Cover the dish with aluminum foil and bake for 30 minutes.

4. Remove the foil and bake uncovered for an additional 10 minutes, or until the sausages are fully cooked and the cheese is melted.

Step 4: Serve & Enjoy

1. Let the dish rest for a few minutes before serving.

2. Serve hot, either on its own or with pasta, salad, or garlic bread.

Tips for Success

Use high-quality sausage for the best flavor.

For extra cheese, sprinkle shredded mozzarella or Parmesan on top before baking.

Add spice with crushed red pepper flakes in the marinara sauce.

Storage Options

Refrigerator: Store in an airtight container for up to 3 days.

Reheat: Warm in the oven at 350°F (175°C) for 10 minutes.

Freezing: Freeze before baking for up to 2 months. Thaw overnight before cooking.

Ground Beef and Peppers Skillet

0

This Ground Beef and Peppers Skillet is a quick and satisfying one-pan meal perfect for busy weeknights. With hearty ground beef, colorful bell peppers, and tender rice simmered in a flavorful broth, this dish delivers a balance of savory and slightly sweet flavors. Topped with melted cheddar cheese, it’s a comforting and delicious meal that comes together in under 30 minutes.

The combination of bell peppers not only adds vibrant color but also a fresh and slightly smoky sweetness that complements the rich beef. Cooking everything in one pan allows the flavors to meld beautifully while keeping cleanup to a minimum. Whether served on its own or paired with a simple side salad or crusty bread, this skillet meal is sure to be a family favorite.

Why You’ll Love This Recipe

One-Pan Meal: Easy preparation and cleanup.

Loaded with Flavor: Bell peppers, herbs, and beef broth create a delicious depth of taste.

Cheesy and Hearty: The melted cheddar makes it extra comforting.

Ingredients

• 1 onion, chopped

• ½ red bell pepper, chopped

• ½ green bell pepper, chopped

• ½ yellow bell pepper, chopped

• 2 tsp minced garlic

• ½ tsp dried oregano

• ½ tsp dried basil

Salt and pepper, to taste

• 1 (14.5 oz) can diced tomatoes

• 2 cups beef broth

• ⅔ cup rice

• 1 ½ cups shredded cheddar cheese

Instructions

Step 1: Cook the Beef & Vegetables

1. Heat a large skillet over medium-high heat.

2. Add the ground beef, onion, and bell peppers to the skillet.

3. Cook until the vegetables soften and the beef is fully browned.

4. Drain any excess fat.

Step 2: Season the Mixture

1. Stir in the minced garlic, oregano, basil, salt, and pepper.

2. Cook for 30 seconds to release the flavors.

Step 3: Add Rice & Simmer

1. Stir in the diced tomatoes, beef broth, and rice.

2. Bring the mixture to a light boil, then reduce the heat to low.

3. Cover and simmer for 20 minutes, or until the rice is tender.

Step 4: Melt the Cheese

1. Sprinkle the shredded cheddar cheese over the skillet.

2. Cover and cook for 2-3 more minutes, until the cheese is melted.

Step 5: Serve & Enjoy

1. Remove from heat and let sit for a few minutes.

2. Serve warm, garnished with fresh parsley if desired.

Tips for Success

Use any bell peppers you like for different flavor combinations.

For extra spice, add crushed red pepper flakes or a dash of hot sauce.

For a low-carb option, replace rice with cauliflower rice and reduce broth slightly.

Storage Options

Refrigerator: Store leftovers in an airtight container for up to 3 days.

Reheat: Warm in a skillet over low heat, adding a splash of broth if needed.

Freezing: Freeze for up to 2 months. Thaw overnight before reheating.

Cheesy Hamburger Potato Casserole

0

This Cheesy Hamburger Potato Casserole is the ultimate comfort food, combining layers of seasoned ground beef, tender potatoes, and a creamy, cheesy sauce. The balance of flavors makes it a satisfying meal that’s perfect for family dinners, potlucks, or meal prep. With its rich, hearty layers, this casserole is a delicious way to turn simple ingredients into a comforting and filling dish.

What makes this casserole even better is the homemade creamy sauce that brings everything together. Instead of relying on canned soups, this recipe includes a smooth and flavorful sauce made with Greek yogurt, beef broth, and a touch of butter. The final layer of melted mozzarella and sharp cheddar creates a golden, bubbly crust that adds even more flavor. Whether served alone or paired with a crisp green salad or garlic bread, this dish is sure to become a favorite.

Why You’ll Love This Recipe

Layers of Flavor: Creamy sauce, melted cheese, and seasoned beef make every bite delicious.

Hearty & Filling: Potatoes and protein-rich beef make this a full meal.

Make-Ahead Friendly: Can be assembled ahead and baked when ready.

Ingredients

Main Casserole:

• 2 lbs ground beef (93% lean, 7% fat)

• 1 ¼ cup onion, chopped

• 3 cloves garlic, minced

• 3 Russet potatoes, sliced into ¼” rounds (skin on)

• 1 cup mozzarella cheese, shredded

• 1 cup sharp cheddar cheese, shredded

• 2 tsp Worcestershire sauce

• 1 tsp garlic powder

• ½ tsp onion powder

• 1 tsp paprika

• Salt and pepper, to taste

Creamy Sauce:

• 1 cup milk (plant-based or whole)

• ½ cup beef broth

• ¾ cup Greek yogurt

• 2 ½ tbsp butter

• 2 ½ tbsp gluten-free all-purpose flour

• Salt and pepper, to taste

Instructions

Step 1: Prepare the Ingredients

1. Preheat oven to 375°F (190°C). Grease a 9×13-inch baking dish with cooking spray or butter.

2. Slice the potatoes into ¼-inch rounds and set aside.

Step 2: Cook the Ground Beef Mixture

1. In a large skillet over medium heat, brown the ground beef, breaking it apart as it cooks.

2. Drain excess fat, then add the chopped onion and garlic. Cook until the onions soften.

3. Stir in Worcestershire sauce, garlic powder, onion powder, paprika, salt, and pepper. Mix well and remove from heat.

Step 3: Make the Cream Sauce

1. In a medium saucepan, melt the butter over medium heat.

2. Whisk in the gluten-free all-purpose flour, stirring constantly to make a roux.

3. Slowly whisk in milk and beef broth, continuing to stir until the sauce thickens.

4. Remove from heat and stir in the Greek yogurt, seasoning with salt and pepper.

Step 4: Assemble the Casserole

1. Layer half of the sliced potatoes in the bottom of the prepared baking dish.

2. Spread half of the ground beef mixture evenly over the potatoes.

3. Pour half of the cream sauce over the beef.

4. Repeat the layers with the remaining potatoes, beef, and cream sauce.

Step 5: Bake the Casserole

1. Sprinkle mozzarella and sharp cheddar cheese over the top.

2. Cover with aluminum foil and bake for 45-50 minutes, until the potatoes are tender.

3. Remove the foil and bake for 10-15 more minutes, until the cheese is melted and bubbly.

4. For a crispy top, broil for 2-3 minutes.

Step 6: Serve & Enjoy

1. Let the casserole rest for a few minutes before slicing.

2. Serve warm with a side salad or garlic bread.

Tips for Success

Slice potatoes evenly for uniform cooking.

Let the casserole rest before serving to allow flavors to meld.

For extra richness, add a sprinkle of Parmesan cheese on top before baking.

Storage Options

Refrigerate: Store leftovers in an airtight container for up to 3 days.

Reheat: Warm in the oven at 350°F (175°C) for 10-15 minutes.

Freeze: Wrap tightly and freeze for up to 2 months. Thaw before baking.

Heaven in a Bowl

0

A rich and indulgent layered dessert featuring fudgy brownies, creamy peanut butter pudding, and layers of Reese’s and whipped topping. Perfect for chocolate and peanut butter lovers!
Best Heaven in a Bowl

Why You’ll Love This Recipe

Decadent & Creamy: A perfect mix of fudgy brownies and smooth pudding.

Easy to Make: Uses simple ingredients with effortless layering.

Crowd-Pleaser: Ideal for potlucks, parties, or special occasions.

Ingredients

• 1 package fudge brownie mix (prepared as directed)

• 2 packages mini Reese’s cups (halved)

• 4 cups cold milk (preferably 2%)

• 2 packages instant vanilla pudding mix

• 1 cup creamy peanut butter

• 4 tsp vanilla extract

• 16 oz Cool Whip, thawed

Instructions

1. Bake the Brownies

• Prepare the brownie batter according to the package instructions.

• Pour into a buttered 9×12-inch pan and bake at 350°F (175°C) for 20-25 minutes.

• Let cool completely, then cut into small squares.

2. Prepare the Peanut Butter Pudding

• In a large bowl, whisk together the milk and pudding mix for 2 minutes until thick.

• Add vanilla extract and peanut butter, mixing until smooth.

• Fold in 1 ½ cups of Cool Whip.

3. Assemble the Layers

• In a large glass trifle bowl (5 quarts), place ⅓ of the brownie pieces at the bottom.

• Sprinkle ⅓ of the halved Reese’s cups on top.

• Spread ⅓ of the pudding mixture evenly over the brownies.

• Repeat the layers two more times.

4. Top & Chill

• Spread the remaining Cool Whip on top.

• Garnish with extra Reese’s cups.

• Refrigerate for at least 30 minutes before serving.

Tips for Success

Chill overnight for even better flavor and texture.

Use homemade brownies for an extra rich taste.

For crunch, add chopped peanuts or crushed Oreos between layers.

Storage Options

Refrigerate: Store in an airtight container for up to 3 days.

Freeze: Not recommended, as the pudding texture may change.