Slow Cooker Country Style Ribs

0

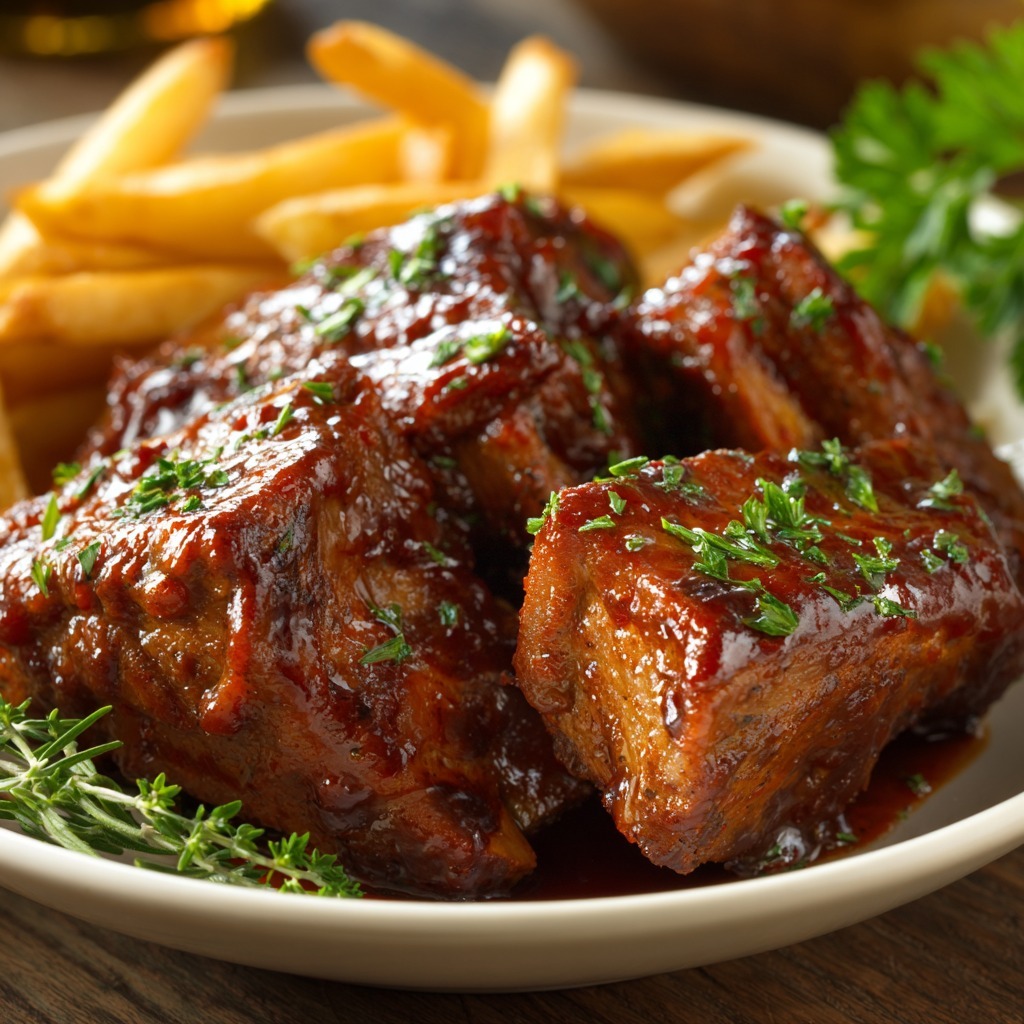
Slow Cooker Country Style Ribs are the epitome of effortless, soul-satisfying comfort food, a dish where patience and low heat transform humble, economical cuts of pork into incredibly tender, flavor-infused meat that falls apart at the mere suggestion of a fork. This recipe is a masterclass in the slow cooker’s magic, leveraging its gentle, moist environment to break down the rich marbling and connective tissue of country-style ribs (cut from the pork shoulder or butt) into succulent, juicy perfection. The genius lies in the simple yet potent dry rub of smoked paprika, ground mustard, garlic, and a kick of cayenne, which creates a flavorful crust directly on the meat before it’s blanketed in your favorite BBQ sauce. As the ribs cook for hours, this sauce and the rendered pork juices meld into a rich, glossy glaze that penetrates every fiber, creating ribs that are deeply seasoned from the inside out.

The brilliance of this recipe is its stunning simplicity and the spectacular results it yields with almost no active effort. It requires no searing, no fussy steps—just a quick seasoning and into the pot they go. The long, slow cook not only tenderizes the meat but also allows the flavors to develop a remarkable complexity, with the tangy sweetness of the BBQ sauce balancing the savory, spicy rub. The optional finishing broil is a pro-touch that caramelizes the exterior sauce, adding a delightful sticky texture and a hint of smoky char. These ribs are the ultimate answer for a stress-free, crowd-pleasing meal, perfect for casual gatherings, game day, or a satisfying family dinner where the only tools required are a slow cooker and an appetite for pure, unpretentious deliciousness.

Why You’ll Love This Recipe:

  • Unbelievably Tender, Fall-Apart Meat: The slow cooking process makes the ribs so tender they literally shred with a fork.
  • Hands-Off, Effortless Cooking: Just season, sauce, and let the slow cooker do all the work for 6-8 hours.
  • Deep, Complex BBQ Flavor: The dry rub and BBQ sauce create layers of savory, sweet, and spicy flavor that permeate the pork.
  • Feeds a Crowd Affordably: Country-style ribs are an economical cut that becomes luxurious through slow cooking.
  • Customizable with Your Favorite Sauce: Use any BBQ sauce you love—sweet, spicy, smoky, or tangy—to make it your own.

Ingredients:

For the Ribs & Rub:
3 pounds country-style pork ribs (bone-in or boneless)*
2 teaspoons smoked paprika
2 teaspoons dry ground mustard (or 1 tablespoon Dijon mustard)
¼ – ½ teaspoon cayenne pepper (adjust to heat preference)
3 cloves garlic, minced
½ teaspoon freshly cracked black pepper
1 teaspoon kosher salt

For the Braising & Glaze:
1 ½ cups (12 oz) your favorite BBQ sauce, plus extra for serving
Optional for finishing: 1-2 tablespoons brown sugar mixed into the sauce

Instructions:

Step 1: Season the Ribs
Pat the country-style ribs dry with paper towels. In a small bowl, combine the smoked paprika, ground mustard, cayenne, minced garlic, black pepper, and salt. Rub this mixture evenly over all sides of the ribs, pressing gently to adhere.

Step 2: Assemble in Slow Cooker
Place the seasoned ribs in the bottom of a 4-6 quart slow cooker. They can be snug but try not to stack them too high. Pour the BBQ sauce over the ribs, turning them to coat all sides.

Step 3: Cook Low and Slow
Cover and cook on the LOW setting for 6-8 hours. The ribs are done when they are extremely tender and easily pull apart with a fork.

Step 4: Optional Broil for Finish
Carefully transfer the cooked ribs to a foil-lined baking sheet. If desired, skim excess fat from the sauce in the slow cooker, then brush the ribs generously with the remaining sauce. For a caramelized finish, place the baking sheet under a preheated broiler for 2-4 minutes, watching closely, until the sauce is bubbling and slightly charred in spots.

Step 5: Rest and Serve
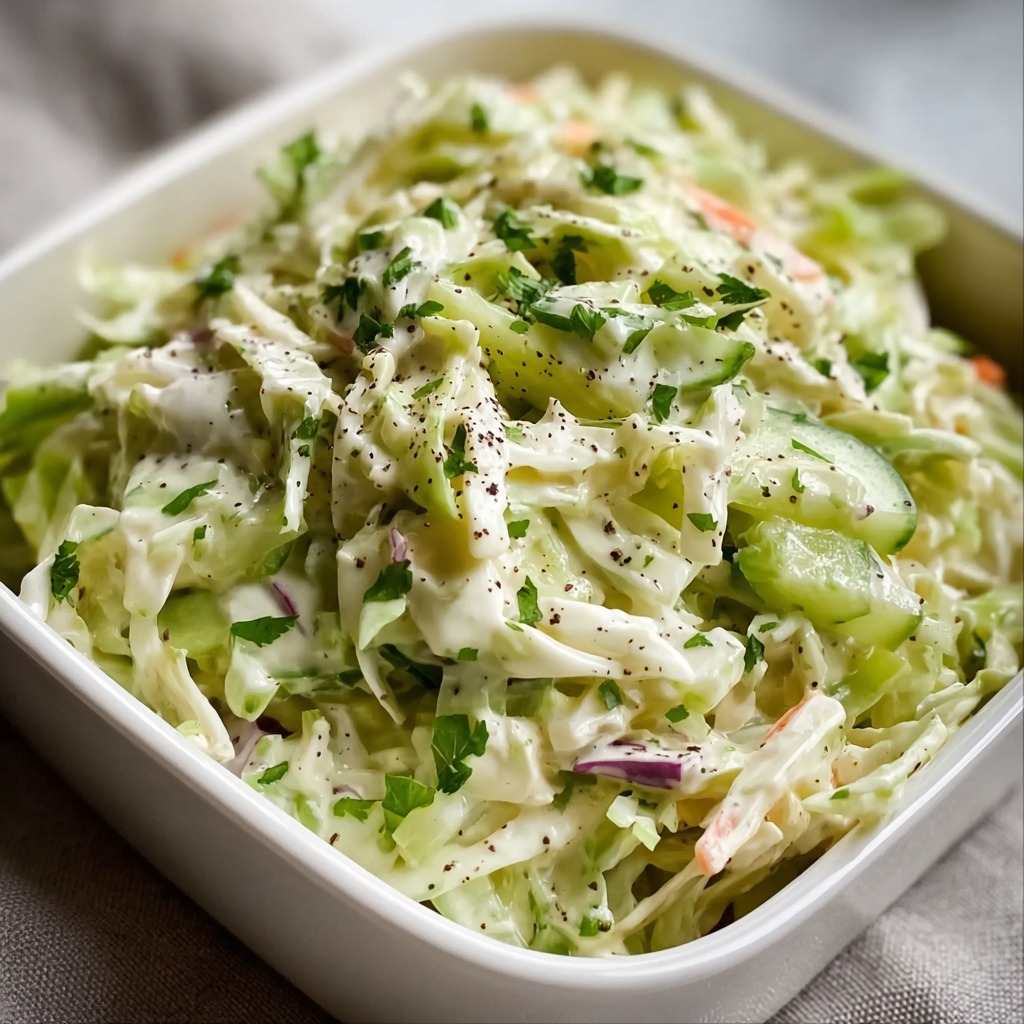
Let the ribs rest for 5-10 minutes before serving. Serve with any remaining sauce from the slow cooker (skimmed of fat) on the side. Perfect with coleslaw, cornbread, or roasted potatoes.

Tips:

  • Choose the Right Cut: Ensure you get ribs cut from the pork shoulder/butt, not the loin. Shoulder ribs are well-marbled and perfect for slow cooking; loin ribs are lean and will dry out.
  • Don’t Skip the Dry Rub: The rub creates a flavorful foundation. For deeper flavor, you can season the ribs, cover, and refrigerate for up to 24 hours before cooking.
  • Low and Slow is Best: Cooking on LOW yields the most tender, shreddable results. The HIGH setting can make the meat slightly more firm.
  • Broiling is Optional but Recommended: The quick broil adds fantastic texture and intensifies the BBQ flavor.
  • Sauce Thickness: If the sauce in the pot is too thin after cooking, you can pour it into a saucepan and simmer for 10-15 minutes to reduce and thicken it.

Storage Options:

  • Refrigerator: Store leftover ribs and sauce in an airtight container in the refrigerator for up to 4 days.
  • Reheating: Reheat gently in a covered dish in the oven at 300°F (150°C) until warmed through, or in the microwave. Add a splash of water or broth to keep them moist.
  • Freezing: The cooked and sauced ribs freeze very well for up to 3 months. Store in a freezer-safe container or bag. Thaw overnight in the refrigerator before reheating.
  • Make-Ahead: This is an ideal make-ahead meal. Cook the ribs fully, then refrigerate or freeze. Reheat and broil just before serving.

Slow Cooker Country Style Ribs are the ultimate definition of set-it-and-forget-it brilliance. They deliver restaurant-quality, finger-licking-good BBQ with minimal effort, making them a guaranteed winner for any occasion that calls for hearty, satisfying, and deeply flavorful food.

Old-Fashioned Beef Spaghetti Pie

0

Old-Fashioned Beef Spaghetti Pie is a charming and ingenious culinary relic, a delightful casserole that masterfully reimagines spaghetti and meat sauce as a sturdy, sliceable pie. This recipe is a beautiful testament to frugal, homespun creativity, transforming simple pantry staples into a comforting, family-friendly meal with a whimsical presentation. The magic begins with the crust—a unique lattice of al dente spaghetti bound with butter, Parmesan, and egg, which bakes into a golden, noodle-based shell with a texture reminiscent of a savory kugel or frittata. This sturdy foundation is then filled with a classic, simmered beef ragù of ground beef, onions, bell peppers, and garlic, all enveloped in a seasoned tomato sauce. The final layer of molten mozzarella cheese melts into a bubbling, bronzed cap, sealing in the flavors and creating the perfect cheesy pull with every slice.

The brilliance of this dish lies in its clever construction and nostalgic appeal. It solves the age-old dilemma of serving spaghetti in a neat, portable form, making it ideal for potlucks, picnics, or slicing into wedges for easy plates. Each component is thoughtfully layered: the sturdy spaghetti crust prevents sogginess, the hearty meat filling provides savory depth, and the cheese topping adds richness and visual appeal. Baking it all together allows the flavors to meld while giving the “pie” its signature firm, sliceable structure. It’s a hearty, complete meal that captures the essence of midwestern hospitality and 1970s dinner-party charm, offering a fun, satisfying, and conversation-starting twist on two universally beloved classics: spaghetti and pie.

Why You’ll Love This Recipe:

  • Nostalgic Comfort Food: A fun, retro recipe that delivers all the familiar flavors of spaghetti and meat sauce in a unique, sliceable format.
  • Great for Feeding a Crowd: Easy to make in one dish, travels well, and slices neatly for serving at potlucks or family dinners.
  • Kid-Friendly & Fun: The novel “pie” presentation makes it an instant hit with children and the young at heart.
  • Versatile & Customizable: Easily adapt with Italian sausage, different vegetables, or your favorite pasta sauce.
  • Excellent Leftovers: Slices reheat beautifully for quick lunches or dinners throughout the week.

Ingredients:

For the Spaghetti Crust:
8 ounces spaghetti
2 tablespoons unsalted butter
⅓ cup grated Parmesan cheese
2 large eggs, lightly beaten
½ teaspoon garlic powder (optional)
¼ teaspoon salt

For the Beef Filling:
1 pound lean ground beef (85/15)
1 small yellow onion, finely chopped
1 medium bell pepper (any color), finely chopped
2 cloves garlic, minced
1 (15-ounce) can tomato sauce
1 teaspoon dried oregano
1 teaspoon dried basil
½ teaspoon kosher salt
¼ teaspoon freshly ground black pepper
¼ teaspoon red pepper flakes (optional)

For the Topping:
1 ½ cups shredded mozzarella cheese
2 tablespoons grated Parmesan cheese (for finishing)
Fresh parsley or basil, chopped (for garnish)

Instructions:

Step 1: Prepare the Spaghetti Crust
Preheat oven to 350°F (175°C). Grease a deep 9-inch pie plate or a 9-inch springform pan. Cook spaghetti in salted boiling water until just al dente. Drain well and return to the hot pot. Immediately add butter, Parmesan, beaten eggs, garlic powder (if using), and salt. Toss vigorously until the spaghetti is evenly coated and the cheese is melted.

Step 2: Form the Crust
Transfer the spaghetti mixture to the prepared pie plate. Using a measuring cup or your fingers, press the mixture firmly and evenly into the bottom and up the sides to form a thick crust. Ensure there are no thin spots.

Step 3: Make the Beef Filling
In a large skillet over medium-high heat, cook the ground beef, breaking it up with a spoon, until no longer pink. Add the chopped onion and bell pepper and cook until softened, about 5-7 minutes. Drain any excess fat. Add the minced garlic and cook for 1 minute until fragrant. Stir in the tomato sauce, oregano, basil, salt, black pepper, and red pepper flakes. Simmer for 5-10 minutes until slightly thickened.

Step 4: Assemble the Pie
Spoon the warm beef filling into the prepared spaghetti crust, spreading it evenly. Sprinkle the shredded mozzarella cheese over the top, followed by the extra Parmesan.

Step 5: Bake
Bake in the preheated oven for 20-25 minutes, or until the cheese is completely melted, bubbly, and starting to turn golden in spots.

Step 6: Rest and Serve
Remove from the oven and let the pie cool on a wire rack for 10-15 minutes. This resting time is crucial for the pie to set and hold its shape when sliced. Garnish with fresh herbs, slice into wedges, and serve.

Tips:

  • Press the Crust Firmly: A well-compacted crust is essential for structure. Use the back of a measuring cup to really press it in.
  • Don’t Overcook the Spaghetti: Cook it to al dente, as it will continue to cook in the oven. Overcooked spaghetti will make a mushy crust.
  • Drain the Beef Well: Removing excess fat after browning prevents the filling from being greasy and the crust from becoming soggy.
  • Thicken the Filling: Let the meat sauce simmer long enough to reduce slightly. A too-wet filling can make the bottom crust soft.
  • Let it Rest: Allowing the pie to cool for 10-15 minutes after baking is non-negotiable for clean slices.

Storage Options:

  • Refrigerator: Store leftovers covered in the baking dish or in an airtight container in the refrigerator for up to 4 days.
  • Reheating: Reheat slices in the microwave or in a covered oven-safe dish at 325°F (165°C) until warmed through.
  • Freezing: This pie freezes well. Cool completely, wrap tightly in plastic wrap and foil, and freeze for up to 2 months. Thaw overnight in the refrigerator before reheating.
  • Make-Ahead: You can prepare the spaghetti crust and the beef filling separately up to a day in advance. Store them covered in the refrigerator. Assemble and bake just before serving, adding 5-10 minutes to the bake time if the ingredients are cold.

Old-Fashioned Beef Spaghetti Pie is a hearty, nostalgic, and utterly satisfying meal that turns dinner into an event. It’s a wonderful way to enjoy classic flavors in a fun, shareable form, and a recipe that’s sure to become a cherished part of your family’s meal rotation.

How Long Can You Freeze Meat? A Practical Guide to Keeping Your Proteins Tasty and Safe

0

Let’s just call it what it is—we’ve all been there. You toss a package of chicken thighs or maybe a single pork chop into your freezer and then promptly forget about it. Next thing you know, it pops up a couple months (okay, sometimes longer!) later, and you’re staring at it like you’ve unearthed a relic from the Ice Age. The big question? Is this still good, or am I playing dinner roulette?

Freezing meat is honestly one of those kitchen habits that saves my sanity (and my budget) more times than I can count. It’s perfect for stretching the grocery bill a little farther, cutting down on waste, and making last-minute dinners possible without running to the store. But—and this is the tricky part—not all meats are created equal when it comes to freezer survival. Some are real champs and hold up beautifully; others, not so much.

So let’s break it down—here’s my go-to guide for how long you can stash different kinds of meat in the freezer before they turn into a culinary question mark.

1. Chicken Breast
Storage Time: Up to 9 months

Chicken breast is the ultimate weeknight savior, isn’t it? It’s lean, cooks up fast, and—bless its heart—freezes like a dream if you take a couple extra steps.

Freezer tip: Give each breast a cozy wrap in plastic first and then tuck them all snug into a good-quality freezer bag. The double-layer is your shield against those frostbitten edges. And really push that air out—trust me, this one step keeps that chicken tasting fresh instead of chewy or weirdly dry.

2. Ground Beef
Storage Time: 3 to 4 months

I always have ground beef on hand for quick chilis, tacos, or my mom’s old-fashioned sloppy joes (comfort food at its finest). But leave it in the freezer too long, and it gets a little sad—almost sandy in texture.

What works best: Shape it flat before freezing—think a thin disc or a square. This isn’t just about space-saving. It freezes faster (less ice buildup) and thaws so much more quickly on a busy night. Wrap in plastic, pop into a freezer bag, and please, kick out as much air as you can—air is pretty much freezer burn’s best buddy.

3. Pork Chops
Storage Time: 4 to 6 months

Pork chops are pure magic when you get them just right—juicy, a little bit pink, total comfort food. But if you let them languish unprotected in the freezer, you’ll end up with dry, flavorless discs (ask me how I know…)

How to freeze right: Forget tossing them all in together—show each chop a little love. Wrap tightly in foil or plastic wrap, then into a freezer bag they go. And be sure to jot down the date; you’ll absolutely forget when you put them in, no matter how sure you feel today.

4. Hot Dogs
Storage Time: 1 to 2 months

I know—hot dogs aren’t a gourmet meal, but boy do they come in handy when dinner has to be on the table now. The thing is, these guys just aren’t built for long-term freezing. They go rubbery if you try to stretch it.

Quick tip: Unopened packages can go right into the freezer as they are. Already opened them? Give each hot dog its own little wrap so you don’t end up with a frozen bundle that’s impossible to pry apart. Store in a bag, and you can grab just what you want, when you want it, without a wrestling match.

5. Bacon
Storage Time: 1 month

Bacon people, I feel your pain. I wish bacon would stay perfect forever, but all that yummy fat actually turns on us and goes rancid way faster than you’d think—freezer or not.

Best practice: Give those slices a little parchment or wax paper wrap each, and toss them in a freezer bag. That way you can slide out a strip or two at a time—no more hacking away at a frozen block (which I’ve done too many times to count). Your weekend breakfast will be infinitely easier.

6. Beef Steaks
Storage Time: 6 to 12 months

Steak lovers, rejoice. Good, marbled steaks are tough little soldiers in the freezer world. Wrap ’em up properly and you can save that ribeye for a special occasion months down the road—maybe even New Year’s.

How to do it: Start with a snug layer of plastic wrap, then top it off with foil (or seal it up with a vacuum sealer if you’re fancy). Date and label it. And when you thaw, take your time—overnight in the fridge is the gold standard. Step away from the countertop defrost method; your steak will thank you for it.

7. Sausages
Storage Time: 1 to 2 months

Oh, sausage—so much variety. Whether it’s bratwurst, Cajun andouille, or classic breakfast links, these guys just aren’t meant for marathon freezer spells, especially if they’re raw. They start picking up funky tastes or freezer burn before you know it.

Storage tip: Wrap each one, or use vacuum-sealed bags if you’ve got them in your stash. Cooked sausages are a bit more forgiving. In any case, keep air and excess moisture far, far away and your taste buds will thank you later.

8. Lamb Chops
Storage Time: 6 to 9 months

Lamb chops feel so fancy to me—they’re a real treat. Because they’re such a splurge, I like to make sure they’re treated right before they go into cold storage.

What to do: Wrap each chop in wax paper to help them keep their natural juiciness, then slide them into a freezer bag. The wax paper is like a little sweater for the lamb, protecting it against the harsh freezer temps.

9. Turkey
Storage Time: Up to 1 year

If you’re like me, you probably can’t pass up a turkey when they’re on sale around the holidays “for next time.” The trick to a turkey that still tastes like a celebration after months in the freezer? Prevention—not cure—when it comes to freezer burn (trust me, it’s worth the extra effort).

Smart approach: If it’s still vacuum-sealed from the grocery store, leave it be. If not, wrap it up good and tight with heavy-duty foil, then either straight into a large freezer bag or double-wrap for extra insurance. You don’t want it dried out or tasting like your freezer’s old onion supply by next Thanksgiving.

10. Fish Fillets
Storage Time: 3 to 4 months

Fish is beautiful but oh-so-temperamental. It freezes fast, thaws fast, and honestly, goes off fast if you don’t wrap it right. Let it go too long and you’ll taste the freezer in every bite—yuck.

Pro tip: Wrap each fillet tightly in plastic wrap, then in foil or vacuum seal them if you can. The big thing with fish is air—get rid of as much as possible, because ice crystals are enemy number one here. Keep your fish in top condition and you’ll never dread a freezer fish dinner again.

So, What’s the Best Way to Freeze Meat?

Over the years (and plenty of “oops” moments along the way), these tips have absolutely changed my freezer game:

  • Label and Date Everything: Seriously, future you will have no idea what’s in that baggie six months down the road—permanent marker and masking tape are your friends.
  • Use the Right Wrapping: Those thin, store-bought trays and plastic aren’t built for real freezer time. Get some sturdy freezer bags, aluminum foil, or even a vacuum sealer if you want to feel like a pro.
  • Avoid Overcrowding: Freezers work best with a little space between items so the cold air can do its thing. If you can’t close the door without some creative shoving, it’s time to rotate and use up what’s there.
  • First In, First Out: This is how restaurants do it. Use up the older stuff first and keep a scrap of paper on the freezer door with a quick inventory if it helps.

Why Freezing Properly Matters

Just so we’re clear—freezing doesn’t kill bacteria (that’s what cooking is for). But getting your storage right keeps things both safe and tasty. Leave meat in too long or cut corners with wrapping, and you’ll get that dreaded freezer burn. Flavor goes, texture changes, and it’s all just so… meh.

If you see grayish, dry spots? That’s freezer burn for you. It won’t make you sick, but it will sure make your dinner less appealing. Basically, the meat’s lost its moisture and the cold air has sucked the life out of it. Not what we’re going for.

Final Thoughts: Your Freezer Is Your Friend—If You Treat It Right

The freezer is way more than just a parking spot for bagged peas and forgotten spaghetti sauce. It’s a kitchen hero—a budget-stretcher, a “dinner is solved” trick up your sleeve, and a lifesaver for squeezing an extra day or two out of your grocery haul.

Just remember: each type of meat has its own freezer life. Sticking to those timelines and wrapping things up with a little care means you’ll enjoy the same delicious results on thawing day as when you first tucked that steak or chicken away. Make it a habit to rotate, label, date, and wrap with love. Your future self (tired, hungry, and facing a packed freezer after a long day) will be oh-so-grateful.

Do yourself a favor—take a peek at what’s hiding in your freezer right now. Still got something from last Easter? I think you know what your next kitchen project should be.

Brown Sugar Pop Tart Cookies

0

Brown Sugar Pop Tart Cookies are a stroke of nostalgic genius, a delectable homemade reimagining that captures the beloved, sugary essence of a frosted cinnamon brown sugar Pop-Tart in the form of a soft, chewy, and irresistibly gooey stuffed cookie. This recipe is a masterful creation, featuring a brown sugar-cinnamon cookie dough so tender it practically melts in your mouth, thanks to the addition of cornstarch and an extra egg yolk. The true magic, however, is hidden within: a buttery, crumbly cinnamon-brown sugar filling that bakes into a molten, jam-like center, perfectly mimicking the heart of the classic toaster pastry. Encased in the spiced dough, each cookie becomes a portable, hand-held treat that delivers a surprise burst of warm, sweet cinnamon in every bite.

The brilliance of this recipe lies in its playful construction and the glorious textural contrast it achieves. The filling—a simple mix of brown sugar, cinnamon, and butter—transforms in the oven, creating a sticky-sweet pocket that remains deliciously soft. The cookies are baked just until set at the edges but still pale on top, ensuring a supremely chewy texture. The final flourish is a drizzle of cinnamon-spiked vanilla glaze, applied in the signature parallel lines of a frosted Pop-Tart, which adds a final layer of sweetness and a beautiful, bakery-style finish. More than just a cookie, this is a whimsical and deeply satisfying dessert experience that evokes childhood memories while showcasing sophisticated baking technique, proving that the most joyful treats often come from clever, heartfelt inspiration.

Why You’ll Love This Recipe:

  • Nostalgic Flavor in Cookie Form: Perfectly captures the iconic taste of a cinnamon brown sugar Pop-Tart in a soft, chewy, homemade cookie.
  • Surprise Gooey Filling: Each cookie hides a warm, molten center of buttery cinnamon sugar that’s utterly irresistible.
  • Perfectly Soft & Chewy Texture: The cornstarch and brown sugar in the dough guarantee a cookie that stays tender for days.
  • Fun to Make & Impressive to Serve: The stuffed cookie method is satisfying to assemble, and the final glazed product looks stunning.
  • Crowd-Pleasing for All Ages: A universally adored flavor combination that delights both kids and adults with a sense of playful nostalgia.

Ingredients:

For the Cinnamon Filling:
½ cup packed light brown sugar
1 ½ teaspoons ground cinnamon
1 tablespoon all-purpose flour
3 tablespoons unsalted butter, melted

For the Brown Sugar Cookie Dough:
1 cup (2 sticks / 226g) unsalted butter, softened
1 cup (200g) packed light brown sugar
½ cup (100g) granulated sugar
1 large egg
1 large egg yolk
2 teaspoons pure vanilla extract
2 ½ cups (312g) all-purpose flour, spooned & leveled
2 teaspoons cornstarch
1 teaspoon baking soda
½ teaspoon kosher salt
1 teaspoon ground cinnamon

For the Cinnamon Glaze:
1 cup (120g) powdered sugar, sifted
½ teaspoon ground cinnamon
1 teaspoon pure vanilla extract
2-3 tablespoons milk or heavy cream

Instructions:

Step 1: Make the Filling
In a small bowl, whisk together the brown sugar, cinnamon, and flour. Pour in the melted butter and stir until the mixture resembles damp, clumpy sand. Set aside to cool and firm up slightly.

Step 2: Make the Cookie Dough
In a large bowl using a hand mixer or stand mixer, cream the softened butter, brown sugar, and granulated sugar together on medium-high speed until light and fluffy, about 3 minutes. Beat in the egg, egg yolk, and vanilla until fully incorporated, scraping down the bowl as needed.

Step 3: Combine Dry Ingredients
In a separate bowl, whisk together the flour, cornstarch, baking soda, salt, and cinnamon. Add the dry ingredients to the wet ingredients and mix on low speed just until the flour disappears and a soft dough forms. If the dough feels very sticky, cover and chill for 20-30 minutes for easier handling.

Step 4: Assemble the Stuffed Cookies
Preheat oven to 350°F (175°C). Line two large baking sheets with parchment paper.
Portion the dough into 12 equal balls (about 3 tablespoons each). Flatten one ball into a disc in the palm of your hand. Place about 1 heaping teaspoon of the cinnamon filling in the center. Carefully wrap the dough around the filling, pinching the seams firmly to seal. Roll gently into a ball and place seam-side down on the prepared baking sheet, spacing them at least 3 inches apart. Repeat with remaining dough and filling.

Step 5: Bake
Bake for 11-13 minutes, or until the edges are set and the tops look dry but are still pale. The centers will look soft—this is key for a chewy texture. Do not overbake.

Step 6: Cool
Allow cookies to cool on the baking sheet for 10 minutes before transferring them to a wire rack to cool completely.

Step 7: Glaze
Once cookies are completely cool, make the glaze. In a small bowl, whisk the sifted powdered sugar, cinnamon, vanilla, and 2 tablespoons of milk until smooth. Add more milk, a teaspoon at a time, until you reach a thick but pourable consistency. Using a spoon or piping bag, drizzle the glaze over the cookies in parallel lines to mimic a Pop-Tart. Let the glaze set for at least 30 minutes before serving.

Tips:

  • Seal the Filling Well: Take care to completely encase the filling and pinch seams firmly to prevent leakage during baking.
  • Don’t Overbake: The cookies will continue to set as they cool. Removing them while the centers look soft ensures a chewy texture.
  • Cool Completely Before Glazing: If the cookies are even slightly warm, the glaze will melt and run off.
  • Filling Consistency: If your filling seems too wet to handle, pop it in the freezer for 5-10 minutes to firm up.
  • Uniform Sizing: Use a cookie scoop for the dough to ensure all cookies are the same size and bake evenly.

Storage Options:

  • Room Temperature: Store glazed cookies in a single layer in an airtight container at room temperature for up to 3 days. Place parchment between layers if stacking.
  • Freezing: Freeze unglazed, baked cookies on a tray until solid, then transfer to a freezer bag for up to 3 months. Thaw and glaze before serving. The cookie dough balls (stuffed and sealed) can also be frozen raw and baked from frozen, adding 1-2 minutes to the bake time.
  • Make-Ahead: The filling can be made up to 2 days ahead and stored covered in the fridge. The cookie dough can be made, portioned, stuffed, and sealed, then chilled for up to 24 hours before baking.

Brown Sugar Pop Tart Cookies are a whimsical and delicious triumph of baking creativity. They transform a simple stuffed cookie into an unforgettable treat that’s packed with flavor, nostalgia, and pure joy.

Chicken Alfredo Lasagna

0

Chicken Alfredo Lasagna is a magnificent fusion of Italian-American classics, a dish that masterfully layers the rich, creamy indulgence of fettuccine Alfredo with the hearty, comforting structure of a traditional lasagna. This recipe is a culinary innovation, replacing the standard tomato-based sauce with a luxurious, from-scratch spinach Alfredo sauce—a velvety emulsion of butter, garlic, Parmesan, and heavy cream, wilted with fresh spinach for color and earthy flavor. This lush sauce blankets tender sheets of pasta, savory shredded chicken, and a creamy ricotta filling, creating strata of flavor and texture that are both familiar and excitingly new. The genius lies in the harmonious balance: the ricotta mixture, lightened with egg and sharp Parmesan, provides a tangy, creamy layer that cuts through the richness of the Alfredo sauce, while the melted mozzarella creates the quintessential stretchy, golden-brown cap that every lasagna deserves.

The brilliance of this recipe is in its thoughtful construction and make-ahead prowess. Building a lasagna is an act of layering love, and here each component is designed to complement the next without becoming soggy or heavy. The chicken adds substantial, lean protein, making the dish a complete and satisfying meal. As it bakes, the flavors meld magnificently, the sauces bubble and set, and the top turns into a beautifully bronzed crust. This lasagna is not just a meal; it’s a centerpiece—perfect for feeding a crowd on a Sunday, for holiday gatherings, or for a special weeknight dinner that yields glorious leftovers. It’s a testament to the idea that the most comforting foods are those that combine beloved flavors in a new, spectacularly satisfying form.

Why You’ll Love This Recipe:

  • Ultimate Comfort Food Fusion: Combines the creamy dreaminess of Alfredo sauce with the hearty, layered satisfaction of lasagna.
  • Rich, From-Scratch Alfredo Sauce: A homemade, spinach-flecked cream sauce that is far superior to any jarred alternative.
  • Creamy, Flavorful Ricotta Layer: The ricotta mixture is perfectly seasoned and adds a delightful textural contrast.
  • Crowd-Pleasing & Impressive: A stunning, decadent dish that’s perfect for entertaining and special family dinners.
  • Excellent for Making Ahead: Can be assembled a day in advance and baked when needed, and leftovers reheat beautifully.

Ingredients:

For the Lasagna Noodles & Chicken:
12 lasagna noodles (regular or no-book)
3 cups cooked chicken, shredded or diced (from a rotisserie chicken or poached breasts)

For the Spinach Alfredo Sauce:
4 tablespoons unsalted butter
1 cup yellow onion, finely diced
3 cloves garlic, minced
⅓ cup all-purpose flour
2 ½ cups low-sodium chicken broth
1 ½ cups heavy cream
1 teaspoon kosher salt
½ teaspoon freshly ground black pepper
½ cup freshly grated Parmesan cheese
5 ounces fresh baby spinach

For the Ricotta Cheese Mixture:
15 ounces (about 1 ¾ cups) whole-milk ricotta cheese
1 large egg
½ cup freshly grated Parmesan cheese
3 cups (12 oz) shredded low-moisture mozzarella cheese, divided
1 teaspoon Italian seasoning

For Garnish:
Fresh parsley or basil, chopped

Instructions:

Step 1: Cook Noodles & Prep
Preheat oven to 375°F (190°C). Cook lasagna noodles in salted boiling water until al dente. Drain, rinse with cool water, and lay flat on kitchen towels or parchment paper to prevent sticking.

Step 2: Make the Spinach Alfredo Sauce
In a large saucepan or Dutch oven, melt butter over medium heat. Add onion and cook until soft, 4-5 minutes. Add garlic and cook 1 minute more. Whisk in flour and cook for 2 minutes to make a roux. Gradually whisk in chicken broth and heavy cream until smooth. Bring to a simmer, stirring often, and cook until thickened, about 5-7 minutes. Remove from heat. Stir in salt, pepper, and Parmesan cheese until melted. Add spinach in handfuls, stirring until wilted. Set aside.

Step 3: Make the Ricotta Mixture
In a medium bowl, combine ricotta, egg, ½ cup Parmesan, 2 cups of the mozzarella, and Italian seasoning. Mix until well blended.

Step 4: Assemble the Lasagna
Spread about ¾ cup of the Alfredo sauce in the bottom of a 9×13-inch baking dish. Arrange 4 noodles over the sauce. Spread half of the ricotta mixture over the noodles. Sprinkle with half of the cooked chicken. Spoon about 1 ½ cups of Alfredo sauce over the chicken. Repeat layers: noodles, remaining ricotta, remaining chicken, and another 1 ½ cups sauce. Top with the final 4 noodles. Spread the remaining Alfredo sauce evenly over the top. Sprinkle with the remaining 1 cup of mozzarella cheese.

Step 5: Bake
Cover the dish tightly with aluminum foil (tented so it doesn’t touch the cheese). Bake for 30 minutes. Remove foil and bake for an additional 15-20 minutes, or until the top is golden and bubbly.

Step 6: Rest and Serve
Let the lasagna rest on a wire rack for 15-20 minutes before slicing. This allows the layers to set for clean cuts. Garnish with fresh herbs and serve.

Tips:

  • No-Boil Noodles: You can use them! Simply skip the boiling step. Ensure there’s plenty of sauce surrounding them, and you may need to add 5-10 minutes to the covered bake time.
  • Dry Your Cooked Chicken: If using pre-cooked chicken, pat it dry to prevent excess moisture in the lasagna.
  • Freshly Grate Your Cheeses: Pre-shredded cheese contains anti-caking agents that can prevent smooth melting.
  • Let it Rest: This crucial step firms up the lasagna, making it much easier to serve neat portions.
  • Add Vegetables: Sautéed mushrooms or roasted red peppers can be added to the chicken layer for extra flavor.

Storage Options:

  • Refrigerator: Store covered tightly in the baking dish or in an airtight container for up to 4 days.
  • Reheating: Reheat individual slices in the microwave. For larger portions, cover with foil and reheat in a 350°F (175°C) oven until warmed through, about 20-30 minutes.
  • Freezing: Assemble the lasagna but do not bake. Wrap tightly in plastic wrap and foil. Freeze for up to 3 months. Thaw overnight in the refrigerator and bake as directed, adding 10-15 minutes to the covered bake time if needed.
  • Make-Ahead: Assemble the entire lasagna up to 24 hours in advance. Cover and refrigerate. Bake as directed, adding 10-15 minutes to the initial covered bake time.

Chicken Alfredo Lasagna is a decadent, show-stopping twist on two beloved classics. It’s a labor of love that rewards you with layers of creamy, cheesy, chicken-filled perfection—a guaranteed crowd-pleaser that will have everyone asking for seconds.

I Almost Opened That Can… Until I Noticed the Lid Was Puffed

0

I had already grabbed the spoon.

That’s how close I was.

It was just a regular can of soup sitting in the pantry—nothing unusual. But when I turned it in my hand, something felt off. The lid looked… slightly raised. Not dramatic. Just enough to make me pause.

And that pause? Probably a good thing.

Because here’s the truth—when a can looks even a little “wrong,” it’s usually not something to ignore.

That Puffed Lid Isn’t Random

At first glance, it might not seem like a big deal.

Maybe it got knocked around. Maybe it’s just the packaging, right?

Not really.

A puffed lid usually means there’s pressure building inside the can—and that pressure doesn’t come out of nowhere. It’s often caused by gases produced by bacteria growing inside.

And once that happens… the food inside isn’t in a safe, sealed environment anymore.

Dents Can Be Just as Tricky

Now dents—those are a little more confusing.

Because not all dents are dangerous.

A small dent on the side? Usually fine.

But if it’s deep, sharp, or sitting right along the seams or the lid… that’s where things get risky.

That kind of damage can weaken the seal—sometimes in ways you can’t even see—and that’s all bacteria need.

So yeah, not every dent is a problem. But some absolutely are.

What’s Actually Happening Inside the Can?

Here’s the part people don’t always realize.

Canned food is safe because it’s sealed tight—no air, no bacteria, no activity.

But if that seal breaks—even slightly—microorganisms can start doing what they do: growing, fermenting, producing gas.

That’s what causes the swelling.

And in some cases, it can lead to bacteria like Clostridium botulinum, which produces toxins you definitely don’t want anywhere near your food.

Not trying to be dramatic… but this is one of those situations where caution really matters.

The Quick Checks Most People Skip

Before opening a can, it takes maybe five seconds to look for warning signs:

  • Is the lid bulging?
  • Any rust, leaks, or sticky residue?
  • Does it feel unusually pressurized?

If something looks even slightly off, trust that instinct.

It’s not worth second-guessing.

And If You Already Opened It…

This happens. You don’t always notice until it’s too late.

So if the can is already open, check:

  • Does it smell normal?
  • Does the food look the way it should?
  • Did anything spray or foam when you opened it?

If there’s a weird smell or anything looks unusual—just stop there.

Don’t taste it “just to check.” That’s one of the biggest mistakes people make.

The “Just a Tiny Bite Won’t Hurt” Myth

It’s tempting.

You don’t want to waste food, so you think—maybe it’s fine, I’ll just try a little.

But with certain toxins, especially the ones linked to spoiled canned foods, even a small amount can be dangerous.

So no tasting. No testing.

If you’re unsure, it’s a no.

What You Should Do Instead

If a can seems suspicious, the safest move is simple:

Throw it out.

But do it properly—seal it in a bag so nothing leaks, and clean the area if anything spilled.

It’s a small step, but it prevents cross-contamination.

And if you bought it recently, it’s worth letting the store know too. Not everyone thinks to do that, but it helps.

A Small Habit That Saves a Lot of Trouble

This part’s easy to overlook.

When you’re at the store, just take a second to check the cans before you buy them:

  • No dents on the seams
  • No swelling
  • No rust

Most of the time, everything’s fine. But catching a bad can early? Saves you from dealing with it later.

Final Thought (And Honestly, This Stuck With Me)

That moment when I hesitated before opening the can—I almost ignored it.

And I probably would have, a few years ago.

But now? I pay attention to those little signs.

Because with canned food, things are either sealed and safe… or they’re not.

There’s not much in between.

So if something looks off—even slightly—it’s okay to walk away from it.

Better a wasted can than a real problem.

Do Bay Leaves Actually Do Anything? The Quiet Ingredient That Changes Everything

0

I used to pull them out.

Not at the end—like you’re supposed to. I mean before the dish even started cooking.

You know when you’re following a recipe and it casually says, “add 2 bay leaves” like it’s obvious? I’d look at that dry little leaf, shrug, and think… this can’t possibly matter.

And for a while, I was convinced it didn’t.

But then—this is the annoying part—I made the same soup twice. Same ingredients, same pot, same everything… except one had bay leaves and the other didn’t.

And yeah. There was a difference.

Not a loud one. Not a “wow what is that flavor” kind of thing. Just… something was missing.

First, What Are We Even Dealing With Here?

Bay leaves come from the Laurus nobilis, which sounds fancy but really just means they’ve been around forever—like ancient civilization forever.

Back then, people weren’t just cooking with them—they were wearing them on their heads like trophies.

Which feels excessive, but also kind of makes you think… okay, maybe this leaf has something going on.

The Weird Part: You Don’t Really Taste Them

Let me say this clearly, because this is where most people get tripped up:

Bay leaves are not there to be tasted.

If you’re expecting a bold flavor—like garlic or basil—you’re going to be disappointed. That’s not what they do.

They’re more like… structure. Or glue.

They sit in the background and make everything else make more sense.

Honestly, it reminds me of when you add salt to chocolate. You don’t taste “salt,” but without it, the whole thing feels flat. Same idea.

But Technically… They Do Have a Flavor

If you really break it down (and yeah, this is where it gets a little nerdy), bay leaves release a mix of aromas when they simmer:

  • Slightly piney
  • A little minty
  • Kind of warm and peppery

Nothing aggressive. Nothing that jumps out.

But when you let it sit in a soup or sauce for a while, it softens everything. Rounds it out. Makes it feel like the flavors actually belong together.

And that only really happens with time.

Which Is Why They Shine in Slow Cooking

Quick sauté? You probably won’t notice much.

But give them 30 minutes… an hour… longer?

That’s where they quietly do their thing.

Soups, stews, braises—anything that simmers for a while—that’s their territory.

It’s kind of like steeping tea. You wouldn’t dip the bag in for two seconds and expect magic. Same logic here.

“I Still Can’t Taste It” — Yeah, That’s Normal

Some people genuinely don’t pick up on bay leaves at all.

And that’s not you doing something wrong. It’s just how subtle they are.

But here’s the catch: even if you don’t taste them, you might notice when they’re gone.

That’s the frustrating magic of it.

So… Are They Actually Worth Using?

Short answer? Yeah.

Long answer? Also yeah, but not for the reason you think.

They’re cheap. They last forever. And they quietly make your food better without asking for attention.

That’s kind of rare, honestly.

And no, they’re not going to save a bad dish. But in something that’s already good? They push it just a little further.

Can You Skip Them?

Of course.

People do it all the time.

You’ll still end up with something perfectly edible—probably even delicious. But it might feel just a little… flatter.

Not worse, exactly. Just not as full.

You can swap in herbs like thyme or oregano if you really need to, but that changes the flavor more than it replaces it.

So it’s not really a one-to-one thing.

If You’re Still Skeptical, Try This

This is what convinced me.

Next time you make something simple—like a tomato sauce or basic soup—split it in half.

Add a bay leaf to one pot. Leave the other alone.

Let them simmer, then taste both.

You’re not going to get hit with a dramatic difference. It’s quieter than that.

But it’s there.

And once you notice it, you can’t really un-notice it.

Final Thought (And I Mean This)

Bay leaves are kind of like good background lighting.

You don’t walk into a room and say, “wow, incredible lighting.”

But if it’s bad—or missing—you feel it immediately.

That’s what they do.

So no, they’re not useless.

They’re just… quiet about it.

My Neighbor Taught Me This Trick to Clean Green Algae Off Siding with 0 Effort. Here’s How It Works.

0

Green algae on siding is one of those things that sneaks up on you. One minute your house looks fine. The next, there’s a faint green tinge on the north side that slowly turns into something that makes you cringe every time you pull into the driveway.

For years, I tried everything. Pressure washing, store-bought cleaners, scrubbing until my arms ached. Nothing really worked without a whole lot of effort.

Then one day, my neighbor—the one with the perpetually clean house—shared a trick that changed everything. It was almost embarrassingly simple. No scrubbing, no expensive equipment, barely any work at all. I was skeptical. But after trying it myself? I haven’t cleaned siding any other way since.

Here’s how it works.

1. The Surprising No-Scrub Trick My Neighbor Shared

The trick came down to a simple mixture of common household products. No harsh chemicals, no scrubbing brushes, no climbing up and down ladders for hours.

My neighbor told me to grab a garden sprayer—the kind you use for fertilizer or weed killer—fill it with a specific solution, and just spray it onto the siding. That’s it. No scrubbing. No pressure washer. Just spray, wait, and rinse.

I honestly didn’t believe it would work until I saw the green patches practically melt away on their own.

2. Why Green Algae Loves Vinyl and Painted Siding

Algae thrives in damp, shady spots. That’s why the north side of a house or the areas under trees always seem to get hit first. Vinyl and painted siding, in particular, can trap moisture longer than other materials, giving algae exactly what it needs to settle in and spread.

The algae feeds off that moisture and whatever organic matter is on the siding, slowly creeping across the surface until what started as a faint shadow turns into a full green patch. Understanding that moisture is the main culprit makes it easier to see why this simple cleaning trick works.

3. The Simple Cleaning Cocktail: What You Actually Need

The mixture itself is surprisingly straightforward. You probably already have everything in your kitchen or laundry room.

All you need is:

  • Water
  • White vinegar
  • A little dish soap

That’s it. No specialized cleaners, no bleach, no complicated formulas.

4. Exact Mixing Ratios So You Don’t Damage Your Siding

Getting the ratios right matters—not because it’s tricky, but because you don’t want anything too harsh sitting on your siding.

The sweet spot is:

  • 1 gallon of water
  • 1 cup of white vinegar
  • 1 tablespoon of dish soap

Mix it together, pour it into your garden sprayer, and you’re ready to go. If you’re worried about delicate paint, test a small spot first. But for most standard siding, this ratio is gentle enough to be safe and strong enough to actually work.

5. How to Apply the Solution Without Ladders or Scrubbing

This is the part that feels almost too easy. Using your garden sprayer, spray the solution directly onto the algae-covered areas. Start from the bottom and work your way up so the solution doesn’t drip down over dry patches.

The beauty of this method is that the sprayer gives you plenty of reach. No ladder required. No balancing acts. Just stand on the ground and spray.

6. The ‘Let It Sit’ Step That Does All the Hard Work

This step requires the most patience—and the least effort.

Once you’ve sprayed the siding, walk away. Let it sit for at least 20 to 30 minutes. The vinegar and soap mixture needs time to break down the algae’s hold on the surface.

If the algae growth is heavy, you can leave it for up to an hour. The longer it sits, the more it loosens. This is where the real “no scrubbing” magic happens.

7. Rinsing It All Away: When the Algae Practically Falls Off

After the waiting period, take your garden hose—not a pressure washer, just a regular hose with a spray nozzle—and rinse the siding from the top down.

The algae should come off with barely any effort. It’s oddly satisfying to watch. Most of it will rinse away on the first pass. Stubborn spots might need a second spray and wait, but in most cases, one treatment does the job.

8. Safety Rules: Protecting Plants, Pets, and Your Paint

Vinegar and dish soap are mild, but it’s still smart to take basic precautions.

Before you spray, wet down any plants or bushes near the foundation so they absorb less of the solution. Keep pets and kids away from the area until everything has been rinsed and dried.

If your siding has older or delicate paint, test a small hidden patch first. That way you know exactly how it will react before you cover the whole side of the house.

9. How Long the Results Last and When to Repeat the Trick

In most cases, a single treatment keeps the siding clean for six months to a year. If your house is heavily shaded or you live in a humid area, the algae may come back sooner.

Checking your siding once or twice a year and hitting it with this spray when you first notice any green coming back makes it easy to stay ahead of it. A quick pass takes less time than letting it build up again.

10. Easy Preventive Habits to Keep Algae from Coming Back

A few small habits can make this cleaning job less frequent.

  • Trim back trees or bushes that keep your siding shaded and damp.
  • Make sure gutters and downspouts are directing water away from the house.
  • Give your siding a quick rinse with a mild detergent and water now and then to remove the dirt and organic matter that algae feeds on.

None of this takes much time, but together they make a noticeable difference.

11. When This Hack Isn’t Enough and What to Try Next

This method works well for normal algae buildup. But if the growth has been there for years or the siding has never been cleaned, you might need something stronger.

If the vinegar solution doesn’t get it all after a couple of tries, a commercial siding cleaner may be the next step. In extreme cases, professional power washing can help—but that should be a last resort. Too much pressure can damage siding, especially if it’s older.

For most homeowners, though? This simple neighborly trick is more than enough to keep things looking fresh without the headache.

Cheesy Corn Dog Bites

0

Cheesy Corn Dog Bites are the ultimate fun-sized party food, a brilliant deconstruction of the classic state fair treat that packs all the nostalgic flavor into irresistible, poppable morsels perfect for sharing. This recipe elevates the humble corn dog by enveloping juicy bites of hot dog in a uniquely delicious batter—a golden, crispy hybrid of sweet cornbread and savory cheese. The magic lies in the batter itself: a quick blend of cornmeal and flour creates the familiar corny texture, while a generous fold-in of shredded cheddar cheese melts during frying, creating pockets of gooey, salty richness within the crispy shell. This cheesy twist transforms each bite into a flavor explosion, where the savory hot dog, sweet corn batter, and molten cheddar cheese unite in perfect harmony.

The brilliance of this recipe is its flawless execution for a crowd and its foolproof frying technique. By cutting the hot dogs into uniform pieces, you ensure even cooking and create the ideal bite-sized vehicle for dipping. The batter clings perfectly to the dried hot dog pieces, frying up into a consistently golden, crackly-crisp exterior that remains sturdy enough to pick up. Frying at a precise 350°F is the key to achieving this perfect texture—hot enough to instantly set the batter without absorbing excess oil, yet controlled enough to cook the hot dog through and melt the cheese without burning the coating. Served warm with an array of dipping sauces, these bites are guaranteed to be the first platter emptied at any gathering, offering a playful, delicious, and utterly satisfying taste of carnival magic right in your own kitchen.

Why You’ll Love This Recipe:

  • Perfect Party Bite: Fun, poppable, and easy to eat, making them ideal for game day, parties, or kid-friendly meals.
  • Crispy, Cheesy, Cornbread Batter: The addition of cheddar cheese to the classic cornmeal batter creates an unbeatable flavor and texture combination.
  • Quick & Easy to Fry: Comes together in under 30 minutes with simple ingredients and straightforward steps.
  • Crowd-Pleasing Nostalgia: Delivers the beloved taste of a fairground corn dog in a more shareable, sophisticated format.
  • Great for Dipping: The perfect vehicle for ketchup, mustard, honey mustard, ranch, or cheese sauce.

Ingredients:

For the Batter & Bites:
4 standard beef hot dogs, cut into 1-inch bite-sized pieces
1 cup (125g) all-purpose flour
1 cup (140g) yellow cornmeal
1 tablespoon granulated sugar
1 teaspoon baking powder
½ teaspoon fine sea salt
1 cup (240ml) whole milk
1 large egg, beaten
1 cup (about 100g) shredded sharp cheddar cheese
Vegetable oil, for frying (enough for 2-3 inches deep in your pot)

For Serving:
Ketchup, yellow mustard, spicy brown mustard, honey mustard, or cheese sauce

Instructions:

Step 1: Heat the Oil
Pour oil into a heavy-bottomed Dutch oven or deep fryer to a depth of about 3 inches. Heat over medium-high heat to 350°F (175°C). Use a candy/deep-fry thermometer for accuracy.

Step 2: Prepare the Hot Dogs & Dry Ingredients
Pat the hot dog pieces thoroughly dry with paper towels. This is crucial for batter adhesion. In a medium bowl, whisk together the flour, cornmeal, sugar, baking powder, and salt.

Step 3: Make the Batter
In a separate small bowl or large measuring cup, whisk together the beaten egg and milk. Pour the wet ingredients into the dry ingredients. Stir with a spatula or spoon until just combined and no dry pockets remain—a few small lumps are okay. Gently fold in the shredded cheddar cheese.

Step 4: Batter the Hot Dog Bites
Working with a few pieces at a time, drop the dried hot dog bites into the batter. Use a fork or your fingers to toss and ensure they are completely coated. Let excess batter drip off slightly.

Step 5: Fry to Golden Perfection
Carefully lower the battered bites into the hot oil using a slotted spoon or tongs. Fry in batches to avoid overcrowding (which lowers oil temp). Fry for 3-4 minutes, turning occasionally, until deeply golden brown and crispy.

Step 6: Drain and Serve
Transfer the fried bites to a wire rack set over a baking sheet or a paper towel-lined plate. Let cool for 1-2 minutes (the cheese inside will be molten hot!). Serve immediately while warm and crispy with your favorite dipping sauces.

Tips:

  • Oil Temperature is Key: Maintain 350°F. Too cool = greasy, soggy bites. Too hot = dark outside, raw inside.
  • Dry the Hot Dogs: This is the #1 tip to prevent the batter from sliding off.
  • Don’t Overmix Batter: Mix until just combined. Overmixing develops gluten and can lead to a tough coating.
  • Test Fry One: Fry a single bite first to check oil temperature and batter consistency.
  • Keep Bites Warm: If frying in batches, keep finished bites warm on a wire rack in a 200°F (95°C) oven.

Storage Options:

  • Best Served Immediately: These are at their absolute peak within 15 minutes of frying.
  • Refrigerator: Store leftovers in an airtight container in the refrigerator for up to 3 days. They will lose their crispness.
  • Reheating: To recrisp, reheat on a wire rack over a baking sheet in a 375°F (190°C) oven or air fryer for 5-7 minutes. The microwave will make them soggy.
  • Make-Ahead/Freezing: You can freeze uncooked, battered bites. Place them on a parchment-lined tray until solid, then transfer to a freezer bag. Fry directly from frozen, adding 1-2 minutes to the fry time.

Cheesy Corn Dog Bites are a guaranteed hit, transforming a simple concept into an irresistibly fun and flavorful snack. They’re the perfect recipe to bring joy, nostalgia, and deliciousness to any gathering.

Creamy Peppery Coleslaw with Cucumbers and Celery

0

Creamy Peppery Coleslaw with Cucumbers and Celery is a vibrant and sophisticated twist on the classic picnic side, a dish that masterfully balances cool, crisp textures with a bold, piquant dressing that awakens the palate. This recipe elevates traditional coleslaw by introducing the refreshing snap of thinly sliced cucumber and the distinct, herbal crunch of celery, creating a mosaic of textures that is far more intriguing than cabbage alone. The magic truly lies in the dressing—a creamy, emulsified blend of mayonnaise and apple cider vinegar sharpened with the complex tang of Dijon mustard and a generous, defining teaspoon of freshly ground black pepper. This pepper is not an afterthought but a starring note, providing a warm, aromatic heat that cuts through the richness of the mayo and complements the natural sweetness of the grated carrot and a hint of sugar.

The brilliance of this coleslaw is its commitment to both freshness and depth. The vegetables are cut with precision to ensure a pleasant, uniform bite, while the simple act of chilling for at least an hour before serving is transformative. This resting period allows the cabbage and cucumber to soften slightly in the dressing, mellowing their raw edge while the flavors meld into a cohesive, deeply seasoned whole. The final stir-in of fresh parsley adds a final layer of garden-fresh brightness. Unlike overly sweet or soggy versions, this coleslaw stands proudly with integrity—its vegetables remain distinct and crisp, its dressing clings with purpose, and its peppery kick makes it the perfect, palate-cleansing companion to rich barbecued meats, fried chicken, or hearty sandwiches. It’s a side dish that is both refreshing and robust, simple yet memorably complex.

Why You’ll Love This Recipe:

  • Brilliant Texture & Freshness: The combination of cabbage, cucumber, and celery offers a wonderfully varied and refreshing crunch.
  • Bold, Peppery Dressing: The prominent black pepper adds a sophisticated, warm spice that sets this slaw apart from all others.
  • Lightly Creamy, Not Soggy: The dressing coats the vegetables perfectly without drowning them, ensuring they stay crisp.
  • Quick & Easy to Prepare: Comes together in 15 minutes, with most of the time being hands-off chilling.
  • Versatile Side Dish: The bright, peppery profile cuts through rich and fatty foods, making it the perfect barbecue, potluck, or sandwich side.

Ingredients:

For the Vegetable Slaw:
4 cups (about ½ medium head) finely shredded green cabbage
1 cup English cucumber, very thinly sliced or julienned
1 cup celery, very thinly sliced on a bias
½ cup grated carrot (from about 1 medium carrot)
¼ cup fresh parsley, finely chopped

For the Creamy Peppery Dressing:
½ cup high-quality mayonnaise
2 tablespoons apple cider vinegar
1 tablespoon Dijon mustard
1 tablespoon granulated sugar (or honey)
1 teaspoon freshly ground black pepper (coarse grind preferred)
½ teaspoon fine sea salt, plus more to taste

Instructions:

Step 1: Prepare the Vegetables
In a large mixing bowl, combine the shredded cabbage, thinly sliced cucumber, sliced celery, and grated carrot. Toss gently to distribute evenly.

Step 2: Make the Dressing
In a separate medium bowl or large measuring cup, whisk together the mayonnaise, apple cider vinegar, Dijon mustard, sugar, freshly ground black pepper, and salt until the mixture is completely smooth, creamy, and emulsified.

Step 3: Combine and Chill
Pour the dressing over the vegetable mixture. Using a pair of tongs or two large spoons, toss and fold until every piece is evenly and lightly coated. Gently stir in the chopped parsley.

Step 4: Rest for Maximum Flavor
Cover the bowl tightly with plastic wrap. Refrigerate for at least 1 hour, and ideally 2-3 hours. This chilling time is crucial for the flavors to meld and for the cabbage to soften slightly, becoming more palatable.

Step 5: Final Adjustments and Serve
Before serving, give the coleslaw a final thorough toss. Taste and adjust seasoning, adding an extra pinch of salt or a twist of black pepper if needed. Serve chilled.

Tips:

  • Freshly Ground Pepper is Essential: Pre-ground pepper lacks the volatile oils and bright heat of freshly cracked. Use a pepper mill for the best flavor.
  • Slice Vegetables Thinly and Evenly: This ensures a pleasant texture and allows the dressing to coat them well. A mandoline is helpful for the cucumber and celery.
  • Drain Cucumbers (Optional): If using a standard cucumber with seeds, consider salting the slices and letting them drain in a colander for 15 minutes to remove excess water and prevent a watery slaw.
  • Balance to Taste: After chilling, taste and adjust the sweet-tangy balance. Add a pinch more sugar if too sharp, or a dash more vinegar if too sweet.
  • Make it Ahead: This slaw holds up beautifully. It can be made a full day in advance; the flavors will continue to develop.

Storage Options:

  • Refrigerator: Store in an airtight container in the refrigerator for 3-4 days. The vegetables will soften but remain flavorful.
  • Not Suitable for Freezing: Freezing will completely destroy the texture of the raw vegetables.
  • Meal Prep: This is an excellent meal prep side. Keep the dressing separate if preparing more than 2 days in advance, and toss just before serving for maximum crunch.
  • Serving Suggestion: For a beautiful presentation, garnish with additional cracked black pepper and a few whole parsley leaves just before serving.

Creamy Peppery Coleslaw with Cucumbers and Celery is a revelation in the world of simple sides. It’s a dish that respects its ingredients, delivering a punch of flavor and a symphony of textures that will make it the star of the picnic table. It’s proof that with a little attention to detail, even the most humble salad can become extraordinary.