Low Carb Crock Pot Candy

0

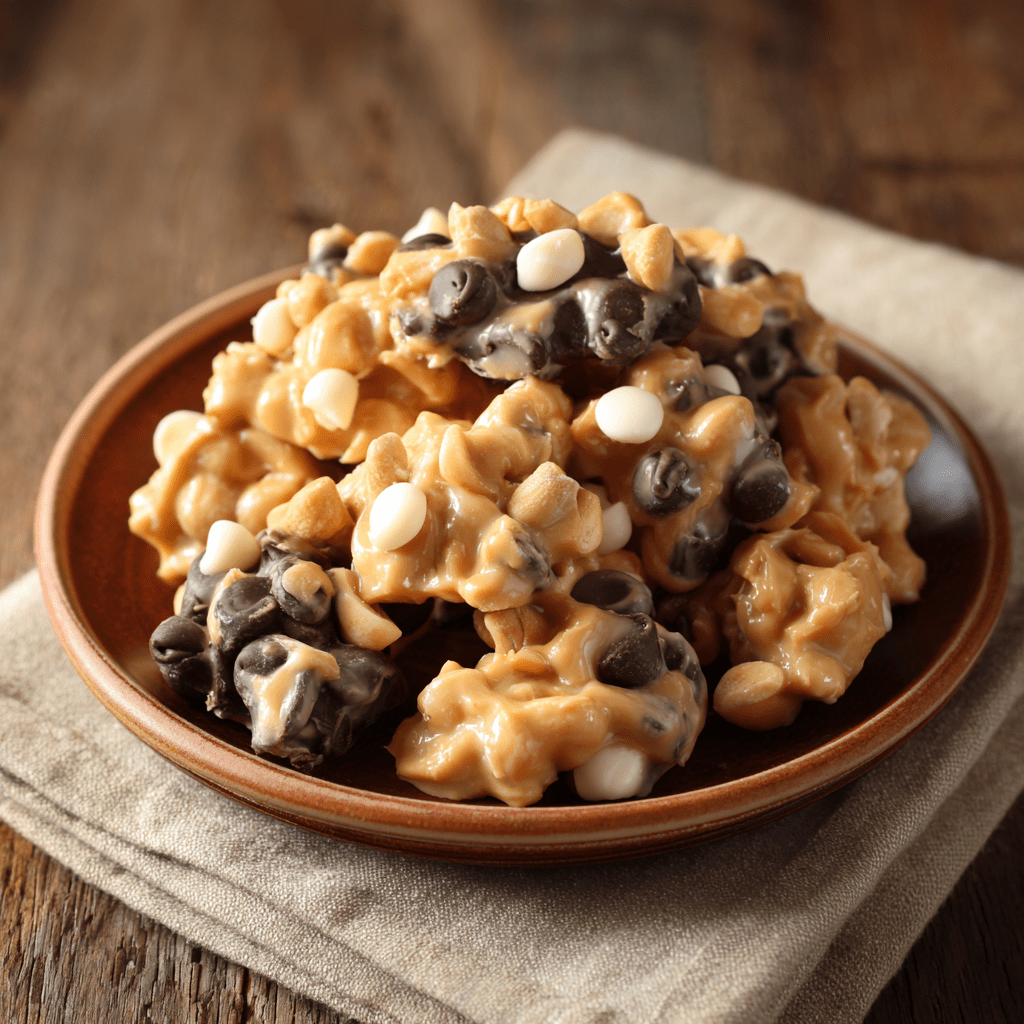
Low Carb Crock Pot Candy is a revelation in effortless, guilt-free confectionery, a recipe that masterfully delivers the rich, satisfying taste of chocolate-peanut clusters while aligning perfectly with a low-carb or keto lifestyle. This ingenious method transforms a handful of simple, sugar-free ingredients into an indulgent treat using the most hands-off kitchen appliance: the slow cooker. The process begins by gently melting together two types of premium sugar-free chocolate—deep, dark chocolate and sweet, creamy white chocolate—alongside creamy peanut butter and a generous quantity of dry roasted peanuts. The slow cooker’s low, steady heat ensures the chocolates melt smoothly and evenly without seizing or burning, creating a velvety, cohesive mixture that perfectly coats each nut. As the clusters cool and harden, they set into rich, crunchy, and perfectly sweet bites that defy the notion that delicious candy requires sugar or complex techniques.

The true brilliance of this recipe lies in its stunning simplicity and its foolproof, no-fuss approach. There is no need for a double boiler, no risk of scorching, and no precise tempering required. The slow cooker does all the work, making this an ideal project for busy days, holiday candy-making, or cooking with kids. The combination of dark and white chocolate offers a sophisticated flavor profile, while the peanut butter adds an extra layer of nutty richness that binds everything together. Finished with an optional sprinkle of flaky sea salt to elevate the sweetness, these clusters are a decadent, portable treat perfect for satisfying sweet cravings, filling a candy dish for guests, or packaging as a thoughtful homemade gift. Low Carb Crock Pot Candy is more than just a recipe; it’s a celebration of smart, simple, and deeply satisfying homemade confectionery that everyone can enjoy.

Why You’ll Love This Recipe:

  • Incredibly Simple: With just four ingredients and a slow cooker, this is the easiest path to homemade candy you’ll ever find.
  • Keto & Low-Carb Friendly: Made entirely with sugar-free chocolate and natural peanuts, it’s a treat you can enjoy without derailing your dietary goals.
  • Perfect for Gifting: These beautiful, homemade clusters look and taste professional, making them an impressive and thoughtful gift.
  • No-Fuss, No-Burn Method: The slow cooker melts the chocolate gently and evenly, eliminating all the usual risks and mess of stovetop melting.

Ingredients:

  • 1 (9 oz) bag Lily’s Sugar Free Dark Chocolate Chips
  • 1 (9 oz) bag Lily’s Sugar Free White Chocolate Chips
  • 1 (16 oz) jar dry roasted, salted peanuts
  • ½ cup creamy, no-sugar-added peanut butter
  • Flaky sea salt, for garnish (optional)

Instructions:

Step 1: Combine in the Slow Cooker
Add the dark chocolate chips, white chocolate chips, entire jar of peanuts, and peanut butter to the bowl of a 4 or 6-quart slow cooker.

Step 2: Melt Gently
Place the lid on the slow cooker and set it to LOW. Heat for 1 hour. Remove the lid and stir the mixture well. Replace the lid and continue heating on LOW for another 30-45 minutes, stirring every 15-20 minutes, until the chocolate is completely melted and the mixture is smooth and well-combined.

Step 3: Scoop and Shape
Line two large baking sheets with parchment paper or silicone baking mats. Using a 1-inch cookie scoop or two spoons, drop tablespoon-sized mounds of the chocolate-peanut mixture onto the prepared sheets, leaving a little space between each. If desired, sprinkle the top of each cluster lightly with flaky sea salt.

Step 4: Set Completely
Allow the clusters to set at room temperature until firm. For faster setting, you can place the baking sheets in the refrigerator for 20-30 minutes.

Step 5: Store and Serve
Once completely set, transfer the clusters to an airtight container. They can be stored at room temperature in a cool place or in the refrigerator.

Tips:

  • Stir Gently but Thoroughly: When stirring the mixture in the slow cooker, be gentle to avoid breaking the peanuts, but ensure the peanut butter is fully incorporated.
  • Watch Closely Towards the End: All slow cookers vary in temperature. Check the mixture after 1.5 hours total to prevent overheating, which can cause the chocolate to become grainy.
  • Use Quality Chocolate: The flavor of the candy hinges on the chocolate. Using a reputable sugar-free brand like Lily’s ensures the best taste and texture.
  • Customize Your Nuts: Feel free to use a mix of nuts, such as almonds, pecans, or macadamias, in place of or in addition to the peanuts.

Storage Options:

  • Room Temperature: Store in an airtight container in a cool, dry place for up to 1 week.
  • Refrigerator: For longer storage or a firmer texture, keep them in the refrigerator for up to 3 weeks.
  • Freezer: These clusters freeze exceptionally well. Place them in a single layer in a freezer-safe container, separating layers with parchment paper. They will keep for up to 3 months. Thaw at room temperature for 10-15 minutes before serving.

Baked Coconut Rice Pudding

0

Baked Coconut Rice Pudding is the epitome of comforting, old-world dessert elegance, a dish that transforms simple pantry staples into a rich, creamy, and irresistibly aromatic treat. This recipe masterfully reinvents the classic stovetop rice pudding by employing the gentle, even heat of the oven, which coaxes the rice to a state of perfect tenderness while allowing a golden, slightly caramelized crust to form on top—a textural delight that stovetop versions can’t replicate. The foundation begins with cooking short or medium-grain rice until just tender, creating a plump and neutral canvas ready to absorb the luxurious custard. This custard is a dreamy blend of creamy coconut milk and whole milk, enriched with eggs and sweetened to perfection, which bakes around each grain of rice, resulting in a pudding that is wonderfully cohesive yet distinct in texture. The subtle tropical sweetness of coconut is the star, offering a sophisticated twist that feels both indulgent and comforting, making each spoonful a warm, creamy, and deeply satisfying experience.

The true brilliance of this recipe lies in its simplicity and its foolproof baking method, which virtually eliminates the risk of scorching or constant stirring required on the stovetop. The oven does all the work, slowly thickening the custard and toasting the top to a beautiful golden brown, creating a delightful contrast between the crisp top layer and the soft, creamy interior beneath. It’s a versatile dessert that welcomes personal touches—a sprinkle of nutmeg or cinnamon before baking, a handful of toasted shredded coconut mixed in, or a drizzle of honey or mango puree upon serving. Baked Coconut Rice Pudding is more than just a dessert; it’s a nourishing, nostalgic, and effortlessly elegant finale to any meal, equally suited for a cozy family dinner or a special occasion, promising to wrap you in warmth and sweetness with every bite.

Why You’ll Love This Recipe:

  • Creamy with a Crispy Top: The oven-baked method creates a unique and delicious contrast between a creamy interior and a golden, slightly crisp topping.
  • Hands-Off Cooking: Unlike stovetop versions requiring constant vigilance, this pudding bakes peacefully in the oven with no need to stir.
  • Elegant Coconut Twist: The coconut milk adds a rich, tropical flavor that feels luxurious and special, elevating the classic rice pudding.
  • Perfect for Make-Ahead: This pudding tastes wonderful warm, at room temperature, or chilled, making it ideal for preparing in advance for parties or weeknight desserts.

Ingredients:

For the Rice Pudding Base:

  • 1 cup uncooked short or medium-grain white rice (such as Arborio or Jasmine)
  • 2 cups water
  • 2 cups full-fat coconut milk
  • 1 cup whole milk
  • ¾ cup granulated sugar
  • 2 large eggs, beaten
  • 1 teaspoon vanilla extract
  • ½ teaspoon salt

Optional Add-Ins:

  • ½ cup shredded coconut (sweetened or unsweetened)
  • ¼ teaspoon ground nutmeg or cinnamon
  • 1 tablespoon unsalted butter, diced

Instructions:

Step 1: Cook the Rice
In a medium saucepan, combine the rice and water. Bring to a boil over high heat. Reduce the heat to low, cover, and simmer for 15-18 minutes, or until the water is absorbed and the rice is tender. Remove from heat and fluff with a fork. Let it cool slightly.

Step 2: Preheat and Prepare Dish
Preheat your oven to 350°F (175°C). Grease a 2-quart baking dish (or an 8×8 inch dish) with butter or non-stick spray.

Step 3: Prepare the Custard Mixture
In a large mixing bowl, whisk together the coconut milk, whole milk, sugar, beaten eggs, vanilla extract, and salt until the sugar is dissolved and the mixture is smooth. If using, whisk in the shredded coconut and spice at this stage.

Step 4: Combine Rice and Custard
Add the slightly cooled, cooked rice to the custard mixture. Stir gently until the rice is evenly distributed throughout the liquid.

Step 5: Bake
Pour the mixture into the prepared baking dish. Dot the top with the optional diced butter. Bake, uncovered, for 35-45 minutes. The pudding is done when the edges are set, the top is a spotted golden brown, and the center only has a slight jiggle when shaken.

Step 6: Cool and Serve
Remove the pudding from the oven and let it cool on a wire rack for at least 15-20 minutes. It will continue to thicken as it cools. Serve warm, at room temperature, or chilled.

Tips:

  • Don’t Overcook the Rice: The rice should be tender but still have a bit of bite before baking, as it will continue to soften in the custard.
  • Temper the Eggs: To prevent curdling, whisk a small amount of the warm milk mixture into the beaten eggs before combining them all. This gradually raises the eggs’ temperature.
  • Check for Doneness: The pudding will look set at the edges but still slightly loose in the very center when you remove it from the oven—it firms up perfectly as it cools.
  • Toast the Coconut (Optional): For a deeper flavor, toast the shredded coconut in a dry skillet over medium heat until golden before adding it to the custard.

Storage Options:

  • Refrigerator: Store cooled pudding, covered with plastic wrap, in the refrigerator for up to 4 days.
  • Reheating: Reheat individual portions gently in the microwave. For larger portions, reheat in a covered oven-safe dish at 300°F (150°C) until warm.
  • Freezing: Freezing is not recommended, as the texture of the dairy and rice will become grainy and watery upon thawing.

Texas Christmas Dip

0

Texas Christmas Dip is a vibrant, hearty, and irresistibly festive party appetizer that brings the bold, Tex-Mex flavors of the Southwest straight to your holiday table in a warm, creamy, and crowd-pleasing format. This recipe is a celebration of layered textures and tastes, starting with a rich and tangy base of cream cheese and sour cream, powerfully seasoned with a packet of taco seasoning for an instant punch of chili, cumin, and garlic. This creamy foundation is then blended with smooth refried beans, mild diced green chiles, and chunky salsa, creating a thick, flavorful, and cohesive dip that bakes into a bubbly, golden-topped masterpiece. The final flourish of fresh, cool toppings—diced tomatoes, crisp green onions, and briny black olives—provides the perfect “Christmas” color contrast and a refreshing crunch that cuts through the rich, savory warmth of the baked dip, making every scoop with a sturdy tortilla chip a perfect bite.

The true genius of this dip lies in its effortless assembly, make-ahead flexibility, and its guaranteed status as the life of the party. It can be prepared up to a day in advance and stored in the refrigerator, ready to be popped into the oven just before guests arrive, filling your home with an inviting, savory aroma. Unlike many delicate dips, this one is robust and forgiving, holding its heat well on a buffet table. Its familiar yet exciting flavor profile appeals to all ages, making it a stress-free choice for any gathering, from casual game days to festive holiday open houses. Texas Christmas Dip is more than just an appetizer; it’s a warm, welcoming, and deliciously fun centerpiece that encourages sharing and conversation, ensuring it disappears from the platter almost as quickly as it appears.

Why You’ll Love This Recipe:

  • Bold, Crowd-Pleasing Flavors: Packed with classic Tex-Mex tastes that everyone loves, from creamy cheese and beans to zesty salsa and spices.
  • Festive and Colorful Presentation: The red (salsa/tomatoes), white (cheese/sour cream), and green (chiles/onions) toppings make it a visually perfect fit for holiday parties.
  • Easy Make-Ahead Appetizer: Assemble it hours or a day in advance for effortless entertaining—just bake and garnish when ready to serve.
  • Warm and Comforting: Served hot from the oven, it’s a cozy, satisfying alternative to cold dips, perfect for chilly weather gatherings.

Ingredients:

  • 8 oz cream cheese, softened to room temperature
  • 1 cup sour cream
  • 1 (1 oz) packet taco seasoning mix
  • 1 (16 oz) can refried beans
  • 1 (4 oz) can diced green chiles, drained
  • 1 cup thick and chunky salsa
  • 2 cups shredded Mexican blend cheese, divided
  • 1 cup diced tomatoes, for topping
  • ½ cup sliced green onions, for topping
  • ¼ cup sliced black olives, for topping (optional)
  • Tortilla chips, for serving

Instructions:

Step 1: Preheat and Prepare
Preheat your oven to 350°F (175°C). Lightly grease a 9×9-inch or similar-sized baking dish.

Step 2: Create the Creamy Base
In a large mixing bowl, use a hand mixer or a sturdy spoon to beat the softened cream cheese, sour cream, and taco seasoning packet together until completely smooth and well combined.

Step 3: Combine All Dip Ingredients
To the creamy base, add the refried beans, drained green chiles, salsa, and 1 ½ cups of the shredded Mexican cheese. Stir until all ingredients are thoroughly and evenly incorporated.

Step 4: Assemble and Bake
Spread the dip mixture evenly into the prepared baking dish. Sprinkle the remaining ½ cup of shredded cheese over the top. Bake, uncovered, for 20-25 minutes, or until the dip is heated through, bubbly around the edges, and the cheese on top is fully melted.

Step 5: Garnish and Serve
Remove the dip from the oven and immediately garnish with the diced tomatoes, sliced green onions, and black olives (if using). Serve hot with a large bowl of sturdy tortilla chips for dipping.

Tips:

  • Ensure Cream Cheese is Soft: Using truly room-temperature cream cheese is the key to a smooth, lump-free base. Take it out of the refrigerator at least an hour ahead.
  • Choose Your Salsa Wisely: Since the salsa is a major flavor component, choose a good-quality, thick, and chunky variety you enjoy. A medium heat level works well for a crowd.
  • Customize the Heat: For a spicier dip, use hot taco seasoning or add a finely chopped jalapeño to the mixture before baking.
  • Make it a Main Dish: This dip is substantial enough to be a meal! Serve it as a filling for burritos or as a topping for baked potatoes or nachos.

Storage Options:

  • Refrigerator (Unbaked): The assembled, unbaked dip can be covered and refrigerated for up to 24 hours before baking. You may need to add 5-10 minutes to the baking time if going straight from the fridge to the oven.
  • Refrigerator (Leftovers): Store any leftover baked dip in an airtight container in the refrigerator for up to 3 days.
  • Reheating: Reheat leftovers in the microwave in short bursts, stirring in between, or in a 350°F (175°C) oven until warmed through.
  • Freezing: Freezing is not recommended, as the dairy and bean texture may become grainy and separate upon thawing.

Mocha Cheesecake

0

Mocha Cheesecake is an exquisite and indulgent dessert that masterfully marries the rich, decadent flavors of dark chocolate and coffee with the classic, creamy luxury of New York-style cheesecake. This recipe elevates the traditional cheesecake into a sophisticated, layered masterpiece, beginning with a unique and nutty crust made from almond flour and crushed pecans, which provides a buttery, gluten-free foundation with a delightful crunch. The filling is a symphony of smooth cream cheese and tangy sour cream, sweetened to perfection and deeply infused with high-quality cocoa powder and potent espresso powder, ensuring the mocha flavor is pronounced and perfectly balanced in every velvety bite. The crowning glory is a lavish pour of silky, sugar-free dark chocolate ganache that sets into a glossy, firm shell, adding a final layer of intense chocolate richness and a stunning visual finish. Each component is carefully crafted to complement the others, resulting in a dessert that is as breathtaking to behold as it is to savor.

The true brilliance of this recipe lies in its thoughtful adaptation for those mindful of sugar, without compromising an ounce of flavor or texture. Using monkfruit sweetener and sugar-free chocolate chips, it delivers all the decadent satisfaction of a traditional dessert while being keto-friendly. The methodical process—creaming the cheese until flawlessly smooth, baking in a water bath for a crack-free surface, and allowing for the essential, slow chilling time—guarantees a professional-quality result. This cheesecake is the ultimate showstopper for special occasions, from dinner parties to holiday celebrations, offering a deeply satisfying, rich, and complex dessert experience that appeals to both coffee and chocolate lovers alike.

Why You’ll Love This Recipe:

  • Decadent Flavor Fusion: Experience the perfect marriage of rich chocolate and bold coffee in a supremely creamy, luxurious cheesecake.
  • Keto-Friendly Indulgence: Made with monkfruit sweetener and sugar-free chocolate, this dessert allows for guilt-free enjoyment of a classic treat.
  • Stunning Layered Presentation: The nutty crust, dark mocha filling, and glossy chocolate ganache create a visually impressive and elegant dessert.
  • Make-Ahead Perfection: This cheesecake must chill for several hours or overnight, making it an ideal, stress-free dessert to prepare in advance for any event.

Ingredients:

For the Crust:

  • 1 ¼ cups super-fine blanched almond flour
  • ¾ cup pecans, finely crushed
  • 5 tablespoons unsalted butter, melted
  • 2 tablespoons monkfruit sweetener (or granulated erythritol)
  • 2 tablespoons unsweetened cocoa powder

For the Mocha Cheesecake Filling:

  • 3 (8 oz) packages full-fat cream cheese, softened to room temperature
  • 1 cup powdered monkfruit sweetener (or confectioners-style erythritol)
  • ½ cup sour cream, at room temperature
  • 3 large eggs, at room temperature
  • ⅓ cup unsweetened cocoa powder, sifted
  • 2 tablespoons instant espresso powder
  • 2 teaspoons vanilla extract

For the Ganache Topping:

  • 1 cup sugar-free dark chocolate chips (like Lily’s)
  • 1 cup heavy whipping cream

Instructions:

Step 1: Preheat and Prepare Pan
Preheat your oven to 350°F (175°C). Line the bottom of a 9-inch springform pan with parchment paper. Wrap the outside bottom and sides of the pan tightly with a double layer of heavy-duty aluminum foil to prevent water leakage if using a water bath.

Step 2: Make the Crust
In a medium bowl, combine the almond flour, crushed pecans, melted butter, 2 tablespoons monkfruit sweetener, and cocoa powder. Mix until the texture resembles wet sand. Press the mixture firmly and evenly into the bottom of the prepared springform pan. Bake for 10 minutes. Remove and let cool while you prepare the filling. Reduce oven temperature to 325°F (160°C).

Step 3: Prepare the Mocha Filling
Using a stand mixer or hand mixer with a paddle attachment, beat the softened cream cheese and 1 cup of powdered monkfruit sweetener on medium-low speed until completely smooth, creamy, and free of lumps. Scrape down the bowl.

Add the sour cream, vanilla extract, sifted cocoa powder, and espresso powder. Beat on low speed until fully combined, scraping the bowl again.

Add the eggs one at a time, beating on low speed after each addition until just incorporated. Do not overmix after adding the eggs.

Step 4: Bake
Pour the filling over the cooled crust. Smooth the top. Place the springform pan into a larger roasting pan. Carefully pour hot water into the roasting pan until it comes about halfway up the sides of the springform pan.

Bake at 325°F (160°C) for 55-70 minutes. The cheesecake is done when the edges are set but the center still has a slight jiggle (like Jell-O) when gently shaken. Turn off the oven, crack the door open, and let the cheesecake cool inside for 1 hour.

Step 5: Cool and Chill
Remove the cheesecake from the water bath and run a thin knife around the edge to loosen it. Let it cool completely on a wire rack at room temperature. Then, cover and refrigerate for at least 6 hours, or preferably overnight.

Step 6: Make the Ganache
Place the sugar-free chocolate chips in a heatproof bowl. Heat the heavy cream in a small saucepan over medium heat until it just begins to simmer (small bubbles around the edges). Immediately pour the hot cream over the chocolate chips. Let it sit for 2-3 minutes, then whisk slowly from the center outward until the mixture is completely smooth and glossy.

Step 7: Finish and Serve
Pour the slightly cooled ganache over the chilled cheesecake, using an offset spatula to guide it to the edges. Return the cheesecake to the refrigerator for at least 1-2 hours to allow the ganache to set completely before slicing and serving.

Tips:

  • Room Temperature is Crucial: Using room-temperature cream cheese, sour cream, and eggs is essential for a smooth, lump-free batter and to prevent cracking.
  • Don’t Overmix: Overbeating the batter, especially after adding the eggs, incorporates too much air and can cause the cheesecake to rise and fall dramatically, leading to cracks.
  • The Water Bath is Key: Baking in a water bath (bain-marie) provides gentle, even heat, which is the best defense against cracks and ensures a creamy texture.
  • Chill Thoroughly: For clean, perfect slices, the cheesecake must be completely chilled and firm. Dip a sharp knife in hot water and wipe it clean between each slice.

Storage Options:

  • Refrigerator: Store covered in the refrigerator for up to 5 days.
  • Freezing: This cheesecake freezes very well. Freeze the whole cheesecake or individual slices on a parchment-lined tray until solid, then wrap tightly in plastic wrap and foil. Store for up to 2 months. Thaw overnight in the refrigerator before serving.

White Chicken Chili

0

White Chicken Chili is a vibrant and comforting departure from its tomato-based counterpart, a creamy, mildly spicy, and incredibly flavorful stew that is both nourishing and deeply satisfying. This recipe masterfully builds layers of flavor, beginning with the essential step of roasting fresh Anaheim or poblano peppers to develop a smoky, sweet depth that forms the soul of the dish. The base is a fragrant blend of sautéed onions, garlic, and a warm spice trio of cumin, chili powder, and a hint of cayenne, which is then simmered with white beans, corn, and rich chicken broth. The ingenious technique of blending a portion of the chili and returning it to the pot is the secret to its luxuriously creamy body without the need for heavy cream. Finished with tender shreds of cooked chicken, a swirl of tangy sour cream, and a burst of fresh cilantro, this chili is a harmonious balance of textures and tastes, offering a lighter yet equally comforting alternative to traditional chili.

The true brilliance of this recipe lies in its adaptability and its elegant, restaurant-quality results achieved with straightforward techniques. It is an excellent way to utilize leftover roasted or rotisserie chicken, transforming it into a completely new and exciting meal. The roasted peppers are well worth the extra effort, as their charred, complex flavor cannot be replicated by canned varieties. This chili is wonderfully versatile—it can be made milder or spicier by adjusting the peppers and cayenne, and it welcomes additions like diced green chiles or a squeeze of lime juice for extra brightness. Served with a sprinkle of Monterey Jack cheese and warm tortillas or crusty bread, White Chicken Chili is more than just a meal; it’s a cozy, crowd-pleasing centerpiece perfect for a casual family dinner or a festive gathering on a chilly evening.

Why You’ll Love This Recipe:

  • Creamy Without Heavy Cream: The pureed bean and vegetable base creates a naturally thick, creamy, and luxurious texture.
  • Deep, Smoky Flavor: Roasting the peppers unlocks a sweet, smoky depth that is the hallmark of an exceptional white chili.
  • Perfect for Leftovers: An ideal and delicious way to use up leftover cooked chicken from another meal.
  • Healthful and Satisfying: Packed with lean protein, fiber-rich beans, and vegetables, this chili is both nourishing and deeply comforting.

Ingredients:

  • 4 Anaheim or poblano peppers
  • 1 ½ tablespoons olive oil
  • 1 medium sweet onion, chopped
  • 2 cloves garlic, minced
  • 1 ½ teaspoons ground cumin
  • 1 teaspoon chili powder
  • ½ teaspoon dried oregano or marjoram
  • ⅛ teaspoon ground cayenne pepper (adjust to taste)
  • 3 cups low-sodium chicken broth
  • 2 (15.8 oz) cans Great Northern beans, drained and rinsed
  • 1 (15.25 oz) can whole kernel corn, drained
  • 2 cups cooked, shredded chicken (rotisserie chicken works perfectly)
  • ½ cup sour cream, plus more for serving
  • ¼ cup fresh cilantro, chopped, plus more for garnish
  • Kosher salt and freshly ground black pepper, to taste
  • Shredded Monterey Jack or Pepper Jack cheese, for serving

Instructions:

Step 1: Roast and Prepare the Peppers
Preheat your oven to 400°F (200°C). Place the whole peppers on a foil-lined baking sheet. Roast for 15-20 minutes, turning halfway through, until the skins are blistered and charred. Transfer the hot peppers to a bowl, cover tightly with plastic wrap, and let them steam for 10-15 minutes. This makes peeling easy. Once cool, peel off the skins, remove the stems and seeds, and dice the flesh. Set aside.

Step 2: Sauté Aromatics and Spices
In a large Dutch oven or heavy pot, heat the olive oil over medium heat. Add the chopped onion and cook until soft and translucent, about 5-7 minutes. Reduce the heat to low and add the minced garlic, cumin, chili powder, oregano, and cayenne. Cook, stirring constantly, for 1 minute until fragrant.

Step 3: Build the Chili Base
Add the chicken broth, drained beans, drained corn, and the diced roasted peppers to the pot. Increase the heat to bring to a simmer, then reduce and let it simmer gently, uncovered, for 10 minutes to allow the flavors to meld.

Step 4: Thicken the Chili
Carefully ladle about 3 cups of the chili mixture (focusing on beans and liquid) into a blender. Blend until completely smooth. Caution: Allow the mixture to cool slightly and vent the blender lid to prevent steam buildup. Stir the puree back into the pot.

Step 5: Add Chicken and Finish
Add the shredded chicken to the pot and simmer for another 3-5 minutes, just until the chicken is heated through. Remove the pot from the heat. Stir in the sour cream and chopped cilantro until fully incorporated.

Step 6: Season and Serve
Taste the chili and season generously with salt and pepper. Ladle into bowls and garnish with shredded cheese, additional cilantro, and a dollop of sour cream.

Tips:

  • Handle Hot Peppers with Care: Wear gloves if you have sensitive skin when peeling and seeding the roasted peppers.
  • Blending Safely: To safely blend hot liquids, allow them to cool slightly, do not fill the blender more than halfway, and hold the lid firmly in place with a kitchen towel.
  • Adjust the Heat: For a milder chili, use only Anaheim peppers. For more heat, include a jalapeño in the roast or use spicier Pepper Jack cheese as a topping.
  • Make it Ahead: This chili tastes even better the next day. Prepare it completely, let it cool, and store it in the refrigerator. Reheat gently on the stovetop, adding a splash of broth if it has thickened too much.

Storage Options:

  • Refrigerator: Store cooled chili in an airtight container in the refrigerator for up to 4 days.
  • Reheating: Reheat gently on the stovetop over low heat, stirring occasionally. The microwave can also be used.
  • Freezing: This chili freezes very well for up to 3 months. Cool completely and freeze in airtight containers or freezer bags. Thaw in the refrigerator overnight before reheating. Stir well after reheating, as separation may occur.

Golden Beef Empanadas

0

Golden Beef Empanadas are a celebration of handheld culinary perfection, a flaky, golden-brown pastry pocket generously filled with a deeply savory, aromatic, and richly spiced beef filling. This recipe is a labor of love that yields impressive results, guiding you through the creation of a buttery, tender homemade dough that shatters with each bite, enveloping a hearty filling that is a symphony of flavors. The dough, made with cold butter and a touch of vinegar for tenderness, is simple to prepare and rewards patience with a light, layered texture that bakes to a beautiful, glossy gold. The filling is where the magic deepens: ground beef is browned with a classic sofrito of onions, bell peppers, and garlic, then simmered with warm spices like cumin and smoked paprika and a touch of tomato sauce until it becomes a thick, flavorful mixture. Optional additions of briny green olives and chopped hard-boiled eggs introduce authentic South American touches, creating pockets of texture and surprise.

The true brilliance of empanadas lies in their versatility, portability, and make-ahead convenience. They are the ultimate food for a crowd—perfect for parties, picnics, or freezing for future quick meals. The assembly process of cutting, filling, and crimping is meditative and can be a fun activity to share. Once baked, they emerge from the oven as individual treasures, their golden crusts promising the delicious reward within. Served with a vibrant chimichurri or a simple salsa, Golden Beef Empanadas are more than just a snack or appetizer; they are a complete, satisfying, and culturally rich meal that transports you straight to the heart of Latin American cuisine, offering a truly rewarding baking and eating experience.

Why You’ll Love This Recipe:

  • Flaky, Buttery Homemade Dough: The tender, shattering pastry is far superior to store-bought and is surprisingly simple to make.
  • Deeply Flavorful, Savory Filling: Aromatic spices and the optional olives and eggs create a complex, authentic taste in every bite.
  • Perfect for Freezing and Make-Ahead: Unbaked empanadas freeze beautifully, providing you with a ready-to-bake homemade meal anytime.
  • Impressive and Portable: These are a stunning and delicious offering for any gathering, and their handheld nature makes them ideal for parties or on-the-go eating.

Ingredients:

For the Dough:

  • 3 cups (375g) all-purpose flour, plus more for dusting
  • 1 teaspoon salt
  • ½ cup (115g) cold unsalted butter, cubed
  • 1 large egg
  • ½ cup (120ml) ice-cold water
  • 1 tablespoon white vinegar or lemon juice

For the Beef Filling:

  • 1 lb (450g) ground beef (80/20)
  • 1 medium yellow onion, finely diced
  • ½ red bell pepper, finely diced
  • 2 cloves garlic, minced
  • 2 tablespoons olive oil
  • 1 teaspoon ground cumin
  • 1 teaspoon smoked paprika
  • ½ teaspoon chili powder (optional)
  • ½ cup tomato sauce
  • Salt and black pepper, to taste
  • ¼ cup sliced green olives (optional)
  • 2 hard-boiled eggs, chopped (optional)

For Assembly:

  • 1 large egg, beaten with 1 tablespoon water (for egg wash)

Instructions:

Step 1: Make the Dough
In a large bowl, whisk together the flour and salt. Using a pastry cutter, two forks, or your fingertips, cut the cold cubed butter into the flour until the mixture resembles coarse crumbs with some pea-sized butter pieces remaining.

In a small bowl, whisk together the egg, ice water, and vinegar. Make a well in the center of the flour mixture and pour in the wet ingredients. Stir with a fork until a shaggy dough forms. Turn out onto a lightly floured surface and knead gently just until the dough comes together. Form into a disc, wrap tightly in plastic wrap, and refrigerate for at least 1 hour (or up to 2 days).

Step 2: Prepare the Filling
Heat olive oil in a large skillet over medium heat. Add the diced onion and bell pepper, and cook until softened, about 5-7 minutes. Add the garlic and cook for 1 minute until fragrant.

Increase heat to medium-high and add the ground beef. Cook, breaking it up with a spoon, until no pink remains. Drain any excess fat. Stir in the cumin, smoked paprika, chili powder (if using), salt, and pepper. Add the tomato sauce, reduce heat to low, and simmer for 5-7 minutes until the mixture thickens slightly. Remove from heat and stir in the optional olives and hard-boiled eggs. Let the filling cool completely.

Step 3: Assemble the Empanadas
Preheat your oven to 375°F (190°C). Line two baking sheets with parchment paper. On a lightly floured surface, roll the chilled dough out to about ⅛-inch thickness. Using a 4-5 inch round cutter (or a bowl as a guide), cut out circles of dough. Re-roll scraps as needed.

Place a heaping tablespoon of the cooled filling in the center of each dough circle. Brush a little water around the edges of the circle. Fold the dough over the filling to create a half-moon shape. Press the edges firmly to seal. Crimp the sealed edge by folding it over itself or pressing with the tines of a fork.

Step 4: Bake to Golden Perfection
Place the assembled empanadas on the prepared baking sheets. Brush the tops generously with the egg wash. Using a sharp knife, prick a small steam vent in the top of each empanada. Bake for 20-25 minutes, rotating the pans halfway through, until the empanadas are uniformly golden brown.

Step 5: Cool and Serve
Let the empanadas cool on the baking sheet for 5-10 minutes before serving. They are delicious warm or at room temperature, served with chimichurri sauce, salsa, or sour cream.

Tips:

  • Keep Ingredients Cold: The key to a flaky crust is keeping the butter in the dough cold and handling it as little as possible.
  • Cool the Filling Completely: A hot filling will melt the butter in the dough, making it greasy and difficult to handle.
  • Seal Tightly: A good seal is essential to prevent the filling from leaking during baking. The water brush helps create a strong bond.
  • Freeze for Later: Freeze unbaked, assembled empanadas on a baking sheet until solid, then transfer to a freezer bag. Bake from frozen, adding 5-10 minutes to the baking time.

Storage Options:

  • Refrigerator (Unbaked): Assembled, unbaked empanadas can be kept covered in the refrigerator for up to 24 hours before baking.
  • Refrigerator (Baked): Store leftover baked empanadas in an airtight container in the refrigerator for up to 3 days.
  • Reheating: Reheat in a 350°F (175°C) oven for about 10 minutes, or until warm and crisp. The microwave will soften the crust.
  • Freezer: See tip above. They will keep frozen for up to 3 months.

No-Bake Buckeye Balls

0

No-Bake Buckeye Balls are an iconic and irresistible confection, a beloved treat that perfectly captures the nostalgic flavor of peanut butter and chocolate in a simple, elegant, and delightfully fun-to-eat form. This recipe is a celebration of no-fuss dessert magic, requiring zero oven time and just a handful of ingredients to create a sweet that looks professional and tastes deeply satisfying. The process begins with a rich, pliable dough made from creamy peanut butter, butter, vanilla, and a generous amount of confectioners’ sugar, which is rolled into smooth, uniform balls that become the decadent, melt-in-your-mouth peanut butter center. The signature finish is a partial dip in melted semisweet chocolate, leaving a small circle of peanut butter exposed to mimic the appearance of a buckeye nut. This technique not only creates a stunning visual but also provides the perfect ratio of rich, bittersweet chocolate shell to sweet, salty peanut butter filling in every single bite.

The true brilliance of this recipe lies in its simplicity, make-ahead convenience, and its status as a guaranteed crowd-pleaser. It is an ideal project for holiday candy making, gift-giving, or cooking with kids, as the hands-on rolling and dipping are both easy and enjoyable. The optional addition of a small amount of vegetable shortening to the chocolate is a pro tip that ensures a smooth, glossy, and crack-free coating that sets beautifully. Once assembled, these candies keep wonderfully in the refrigerator or freezer, making them a perfect prepare-ahead treat for parties or a ready-to-enjoy sweet craving. No-Bake Buckeye Balls are more than just a candy; they are a piece of edible nostalgia, a testament to the timeless appeal of a perfect flavor combination, and a homemade gift that is always received with pure delight.

Why You’ll Love This Recipe:

  • Iconic Flavor Combination: It delivers the perfect, beloved balance of sweet, salty peanut butter and rich, dark chocolate.
  • No Baking Required: An easy, accessible recipe perfect for hot days or when you don’t want to turn on the oven.
  • Perfect for Gifting: These elegant homemade candies make a thoughtful and impressive gift for neighbors, teachers, or hostesses.
  • Fun to Make: Rolling the balls and dipping them in chocolate is a simple and enjoyable process, great for involving helpers in the kitchen.

Ingredients:

  • 1 ½ cups creamy peanut butter
  • ½ cup (1 stick) unsalted butter, softened
  • 1 teaspoon vanilla extract
  • ½ teaspoon kosher salt
  • 3 ½ cups confectioners’ (powdered) sugar, sifted if lumpy
  • 12 ounces semisweet chocolate chips or chopped baking chocolate
  • 2 tablespoons vegetable shortening (optional, for a smoother dip)

Instructions:

Step 1: Prepare the Pan
Line a large baking sheet with parchment paper or a silicone baking mat.

Step 2: Make the Peanut Butter Dough
In a large mixing bowl, use an electric mixer to beat the peanut butter and softened butter together until completely smooth and creamy. Beat in the vanilla extract and salt. Gradually add the confectioners’ sugar, about one cup at a time, mixing on low speed until fully incorporated. The dough will be very thick and should hold together when pressed.

Step 3: Form the Balls
Using a tablespoon cookie scoop or your hands, portion the dough and roll into smooth, 1-inch balls. Place them on the prepared baking sheet. Once all balls are formed, place the baking sheet in the refrigerator for at least 30 minutes, or in the freezer for 15 minutes, until very firm.

Step 4: Melt the Chocolate
Place the chocolate chips (and vegetable shortening, if using) in a microwave-safe bowl. Microwave in 20-30 second intervals, stirring thoroughly after each interval, until the chocolate is completely smooth and glossy. Alternatively, melt using a double boiler.

Step 5: Dip the Buckeyes
Remove the peanut butter balls from the refrigerator. Insert a toothpick into the center of one ball. Dip the ball into the melted chocolate, leaving the top quarter undipped to create the classic “buckeye” look. Allow any excess chocolate to drip off, then place it back on the parchment-lined sheet. Carefully twist and remove the toothpick. Repeat with all balls.

Step 6: Set and Serve
Once all balls are dipped, you can use your fingertip to gently smooth over the toothpick holes. Return the baking sheet to the refrigerator for about 15 minutes, or until the chocolate is completely set. Store the buckeyes in an airtight container in the refrigerator.

Tips:

  • Sift the Sugar: If your confectioners’ sugar is at all lumpy, sift it before adding. This ensures an ultra-smooth peanut butter center.
  • Chill Thoroughly: The peanut butter balls must be very cold and firm before dipping. This prevents them from falling off the toothpick or losing their shape in the warm chocolate.
  • Use Shortening for a Perfect Coat: The optional vegetable shortening makes the melted chocolate thinner, easier to work with, and gives it a beautiful sheen as it sets.
  • Work Efficiently: If the chocolate begins to thicken as you dip, reheat it for a few seconds in the microwave, stirring well.

Storage Options:

  • Refrigerator: Store in an airtight container in the refrigerator for up to 2 weeks. They are best served cool.
  • Freezer: These freeze exceptionally well. Place them in a single layer on a baking sheet to freeze solid, then transfer to a freezer bag or container. They will keep for up to 3 months. Thaw in the refrigerator.
  • Room Temperature: They can sit out for a few hours for serving, but the chocolate may become soft if the room is very warm.

3-Ingredient Cranberry Chicken Holiday Casserole

0

3-Ingredient Cranberry Chicken Holiday Casserole is a stunningly simple yet profoundly flavorful dish that embodies the spirit of effortless, elegant entertaining. This recipe is a masterclass in minimalism, proving that with just three humble ingredients, you can create a festive, sweet-and-savory centerpiece that tastes far more complex than its preparation would suggest. The magic lies in the alchemy between whole-berry cranberry sauce and dry onion soup mix; when combined, they form a glossy, ruby-red glaze that is simultaneously tart, sweet, and deeply savory. As it bakes, this glaze clings to the chicken, caramelizing slightly at the edges while the juices from the meat mingle with the sauce, creating a rich, self-made gravy. The chicken, whether using thighs for ultimate juiciness or breasts for a leaner option, becomes incredibly tender and infused with the festive flavors of cranberry and aromatic onion, making every bite a harmonious celebration of holiday tastes.

The true brilliance of this casserole is its unparalleled ease and its ability to look and taste like a dish that required hours of preparation. It is the ultimate solution for a stress-free holiday meal, a busy weeknight with a touch of celebration, or a potluck where you want to impress without fuss. The two-stage baking process—covered to steam and tenderize, then uncovered to thicken and glaze—ensures perfectly cooked chicken with a beautiful, glossy finish. This dish is wonderfully versatile; it pairs beautifully with classic sides like wild rice pilaf, roasted Brussels sprouts, or creamy mashed potatoes to soak up the exquisite sauce. 3-Ingredient Cranberry Chicken Holiday Casserole is more than just a recipe; it’s a culinary shortcut to a memorable, delicious, and beautifully festive meal that lets you spend less time in the kitchen and more time enjoying the moment.

Why You’ll Love This Recipe:

  • Unbeatable Simplicity: With only three ingredients and five minutes of active prep, this is the easiest path to an impressive, holiday-worthy meal.
  • Festive Sweet & Savory Flavor: The combination of tart cranberry and savory onion soup mix creates a uniquely delicious and celebratory sauce.
  • Hands-Off Cooking: Once in the oven, the dish practically cooks itself, freeing you to prepare sides or enjoy time with guests.
  • Crowd-Pleasing Elegance: The beautiful red glaze and tender chicken make this a visually stunning and universally appealing main course.

Ingredients:

  • 2 pounds boneless, skinless chicken thighs or breasts
  • 1 (14-ounce) can whole-berry cranberry sauce
  • 1 (1-ounce) packet dry onion soup mix

Instructions:

Step 1: Preheat and Prepare
Preheat your oven to 350°F (175°C). Lightly grease a 9×13-inch baking dish or a similar-sized casserole dish.

Step 2: Arrange the Chicken
Pat the chicken pieces dry with paper towels and arrange them in a single layer in the prepared baking dish. Season lightly with black pepper if desired (the soup mix provides ample salt).

Step 3: Create the Glaze
In a medium bowl, empty the can of whole-berry cranberry sauce. Add the entire packet of dry onion soup mix. Stir vigorously until the two ingredients are completely and evenly combined into a thick, chunky glaze.

Step 4: Apply Glaze and Bake
Pour the cranberry-onion glaze over the chicken, using a spoon or spatula to spread it evenly and ensure every piece is well-coated. Cover the baking dish tightly with aluminum foil.

Step 5: Bake, Covered
Bake, covered, for 25 minutes. This initial covered cooking time steams the chicken, making it tender and allowing the flavors to penetrate.

Step 6: Finish Uncovered
Carefully remove the baking dish from the oven and uncover. Baste the chicken with the sauce collected in the dish. Return the dish to the oven, uncovered, and bake for an additional 15-25 minutes. The chicken is done when it reaches an internal temperature of 165°F (74°C) and the sauce is bubbling and slightly thickened around the edges.

Step 7: Rest and Serve
Remove the casserole from the oven and let it rest for 5-10 minutes. This allows the juices to settle. Serve the chicken pieces with the generous amount of sauce spooned over the top.

Tips:

  • Pat Chicken Dry: This simple step helps the glaze adhere better to the chicken and promotes better browning.
  • Use Whole-Berry Sauce: The texture and visual appeal of whole-berry cranberry sauce are superior to jellied sauce for this recipe.
  • Baste for Extra Flavor: Basting during the uncovered bake time ensures a more even, glossy glaze on the chicken.
  • Thicken the Sauce (Optional): If you prefer a thicker sauce, after removing the chicken to rest, you can pour the pan juices into a small saucepan and simmer for a few minutes until reduced to your liking.

Storage Options:

  • Refrigerator: Store leftovers in an airtight container in the refrigerator for up to 3-4 days.
  • Reheating: Reheat gently in a covered oven-safe dish at 325°F (165°C) until warmed through, or in the microwave. Add a splash of water or chicken broth if the sauce has thickened too much.
  • Freezing: This dish freezes well. Cool completely and store in a freezer-safe container for up to 2 months. Thaw in the refrigerator before reheating.

Homemade Hamburger Helper

0

Homemade Hamburger Helper is a brilliant and satisfying reboot of the nostalgic boxed dinner, offering all the comforting, creamy, and cheesy flavors of the original with the wholesome goodness and customizable control of a from-scratch meal. This recipe masterfully deconstructs the classic into simple, real-food ingredients, creating a one-pot wonder that is both hearty and surprisingly quick to prepare. The foundation is built with ground beef, browned to savory perfection, which then simmers directly with uncooked macaroni in boiling water, allowing the pasta to absorb the rich meaty flavors as it cooks. The magic unfolds with a simple sauce made from milk thickened with cornstarch—a clever alternative to a roux—and a powerful blend of paprika, garlic, and onion powders that deliver that iconic, savory depth. The final, glorious stir-in of sharp cheddar cheese transforms the mixture into a velvety, cohesive, and irresistibly cheesy dish that far surpasses any packaged version.

The true genius of this recipe lies in its streamlined, one-pan method and its liberation from processed ingredients. It captures the essential weeknight convenience of the boxed classic—minimal dishes, quick cooking time, and family-friendly appeal—while allowing you to adjust seasoning, cheese level, and even incorporate extra vegetables like peas or diced tomatoes. The cornstarch slurry guarantees a smooth, lump-free sauce that clings perfectly to every piece of pasta and beef without the need for a separate thickening step. Homemade Hamburger Helper is more than just a meal; it’s a warm, comforting, and deeply satisfying dinner that proves you can have the nostalgic taste you love with the wholesome simplicity of homemade cooking, making it a reliable staple for busy evenings.

Why You’ll Love This Recipe:

  • Nostalgic Comfort Food, Upgraded: Enjoy all the familiar, crave-worthy flavors of the boxed dinner, made with simple, real ingredients you can feel good about.
  • One-Pot Wonder: Everything cooks in a single skillet, meaning incredible flavor and minimal cleanup.
  • Ready in 30 Minutes: This quick and easy recipe is a perfect solution for a hectic weeknight.
  • Endlessly Customizable: Easily add extra vegetables, swap the cheese, or use ground turkey for a personalized twist.

Ingredients:

  • 1 pound ground beef (80/20 or 90/10)
  • 1 cup uncooked elbow macaroni
  • 1 cup boiling water
  • 2 cups whole milk
  • 1 tablespoon cornstarch
  • 1 tablespoon paprika
  • 2 teaspoons garlic powder
  • 2 teaspoons onion powder
  • 1 teaspoon dry mustard powder
  • 1 ½ cups shredded sharp cheddar cheese
  • Salt and black pepper, to taste
  • Optional: 1 cup frozen peas or corn (thawed)

Instructions:

Step 1: Brown the Beef
In a large, deep skillet or Dutch oven, cook the ground beef over medium-high heat, breaking it up with a spoon, until it is fully browned and no pink remains. Drain off any excess grease.

Step 2: Cook the Pasta
To the skillet with the beef, add the uncooked macaroni and the boiling water. Stir to combine. Bring the mixture to a simmer, then reduce the heat to medium-low, cover, and cook for 10-12 minutes, stirring occasionally, until the pasta is tender and most of the water has been absorbed.

Step 3: Create the Sauce Base
While the pasta cooks, in a medium bowl or measuring cup, whisk together the milk and cornstarch until the cornstarch is completely dissolved and no lumps remain.

Step 4: Thicken and Season
Once the pasta is tender, pour the milk and cornstarch mixture into the skillet. Add the paprika, garlic powder, onion powder, and dry mustard. Stir well to combine. Bring the mixture back to a gentle simmer over medium heat and cook, stirring constantly, for 3-5 minutes, until the sauce has thickened noticeably.

Step 5: Add Cheese and Final Touches
Reduce the heat to low. Stir in the shredded cheddar cheese until it is completely melted and the sauce is smooth. If using, stir in the thawed peas or corn at this stage to warm through. Taste and season generously with salt and black pepper.

Step 6: Rest and Serve
Remove the skillet from the heat and let the mixture sit for 2-3 minutes. It will continue to thicken slightly. Serve hot.

Tips:

  • Use Freshly Shredded Cheese: Pre-shredded cheese contains anti-caking agents that can make the sauce grainy. Shredding a block of cheddar yourself will give you a much smoother, creamier result.
  • Don’t Skip the Cornstarch Slurry: This is what thickens the sauce smoothly and quickly without requiring a separate roux. Ensure it’s well-dissolved before adding.
  • Adjust Liquid as Needed: If the sauce seems too thick after adding the cheese, stir in a splash of milk. If it’s too thin, let it simmer for another minute or two.
  • Boost the Flavor: For an extra flavor kick, add a teaspoon of Worcestershire sauce with the spices or use a smoked paprika.

Storage Options:

  • Refrigerator: Store leftovers in an airtight container in the refrigerator for up to 3-4 days. The pasta will absorb sauce, so it will thicken.
  • Reheating: Reheat gently in a saucepan over low heat, adding a splash of milk to loosen the sauce to your desired consistency. Stir frequently. The microwave can also be used.
  • Freezing: This dish can be frozen, though the texture of the pasta may soften slightly upon thawing. Cool completely and store in a freezer-safe container for up to 2 months. Thaw in the refrigerator before reheating.

Cheesy Mozzarella Chicken Bake

0

Cheesy Mozzarella Chicken Bake is the quintessential weeknight hero, a dish that masterfully combines simplicity with robust, crowd-pleasing flavors to create a comforting and complete meal with minimal effort. This recipe transforms basic chicken breasts into a juicy, savory, and indulgent centerpiece by layering them with vibrant marinara sauce and a generous blanket of melted, golden cheese. The process begins with a crucial step of searing the chicken, which not only locks in juices but also builds a flavorful, caramelized crust that adds a welcome depth to the final bake. Nestled in a dish and smothered with tangy marinara sauce, the chicken is then crowned with a blend of gooey mozzarella and sharp Parmesan, which melts into a bubbly, irresistible cheese cap as it bakes. The result is a harmonious blend of tender, well-seasoned chicken, zesty tomato sauce, and creamy, stretchy cheese in every forkful.

The true brilliance of this dish lies in its elegant efficiency and universal appeal. It requires just a handful of pantry-staple ingredients and one skillet-to-oven baking dish, making cleanup a breeze. The Italian seasoning and garlic powder infuse the chicken with classic Mediterranean aromas, while the two-cheese topping provides the perfect textural contrast between the soft, melted mozzarella and the slightly crisp, nutty Parmesan. This bake is incredibly versatile, serving beautifully over a bed of pasta, alongside a crisp salad, or with crusty garlic bread for soaking up the delicious sauce. Cheesy Mozzarella Chicken Bake is more than just a recipe; it’s a reliable, family-friendly solution for busy evenings that delivers restaurant-style satisfaction with homestyle ease, proving that the most beloved meals are often the simplest to prepare.

Why You’ll Love This Recipe:

  • Easy One-Pan Meal: With searing and baking happening in the same dish, prep and cleanup are incredibly simple.
  • Family-Friendly Favorite: The combination of tender chicken, tomato sauce, and melted cheese is a guaranteed hit with both kids and adults.
  • Quick and Impressive: Ready in under 40 minutes, this dish is perfect for a busy weeknight but looks and tastes special enough for company.
  • Endlessly Customizable: Easily add sliced mushrooms, spinach, or pepperoni under the cheese, or use your favorite pasta sauce.

Ingredients:

  • 4 boneless, skinless chicken breasts (about 1.5 – 2 lbs)
  • 1 tablespoon olive oil
  • 1 teaspoon Italian seasoning
  • 1 teaspoon garlic powder
  • Salt and black pepper, to taste
  • 1 cup marinara sauce
  • 1 cup shredded mozzarella cheese
  • 2 tablespoons grated Parmesan cheese
  • Fresh basil or parsley, chopped (for garnish)

Instructions:

Step 1: Preheat and Prepare
Preheat your oven to 375°F (190°C). Pat the chicken breasts dry with paper towels and season both sides generously with Italian seasoning, garlic powder, salt, and pepper.

Step 2: Sear the Chicken
Heat the olive oil in a large, oven-safe skillet (like cast iron) over medium-high heat. Once hot, add the chicken breasts and sear for 3-4 minutes per side, until a golden-brown crust forms. The chicken does not need to be cooked through at this stage.

Step 3: Assemble the Bake
If your skillet is oven-safe, leave the chicken in it. Otherwise, transfer the seared chicken to a baking dish. Pour the marinara sauce over and around the chicken breasts. Sprinkle the shredded mozzarella cheese evenly over each piece, then top with the grated Parmesan.

Step 4: Bake to Perfection
Transfer the skillet or baking dish to the preheated oven. Bake, uncovered, for 20-25 minutes, or until the chicken is cooked through (internal temperature of 165°F / 74°C) and the cheese is melted, bubbly, and lightly golden.

Step 5: Rest and Serve
Remove the dish from the oven and let the chicken rest for 5 minutes before serving. This allows the juices to redistribute. Garnish with fresh basil or parsley and serve hot.

Tips:

  • Pound for Even Cooking: For perfectly even cooking, place the chicken breasts between two pieces of plastic wrap and gently pound them to an even ½-inch thickness before seasoning.
  • Don’t Skip the Sear: Searing creates the flavorful fond (browned bits) in the pan. If you’re using a baking dish, you can deglaze the skillet with a splash of chicken broth after searing and pour those flavorful juices over the chicken before adding the sauce.
  • Use High-Quality Sauce: Since the sauce is a key flavor component, using a good-quality jarred marinara or homemade sauce makes a significant difference.
  • Add Vegetables: For a more complete meal, add a layer of sautéed spinach, sliced mushrooms, or bell peppers on top of the chicken before adding the sauce and cheese.

Storage Options:

  • Refrigerator: Store leftovers in an airtight container in the refrigerator for up to 3 days.
  • Reheating: Reheat gently in a covered oven-safe dish at 350°F (175°C) until warmed through, or in the microwave. For best texture, use the oven method.
  • Freezing: This dish freezes well after baking. Cool completely, wrap tightly, and freeze for up to 2 months. Thaw in the refrigerator overnight before reheating.