Kielbasa and Apple Slow Cooker Delight

0

This Kielbasa and Apple Slow Cooker Delight is a perfect blend of savory and sweet flavors that come together to create a dish that’s absolutely mouth-watering. Featuring hearty kielbasa sausage paired with the natural sweetness of apples, this recipe is simmered in a flavorful sauce enhanced by brown sugar, apple cider, and a hint of mustard. The slow cooker does all the work, allowing the flavors to meld beautifully. This dish is ideal for a fuss-free meal that promises to be a crowd-pleaser at any gathering or a cozy night in.

The combination of kielbasa and apples provides a comforting balance of flavors that makes this dish uniquely satisfying. It’s an excellent choice for those seeking a tasty and easy-to-prepare meal that feels both familiar and exciting.

Why You’ll Love This Recipe

Effortless Preparation: Simply chop, combine, and let the slow cooker do its magic.

Deliciously Balanced Flavors: The smoky flavor of kielbasa perfectly complements the sweet and tangy apple mixture.

Versatile Serving Options: Serve as an appetizer, over grains, or alongside your favorite side dishes.

Ingredients

• 1 pound kielbasa sausage, cut into 1/2-inch slices

• 2 apples, cored and chopped into small pieces

• 1/2 cup brown sugar

• 1/2 cup apple cider or apple juice

• 2 tablespoons Dijon mustard

• 1 teaspoon garlic powder

• Salt and pepper to taste

• Fresh parsley for garnish (optional)

Instructions

1. Prepare the Slow Cooker

• Lightly grease the slow cooker with cooking spray or use a slow cooker liner to facilitate easy cleanup.

2. Add the Kielbasa

• Place the sliced kielbasa evenly in the bottom of the slow cooker.

3. Mix the Apple Mixture

• In a bowl, combine the chopped apples, brown sugar, apple cider, Dijon mustard, and garlic powder. Season with salt and pepper to taste. Mix well to ensure all apple pieces are coated.

4. Combine and Cook

• Pour the apple mixture over the kielbasa in the slow cooker, making sure the sausage slices are well-coated with the sauce.

• Cover and cook on low for 3-4 hours or on high for 1-2 hours, until the kielbasa is heated through and the apples are tender.

5. Stir and Check

• Stir the mixture to coat the kielbasa and apples in the sauce. Ensure everything is well heated and the apples are soft.

6. Garnish and Serve

• If desired, garnish with freshly chopped parsley before serving.

• Serve hot, directly from the slow cooker, on a tray with toothpicks as an appetizer, or over rice, mashed potatoes, or a salad for a more filling meal.

Tips

Choosing Apples: Use a variety of apples that holds up well to cooking, such as Granny Smith or Honeycrisp, for the best texture.

For More Depth: Add a splash of white wine or a sprinkle of smoked paprika to the apple mixture before cooking for added complexity.

Storage Options

Refrigerate: Store leftovers in an airtight container in the refrigerator for up to 3 days.

Reheat: Gently reheat in the microwave or on the stovetop until warm throughout.

This Kielbasa and Apple Slow Cooker Delight is not just easy to make but also offers a comforting and hearty meal option that’s perfect for any time of the year. Enjoy the rich flavors and tender textures of this simple yet delicious dish.

Garlic Steak and Potato Foil Packs

0

Garlic Steak and Potato Foil Packs are a perfect all-in-one meal for camping trips, backyard grills, or even a simple oven-baked dinner. This recipe combines succulent steak cubes with hearty potatoes and spicy jalapeños, all wrapped up in individual foil packets. Each pack is seasoned with a robust mixture of garlic butter, Worcestershire sauce, and herbs, creating a deliciously aromatic and flavorful meal. These foil packs are not only easy to prepare but also minimize cleanup, making them ideal for any cooking environment.

The versatility of this dish allows for variations in spice levels and ingredients, so you can easily tailor it to your taste preferences. Whether you’re feeding a crowd or looking for an easy weeknight dinner, these garlic steak and potato foil packs are sure to satisfy.

Why You’ll Love This Recipe

Effortless Preparation and Clean-up: Everything cooks together in one foil pack, making both preparation and clean-up a breeze.

Customizable: Easily adjust the ingredients to suit your dietary preferences or to work with what you have on hand.

Flavorful and Comforting: The combination of garlic butter, herbs, and Worcestershire sauce infuses the steak and potatoes with deep, savory flavors.

Ingredients

• 2 pounds steak (sirloin or your favorite cut), cubed

• 2 pounds red potatoes, cut into bite-size pieces

• 2 jalapeños, finely chopped (adjust quantity for desired heat; deseed for less spice)

• 6 tablespoons salted butter, softened

• 2 tablespoons chopped parsley, plus more for garnish

• 2 teaspoons salt

• 2 teaspoons black pepper

• 2 teaspoons granulated garlic

• 1 tablespoon Worcestershire sauce

• 4 sprigs rosemary (about 2 inches long, optional)

Instructions

1. Prepare Ingredients

• Cube the steak, removing any sinew for tender bites. Parboil the red potatoes for about 5 minutes until slightly tender but still firm.

2. Assemble Foil Packs

• Lay out four large pieces of aluminum foil, each approximately 14×18 inches. Divide the cubed steak and par-cooked potatoes evenly among the foil sheets.

• Sprinkle the chopped jalapeños over the steak and potatoes, adjusting the amount according to your spice preference.

3. Make Garlic Butter Mixture

• In a small bowl, whisk together the softened butter, chopped parsley, salt, pepper, granulated garlic, and Worcestershire sauce. Divide this mixture evenly among the foil packs, spooning it over the steak and potatoes.

4. Add Aromatics and Seal

• Place a sprig of rosemary on top of each pack, if using. Fold the edges of the foil over and seal the packets tightly to ensure no steam escapes during cooking.

5. Cooking Options

Oven Method: Preheat the oven to 375°F (190°C) and bake the foil packs for 25-30 minutes.

Grilling Method: Preheat the grill to 400°F (200°C) and place the foil packs on the grill for 15-20 minutes.

6. Check and Serve

• Carefully open one foil pack to check for doneness. If necessary, cook for an additional 5-7 minutes or until the steak reaches your desired level of doneness.

• Serve the foil packs directly from the foil for a fun and interactive meal, or transfer the contents to plates. Garnish with additional chopped parsley if desired.

Tips

Ensuring Even Cooking: Cut the steak and potatoes into uniform pieces to promote even cooking.

For More Flavor: Consider adding other herbs like thyme or marjoram for additional flavor layers.

Safety Tip: When opening the foil packs, be careful of the hot steam that will escape.

Storage Options

Refrigerate: Store any leftovers in an airtight container in the refrigerator for up to 3 days.

Reheat: Reheat in the oven or on the grill until heated through.

These Garlic Steak and Potato Foil Packs are a hearty, flavorful meal that’s perfect for any occasion, from a casual backyard barbecue to a more adventurous outdoor meal. Enjoy the delightful combination of tender steak and potatoes with the zesty kick of jalapeños!

Corn Nuggets

0

Corn nuggets offer a delightful combination of sweet and savory flavors, encased in a crispy golden crust. This easy-to-make snack is perfect for gatherings, serving as a tasty appetizer or a fun side dish. Using simple ingredients like creamed and whole kernel corn, these nuggets fry up into irresistible bites that are sure to be a hit with both kids and adults. Whether you’re hosting a party or just looking for a delicious snack, these corn nuggets are a fantastic choice.

Enjoy the process of making these little treats and watch them disappear as quickly as they come out of the fryer. They’re that good!

Why You’ll Love This Recipe

Quick and Easy: With minimal prep and cooking time, you can have these nuggets ready in no time.

Versatile Snack: Perfect for any occasion, and you can pair them with various dipping sauces to match any taste preference.

Deliciously Different: A great way to enjoy corn in a fun, finger-food format that’s different from the usual preparations.

Ingredients

• 1 can (11 ounces) creamed corn

• 1 can (11 ounces) whole kernel corn, drained

• 1/2 cup yellow cornmeal, plus more as needed for thickening

• Salt and pepper, to taste

• Oil, for frying

Instructions

1. Prepare the Mixture

• In a large mixing bowl, combine the creamed corn and drained whole kernel corn with 1/2 cup of yellow cornmeal. Stir well until the mixture is slightly thickened. If necessary, add a little more cornmeal to reach the desired consistency for forming nuggets. Season with salt and pepper to taste.

2. Form the Nuggets

• Using a spoon or your hands, form the mixture into small, round nuggets, about 1-2 inches in diameter. Place them on a parchment-lined tray to prevent sticking.

3. Heat the Oil

• Heat oil in a large skillet or deep fryer to 350°F (175°C). Ensure there is enough oil to cover the nuggets partially or completely, depending on your equipment.

4. Fry the Nuggets

• Carefully add the nuggets to the hot oil in batches, frying for 3-5 minutes or until they are crispy and golden brown. Flip them occasionally to ensure even cooking.

5. Drain and Serve

• Use a slotted spoon to remove the nuggets from the oil and place them on a plate lined with paper towels to drain excess oil.

• Arrange the cooked corn nuggets on a serving platter and serve hot with your choice of dipping sauces like ranch, honey mustard, spicy aioli, or ketchup.

Tips

Consistency Check: The batter should be thick enough to hold its shape when formed into nuggets. If it’s too wet, add a bit more cornmeal.

Serving Suggestion: Serve these nuggets as part of a larger appetizer spread with multiple dipping options to cater to various tastes.

Safety First: When frying, keep children and pets away from the cooking area, and use caution when adding or removing items from hot oil.

Storage Options

Refrigerator: Store any leftover corn nuggets in an airtight container in the refrigerator for up to 3 days.

Reheat: To reheat, place them in an oven preheated to 350°F (175°C) for about 10 minutes, or until they are heated through and crispy again.

These corn nuggets are a simple yet delicious treat that brings a touch of homemade comfort to your table. Enjoy the crispy exterior and soft, savory interior of these delightful bites as you dip them into your favorite sauces.

Amish Apple Fritter Bread

0

Amish Apple Fritter Bread is a delightful treat that brings the cozy warmth of cinnamon and sweet apples into a soft, comforting loaf. This recipe is reminiscent of classic apple fritters but presented in a bread form that’s perfect for slicing and sharing. Infused with a cinnamon-sugar mixture and layered with fresh diced apples, this bread bakes up into a beautifully marbled loaf topped with a sweet glaze that enhances its dessert-like appeal.

Whether enjoyed as a breakfast option, a snack, or a dessert, this apple fritter bread is versatile and satisfying. It’s a fantastic way to celebrate the flavors of fall or bring a bit of sweetness into any day of the year.

Why You’ll Love This Recipe

Full of Flavor: The combination of cinnamon, apple, and a sweet glaze mimics the taste of traditional apple fritters.

Comforting and Cozy: Perfect for chilly mornings or as a delightful afternoon treat with tea or coffee.

Easy to Make: While it looks and tastes impressive, this bread is surprisingly straightforward to prepare.

Ingredients

• 1/3 cup light brown sugar

• 2 tsp ground cinnamon

• 2 large apples, peeled, cored, and diced

• 2/3 cup white sugar

• 1/2 cup unsalted butter, softened

• 2 large eggs, at room temperature

• 1 1/2 tsp vanilla extract

• 1 1/2 cups all-purpose flour

• 1 3/4 tsp baking powder

• 1/2 cup milk

• 1/2 cup powdered sugar

• 2-3 tbsp milk or cream (for glaze)

Instructions

1. Prepare the Oven and Pan

• Preheat your oven to 350°F (175°C). Grease a 9×5 inch loaf pan or line it with parchment paper for easy removal.

2. Mix Cinnamon and Apples

• In a small bowl, combine 1/3 cup light brown sugar and 1 teaspoon ground cinnamon. Toss the diced apples in this mixture until well coated. Set aside.

3. Cream Sugar and Butter

• In a large mixing bowl, cream together the 2/3 cup white sugar and 1/2 cup softened butter until light and fluffy.

4. Add Eggs and Vanilla

• Beat in the eggs one at a time, making sure each is fully incorporated before adding the next. Stir in 1 1/2 teaspoons vanilla extract.

5. Combine Dry Ingredients

• Sift together the all-purpose flour and baking powder. Gradually mix these dry ingredients into the wet mixture, alternating with 1/2 cup milk, until just combined.

6. Layer Batter and Apples

• Pour half of the batter into the prepared loaf pan, smoothing the top. Layer half of the cinnamon-sugar-coated apples over the batter, pressing them in gently. Repeat with the remaining batter and apple mixture. Swirl through the layers with a knife to create a marbled effect.

7. Bake

• Bake in the preheated oven for 50-60 minutes, or until a toothpick inserted into the center of the bread comes out clean.

8. Cool and Glaze

• Allow the bread to cool in the pan for 10 minutes, then remove and transfer to a wire rack to cool completely. Mix the powdered sugar with 2-3 tablespoons of milk or cream until smooth, and drizzle over the cooled bread.

Tips

Apple Choice: For best results, use firm apples like Granny Smith or Honeycrisp that hold up well during baking.

Glaze Consistency: Adjust the amount of milk or cream in the glaze to get the desired thickness. It should be pourable but thick enough to set on the bread.

Serving Suggestion: This bread tastes best when served slightly warm. Reheat slices briefly in the microwave if serving the next day.

Storage Options

Room Temperature: Keep covered at room temperature for up to 2 days.

Refrigerate: For longer storage, refrigerate in an airtight container for up to 5 days.

Freeze: Wrap the bread tightly in plastic wrap and freeze for up to 2 months. Thaw overnight at room temperature before serving.

Amish Apple Fritter Bread is a comforting, aromatic bake that’s sure to please. Its layers of apple and cinnamon offer a delightful texture and taste, perfect for any occasion or simply as a treat to brighten your day. Enjoy baking and sharing this delicious bread!

Cabbage Roll Soup

0

Cabbage Roll Soup is a deconstructed version of the classic cabbage roll, transformed into a hearty and comforting soup that’s perfect for chilly evenings. This recipe captures all the flavors of traditional stuffed cabbage without the fuss of rolling and stuffing leaves, making it a convenient and quick alternative. With tender bits of ground beef, fluffy rice, and sweet cabbage simmered in a rich tomato base, this soup is a filling meal all on its own.

This dish is not only a time-saver but also a flavorful feast that warms you from the inside out. It’s ideal for those busy weeknights when you crave something wholesome yet simple to prepare. Whether served as a main course or as a warm appetizer, this soup promises a satisfying eating experience with every spoonful.

Why You’ll Love This Recipe

Effortless Cooking: Simplifies the classic cabbage roll into an easy-to-make soup that doesn’t require meticulous preparation.

Rich and Hearty: Offers a robust combination of beef, rice, and vegetables, making it a fulfilling dish perfect for satisfying large appetites.

Versatile: Easily adaptable with different types of meat or additional vegetables depending on your preferences.

Ingredients

• 1 ½ cups converted long-grain white rice

• 5 cups water, divided

• 1 pound ground beef

• 1 (20 ounce) jar of pasta sauce

• 1 (10 ounce) can of tomato soup

• 3 ½ pounds cabbage, cut into bite-size pieces

• 1 onion, chopped

• Salt and ground black pepper to taste

• 1 dash hot pepper sauce

Instructions

1. Cook the Rice

• In a medium saucepan, bring 3 cups of water to a boil. Add the rice and reduce the heat to a simmer. Cover and cook for 20-25 minutes, or until the rice is soft and the water is absorbed. Remove from heat and set aside.

2. Brown the Beef

• Heat a large soup pot over medium-high heat. Add the ground beef and cook for 5-7 minutes, stirring occasionally, until the beef is fully browned. Drain any excess grease from the pot.

3. Combine Ingredients

• To the pot with the browned beef, add 2 cups of water, cooked rice, pasta sauce, tomato soup, chopped cabbage, onion, salt, black pepper, and a dash of hot pepper sauce. Stir well to combine all the ingredients.

4. Simmer the Soup

• Bring the mixture to a boil, then reduce the heat to medium-low. Cover the pot and let it simmer for 20-30 minutes, or until the cabbage is tender and the flavors are well blended.

Tips

Flavor Enhancements: For a deeper flavor, consider sautéing the onion before adding it to the pot, or use beef broth instead of water for more richness.

Spice It Up: Adjust the amount of hot pepper sauce according to your taste, or add other spices like paprika or garlic powder for an extra kick.

Meat Variations: Substitute ground beef with ground turkey or pork for a different flavor profile.

Storage Options

Refrigerator: Store leftovers in an airtight container in the refrigerator for up to 3 days.

Freezer: This soup freezes well. Cool completely and store in freezer-safe containers for up to 3 months. Thaw overnight in the refrigerator before reheating on the stove.

Cabbage Roll Soup is a delightful twist on the traditional dish, offering the comforting tastes of a home-cooked meal with less work. Its rich flavor and hearty ingredients make it a perfect choice for a satisfying dinner that the whole family will enjoy.

Purple Velvet Cake

0

The Purple Velvet Cake is a stunning twist on the classic red velvet, featuring a vibrant purple hue that makes it a visual standout at any gathering. This cake combines the rich, moist texture of traditional velvet cakes with an eye-catching color, making it not only delicious but also a conversation starter. It’s perfect for parties, celebrations, or any occasion where you want to impress your guests with something uniquely beautiful and delectably sweet.

This recipe is a delightful variation that maintains the tender crumb and creamy frosting of its red counterpart but steps into its own with a bold new color. Whether you’re a seasoned baker or a novice, this cake offers a fun baking experience with a spectacular result that everyone will love.

Why You’ll Love This Recipe

Striking Presentation: The vivid purple color adds a fun and festive touch to your dessert table, perfect for special occasions.

Classic Flavor: With its soft, moist texture and hint of cocoa, this cake is a hit with guests who love traditional velvet cakes.

Customizable: Easy to adapt with different extracts or decorations, this cake allows you to put your own creative spin on it.

Ingredients

• 2 1/2 cups all-purpose flour

• 1 1/2 cups granulated sugar

• 1 teaspoon baking powder

• 1 teaspoon fine salt

• 1 teaspoon cocoa powder

• 1 1/2 cups vegetable oil

• 1 cup buttermilk, at room temperature

• 2 large eggs, at room temperature

• 2 tablespoons (1 ounce) purple food coloring

• 1 teaspoon distilled white vinegar

• 1 teaspoon vanilla extract

• Cream cheese frosting (homemade or store-bought)

Instructions

1. Preheat and Prepare Pans

• Preheat your oven to 350°F (175°C). Grease and flour two 9-inch round cake pans and line the bottoms with parchment paper to ensure easy removal after baking.

2. Mix Dry Ingredients

• In a large mixing bowl, whisk together the flour, sugar, baking powder, salt, and cocoa powder until well combined.

3. Mix Wet Ingredients

• In another bowl, stir together the vegetable oil, buttermilk, eggs, purple food coloring, vinegar, and vanilla extract until smooth and fully integrated.

4. Combine Ingredients

• Gradually add the wet ingredients to the dry ingredients, mixing until just combined and smooth. Avoid overmixing to keep the cake light and fluffy.

5. Baking

• Divide the batter evenly between the prepared pans. Smooth the tops with a spatula. Bake in the preheated oven for about 30 minutes, or until a toothpick inserted into the center comes out clean.

• Remove from the oven and let the cakes cool in the pans for 10 minutes, then turn out onto a wire rack to cool completely.

6. Frosting

• Once completely cooled, frost the cake with your choice of cream cheese frosting. Apply a crumb coat first, then a final thicker coat for a smooth finish.

Tips

Color Intensity: Adjust the amount of purple food coloring to achieve the desired shade of purple. Start with the suggested amount and add more if needed.

Homemade Buttermilk: No buttermilk? Mix 1 cup of milk with 1 tablespoon of lemon juice or vinegar and let it sit for 5 minutes before using.

Flavor Twist: Add a teaspoon of almond extract to the batter to introduce a subtle nutty flavor that complements the cream cheese frosting.

Storage Options

Refrigerate: Store the frosted cake in the refrigerator for up to 5 days. Cover loosely with plastic wrap to prevent drying out.

Freeze: Unfrosted cakes can be wrapped in plastic wrap and frozen for up to 2 months. Thaw in the refrigerator overnight before frosting and serving.

Purple Velvet Cake is more than just a dessert; it’s a showpiece that brings joy and a splash of color to your table. Enjoy the process of creating this beautiful cake and the many compliments it will surely receive!

Magic Lemon Pie

0

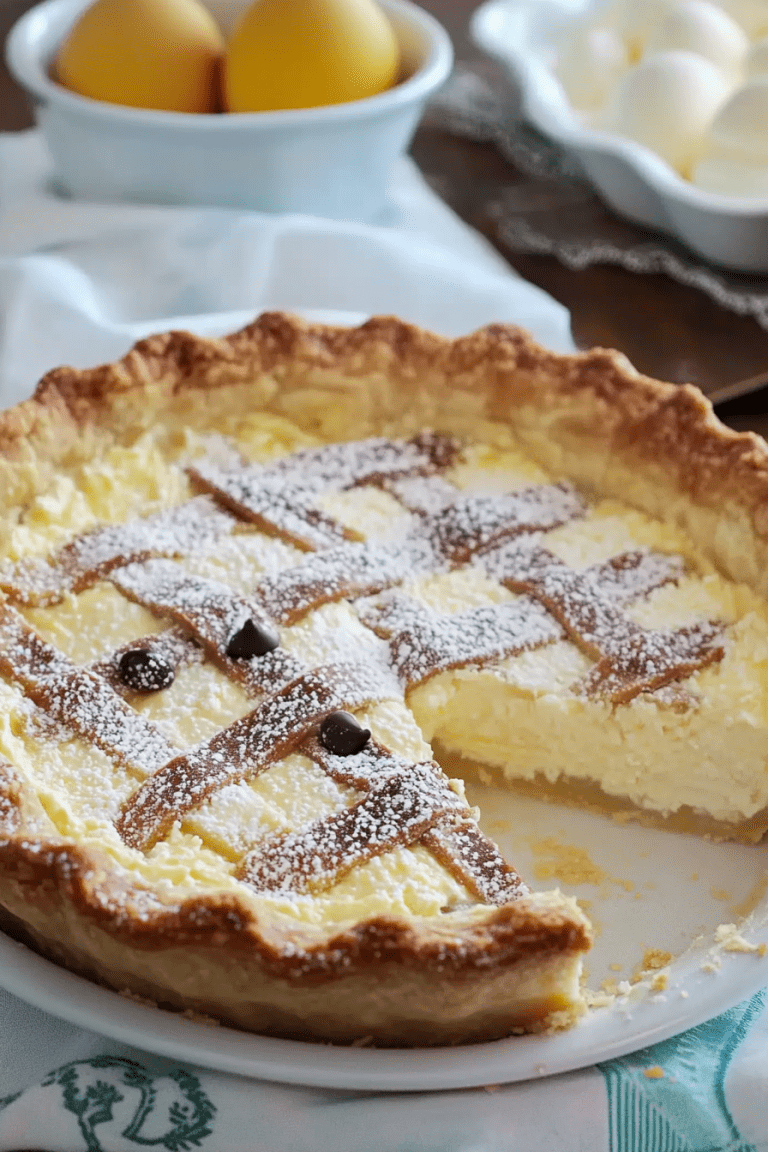
Embark on a culinary journey with our Magic Lemon Pie, a delightful dessert that combines the zest of lemons with the sweet creaminess of condensed milk. This cherished recipe, a legacy from my mother’s kitchen, has been brightening family gatherings for over 30 years. Each bite of this Lemon Meringue Pie is a perfect harmony of tangy and sweet, offering a refreshing twist on a classic favorite. Ideal for any occasion, this pie is sure to enchant your guests with its delightful flavors and light, airy meringue topping.

This pie isn’t just a treat; it’s a part of our heritage, a recipe enriched with love and the joy of sharing good food with loved ones. Whether it’s a sunny picnic day or a cozy evening, this pie promises a slice of bliss with every piece.

Why You’ll Love This Recipe

Timeless Flavor: The combination of lemon and sweetened condensed milk creates a refreshingly creamy filling that is both tangy and sweet.

Simple Ingredients: Made with everyday ingredients, this pie is both easy to assemble and delicious.

Perfect for Any Occasion: Whether it’s a family dinner, a special celebration, or just a craving for something sweet, this pie fits perfectly.

Ingredients

• 1 can (14 oz) Eagle Brand sweetened condensed milk (not evaporated milk)

• 1/2 cup lemon juice

• 1 teaspoon grated lemon zest or 1/4 teaspoon lemon extract

• 2 eggs, separated

• 1 graham cracker or baked pie crust (8 or 9 inches)

• 1/4 teaspoon cream of tartar

• 4 tablespoons sugar

Instructions

1. Preheat and Prepare

• Preheat your oven to 325°F (163°C). Prepare your pie crust by ensuring it is cool and set aside.

2. Make the Filling

• In a medium mixing bowl, combine the sweetened condensed milk, lemon juice, lemon zest (or extract), and egg yolks. Whisk them together until the mixture thickens. Pour this filling into the prepared pie crust.

3. Prepare the Meringue

• In another medium bowl, use an electric mixer to beat the egg whites and cream of tartar on high speed until soft peaks form. Gradually add the sugar, one tablespoon at a time, continuing to beat on medium speed. Beat until the sugar completely dissolves and the mixture forms firm, glossy peaks.

4. Assemble and Bake

• Spread the meringue over the pie, making sure to seal the edges at the crust to prevent shrinkage. Bake in the preheated oven for 12-15 minutes, or until the meringue is golden brown.

5. Cool and Serve

• Allow the pie to cool on a wire rack before slicing. Serve each piece with a sense of celebration and enjoy the burst of lemony sweetness.

Tips

Lemon Zest: Use fresh lemon zest for a brighter, more citrus-forward flavor.

Meringue Tips: Ensure that your bowl and beaters are clean and dry before whipping the egg whites to get the best volume.

Serving Suggestion: Serve chilled for a refreshing dessert experience, especially delightful on warm days.

Storage Options

Refrigerate: Store any leftover pie in the refrigerator, covered, for up to 3 days. The cool environment helps maintain the texture and integrity of the meringue.

Dive into the world of zesty sweetness with this Magic Lemon Pie. Each slice promises a creamy, dreamy experience that makes any day a little brighter. Whether you’re making it for a special occasion or as a treat for yourself, this pie is a testament to the simple joys of baking and enjoying good food.

Baked Garlic Brown Sugar Chicken

0

Baked Garlic Brown Sugar Chicken is a simple yet flavorful dish that combines tender chicken breasts with a sweet and savory garlic glaze. This easy recipe is perfect for busy weeknights or when you want a delicious meal without spending hours in the kitchen.

The sweetness of brown sugar pairs beautifully with the aromatic garlic, creating a caramelized topping that enhances the juicy chicken. With minimal ingredients and just a few steps, this dish is a true crowd-pleaser.

Why You’ll Love This Recipe

Quick and Easy: Ready in under 30 minutes with only a handful of ingredients.

Sweet and Savory: The combination of garlic and brown sugar creates a perfect balance of flavors.

Family-Friendly: A guaranteed hit for both kids and adults.

Ingredients

• 4 boneless, skinless chicken breasts

• 4 garlic cloves, minced

• 4 tablespoons brown sugar

• 3 teaspoons olive oil

• Salt and pepper to taste

Instructions

Step 1: Preheat the Oven

1. Preheat your oven to 500°F (260°C).

2. Spray a casserole dish with cooking spray to prevent sticking.

Step 2: Sauté the Garlic

1. Heat the olive oil in a small skillet over medium heat.

2. Add the minced garlic and sauté until translucent but not browned, about 1–2 minutes. Remove from heat and set aside.

Step 3: Prepare the Chicken

1. Place the chicken breasts in the prepared casserole dish.

2. Sprinkle salt and pepper evenly over both sides of the chicken.

Step 4: Add the Brown Sugar Mixture

1. Mix the brown sugar into the sautéed garlic until combined.

2. Spoon the garlic-brown sugar mixture evenly over the top of each chicken breast.

Step 5: Bake the Chicken

1. Place the casserole dish in the preheated oven and bake, uncovered, for 15–20 minutes, or until the internal temperature of the chicken reaches 165°F (75°C).

2. The brown sugar mixture should caramelize slightly on top.

Step 6: Serve and Enjoy

1. Remove the chicken from the oven and let it rest for a few minutes before serving.

2. Pair with your favorite sides, such as roasted vegetables, mashed potatoes, or a fresh salad.

Tips

Watch the Garlic: Be careful not to brown the garlic while sautéing to avoid bitterness.

Customize the Flavor: Add a pinch of chili flakes for heat or a squeeze of lemon juice for brightness.

Check for Doneness: Use a meat thermometer to ensure the chicken is cooked through but not overdone.

Storage Options

Refrigeration: Store leftovers in an airtight container in the fridge for up to 3 days. Reheat in the oven or microwave until warmed through.

Freezing: Freeze cooked chicken breasts for up to 2 months. Thaw overnight in the fridge and reheat before serving.

Baked Garlic Brown Sugar Chicken is a deliciously simple recipe that’s perfect for any occasion. With its tender chicken and flavorful glaze, it’s a dish you’ll want to make again and again. Enjoy!

Philly Cheesesteak Stuffed Peppers

0

Philly Cheesesteak Stuffed Peppers are a flavorful twist on the classic sandwich, packed with a hearty filling of seasoned beef, sautéed onions, mushrooms, and gooey melted cheese. Nestled in sweet bell peppers and baked to perfection, this dish offers all the deliciousness of a Philly cheesesteak without the bread.

This recipe is a fantastic low-carb option that doesn’t skimp on flavor. It’s easy to prepare, making it perfect for weeknight dinners or meal prep, and it’s sure to become a family favorite.

Why You’ll Love This Recipe

Bold and Savory: Packed with the flavors of a Philly cheesesteak in every bite.

Low-Carb Alternative: All the indulgence without the bread.

Customizable: Adjust the ingredients to suit your preferences.

Ingredients

• 4 large bell peppers (any color)

• 1 lb ground beef

• 1 medium onion, chopped

• 1 cup mushrooms, chopped

• ½ cup beef broth

• 1 tablespoon Worcestershire sauce

• 2 tablespoons ketchup

• Salt and pepper to taste

• 1 cup shredded mozzarella cheese

Instructions

Step 1: Prepare the Bell Peppers

1. Preheat your oven to 350°F (175°C).

2. Slice the tops off the bell peppers and remove the seeds and membranes. Set them upright in a baking dish.

Step 2: Cook the Filling

1. Heat a large skillet over medium-high heat. Add the ground beef and chopped onion.

2. Cook, breaking up the beef, until it’s browned and the onion is softened.

Step 3: Add Mushrooms and Sauce

1. Stir the chopped mushrooms into the skillet with the beef and onions.

2. Add the beef broth, Worcestershire sauce, and ketchup. Season with salt and pepper to taste.

3. Let the mixture simmer until most of the liquid has been absorbed.

Step 4: Stuff the Peppers

1. Spoon the beef mixture into the prepared bell peppers, packing it tightly.

Step 5: Add the Cheese and Bake

1. Sprinkle shredded mozzarella cheese generously over the tops of the stuffed peppers.

2. Cover the baking dish with aluminum foil, tenting it slightly to avoid the foil touching the cheese.

3. Bake for 45 minutes, or until the peppers are tender and the cheese is melted and bubbly.

Step 6: Serve

1. Remove the peppers from the oven and let cool slightly before serving.

2. Garnish with additional cheese or fresh parsley, if desired.

Tips

Choose the Right Peppers: Use bell peppers that can stand upright and have enough space for filling.

Extra Cheesiness: Mix some cheese into the filling for even more gooey goodness.

Make Ahead: Prepare the peppers and filling ahead of time, then bake when ready to serve.

Storage Options

Refrigeration: Store leftovers in an airtight container in the fridge for up to 3 days. Reheat in the oven or microwave.

Freezing: Freeze stuffed peppers before baking for up to 2 months. Thaw overnight in the fridge and bake as directed.

Philly Cheesesteak Stuffed Peppers are a satisfying, hearty dish that combines the best of comfort food and healthy eating. With their rich flavors and easy preparation, they’re sure to become a favorite in your meal rotation. Enjoy this delightful take on a classic!

Italian Stuffed Shells

0

Italian Stuffed Shells are a classic, hearty dish that brings the warmth and flavors of Italy straight to your table. Jumbo pasta shells are filled with a creamy, seasoned ricotta mixture, nestled in rich marinara sauce, and topped with gooey melted mozzarella cheese. This comforting meal is perfect for weeknight dinners, special gatherings, or when you’re craving a taste of Italian cuisine.

With its balance of textures and flavors, this recipe is a crowd-pleaser that feels fancy but is surprisingly easy to make. The filling is rich and creamy, the sauce is flavorful, and the baked cheese on top adds the perfect finishing touch. Whether served as a main course or alongside a crisp salad, Italian Stuffed Shells are sure to delight.

Why You’ll Love This Recipe

Rich and Cheesy: A creamy ricotta filling paired with gooey mozzarella and Parmesan.

Simple yet Elegant: A dish that’s easy to make but feels fancy enough for special occasions.

Family-Friendly: Loved by kids and adults alike, it’s a guaranteed hit!

Ingredients

• 20 jumbo pasta shells

• 1 lb ricotta cheese

• 2 cups shredded mozzarella cheese

• 1 cup grated Parmesan cheese

• 1 large egg

• 2 cups marinara sauce

• 1 teaspoon dried basil

• 1 teaspoon dried oregano

• 1 teaspoon garlic powder

• Salt and pepper to taste

• Fresh parsley for garnish (optional)

Instructions

Step 1: Preheat the Oven

1. Preheat your oven to 375°F (190°C).

Step 2: Cook the Pasta

1. Bring a large pot of salted water to a boil.

2. Add the jumbo pasta shells and cook until al dente according to the package instructions.

3. Drain and set aside to cool slightly.

Step 3: Prepare the Filling

1. In a large mixing bowl, combine the ricotta cheese, 1½ cups of mozzarella cheese, Parmesan cheese, egg, dried basil, dried oregano, garlic powder, salt, and pepper.

2. Mix thoroughly until all ingredients are evenly combined.

Step 4: Stuff the Shells

1. Using a spoon, carefully fill each cooked pasta shell with the ricotta mixture, ensuring they are generously stuffed.

Step 5: Assemble the Dish

1. Spread 1 cup of marinara sauce evenly over the bottom of a 9×13-inch baking dish.

2. Arrange the stuffed shells in the dish, seam side up, in a single layer.

3. Pour the remaining marinara sauce over the top, ensuring the shells are fully covered.

Step 6: Add Cheese and Bake

1. Sprinkle the remaining ½ cup of mozzarella cheese over the stuffed shells.

2. Cover the dish with aluminum foil and bake in the preheated oven for 30 minutes.

3. Remove the foil and bake for an additional 10 minutes, or until the cheese is melted and bubbly.

Step 7: Garnish and Serve

1. Remove the dish from the oven and allow it to cool slightly before serving.

2. Garnish with freshly chopped parsley for a touch of color and flavor, if desired.

Tips

Perfect Pasta: Avoid overcooking the shells as they will continue to cook in the oven.

Customizable: Add cooked spinach or crumbled sausage to the filling for extra flavor.

Freezer-Friendly: Assemble the dish ahead of time, cover tightly, and freeze. Bake directly from frozen, adding 10–15 minutes to the baking time.

Storage Options

Refrigeration: Store leftovers in an airtight container in the fridge for up to 3 days.

Freezing: Freeze individual portions or the entire dish for up to 2 months. Reheat in the oven or microwave until warmed through.

Indulge in the rich, comforting flavors of these Italian Stuffed Shells. With their creamy filling, savory marinara, and bubbling cheese, they’re sure to become a family favorite. Buon appetito!