Baked Corned Beef Sliders

0

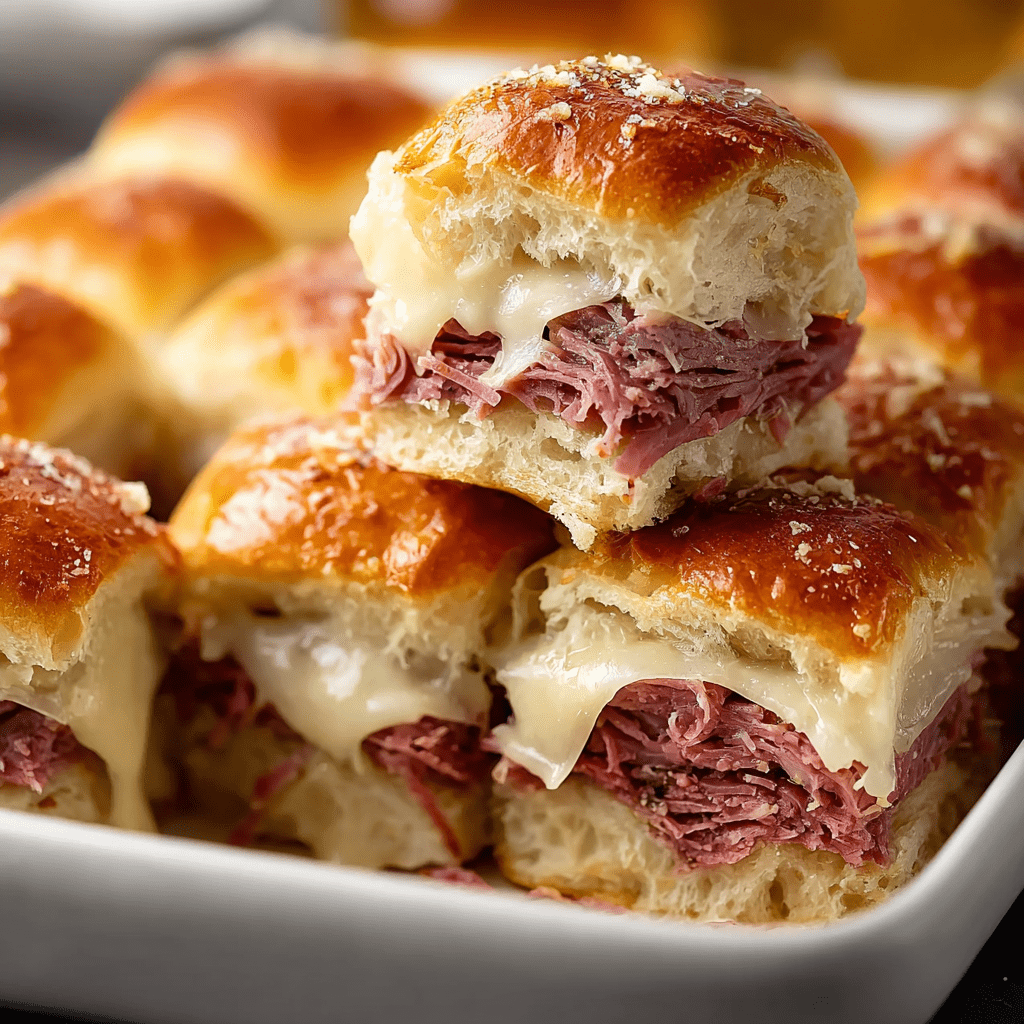
Baked Corned Beef Sliders are the ultimate way to transform leftover St. Patrick’s Day corned beef (or a deli purchase) into a warm, melty, buttery, crowd-pleasing meal in minutes. This recipe is a celebration of simplicity and flavor, layering tender, salty corned beef and nutty Swiss cheese between soft, sweet Hawaiian rolls, then baking everything to golden, toasty perfection. The magic begins with a sheet of slider buns kept intact, sliced horizontally to create a top and bottom “lid.” Generous layers of corned beef and Swiss cheese are stacked between, creating a cohesive, sandwich-like slab that’s easy to assemble and slice. A generous brushing of melted butter over the tops ensures the buns turn gloriously golden and crisp in the oven, while the covered bake guarantees the cheese melts into a gooey, irresistible layer.

The brilliance of this recipe lies in its simplicity and the incredible result it delivers with almost no effort. The sliders bake together as one connected sheet, then are sliced into individual portions, making them perfect for parties, game-day spreads, or a quick family dinner. The combination of salty corned beef and buttery Swiss is a classic for a reason, and the sweet Hawaiian rolls provide the perfect soft, slightly sweet counterpoint. For an extra layer of flavor, add a swipe of Russian dressing, Thousand Island, or spicy brown mustard before layering the meat. Serve these sliders warm, straight from the oven, and watch them disappear.

Why You’ll Love This Recipe:

  • Perfect Use for Leftover Corned Beef: Transforms St. Patrick’s Day leftovers into a brand-new meal.
  • Easy to Assemble: Uses a sheet of slider buns for quick, no-fuss layering.
  • Warm, Melty, and Buttery: The combination of melted Swiss, tender corned beef, and buttery toasted buns is irresistible.
  • Crowd-Pleasing Party Food: Perfect for game day, potlucks, or any casual gathering.
  • Customizable: Add sauerkraut for a Reuben twist, or swap in different cheeses and meats.

Ingredients:

For the Sliders:*
12 small slider buns or one sheet (12-count) Hawaiian rolls, kept together
12 ounces thinly sliced corned beef (deli or leftover)
6 slices Swiss cheese, cut in half (or 12 small pieces)

For the Topping:*
4 tablespoons (½ stick) unsalted butter, melted

Optional Add-Ons:*
Russian dressing, Thousand Island dressing, or spicy brown mustard

Instructions:

Step 1: Preheat Oven and Prepare Dish*
Preheat your oven to 350°F (175°C). Lightly grease a 9×13-inch baking dish.

Step 2: Prepare the Rolls*
Without separating the individual rolls, slice the entire sheet of slider buns horizontally in half using a serrated knife. Place the bottom half of the rolls (cut-side up) in the prepared baking dish.

Step 3: Layer the Filling*
If using dressing, spread a thin layer over the bottom buns. Evenly distribute the sliced corned beef over the bottom buns, covering the entire surface. Arrange the Swiss cheese pieces evenly over the corned beef.

Step 4: Add the Tops*
Place the top half of the rolls back over the layered filling, pressing down gently.

Step 5: Butter the Rolls*
Brush the melted butter evenly over the tops of the buns, making sure to coat the edges.

Step 6: Bake Covered*
Cover the baking dish loosely with aluminum foil. Bake for 12-15 minutes, until the cheese is melted and the sliders are heated through.

Step 7: Finish and Serve*
Remove the foil and bake for an additional 2-3 minutes to lightly toast the tops. Remove from the oven and let cool for 2 minutes. Using a sharp knife, slice along the roll lines to separate into individual sliders. Serve warm.

Tips:

  • Keep Rolls Attached: Keeping the buns connected makes assembly and slicing much easier.
  • Use a Serrated Knife: A serrated knife slices through the soft rolls cleanly without squishing them.
  • Don’t Skip the Foil: Covering the sliders for the first part of baking ensures the cheese melts fully without burning the tops.
  • Add Sauerkraut: For a Reuben slider, add a layer of well-drained sauerkraut over the corned beef before adding the cheese.
  • Customize the Cheese: Provolone, provolone, or cheddar work beautifully in place of Swiss.

Storage Options:

  • Refrigerator: Store leftover sliders in an airtight container in the refrigerator for up to 3 days.
  • Reheating: Reheat in a 350°F (175°C) oven or air fryer for 5-7 minutes to restore crispness. The microwave will make the buns soft.
  • Make-Ahead: Assemble the sliders (without baking) up to 24 hours in advance. Cover and refrigerate. Add the butter topping just before baking.

Baked Corned Beef Sliders are a warm, buttery, cheesy, and satisfying way to enjoy the classic deli combination. Perfect for parties, leftovers, or a quick dinner, they’re guaranteed to be a hit.

Oven-Baked Barbecue Pork Chops

0

Oven-Baked Barbecue Pork Chops are the perfect solution for a flavorful, juicy, and fuss-free weeknight dinner—tender bone-in pork chops coated in a smoky, sweet-spice rub, then glazed with tangy barbecue sauce and baked to perfection. This recipe is a masterclass in achieving succulent, restaurant-quality pork chops without firing up the grill. The magic begins with a dry rub that transforms simple chops into something extraordinary: smoked paprika adds a deep, earthy smokiness, brown sugar provides a touch of sweetness that caramelizes beautifully in the oven, and a hint of cayenne offers a gentle warmth. The chops are seared with flavor from the rub, then baked covered to lock in moisture, ensuring they stay incredibly tender and juicy. A final slather of barbecue sauce, enhanced with apple cider vinegar and Dijon mustard for brightness and tang, creates a sticky, glossy glaze that caramelizes around the edges.

The brilliance of this recipe lies in its two-stage baking method. Covering the chops for the first 15 minutes traps steam, gently cooking the meat through without drying it out. Uncovering and basting with additional sauce allows the glaze to set and caramelize, creating those irresistible sticky edges. The result is a pork chop that is juicy, flavorful, and beautifully glazed—no grill required. Served with extra barbecue sauce on the side, these chops are perfect alongside mashed potatoes, coleslaw, cornbread, or roasted vegetables. It’s a simple, dependable recipe that delivers big flavor with minimal effort.

Why You’ll Love This Recipe:

  • Juicy, Tender Pork Chops Every Time: The covered baking method locks in moisture for perfect results.
  • Big, Bold Barbecue Flavor: A smoky, sweet spice rub and tangy barbecue sauce create layers of deliciousness.
  • No Grill Required: Achieve that caramelized, sticky glaze right in your oven.
  • Quick and Easy: Ready in under 45 minutes with minimal prep.
  • Customizable Heat: Adjust the cayenne and barbecue sauce to your spice preference.

Ingredients:

For the Pork Chops:*
4 bone-in pork chops (6-8 oz each, about 1 inch thick)
2 tablespoons olive oil
1 teaspoon kosher salt
½ teaspoon freshly ground black pepper
1 teaspoon smoked paprika
1 teaspoon garlic powder
1 teaspoon onion powder
1 tablespoon light brown sugar, lightly packed
Pinch of cayenne pepper (optional)

For the Barbecue Glaze:*
¾ cup barbecue sauce (your favorite brand)
1 tablespoon apple cider vinegar (optional)
1 teaspoon Dijon mustard (optional)

Instructions:

Step 1: Preheat Oven and Prepare Dish*
Preheat your oven to 400°F (200°C). Lightly grease a 9×13-inch baking dish or line it with foil for easy cleanup.

Step 2: Make the Spice Rub*
In a small bowl, combine the kosher salt, black pepper, smoked paprika, garlic powder, onion powder, brown sugar, and cayenne pepper (if using). Mix well.

Step 3: Season the Pork Chops*
Pat the pork chops completely dry with paper towels. Rub both sides of each chop with olive oil. Generously coat both sides of each chop with the spice rub, pressing gently to adhere.

Step 4: Make the Barbecue Glaze*
In a small bowl, mix together the barbecue sauce, apple cider vinegar, and Dijon mustard (if using). Set aside.

Step 5: Assemble and Bake Covered*
Place the seasoned pork chops in the prepared baking dish. Brush or spoon half of the barbecue glaze over the tops of the chops. Cover the dish tightly with aluminum foil. Bake for 15 minutes.

Step 6: Uncover, Baste, and Finish Baking*
Remove the foil. Brush or spoon the remaining barbecue glaze over the chops. Return the dish to the oven, uncovered, and bake for an additional 10-15 minutes, until the internal temperature of the thickest chop reaches 145°F (63°C) and the glaze is sticky and caramelized.

Step 7: Rest and Serve*
Remove the pork chops from the oven and let them rest in the dish for 5 minutes. This allows the juices to redistribute. Serve hot with extra barbecue sauce on the side.

Tips:

  • Choose Bone-In Chops: Bone-in pork chops are more forgiving and stay juicier than boneless.
  • Pat the Chops Dry: Removing surface moisture helps the spice rub adhere and promotes better browning.
  • Don’t Skip the Rest: Resting is crucial for juicy pork chops. Let them rest for a full 5 minutes before serving.
  • Use a Meat Thermometer: Oven temperatures vary. An instant-read thermometer ensures perfectly cooked chops without guesswork.
  • Customize the Glaze: Add a splash of honey for sweetness, a dash of hot sauce for heat, or a spoonful of molasses for deeper flavor.

Storage Options:

  • Refrigerator: Store leftovers in an airtight container in the refrigerator for up to 4 days.
  • Reheating: Reheat gently in a covered skillet over medium-low heat with a splash of broth or water to prevent drying. You can also reheat in a 325°F (165°C) oven covered with foil.
  • Freezing: Cooked pork chops can be frozen for up to 2 months. Cool completely, wrap tightly, and place in a freezer-safe container. Thaw overnight in the refrigerator before reheating.
  • Make-Ahead: Season the pork chops with the dry rub up to 24 hours in advance and keep covered in the refrigerator. Bring to room temperature for 30 minutes before baking.

Oven-Baked Barbecue Pork Chops are a simple, dependable dinner that delivers big, bold flavor with minimal fuss. Perfect for busy weeknights or casual dinners, they’re sure to become a favorite in your recipe rotation.

Pizza Burgers

0

Pizza Burgers are the glorious mashup you never knew you needed—a crispy, toasted English muffin piled high with a savory ground beef and sausage meat sauce, topped with pepperoni and melted mozzarella, delivering all the flavors of a classic pizza in a fun, handheld form. This recipe is a celebration of clever comfort food, combining the hearty satisfaction of a burger with the irresistible appeal of pizza night. The magic begins with a rich, chunky meat sauce: ground beef and Italian sausage are browned together, then joined by butter-sautéed mushrooms and onions for deep, savory flavor. Garlic, marjoram, and a generous amount of marinara sauce simmer into a thick, robust topping that’s far superior to any jarred pizza sauce. Spooned over toasted English muffins, then crowned with diced pepperoni and a blanket of melted mozzarella, these Pizza Burgers are a weeknight dinner hero.

The brilliance of this recipe lies in its simplicity and the way it transforms humble ingredients into something truly special. English muffins provide the perfect sturdy, crispy base with their nooks and crannies catching every bit of sauce and cheese. The broiler does the final work, melting the cheese into a golden, bubbly topping while leaving the edges of the muffin delightfully crisp. Whether served as a quick family dinner, a fun party snack, or a game-day treat, these Pizza Burgers are guaranteed to be a hit with kids and adults alike. They’re proof that the best meals are often the most creative.

Why You’ll Love This Recipe:

  • All the Flavors of Pizza in a Handheld Burger: Savory meat sauce, pepperoni, and melted mozzarella on a crispy English muffin.
  • Quick and Easy: Comes together in under 30 minutes for a fun weeknight dinner.
  • Customizable: Add your favorite pizza toppings like olives, peppers, or mushrooms.
  • Kid-Friendly and Crowd-Pleasing: A guaranteed hit with both kids and adults.
  • Perfect for Game Day or Parties: Easy to eat and endlessly adaptable.

Ingredients:

For the Meat Sauce:*
1 pound ground beef
½ pound ground Italian sausage (bulk or casings removed)
2 tablespoons unsalted butter
8 ounces cremini or white mushrooms, thickly sliced
½ medium yellow onion, finely chopped
2 cloves garlic, minced
½ teaspoon dried marjoram
3 cups marinara sauce (homemade or jarred)
Kosher salt and freshly ground black pepper, to taste

For Assembly:*
6 English muffins, split
2 ounces pepperoni, diced
1½ cups shredded mozzarella cheese

Instructions:

Step 1: Brown the Meats*
In a large skillet over medium-high heat, add the ground beef and ground sausage. Cook, breaking up the meat with a spoon, until it is about halfway browned, about 4-5 minutes.

Step 2: Add Mushrooms and Onions*
Add the butter, sliced mushrooms, and chopped onion to the skillet. Continue cooking until the meat is fully browned, the mushrooms are golden and have released their liquid, and the onions are soft, about 5-7 minutes more.

Step 3: Add Aromatics and Simmer*
Reduce the heat to medium-low. Add the minced garlic and marjoram, stirring constantly for 1 minute until fragrant. Pour in the marinara sauce and stir to combine. Season with kosher salt and freshly ground black pepper to taste. Let the sauce simmer for 7-10 minutes, stirring occasionally, until slightly thickened.

Step 4: Toast the English Muffins*
While the sauce simmers, preheat your broiler. Line a baking sheet with aluminum foil. Split the English muffins and place them cut-side up on the prepared baking sheet. Toast under the broiler for 1-2 minutes, watching closely, until lightly golden.

Step 5: Assemble the Pizza Burgers*
Remove the baking sheet from the oven. Divide the meat sauce evenly among the toasted English muffin halves, spreading it to cover. Top each with diced pepperoni, then sprinkle generously with shredded mozzarella cheese.

Step 6: Melt the Cheese*
Return the baking sheet to the broiler. Broil for 2-3 minutes, watching closely, until the cheese is melted, bubbly, and lightly golden in spots.

Step 7: Serve*
Remove from the oven and let cool for 1-2 minutes. Serve hot.

Tips:

  • Don’t Overcook the Mushrooms: Sauté until golden and just tender. Overcooked mushrooms become rubbery.
  • Toast the Muffins Well: A good toast creates a sturdy base that won’t get soggy under the sauce.
  • Watch the Broiler: Broilers heat unevenly and can burn quickly. Stay nearby and rotate the pan if needed.
  • Customize Your Toppings: Add sliced olives, roasted red peppers, or banana peppers before the cheese.
  • Use Good Marinara: A quality jarred sauce or homemade marinara makes a big difference.

Storage Options:

  • Refrigerator: Store leftover meat sauce separately from the English muffins in an airtight container for up to 4 days. Assemble and broil fresh when ready to serve.
  • Reheating Assembled Burgers: Reheat on a baking sheet in a 350°F (175°C) oven until warmed through and cheese is melted.
  • Freezing: The meat sauce freezes beautifully for up to 2 months. Thaw in the refrigerator before reheating and assembling.
  • Make-Ahead: Prepare the meat sauce up to 2 days in advance. Assemble and broil just before serving.

Pizza Burgers are a fun, delicious, and endlessly customizable twist on two beloved classics. With their crispy English muffin base, savory meat sauce, and gooey melted cheese, they’re a weeknight winner that will have everyone asking for seconds.

Playoff Puffs

0

Playoff Puffs are the ultimate game-day appetizer—a crispy, creamy, spicy, and bacon-studded bite that delivers everything you want in a finger food, all nestled inside a perfectly scoop-shaped tortilla chip. This recipe is a brilliant celebration of big-game snacking, transforming simple ingredients into a warm, melty, irresistible treat that disappears faster than you can make them. The magic begins with Tostitos Scoops, whose cup-like shape makes them the perfect edible vessel for a rich, savory filling. The filling itself is a luscious blend of softened cream cheese, sour cream, and egg, creating a smooth, creamy base that bakes into a light, fluffy texture. Diced jalapeños add a fresh, zesty heat, while generous bacon crumbles bring smoky, salty crunch. A sprinkle of garlic powder deepens the savory notes, and a final dusting of grated Parmesan creates a golden, bubbly, slightly crisp top as they bake.

The brilliance of this recipe lies in its simplicity and the incredible crowd-pleasing result it delivers with minimal effort. There’s no dough to roll, no pastry to fold—just mix, scoop, bake, and serve. The chips stay remarkably crisp in the oven, providing a satisfying crunch that contrasts beautifully with the warm, creamy filling. These Playoff Puffs are the perfect addition to any Super Bowl party, game-day gathering, or casual get-together. Serve them hot, right from the oven, and watch them vanish. They’re proof that the best snacks don’t have to be complicated—just delicious.

Why You’ll Love This Recipe:

  • Perfect Game-Day Bite: Crispy, creamy, spicy, and bacon-filled—everything you want in an appetizer.
  • Incredibly Easy to Make: No dough, no rolling—just mix, fill, and bake.
  • Crowd-Pleasing Flavor: The combination of cream cheese, bacon, and jalapeño is universally loved.
  • Customizable Heat: Adjust the number of jalapeños or remove seeds for a milder version.
  • Bakes in Minutes: Ready in under 15 minutes for a hot, fresh appetizer.

Ingredients:

For the Puffs:*
1 (10 oz) bag Tostitos Scoops tortilla chips
1 (8 oz) package cream cheese, softened to room temperature
½ cup sour cream
1 large egg
2–3 jalapeños, seeded and finely diced
⅔ cup bacon crumbles (about 6 slices, cooked and crumbled)
1 teaspoon garlic powder
⅓ cup grated Parmesan cheese (for topping)

Instructions:

Step 1: Preheat and Prepare*
Preheat your oven to 400°F (200°C). Line a large baking sheet with parchment paper.

Step 2: Make the Filling*
In a medium bowl, combine the softened cream cheese, sour cream, and egg. Mix with a spatula or hand mixer until smooth and well combined. Stir in the diced jalapeños, bacon crumbles, and garlic powder until evenly distributed.

Step 3: Fill the Chips*
Arrange the Tostitos Scoops on the prepared baking sheet with the cup side facing up. Using a small cookie scoop or a spoon, fill each chip generously with the cream cheese mixture.

Step 4: Add Topping and Bake*
Sprinkle the grated Parmesan cheese evenly over all the filled chips. Bake for 10-12 minutes, until the filling is hot, puffed slightly, and just beginning to bubble.

Step 5: Serve*
Remove from the oven and let cool for 2-3 minutes before serving. Serve hot for the best taste and texture.

Tips:

  • Soften Cream Cheese Properly: Let the cream cheese sit at room temperature for at least 30 minutes to ensure a smooth, lump-free filling.
  • Don’t Overfill: Fill the chips generously but avoid overflowing to prevent messes on the baking sheet.
  • Customize the Heat: For milder puffs, remove the seeds and membranes from the jalapeños. For extra heat, leave the seeds in or add a dash of cayenne.
  • Add Toppings: Garnish with fresh chopped cilantro, sliced green onions, or a drizzle of hot sauce before serving.
  • Make Ahead: Prepare the filling up to 2 days in advance and store covered in the refrigerator. Fill and bake just before serving.

Storage Options:

  • Not Recommended for Storage: Playoff Puffs are best enjoyed fresh from the oven, as the chips lose their crispness upon refrigeration.
  • Reheating: If you have leftovers, reheat in a 350°F (175°C) oven or air fryer for 3-5 minutes to restore some crispness. The microwave will make them soggy.
  • Make-Ahead: Prepare the filling and store it in the refrigerator. Fill and bake just before serving for the best texture.

Playoff Puffs are the ultimate crowd-pleasing appetizer—crispy, creamy, cheesy, and packed with bacon and jalapeño flavor. They’re the perfect way to kick off any game-day celebration or casual get-together.

Ham and Potato Corn Chowder

0

Ham and Potato Corn Chowder is the ultimate creamy, comforting bowl of goodness—a hearty, soul-warming soup that combines tender potatoes, sweet corn, savory ham, and smoky bacon in a rich, velvety broth. This recipe is a celebration of rustic, homestyle cooking, where simple ingredients come together to create a chowder that is both satisfying and deeply flavorful. The magic begins with a classic mirepoix of carrots, celery, and onion sautéed in butter, building a savory foundation. Chicken broth, tender potatoes, thyme, bay leaf, and oregano are added, simmering until the potatoes are soft and infused with herbal warmth. Diced ham and sweet corn join the pot, adding pops of salty and sweet flavor. The crowning glory is a luscious, creamy base made separately—a roux-thickened mixture of milk and sour cream (or heavy cream) that is gently stirred into the soup, transforming it into a silky, rich chowder.

The brilliance of this recipe lies in its two-part method, which ensures a perfectly creamy texture without curdling or becoming gluey. By thickening the milk and cream separately before adding it to the soup, you achieve a velvety consistency that coats every spoonful. The final garnish of crispy bacon crumbles and fresh green onions adds a smoky, crunchy, and bright finish that elevates the entire dish. This chowder is a complete meal in a bowl—perfect for chilly evenings, served with crusty bread or oyster crackers, and guaranteed to become a family favorite.

Why You’ll Love This Recipe:

  • Rich, Creamy, and Hearty: A velvety chowder packed with potatoes, ham, corn, and bacon.
  • Perfect Balance of Flavors: Savory ham, sweet corn, smoky bacon, and tender potatoes in a herb-infused cream base.
  • Complete One-Bowl Meal: Satisfying enough to serve as a main course with bread or crackers.
  • Great for Leftover Ham: A delicious way to use up leftover holiday ham.
  • Crowd-Pleasing Comfort Food: A guaranteed hit with family and friends.

Ingredients:

For the Soup Base:*
5½ tablespoons unsalted butter, divided
2 carrots, peeled and diced
2 stalks celery, chopped
1 medium yellow onion, chopped
2 cans (14.5 oz each) low-sodium chicken broth
5 medium red potatoes, cubed (about 2 cups)
½ teaspoon dried thyme
1 bay leaf
¾ teaspoon dried oregano
Salt and freshly ground black pepper, to taste

For the Chowder:*
2 cups cooked ham, diced
2 cups fresh or frozen corn kernels
3 cups whole milk
⅓ cup all-purpose flour
½ cup sour cream or heavy whipping cream
6 slices bacon, cooked and crumbled
Green onions, chopped, for garnish

Instructions:

Step 1: Sauté the Vegetables*
In a large pot or Dutch oven over medium heat, melt 1 tablespoon of butter. Add the diced carrots, chopped celery, and chopped onion. Sauté for 5-7 minutes, until the vegetables have softened.

Step 2: Simmer the Soup Base*
Pour in the chicken broth. Add the cubed potatoes, thyme, bay leaf, and oregano. Season with salt and pepper to taste. Bring the mixture to a boil, then reduce the heat to medium-low. Cover and simmer for 15 minutes, or until the potatoes are fork-tender.

Step 3: Add Ham and Corn*
Stir in the diced ham and corn kernels. Continue to simmer for another 5 minutes.

Step 4: Make the Creamy Thickener*
While the soup simmers, prepare the cream base. In a separate saucepan over medium heat, melt the remaining 4 tablespoons of butter. Whisk in the flour and cook for 1-2 minutes, stirring constantly, until the mixture is smooth and bubbly. Gradually whisk in the milk, continuing to stir until the mixture thickens, about 3-5 minutes.

Step 5: Add the Cream*
Remove the milk mixture from the heat. Stir in the sour cream (or heavy cream) until smooth.

Step 6: Combine and Finish*
Pour the creamy milk mixture into the soup, stirring gently to combine. Simmer for an additional 5 minutes to allow the flavors to meld. Remove the bay leaf. Taste and adjust seasoning with additional salt and pepper if needed.

Step 7: Serve*
Ladle the chowder into bowls. Garnish with crumbled bacon and chopped green onions. Serve hot.

Tips:

  • Cube Potatoes Evenly: Uniform potato cubes ensure even cooking.
  • Don’t Skip the Separate Thickener: Making the cream base separately prevents the dairy from curdling and creates a perfectly smooth chowder.
  • Use Whole Milk: Whole milk provides the richest, creamiest texture. For an even richer chowder, use half-and-half.
  • Customize the Protein: Substitute cooked chicken or kielbasa sausage for the ham.
  • Add Heat: A pinch of cayenne pepper or red pepper flakes adds a lovely warmth.

Storage Options:

  • Refrigerator: Store leftover chowder in an airtight container in the refrigerator for up to 4 days.
  • Reheating: Reheat gently on the stovetop over low heat, stirring occasionally. Add a splash of milk or broth if the chowder has thickened too much. Avoid boiling.
  • Freezing: Cream-based soups can separate upon thawing. For best results, freeze the soup before adding the cream base, or freeze and then reheat gently, whisking to recombine.
  • Make-Ahead: Prepare the soup through Step 3, cool, and refrigerate. When ready to serve, make the cream base and combine, then reheat gently.

Ham and Potato Corn Chowder is the epitome of cozy, comforting soup—creamy, hearty, and packed with flavor. It’s the kind of meal that warms you from the inside out, perfect for chilly days and quiet evenings at home.

Chewy Snickers Brownies

0

Chewy Snickers Brownies are the ultimate indulgence for chocolate and candy lovers alike—a fudgy, intensely chocolatey brownie packed with chunks of Snickers bars that melt into pockets of caramel, peanut, and nougat goodness. This recipe is a masterclass in creating the perfect brownie texture: a crackly, paper-thin top crust gives way to an incredibly dense, fudgy, and chewy interior that is nothing short of brownie perfection. The magic begins with a rich, deeply chocolate batter made from Dutch-process cocoa, unsweetened chocolate, and a touch of instant espresso, which enhances the chocolate flavor without adding any coffee taste. A generous amount of sugar, eggs, and egg yolks creates that signature chewy texture, while the careful balance of butter and oil ensures the brownies stay moist and fudgy for days.

The brilliance of this recipe lies in the layering of chopped Snickers bars directly into the batter. Half the batter goes into the pan, followed by a generous sprinkle of candy, then the remaining batter, and finally more Snickers on top. As the brownies bake, the Snickers pieces soften and melt slightly, creating gooey, caramelized pockets of sweetness that contrast beautifully with the deep, dark chocolate of the brownie. The result is a bar that is rich, decadent, and utterly irresistible—perfect for bake sales, potlucks, or any occasion that calls for a showstopping dessert. These Chewy Snickers Brownies are guaranteed to be the first to disappear from any table.

Why You’ll Love This Recipe:

  • Incredibly Fudgy and Chewy Texture: The perfect brownie—crackly top, dense center, and ultra-chewy edges.
  • Deep, Intense Chocolate Flavor: Dutch-process cocoa, unsweetened chocolate, and espresso powder create a rich, complex chocolate taste.
  • Gooey Snickers Pockets: Chopped Snickers bars melt into caramel, peanut, and nougat-filled pockets throughout.
  • Easy to Make in a 9×13 Pan: Perfect for feeding a crowd or bringing to a gathering.
  • Bakery-Quality Results: These brownies look and taste like they came from a high-end bakery.

Ingredients:

For the Brownie Batter:*
⅓ cup Dutch-processed cocoa powder
1½ teaspoons instant espresso powder (or instant coffee)
½ cup plus 2 tablespoons boiling water
2 ounces unsweetened chocolate, finely chopped
4 tablespoons (½ stick) unsalted butter, melted
½ cup plus 2 tablespoons vegetable oil
2 large eggs
2 large egg yolks
2 teaspoons vanilla extract
2½ cups granulated sugar
1¾ cups unbleached all-purpose flour
¾ teaspoon table salt

For the Filling and Topping:*
16 “fun-size” Snickers bars, coarsely chopped (about 2 cups chopped)

Instructions:

Step 1: Preheat and Prepare Pan*
Preheat your oven to 350°F (175°C). Butter the bottom and sides of a 9×13-inch metal baking pan. Place a long piece of parchment paper in the bottom of the pan, letting it extend up two sides and overhang slightly on both ends. Place another piece of parchment paper perpendicular to the first, creating a cross. Butter the parchment as well. This sling makes removing the brownies effortless.

Step 2: Bloom the Cocoa*
In a large bowl, whisk together the cocoa powder, instant espresso powder, and boiling water until smooth. Add the finely chopped unsweetened chocolate and whisk until the chocolate is completely melted.

Step 3: Add Wet Ingredients*
Whisk in the melted butter and vegetable oil until combined. Add the eggs, egg yolks, and vanilla extract, continuing to whisk until the mixture is smooth and homogeneous. Whisk in the granulated sugar until fully incorporated.

Step 4: Add Dry Ingredients*
Add the flour and salt to the bowl. Using a rubber spatula, fold and mix gently until just combined. Do not overmix.

Step 5: Assemble the Brownies*
Transfer half of the batter to the prepared pan. Use the spatula to spread it evenly into the corners. Sprinkle three-quarters of the chopped Snickers evenly over the batter. Carefully spread the remaining batter over the candy, smoothing the top. Sprinkle the remaining chopped Snickers over the top.

Step 6: Bake*
Bake for 30-35 minutes, or until a toothpick inserted into the center comes out with just a few moist crumbs attached. Do not overbake. Transfer the pan to a wire rack and cool for 1½ hours.

Step 7: Remove and Cool Completely*
Using the parchment overhangs, carefully lift the brownies from the pan. Return the brownies to the wire rack and let them cool completely, about 1 more hour.

Step 8: Slice and Serve*
Cut into 2-inch squares and serve.

Tips:

  • Use a Metal Pan: A metal baking pan conducts heat more evenly than glass, ensuring perfectly baked brownies.
  • Don’t Overmix: Overmixing the batter once the flour is added can develop gluten, resulting in cakey rather than fudgy brownies.
  • Cool Completely: Patience is key. Letting the brownies cool completely ensures clean, neat slices.
  • Customize the Candy: Swap Snickers for Milky Way, Twix, Reese’s cups, or a mix of your favorite chocolate bars.
  • Add Sea Salt: A sprinkle of flaky sea salt on top before baking enhances the sweet-salty contrast.

Storage Options:

  • Room Temperature: Store brownies in an airtight container at room temperature for up to 5 days.
  • Refrigerator: For longer storage, keep in the refrigerator for up to 1 week. Bring to room temperature before serving for the best texture.
  • Freezer: These brownies freeze beautifully for up to 3 months. Wrap individually or place in a freezer-safe container with parchment between layers. Thaw at room temperature.
  • Make-Ahead: Bake the brownies a day or two in advance and store in an airtight container. The flavors meld and deepen over time.

Chewy Snickers Brownies are the ultimate chocolate lover’s dream—rich, fudgy, and packed with gooey candy bar pockets. Whether for a bake sale, a birthday, or simply a Tuesday, they’re guaranteed to bring smiles and requests for the recipe.

Deep Fried Lobster Tails

0

Deep Fried Lobster Tails are the ultimate indulgence—a luxurious, golden-crusted seafood delicacy that transforms elegant lobster into a crispy, tender, utterly irresistible comfort food. This recipe is a celebration of contrast: the sweet, delicate, succulent lobster meat is enveloped in a shatteringly crisp, well-seasoned crust that gives way to buttery, perfectly cooked seafood with every bite. The magic begins with preparing the lobster tails by “butterflying” them—cutting through the top shell and pulling the meat up to rest on top, creating a beautiful presentation and ensuring even cooking. A quick soak in a tangy mixture of buttermilk and hot sauce tenderizes the meat and adds a subtle kick, while the seasoned flour coating, enhanced with a few tablespoons of the buttermilk mixture to create small clumps, guarantees an exceptionally craggy, crispy crust.

The brilliance of this recipe lies in its technique and the spectacular results it delivers. Deep frying at the proper temperature ensures the lobster cooks quickly, staying tender and juicy inside while the exterior turns a deep, golden brown. The result is a dish that is both elegant and approachable—perfect for a special occasion dinner, a romantic Valentine’s Day meal, or any time you want to impress. Served with drawn butter, lemon wedges, or a creamy dipping sauce, these Deep Fried Lobster Tails are a showstopper that will have everyone at the table reaching for more.

Why You’ll Love This Recipe:

  • Incredibly Crispy, Craggy Crust: The buttermilk-clump flour technique creates an extra-crunchy, golden coating.
  • Tender, Sweet Lobster Inside: Quick frying at the right temperature keeps the lobster juicy and perfectly cooked.
  • Easy to Prepare at Home: Simple ingredients and straightforward steps make this impressive dish achievable.
  • Perfect for Special Occasions: A showstopping centerpiece for date night, holidays, or celebrations.
  • Customizable Heat Level: Adjust the hot sauce in the buttermilk soak to your spice preference.

Ingredients:

For the Lobster:*
2-4 large lobster tails
1 cup all-purpose flour
1 tablespoon cornstarch
1 cup buttermilk (or almond milk)
1 tablespoon hot sauce (adjust to taste)
1 teaspoon salt, plus more for finishing
1 teaspoon black pepper
Enough canola oil to submerge the lobster tails for deep frying

Instructions:

Step 1: Heat the Oil*
Pour enough canola oil into a deep pot or Dutch oven to submerge the lobster tails. Heat the oil to 350°F (175°C), using a deep-fry thermometer to monitor the temperature.

Step 2: Prepare the Lobster Tails*
Rinse the lobster tails under cold water and pat them dry. Using kitchen shears or a sharp knife, carefully cut a slit down the center of the top shell. Gently pull the lobster meat up and partially out of the shell, resting it on top of the shell. Be careful not to detach the meat completely from the tail end—it should remain attached at the very tip for stability.

Step 3: Soak in Buttermilk Mixture*
In a medium bowl, whisk together the buttermilk and hot sauce. Submerge the prepared lobster tails in the mixture, ensuring they are fully coated. Let them soak for 5 minutes at room temperature.

Step 4: Prepare the Flour Coating*
In a shallow dish, combine the all-purpose flour, cornstarch, salt, and black pepper. Whisk to blend. Pour 2-3 tablespoons of the buttermilk mixture into the flour and stir with a fork to create small clumps. These clumps will create an extra-craggy, crispy crust when fried.

Step 5: Dredge the Lobster Tails*
Remove each lobster tail from the buttermilk mixture, allowing any excess to drip off. Dredge each tail in the seasoned flour mixture, pressing gently to adhere the flour and clumps to the meat and shell. Shake off any excess flour.

Step 6: Deep Fry*
Carefully lower the coated lobster tails into the preheated 350°F (175°C) oil. Fry for 6-8 minutes, turning once halfway through, until the coating is deep golden brown and the lobster is cooked through (internal temperature should reach 140°F/60°C). Fry in batches if necessary to avoid overcrowding.

Step 7: Drain and Serve*
Remove the lobster tails from the oil using tongs or a slotted spoon. Drain on a brown paper bag or a wire rack set over a baking sheet. Sprinkle immediately with a dash of sea salt. Serve hot with drawn butter, lemon wedges, or your favorite dipping sauce.

Tips:

  • Monitor Oil Temperature: Maintain a steady 350°F (175°C). Too cool, and the coating will be greasy; too hot, and the outside will burn before the lobster cooks through.
  • Don’t Overcook: Lobster cooks quickly. Overcooked lobster becomes tough and rubbery. Aim for an internal temperature of 140°F (60°C).
  • Create a Stable Base: Leaving the meat attached at the tail tip helps the lobster stay in place during frying.
  • Make Clumps for Extra Crispiness: The small clumps of flour and buttermilk are the secret to a shatteringly crisp coating.
  • Serve Immediately: Fried lobster tails are best enjoyed hot and fresh.

Storage Options:

  • Not Recommended for Storage: Deep fried lobster tails are best enjoyed immediately after cooking. The coating loses its crispness upon refrigeration.
  • Reheating: If necessary, reheat in a 375°F (190°C) oven or air fryer for 5-7 minutes to restore some crispness. The microwave will make the coating soggy.

Deep Fried Lobster Tails are a decadent, unforgettable dish that brings restaurant-quality indulgence to your home kitchen. With their golden, crispy exterior and tender, sweet interior, they’re the perfect way to celebrate a special occasion or simply treat yourself to something extraordinary.

Cheesy Meatball Potato Bake

0

Cheesy Meatball Potato Bake is the ultimate all-in-one comfort food casserole—a hearty, satisfying dish that layers tender sliced potatoes, juicy homemade meatballs, and a luscious, creamy cheese sauce, all baked to golden, bubbly perfection. This recipe is a celebration of rustic, family-friendly cooking, transforming simple ingredients into a warm, soul-satisfying meal that comes together in one dish. The magic begins with small, flavorful meatballs made from ground beef, seasoned with onion, garlic, paprika, and breadcrumbs, then nestled between layers of thinly sliced potatoes. A rich, homemade cheese sauce—creamy with butter, milk, and a generous amount of shredded cheddar or mozzarella—is poured over the top, seeping down between the layers to coat every bite. As it bakes, the potatoes become tender, the meatballs stay juicy, and the cheese sauce thickens into a silky, golden blanket.

The brilliance of this recipe lies in its simplicity and the incredible depth of flavor achieved with basic ingredients. There’s no need to pre-cook the meatballs or par-boil the potatoes—everything cooks together in the oven, making for an easy, hands-off meal. The final sprinkle of extra cheese creates a gloriously golden, bubbly crust that’s impossible to resist. Whether served as a weeknight dinner for the family or a hearty dish for a potluck, this Cheesy Meatball Potato Bake is guaranteed to satisfy. Pair it with a simple green salad or steamed vegetables for a complete meal, and watch it disappear.

Why You’ll Love This Recipe:

  • Complete One-Dish Meal: Protein, starch, and creamy cheese sauce all bake together in a single dish.
  • Juicy, Flavorful Meatballs: Seasoned with onion, garlic, and paprika, they stay tender and delicious.
  • Creamy, Dreamy Cheese Sauce: A from-scratch sauce that’s velvety smooth and packed with cheesy flavor.
  • Perfectly Tender Potatoes: Thinly sliced potatoes cook to soft, buttery perfection in the oven.
  • Family-Friendly and Crowd-Pleasing: A guaranteed hit with both kids and adults.

Ingredients:

For the Meatballs:*
500 g (about 1.1 lbs) ground beef (or beef and turkey mix)
1 small onion, finely chopped
2 cloves garlic, minced
1 large egg
½ cup (60 g) breadcrumbs
1 teaspoon salt
½ teaspoon black pepper
1 teaspoon paprika (optional)

For the Potatoes:*
600 g (about 5 medium) potatoes, peeled and thinly sliced (about 3 mm thick)

For the Creamy Cheese Sauce:*
2 tablespoons butter
2 tablespoons all-purpose flour
2 cups (480 ml) whole milk
1 ½ cups shredded cheese (cheddar, mozzarella, or a mix)
½ teaspoon salt
¼ teaspoon black pepper

For the Topping:*
½ cup shredded cheese (for golden top)
Fresh parsley, chopped (optional, for garnish)

Instructions:

Step 1: Preheat Oven and Prepare Dish*
Preheat your oven to 375°F (190°C). Lightly grease a 9×13-inch baking dish.

Step 2: Make the Meatballs*
In a large bowl, combine the ground beef, finely chopped onion, minced garlic, egg, breadcrumbs, salt, pepper, and paprika (if using). Mix gently with your hands until just combined—do not overmix. Shape the mixture into small meatballs, about 2-3 cm (1 inch) in diameter.

Step 3: Slice the Potatoes*
Peel the potatoes (if desired) and slice them thinly, about 3 mm (⅛ inch) thick. Even slicing ensures they cook evenly.

Step 4: Make the Cheese Sauce*
In a medium saucepan over medium heat, melt the butter. Add the flour and whisk constantly for 1 minute to cook out the raw flour taste. Gradually pour in the milk, whisking continuously to prevent lumps. Cook, stirring frequently, until the sauce thickens slightly, about 3-5 minutes. Remove from heat and stir in 1½ cups of shredded cheese, salt, and pepper until smooth and creamy.

Step 5: Assemble the Bake*
Arrange half of the potato slices in an even layer in the prepared baking dish. Place the meatballs evenly over the potatoes. Top with the remaining potato slices. Pour the cheese sauce evenly over everything, ensuring it seeps down between the layers.

Step 6: Bake*
Cover the baking dish with foil. Bake for 35 minutes. Remove the foil, sprinkle the remaining ½ cup of shredded cheese over the top, and bake uncovered for an additional 15-20 minutes, until the potatoes are tender, the sauce is bubbly, and the top is golden brown.

Step 7: Rest and Serve*
Remove from the oven and let the casserole rest for 10 minutes before serving. This allows the layers to set for cleaner slices. Garnish with fresh parsley if desired.

Tips:

  • Slice Potatoes Thinly and Evenly: Uniform slices ensure even cooking. A mandoline slicer is helpful.
  • Don’t Overmix Meatballs: Overworking the meat can make them dense and tough. Mix just until combined.
  • Use Full-Fat Milk: Whole milk creates the creamiest, most luscious sauce.
  • Shred Your Own Cheese: Pre-shredded cheese contains anti-caking agents that can affect melting. Shred from a block for best results.
  • Customize the Meat: Use ground turkey, chicken, or a mix of beef and pork.

Storage Options:

  • Refrigerator: Store leftovers in an airtight container in the refrigerator for up to 4 days.
  • Reheating: Reheat individual portions in the microwave, or cover the baking dish with foil and reheat in a 325°F (165°C) oven until warmed through.
  • Freezing: This casserole freezes well for up to 2 months. Cool completely, wrap tightly in plastic wrap and foil, and freeze. Thaw overnight in the refrigerator before reheating.
  • Make-Ahead: Assemble the casserole completely (without baking), cover, and refrigerate for up to 24 hours. Bake as directed, adding 10-15 minutes to the covered bake time.

Cheesy Meatball Potato Bake is the ultimate comfort food—a warm, creamy, cheesy, and satisfying casserole that brings together everything you love in a hearty meal. It’s simple enough for a weeknight and special enough for Sunday dinner.

Slow Cooker Honey Butter Sweet Potatoes

0

Slow Cooker Honey Butter Sweet Potatoes are the epitome of cozy, effortless comfort food—a warm, tender, and gloriously sweet side dish that fills your home with the irresistible aroma of cinnamon and honey as it slowly cooks to perfection. This recipe is a celebration of simplicity, transforming humble sweet potatoes into a velvety, buttery, caramelized masterpiece using just a handful of ingredients and the gentle heat of a slow cooker. The magic begins with thinly sliced sweet potatoes, layered casually in the crock, then bathed in a luscious mixture of melted butter, golden honey, warm cinnamon, and a pinch of salt to balance the sweetness. As they cook low and slow for 4-5 hours, the slices become fork-tender, absorbing all the buttery honey glaze while the edges caramelize slightly, creating a dish that is both rustic and elegant.

The brilliance of this recipe lies in its hands-off, set-it-and-forget-it method and the incredible depth of flavor it achieves with minimal effort. There’s no need to peel and boil, no watching a pot on the stove—just slice, toss, and let the slow cooker work its magic. The result is a side dish that tastes like a warm hug: tender sweet potato slices coated in a silky, cinnamon-kissed honey butter sauce that pools at the bottom of the pot, just begging to be spooned over each serving. Perfect for holiday feasts, Sunday suppers, or any day you crave a little extra warmth and sweetness, these Slow Cooker Honey Butter Sweet Potatoes are guaranteed to become a beloved staple in your recipe collection.

Why You’ll Love This Recipe:

  • Effortless Slow Cooker Method: No boiling, no oven—just slice, toss, and let the crockpot do the work.
  • Perfectly Tender and Caramelized: Low, slow cooking creates sweet potatoes that are soft, buttery, and lightly caramelized.
  • Warm, Cozy Flavors: The combination of honey, butter, and cinnamon is pure comfort.
  • Versatile Side Dish: Pairs beautifully with roasted meats, holiday turkeys, or as a vegetarian main.
  • Naturally Sweet and Wholesome: Made with real ingredients and no refined sugar.

Ingredients:

For the Sweet Potatoes:*
4 medium sweet potatoes, peeled and thinly sliced (about ¼ inch thick)
¼ cup honey (local honey preferred; maple syrup works as a substitute)
¼ cup unsalted butter, melted (salted butter works too—adjust added salt)
1 teaspoon ground cinnamon (or more, if you love extra cinnamon)
½ teaspoon salt (to balance the sweetness)

Instructions:

Step 1: Prepare the Sweet Potatoes*
Peel the sweet potatoes and slice them into thin, even rounds, about ¼ inch thick. Place the slices directly into the slow cooker. No need to arrange them perfectly—a rustic, layered pile works just fine.

Step 2: Make the Honey Butter Mixture*
In a small bowl, combine the melted butter, honey, cinnamon, and salt. Whisk or stir until well blended and smooth.

Step 3: Coat the Sweet Potatoes*
Pour the honey butter mixture evenly over the sweet potato slices. Use a spoon or your hands to gently toss and coat the slices until they are all well covered.

Step 4: Cook Low and Slow*
Cover the slow cooker with the lid. Cook on LOW for 4 to 5 hours, or until the sweet potatoes are fork-tender and have absorbed the buttery sweetness. Avoid lifting the lid during cooking to maintain heat and moisture.

Step 5: Serve*
Gently stir the sweet potatoes before serving to coat all the pieces with the sauce that has pooled at the bottom. Serve warm.

Tips:

  • Slice Evenly: Uniform ¼-inch slices ensure even cooking. A mandoline slicer makes quick work of this.
  • Don’t Overcook: Check for tenderness at the 4-hour mark. Overcooked sweet potatoes can become mushy.
  • Adjust Sweetness: For a less sweet version, reduce honey to 3 tablespoons. For extra sweetness, drizzle with additional honey before serving.
  • Add Warm Spices: A pinch of nutmeg, allspice, or ground ginger complements the cinnamon beautifully.
  • Make it Savory-Sweet: Add a sprinkle of fresh thyme or rosemary for an herbaceous twist.

Storage Options:

  • Refrigerator: Store leftovers in an airtight container in the refrigerator for up to 5 days.
  • Reheating: Reheat gently in the microwave or in a covered skillet over low heat. You can also return them to the slow cooker on LOW for 30 minutes.
  • Freezing: Not recommended—sweet potatoes tend to become watery and lose their texture upon thawing.
  • Make-Ahead: Assemble the dish in the slow cooker insert (without cooking), cover, and refrigerate overnight. Add an extra 30-60 minutes to the cook time when starting from cold.

Slow Cooker Honey Butter Sweet Potatoes are the perfect side dish for those days when you crave warmth, sweetness, and comfort without the fuss. With their tender texture and rich, buttery glaze, they’re a simple pleasure that feels like a cozy afternoon in a bowl.

Keto Bacon Egg and Cheese Rolls

0

Keto Bacon Egg and Cheese Rolls are a glorious low-carb breakfast innovation—a warm, flaky, cheese-infused dough wrapped around a savory filling of soft scrambled eggs, crispy bacon, and melted cheddar, all baked to golden perfection. This recipe is a masterclass in keto baking, transforming a simple combination of mozzarella, cream cheese, and almond flour into a pliable, dough-like base that is shockingly similar to traditional pastry. The magic begins with the famous “fathead” dough, where melted cheeses create a stretchy, workable texture that rolls, shapes, and bakes beautifully. This dough is rolled thin, sliced into triangles, then filled with a luxurious mixture of soft-scrambled eggs enriched with cream cheese and cheddar, plus a generous piece of crispy bacon. Rolled into crescents, brushed with egg wash, and baked until deep golden brown, these rolls emerge from the oven with a flaky, cheesy crust and a warm, savory center.

The brilliance of this recipe lies in its clever construction and the incredible satisfaction it delivers to those following a low-carb or keto lifestyle. The dough, while simple to make, requires a specific technique—melting the cheeses, incorporating the dry ingredients, and working the dough while warm—but the result is a versatile, bread-like base that’s perfect for savory fillings. Each roll is a complete, portable breakfast: protein-packed eggs, salty bacon, and melty cheese, all wrapped in a satisfying, bread-like shell. Whether enjoyed fresh from the oven for a leisurely weekend brunch or meal-prepped for busy weekday mornings, these Keto Bacon Egg and Cheese Rolls are proof that a low-carb diet can be delicious, comforting, and endlessly creative.

Why You’ll Love This Recipe:

  • Complete Low-Carb Breakfast in a Portable Roll: Eggs, bacon, and cheese wrapped in a satisfying, bread-like keto dough.
  • Flaky, Cheesy, Golden Crust: The fathead dough bakes into a beautiful, pastry-like exterior.
  • Make-Ahead and Meal-Prep Friendly: Perfect for grab-and-go breakfasts throughout the week.
  • Customizable Filling: Easily swap the bacon for sausage, ham, or add spinach and mushrooms.
  • Satisfies the Bread Craving: A delicious keto-friendly alternative to traditional breakfast pastries.

Ingredients:

For the Keto Dough:*
1 ½ cups (170g) shredded low-moisture mozzarella cheese
1 ounce (28g) cream cheese, cubed
½ cup (56g) blanched almond flour
½ teaspoon baking powder
1 large egg white, beaten

For the Filling:*
5 large eggs
1 ounce (28g) cream cheese
3 large slices of bacon, cut in half and cooked until crisp
¾ cup (75g) shredded cheddar cheese
Salt and freshly ground black pepper, to taste

For the Topping:*
1 large egg white, beaten (for egg wash)

Instructions:

Step 1: Prepare the Filling First
Before making the dough, prepare the filling as the dough is best worked with while warm. Cook the bacon slices until crisp, then cut each slice in half (each roll will use half a slice). In a small bowl, whisk the 5 eggs.

Step 2: Scramble the Eggs*
In a non-stick skillet over medium-low heat, cook the scrambled eggs, stirring gently. When the eggs are about halfway cooked, add the 1 ounce of cream cheese and continue stirring until the eggs are soft and creamy. Remove from heat. Transfer to a bowl and stir in the shredded cheddar cheese. Season with salt and pepper to taste. Set aside.

Step 3: Preheat Oven*
Preheat your oven to 350°F (175°C). Line a baking sheet with parchment paper or a silicone baking mat.

Step 4: Make the Keto Dough*
In a large microwave-safe bowl, combine the shredded mozzarella and the cubed cream cheese. Microwave in 30-second increments, stirring between each, until the cheeses are completely melted and smooth (about 1-1½ minutes total). In a small bowl, whisk together the almond flour and baking powder. Add the almond flour mixture to the melted cheeses and stir to combine.

Step 5: Add the Egg White*
Add the beaten egg white to the cheese and flour mixture. Stir well, then use your hands to work the dough until the egg white is fully incorporated and no white streaks remain. If the dough feels too wet, add 1 tablespoon of almond flour at a time until it reaches a workable consistency.

Step 6: Roll and Shape*
Place the dough on a silicone baking mat or a piece of parchment paper. Place a second piece of parchment or another silicone mat on top. Roll or press the dough into a thin rectangle, about 10×14 inches. Remove the top layer. Using a knife or pizza cutter, slice the dough into 6 triangles (like slicing a pizza into wedges).

Step 7: Fill and Roll*
At the widest end of each triangle, place a heaping spoonful of the egg mixture and half a slice of crispy bacon. Starting at the wide end, tightly roll each triangle toward the point, enclosing the filling. Place the rolls on the prepared baking sheet, point-side down.

Step 8: Egg Wash and Bake*
Brush the tops of each roll with the remaining beaten egg white. Bake for 15-18 minutes, until the rolls are puffed and deep golden brown.

Step 9: Serve*
Let the rolls cool on the baking sheet for 5 minutes before serving. Enjoy warm.

Tips:

  • Work the Dough While Warm: The fathead dough becomes harder to shape as it cools. If it stiffens, microwave for 10-15 seconds to soften.
  • Don’t Overfill: Use about 1-2 tablespoons of filling per roll to ensure they seal properly.
  • Use a Silicone Mat: Rolling the dough between silicone mats prevents sticking and makes it easy to achieve a thin, even rectangle.
  • Soft Scramble the Eggs: Cooking the eggs low and slow with cream cheese ensures they remain creamy and soft, not dry and crumbly.
  • Customize the Filling: Add cooked sausage, diced ham, sautéed mushrooms, or wilted spinach.

Storage Options:

  • Refrigerator: Store cooled rolls in an airtight container in the refrigerator for up to 5 days.
  • Reheating: Reheat in a 350°F (175°C) oven or air fryer for 5-7 minutes to restore crispness. The microwave works but may make the dough soft.
  • Freezing: These rolls freeze beautifully for up to 2 months. Cool completely, wrap individually in plastic wrap, and place in a freezer bag. Thaw in the refrigerator overnight and reheat in the oven.
  • Make-Ahead: Prepare the filling and bacon up to 2 days in advance. Assemble and bake fresh when ready to serve.

Keto Bacon Egg and Cheese Rolls are a game-changer for low-carb breakfasts. With their flaky, cheesy dough and savory, protein-packed filling, they prove that eating keto can be delicious, satisfying, and endlessly creative.