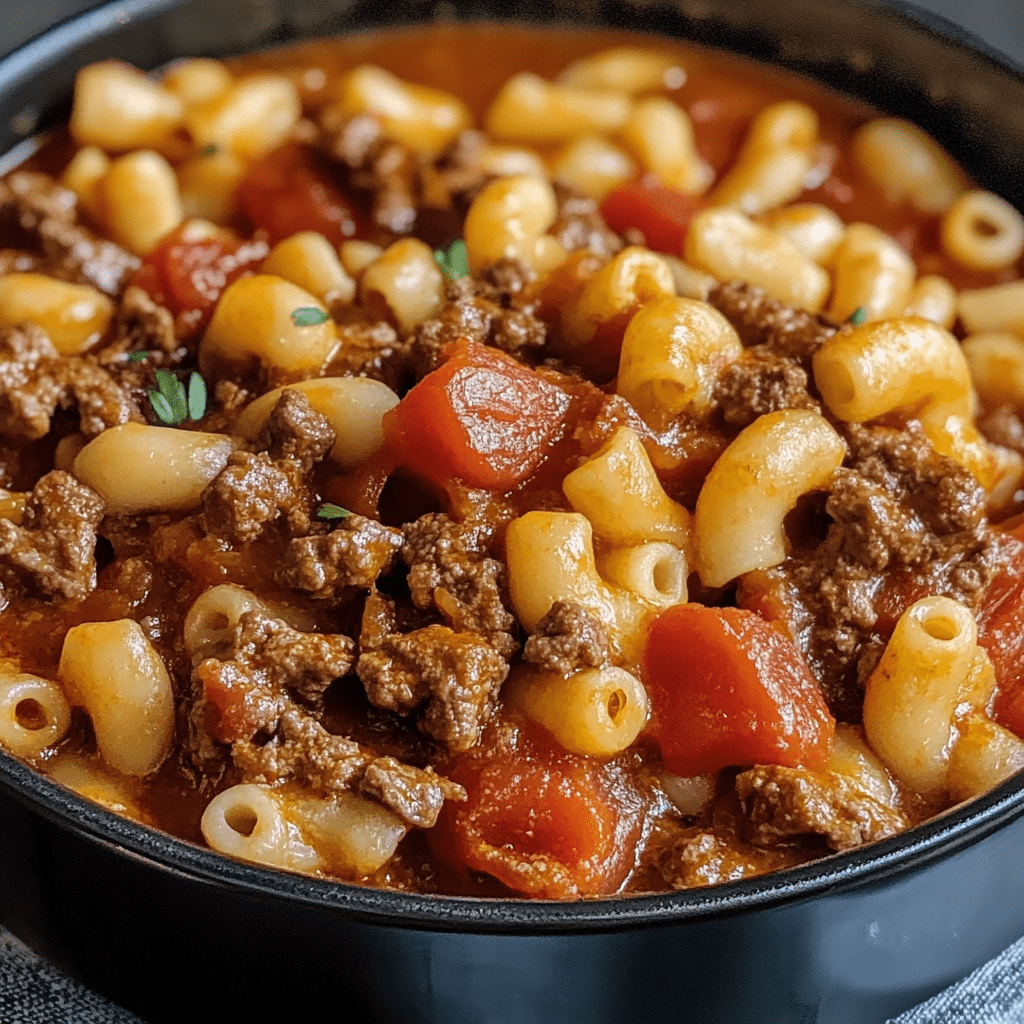
Caramel Cheesecake-Stuffed Churro Rings

0

Caramel Cheesecake-Stuffed Churro Rings combine two beloved desserts into one decadent treat. The crispy, golden churro rings are coated in cinnamon sugar and filled with creamy cheesecake and luscious caramel. Each bite is a delightful contrast of textures and flavors, from the crunchy exterior to the smooth and rich filling. These churro rings are perfect for special occasions, parties, or anytime you want to impress your guests with something extraordinary.

What makes this recipe truly irresistible is its fusion of flavors and presentation. The cheesecake filling adds a creamy tanginess that balances the sweetness of the caramel sauce, while the churro dough provides a slightly crisp texture that melts in your mouth. Whether served warm as a dessert centerpiece or enjoyed as a fun snack, these stuffed churro rings are guaranteed to leave everyone reaching for seconds.

Why You’ll Love This Recipe

Irresistible Combination: Crispy churros paired with creamy cheesecake and caramel create a dessert dream.

Fun and Unique Presentation: The ring shape is perfect for parties or as an eye-catching dessert.

Make-Ahead Options: Prep the cheesecake filling in advance for easy assembly.

Ingredients

For the Churro Dough:

• 1 cup water

• 1/2 cup unsalted butter

• 1/4 teaspoon salt

• 1 cup all-purpose flour

• 3 large eggs

• 1 teaspoon vanilla extract

For the Cheesecake Filling:

• 1 package (8 oz) cream cheese, softened

• 1/4 cup granulated sugar

• 1 teaspoon vanilla extract

For the Caramel Filling:

• 1/2 cup caramel sauce (store-bought or homemade)

For the Cinnamon Sugar Coating:

• 1 cup granulated sugar

• 1 tablespoon ground cinnamon

For Frying:

• Vegetable oil

Instructions

Prepare the Cheesecake Filling:

1. In a medium bowl, beat the softened cream cheese, granulated sugar, and vanilla extract until smooth and creamy.

2. Transfer the mixture to a piping bag fitted with a round tip. Refrigerate until needed.

Prepare the Churro Dough:

1. Combine water, unsalted butter, and salt in a medium saucepan. Bring to a boil over medium heat.

2. Once boiling, reduce the heat to low and add the flour all at once. Stir vigorously until the mixture forms a smooth ball and pulls away from the sides of the pan.

3. Remove from heat and let the dough cool for 5 minutes.

4. Add the eggs one at a time, mixing thoroughly after each addition until the dough is smooth and glossy. Stir in the vanilla extract.

5. Transfer the dough to a piping bag fitted with a large star tip.

Form and Fry the Churro Rings:

1. Heat vegetable oil in a large, deep saucepan or deep fryer to 350°F (175°C).

2. Pipe rings of churro dough onto small squares of parchment paper.

3. Carefully lower the parchment paper into the hot oil, allowing the dough rings to separate from the paper. Fry in batches until golden brown and crispy, about 2-3 minutes per side.

4. Use a slotted spoon to transfer churro rings to paper towels to drain. Toss them in the cinnamon sugar coating while still warm.

Assemble the Churro Rings:

1. Once the churro rings have cooled slightly, use a small knife to create a slit on the side of each ring.

2. Pipe the cheesecake filling into each ring until full.

3. Drizzle or pipe the caramel sauce into the cheesecake-filled churro rings.

Serve:

Serve the churro rings immediately while warm, with the cheesecake filling slightly gooey and the caramel perfectly drizzled.

Tips

Oil Temperature: Keep the oil at a steady 350°F for even frying. Use a thermometer to monitor the temperature.

Mess-Free Piping: Use a large star tip for the dough and a fine round tip for the cheesecake filling for precision.

Customize the Filling: Swap out caramel for chocolate ganache or fruit compote for a twist.

Storage Options

Room Temperature: Store unfilled churro rings in an airtight container for up to 1 day. Reheat briefly in the oven before serving.

Refrigeration: Store assembled churro rings in the refrigerator for up to 2 days. Note that the churros may lose some crispness.

Freezing: Freeze unfilled churro rings in a freezer-safe bag for up to 1 month. Reheat in a 350°F oven until crisp before filling and serving.

Caramel Cheesecake-Stuffed Churro Rings bring together the best of crispy churros and creamy cheesecake, making them a must-try dessert that’s as delicious as it is visually stunning.

Cherry Pie Bites

0

Cherry Pie Bites are a quick and delightful dessert that combines the flaky, buttery goodness of crescent dough with the sweet-tart flavor of cherry pie filling. Perfect for satisfying a sweet craving or impressing guests with minimal effort, these bite-sized treats are a great addition to any gathering or casual snack.

With only two ingredients and a simple preparation process, Cherry Pie Bites are easy enough for novice bakers yet impressive enough to serve at a party. Their golden brown crust and gooey cherry center make them irresistible!

Why You’ll Love This Recipe

Quick and Easy: Ready in under 20 minutes with just two main ingredients.

Versatile: Substitute with your favorite pie fillings for endless variations.

Perfectly Portioned: Bite-sized for convenient serving and snacking.

Ingredients

1 can (21 ounces) cherry pie filling

2 tubes (8 ounces each) crescent roll dough

Instructions

Step 1: Prepare the Muffin Tin

1. Preheat your oven to 375°F (190°C).

2. Lightly grease a muffin tin or line it with muffin cups for easy cleanup.

Step 2: Shape the Crescent Dough

1. Unroll the crescent roll dough and separate it into individual triangles.

2. Place each triangle into a muffin tin cup, pressing gently to form a cup shape.

Step 3: Add the Filling

1. Spoon a generous scoop of cherry pie filling into each crescent dough cup.

Step 4: Seal the Dough

1. Gently fold the corners of the dough over the filling, pinching them together to seal.

Step 5: Bake

1. Place the muffin tin in the preheated oven.

2. Bake for about 12 minutes, or until the dough is golden brown and cooked through.

Step 6: Cool and Serve

1. Remove the muffin tin from the oven and allow the Cherry Pie Bites to cool slightly.

2. Serve warm or at room temperature, as desired.

Tips

Extra Flavor: Dust with powdered sugar or drizzle with icing for a sweet finishing touch.

Filling Options: Try apple, blueberry, or peach pie filling for variety.

Storage: Store leftovers in an airtight container at room temperature for up to 2 days.

Storage Options

Refrigeration: These can be stored in the refrigerator for up to 3 days. Reheat in the oven for a freshly baked texture.

Freezing: Freeze after baking and cooling for up to 1 month. Thaw and reheat before serving.

Cherry Pie Bites are a delightful combination of convenience and flavor, perfect for any occasion. Whether you’re serving them to guests or enjoying them as a quick dessert, these little treats are sure to please. Enjoy!

Chocolate Peanut Butter Rice Krispie Cups

0

Chocolate Peanut Butter Rice Krispie Cups are the ultimate no-bake treat, combining the crispy texture of Rice Krispies with the creamy, nutty richness of peanut butter and a luxurious layer of chocolate. Perfect for snacking, parties, or a quick dessert fix, these cups are easy to make yet utterly indulgent.

Each bite delivers a delightful contrast of crunch and smoothness, balanced by the sweetness of honey and the richness of chocolate. Whether you’re sharing them with loved ones or enjoying them solo, these treats promise pure joy in every bite.

Why You’ll Love This Recipe

No-Bake Simplicity: No oven required, making it a breeze to prepare.

Perfect Texture: The crunch of Rice Krispies meets creamy peanut butter and velvety chocolate.

Versatile: Easily adaptable for vegan or gluten-free diets.

Ingredients

3 cups Rice Krispies cereal

1½ cups chocolate chips (vegan chocolate chips can be used)

1 cup chunky peanut butter

6 tablespoons honey

⅛ teaspoon salt

Instructions

Step 1: Prepare the Muffin Tin

1. Line a muffin tin with paper or silicone liners to ensure easy removal.

Step 2: Make the Peanut Butter Mixture

1. In a saucepan over low heat, combine the peanut butter, honey, and salt.

2. Stir continuously until the mixture becomes smooth and pourable.

3. Remove the saucepan from the heat.

Step 3: Combine with Rice Krispies

1. Pour the Rice Krispies into the peanut butter mixture.

2. Gently fold until every piece of cereal is coated evenly.

Step 4: Form the Cups

1. Spoon the coated Rice Krispies mixture into the prepared muffin tin.

2. Press gently to create a firm base for the cups.

Step 5: Melt the Chocolate

1. In a separate pan or microwave-safe bowl, melt the chocolate chips until smooth and glossy. Use short bursts in the microwave, stirring frequently to avoid burning.

2. Spoon the melted chocolate over the peanut butter layer in each cup, spreading it evenly to cover.

Step 6: Chill

1. Place the muffin tin in the refrigerator and let the cups chill for at least 1 hour, or until the chocolate is fully set.

Step 7: Serve and Enjoy

1. Once set, remove the cups from the refrigerator.

2. Peel away the liners and enjoy the crunchy, chocolatey, peanut buttery bliss!

Tips

Ingredient Quality: Use high-quality chocolate chips for a richer, smoother topping.

Customizable: Add a sprinkle of sea salt or chopped nuts on top of the chocolate for an extra touch.

Storage: Store in an airtight container in the refrigerator for up to 1 week.

Storage Options

Refrigeration: Best stored in the refrigerator to keep the chocolate firm and the texture intact.

Freezing: These cups freeze well. Store in a freezer-safe container for up to 2 months. Thaw in the refrigerator before serving.

Chocolate Peanut Butter Rice Krispie Cups are an easy, no-fuss treat that delivers big on flavor and texture. Perfect for satisfying your sweet tooth or impressing guests, these little cups are guaranteed to disappear quickly. Enjoy!

Texas Sheet Cake

0

Texas Sheet Cake is a rich, chocolatey dessert that’s as easy to make as it is to devour. Known for its moist, tender crumb and decadent cocoa icing, this Southern classic is perfect for celebrations, potlucks, or any time you’re craving chocolate. Topped with pecans for extra texture and flavor, this cake is baked in a thin sheet pan, making it quick to cook and simple to serve.

The real magic happens when the warm cocoa icing is poured over the freshly baked cake, creating a glossy, fudge-like topping that seeps into the layers. Whether enjoyed warm or at room temperature, this dessert is guaranteed to disappear fast!

Why You’ll Love This Recipe

Quick and Easy: Made with simple ingredients and ready in under an hour.

Rich Flavor: A double dose of cocoa in the cake and icing satisfies every chocolate craving.

Perfect for Sharing: Baked in a large pan, it’s ideal for feeding a crowd.

Ingredients

For the Cake:

1 cup butter

1 cup water

¼ cup cocoa powder

2 cups sugar

2 cups all-purpose flour

⅛ teaspoon salt

2 eggs

1 teaspoon baking soda

½ cup sour cream

1 teaspoon vanilla extract

For the Icing:

½ cup butter

¼ cup cocoa powder

¼ cup plus 2 tablespoons milk

1 pound confectioners’ sugar, sifted

½ teaspoon vanilla extract

Chopped pecans (optional)

Instructions

Step 1: Prepare the Cake

1. Preheat your oven to 350°F (175°C). Grease a sheet cake pan or jelly roll pan.

2. In a medium saucepan over medium heat, combine the butter, water, and cocoa powder. Stir until the butter melts and the mixture is smooth. Remove from heat and set aside.

3. In a large mixing bowl, combine the sugar, flour, and salt. Add the eggs and baking soda, mixing until combined.

4. Gradually add the hot cocoa mixture to the dry ingredients, stirring continuously to prevent scrambling the eggs.

5. Mix in the sour cream and vanilla extract until the batter is smooth.

6. Pour the batter into the prepared pan, spreading it evenly.

7. Bake for 20 minutes, or until a toothpick inserted in the center comes out clean.

Step 2: Prepare the Icing

1. While the cake bakes, make the icing. In a saucepan over medium heat, combine the butter, cocoa powder, and milk. Bring the mixture to a boil, then immediately remove it from heat.

2. Using a mixer, beat the confectioners’ sugar and vanilla extract into the cocoa mixture until smooth.

3. If using pecans, you can stir them into the icing or sprinkle them on top after icing the cake.

Step 3: Ice the Cake

1. Pour the hot icing over the cake as soon as it comes out of the oven. Spread it evenly with a spatula to cover the entire surface.

2. If you didn’t mix the pecans into the icing, sprinkle them over the top now.

Step 4: Cool and Serve

1. Allow the cake to cool slightly before cutting it into squares or rectangles.

2. Serve warm for a gooey treat, or at room temperature for a firmer texture.

Tips

Sifting Sugar: Always sift the confectioners’ sugar to ensure a smooth icing.

Pecan Variations: Toast the pecans before adding for a deeper, nuttier flavor.

Storage: Cover the cake tightly and store at room temperature for up to 3 days or refrigerate for up to a week.

Texas Sheet Cake is a timeless dessert that’s simple to make and impossible to resist. Its rich, fudgy icing and tender cake make it a favorite for any occasion. Enjoy!

Homemade Blackberry Cobbler

0

Homemade Blackberry Cobbler is the epitome of comfort dessert, offering the perfect balance between tart blackberries and a buttery, golden crust. This dessert is easy to prepare yet delivers a wow factor with its rustic appearance and incredible flavor. The natural sweetness of blackberries is coaxed out through maceration, while the batter bakes into a tender, slightly crisp topping that soaks up the luscious berry juices.

Whether served warm with cream, a scoop of vanilla ice cream, or simply enjoyed on its own, this cobbler is a celebration of simplicity and deliciousness. It’s perfect for gatherings, a sweet family treat, or even a decadent breakfast the next day!

Why You’ll Love This Recipe

Simple Ingredients: Pantry staples come together to make a crowd-pleasing dessert.

Fresh Flavor: Highlighting the natural sweetness of blackberries with a touch of sugar.

Rustic Elegance: A dessert that looks as good as it tastes, with minimal effort.

Ingredients

2½ cups fresh blackberries, washed

1 cup sugar

1 cup flour

2 teaspoons baking powder

½ teaspoon salt

1 cup milk

1 stick unsalted butter, melted

Instructions

Step 1: Macerate the Blackberries

1. In a large bowl, stir together the blackberries and sugar.

2. Let the mixture sit for 25-30 minutes to allow the berries to release their juices and absorb the sugar. This process, called maceration, enhances the flavor of the blackberries.

Step 2: Preheat the Oven and Prepare the Batter

1. After about 20 minutes, preheat your oven to 375°F (190°C).

2. In another bowl, stir together the flour, baking powder, salt, and milk with a wooden spoon.

3. Add the melted butter to the mixture and stir until smooth and well combined.

Step 3: Assemble the Cobbler

1. Choose a small baking dish (such as an 8×8-inch pan).

2. Pour the batter into the baking dish and smooth it out with a spatula. No need to grease the pan; the butter in the batter will suffice.

3. Evenly distribute the macerated blackberries, along with all their juices, over the batter.

Step 4: Bake the Cobbler

1. Place the dish in the preheated oven and bake for 45-60 minutes, or until the top is golden brown and the batter has puffed up around the bubbling blackberries.

2. Remove from the oven and let the cobbler cool for at least 15 minutes to set up and make it easier to slice.

Step 5: Serve and Enjoy

1. Serve the cobbler warm or at room temperature.

2. Pair with warmed cream, fresh whipped cream, or a scoop of vanilla ice cream for an extra indulgent treat.

Tips

Berry Substitutions: If blackberries aren’t available, substitute with blueberries, raspberries, or a mix of berries.

Golden Perfection: Keep an eye on the cobbler towards the end of baking. If you prefer a lighter crust, bake for less time.

Storage: Cover the cobbler with foil and store at room temperature for 2-3 days or in the refrigerator for up to 5 days. Reheat in the oven to refresh its texture.

Homemade Blackberry Cobbler is a timeless dessert that’s as delightful to make as it is to eat. With its bubbling, juicy filling and crisp, buttery crust, this cobbler is sure to become a favorite in your recipe collection. Enjoy every bite!

Cherry Cheesecake Fluff

0

Cherry Cheesecake Fluff is a decadent yet simple dessert that combines the tangy richness of cheesecake with the fruity sweetness of cherry pie filling. The fluffy texture comes from whipped cream and marshmallows, creating a light yet indulgent treat that’s perfect for gatherings, potlucks, or a family dessert night.

This no-bake dessert is as easy to make as it is to enjoy. With its creamy texture and bursts of cherry flavor, it’s a guaranteed crowd-pleaser that can be prepared in advance, making it as convenient as it is delicious.

Why You’ll Love This Recipe

No-Bake Simplicity: Perfect for hot days or when you need a quick dessert.

Sweet and Tangy: The cheesecake flavor perfectly complements the cherry filling.

Crowd-Pleaser: Ideal for potlucks, holidays, or as an easy weeknight treat.

Ingredients

8 ounces cream cheese, room temperature

3.4 ounces cheesecake instant pudding mix

1 teaspoon vanilla extract

¼ cup milk

8 ounces Cool Whip (or homemade stabilized whipped cream)

21 ounces cherry pie filling

10 ounces mini marshmallows

Instructions

Step 1: Prepare the Base

1. In a large mixing bowl, combine the softened cream cheese, cheesecake instant pudding mix, vanilla extract, and milk.

2. Beat with a hand mixer or stand mixer until smooth and creamy.

Step 2: Incorporate the Whipped Cream

1. Fold in the Cool Whip gently to maintain the light, fluffy texture.

Step 3: Add the Cherry Pie Filling and Marshmallows

1. Gently fold in the cherry pie filling, ensuring the cherries are evenly distributed throughout the mixture.

2. Add the mini marshmallows and fold until evenly combined.

Step 4: Chill the Dessert

1. Cover the bowl with plastic wrap or transfer the fluff to an airtight container.

2. Refrigerate for at least 2 hours, or up to 24 hours, to allow the flavors to meld and the fluff to set.

Step 5: Serve and Enjoy

1. Serve the Cherry Cheesecake Fluff chilled.

2. Optionally, garnish with extra cherries, whipped cream, or a sprinkle of graham cracker crumbs for a decorative touch.

Tips

Room Temperature Cream Cheese: Ensures a smoother mixture without lumps.

Homemade Whipped Cream: Substitute Cool Whip with homemade stabilized whipped cream for a fresher flavor.

Add Crunch: Sprinkle chopped nuts or graham cracker crumbs on top for added texture.

Storage Options

Refrigeration: Store in an airtight container in the refrigerator for up to 3 days.

Freezing: Not recommended, as the marshmallows may become soggy when thawed.

Cherry Cheesecake Fluff is an effortless dessert that’s sure to impress with its creamy texture and fruity, tangy flavors. It’s the perfect addition to any dessert table, offering a delightful, no-fuss treat for all occasions. Enjoy!

Delightful Banana Cream Dessert

0

Delightful Banana Cream Dessert is a luscious, no-bake treat that layers the flavors of creamy banana pudding, smooth cream cheese, and a buttery graham cracker crust. Perfect for potlucks, family gatherings, or an indulgent dessert at home, this sweet delight combines simplicity with elegance.

The texture of the crunchy graham cracker crust perfectly complements the creamy filling and fresh banana slices, creating a well-balanced and utterly satisfying dessert. It’s an easy recipe that delivers stunning results, making it a go-to favorite for any occasion.

Why You’ll Love This Recipe

Simple and Quick: Minimal baking required for an easy-to-make dessert.

Versatile: Perfect for any gathering or as a sweet treat for your family.

Banana Bliss: The combination of real bananas and banana pudding creates a flavor-packed dessert.

Ingredients

Crust:

1¾ cups graham cracker crumbs

¼ cup sugar

½ cup melted butter

Filling:

1 package (8 ounces) cream cheese, softened

½ cup sugar

1 (8-ounce) container frozen whipped topping, thawed, divided

3 to 4 medium bananas, sliced

Pudding Layer:

1¾ cups 2% milk

1 package (3.4 ounces) instant banana cream pudding mix

Instructions

Step 1: Prepare the Crust

1. Preheat your oven to 350°F (175°C).

2. In a small bowl, mix the graham cracker crumbs and sugar.

3. Stir in the melted butter until the mixture resembles wet sand.

4. Press the crust mixture firmly into the bottom of a 9-inch square or round baking dish.

5. Bake for 5-7 minutes, then let it cool completely on a wire rack.

Step 2: Make the Filling

1. In a large bowl, beat the softened cream cheese and sugar until smooth and creamy.

2. Gently fold in 2 cups of the thawed whipped topping until well combined.

Step 3: Add the First Layer of Bananas and Cream

1. Slice half of the bananas and arrange them evenly over the cooled crust.

2. Spread half of the cream cheese mixture over the banana layer, smoothing it with a spatula.

Step 4: Prepare the Pudding

1. In a separate bowl, whisk the milk and banana cream pudding mix together for about 2 minutes.

2. Let the pudding sit for another 2 minutes until it begins to set.

3. Fold the remaining whipped topping into the pudding mixture gently.

Step 5: Assemble the Dessert

1. Spread the pudding mixture over the cream cheese layer in the baking dish.

2. Slice the remaining bananas and arrange them decoratively on top.

Step 6: Chill

1. Cover the dessert with plastic wrap and refrigerate for 1-2 hours, or until the layers are firm and well-set.

Step 7: Serve

1. Slice the dessert into squares or wedges and serve chilled.

2. Optionally, garnish with additional whipped topping or a sprinkle of crushed graham crackers for presentation.

Tips

Banana Tips: Use ripe, firm bananas for the best flavor and texture.

Make Ahead: Prepare the dessert up to a day in advance and refrigerate until serving.

Extra Toppings: Add chocolate shavings, caramel drizzle, or chopped nuts for an extra indulgent touch.

Storage Options

Refrigeration: Store leftovers in an airtight container in the refrigerator for up to 3 days.

Freezing: Freezing is not recommended, as the bananas may become mushy when thawed.

Delightful Banana Cream Dessert is a simple yet elegant dessert that delivers big on flavor. Its layers of creamy goodness and fresh bananas will have everyone coming back for seconds. Enjoy!

Creamy Garlic Parmesan Chicken and Rice Skillet

0

Creamy Garlic Parmesan Chicken and Rice Skillet is the ultimate comfort meal that’s hearty, flavorful, and incredibly easy to prepare in just one pan. This dish features tender chicken, perfectly cooked rice infused with garlic, herbs, and a creamy parmesan sauce. It’s a rich and satisfying meal that’s perfect for busy weeknights or when you’re craving a cozy, home-cooked dinner.

The combination of thyme, rosemary, and freshly grated parmesan elevates the flavor, while the creamy sauce ties everything together for a dish that’s both indulgent and balanced. With minimal cleanup and maximum flavor, this skillet meal is sure to become a family favorite.

Why You’ll Love This Recipe

One-Pan Wonder: Minimal dishes make this recipe perfect for busy nights.

Rich and Creamy: A velvety sauce makes every bite comforting and delicious.

Simple Ingredients: Pantry staples combine to create a gourmet-tasting dish.

Ingredients

Chicken Breasts: 680g / 1.5 lbs, cubed

Butter: 56g / 4 tablespoons

White Onion: 1, diced

Garlic: 4 cloves, minced

Dried Thyme: 1 teaspoon

Dried Rosemary: ½ teaspoon, crumbled

Chicken Broth: 600ml / 2.5 cups

Long-Grain White Rice: 190g / 1 cup (not quick cooking)

Heavy Cream: 120ml / ½ cup

Parmesan Cheese: 60g / ½ cup, freshly grated

Kosher Salt and Freshly Ground Black Pepper: to taste

Fresh Parsley: chopped, for serving

Instructions

Step 1: Heat Your Skillet

1. Heat your skillet over medium-high heat and melt the butter.

2. Add the diced onion and sauté until softened, about 2-3 minutes.

Step 2: Cook the Chicken

1. Add the cubed chicken to the skillet.

2. Season with kosher salt, freshly ground black pepper, thyme, and rosemary.

3. Cook for about 5 minutes, stirring occasionally, until the chicken is golden-brown on all sides.

4. Stir in the minced garlic and cook for an additional minute until fragrant.

Step 3: Add Broth and Rice

1. Pour in the chicken broth and add the uncooked rice.

2. Stir everything together to combine.

3. Bring the mixture to a boil, then reduce the heat to medium-low.

Step 4: Simmer

1. Cover the skillet and let the mixture simmer for 15-20 minutes, or until the rice is tender and has absorbed most of the liquid.

2. Stir occasionally to prevent sticking.

Step 5: Finish with Cream and Parmesan

1. Once the rice is tender, remove the skillet from the heat.

2. Stir in the heavy cream and freshly grated parmesan cheese until the sauce is creamy and well combined.

Step 6: Serve and Garnish

1. Dish up the chicken and rice onto plates or bowls.

2. Sprinkle with additional parmesan and chopped fresh parsley for garnish.

3. Serve hot and enjoy this cozy, flavorful meal!

Tips

Use Fresh Parmesan: Freshly grated parmesan melts better and provides a more authentic flavor.

Veggie Additions: Add spinach or peas during the last 5 minutes of cooking for extra nutrients.

Brown the Chicken: Searing the chicken enhances flavor and ensures a beautiful golden crust.

Storage Options

Refrigeration: Store leftovers in an airtight container in the refrigerator for up to 3 days. Reheat gently on the stovetop or in the microwave.

Freezing: This dish freezes well. Store in a freezer-safe container for up to 2 months. Thaw overnight in the refrigerator before reheating.

Creamy Garlic Parmesan Chicken and Rice Skillet is the ultimate combination of ease and indulgence. With its creamy texture, tender chicken, and perfectly cooked rice, it’s a recipe that’s sure to delight everyone at the table. Enjoy!

Banana Bread Brownies

0

Banana Bread Brownies are the perfect fusion of moist, flavorful banana bread and the decadent richness of brownies. Topped with a luscious brown butter frosting, these bars are an irresistible treat that combines the comfort of a classic dessert with a gourmet touch. Perfect for parties, potlucks, or as an indulgent snack, these bars are easy to make and guaranteed to satisfy any sweet tooth.

The brown butter frosting adds a nutty, caramel-like flavor that complements the sweet banana base and the crunch of walnuts. These brownies are so versatile they can be served as a dessert or paired with coffee for a delightful afternoon treat.

Why You’ll Love This Recipe

Moist and Flavorful: The combination of bananas and sour cream creates an ultra-moist texture.

Decadent Topping: The brown butter frosting elevates the flavor profile.

Perfect for Sharing: Ideal for large gatherings or a sweet family treat.

Ingredients

For the Bars:

• 1½ cups sugar

• 1 cup sour cream

• ½ cup butter

• 2 eggs

• 4 ripe bananas, mashed

• 2 teaspoons vanilla extract

• 2 cups all-purpose flour

• 1 teaspoon baking soda

• ¾ teaspoon salt

• ½ cup chopped walnuts

For the Brown Butter Frosting:

• ½ cup butter

• 4 cups powdered sugar

• 1½ teaspoons vanilla extract

• 3 tablespoons milk

Instructions

Step 1: Preheat Oven

1. Preheat your oven to 375°F (190°C).

2. Grease and flour a 15×10-inch jelly roll pan to prepare for the batter.

Step 2: Prepare the Batter

1. In a large mixing bowl, beat together the sugar, sour cream, butter, and eggs until creamy.

2. Blend in the mashed bananas and vanilla extract until smooth.

Step 3: Combine Dry Ingredients

1. In a separate bowl, whisk together the flour, baking soda, and salt.

2. Gradually add the dry ingredients to the wet mixture, blending for about 1 minute until well combined.

3. Fold in the chopped walnuts for added crunch and flavor.

Step 4: Bake the Bars

1. Spread the batter evenly into the prepared pan.

2. Bake for 20 to 25 minutes, or until the bars are golden brown and a toothpick inserted into the center comes out clean.

Step 5: Make the Frosting

1. While the bars are baking, prepare the brown butter frosting.

2. In a large saucepan over medium heat, melt the butter. Let it cook until it turns a delicate brown color, being careful not to burn it.

3. Remove the butter from heat immediately and whisk in the powdered sugar, vanilla extract, and milk. Mix until smooth and slightly thicker than a glaze.

Step 6: Frost the Bars

1. Once the bars are baked, remove them from the oven and let them cool slightly.

2. While the bars are still warm, spread the brown butter frosting evenly over the top using a spatula.

Step 7: Serve

1. Allow the bars to cool completely before cutting into squares.

2. Serve as a dessert or snack and enjoy the moist, flavorful banana bread brownies with a touch of nutty sweetness.

Tips

Banana Ripeness: Use overripe bananas for maximum flavor and sweetness.

Nut-Free Option: Omit walnuts if you prefer or replace them with chocolate chips.

Storage: Store bars in an airtight container at room temperature for up to 3 days or refrigerate for up to a week.

Storage Options

Freezing: These bars freeze well. Wrap individual portions in plastic wrap and store them in an airtight container for up to 2 months. Thaw at room temperature before serving.

Banana Bread Brownies are a delightful, crowd-pleasing dessert that combines nostalgic banana bread flavors with a luxurious frosting. Perfect for any occasion, this recipe is a must-try for anyone who loves banana desserts. Enjoy!

Shrimp Scampi with Angel Hair Pasta

0

Shrimp Scampi with Angel Hair Pasta is a light, flavorful dish that combines tender shrimp with garlic, white wine, and fresh vegetables, tossed with multigrain angel hair pasta. The buttery, garlicky sauce is elevated with a hint of heat from chili flakes and brightened with fresh parsley, creating a meal that’s both satisfying and elegant. Perfect for weeknights or a special occasion, this recipe is quick to make yet impressive to serve.

With fresh spinach, sweet cherry tomatoes, and a touch of olive oil, this dish is as wholesome as it is delicious. It’s a wonderful example of how simple ingredients can create a restaurant-quality meal in the comfort of your home.

Why You’ll Love This Recipe

Quick and Easy: Ready in under 30 minutes for a fast yet gourmet meal.

Healthy and Flavorful: Fresh vegetables and whole wheat pasta add a nutritious twist.

Versatile: Adjust spice levels and ingredients to suit your taste.

Ingredients

For the Pasta and Vegetables:

• 8 oz whole wheat (multigrain) angel hair pasta

• 4 cups fresh spinach

• 1½ cups cherry tomatoes, halved

• 3 teaspoons olive oil

For the Shrimp Scampi:

• 2 tablespoons butter

• 1½ lb medium shrimp, peeled, deveined, tails removed

• 1 medium onion, finely chopped (½ cup)

• 3 cloves garlic, finely chopped

• ¼ cup red chili flakes

• ½ cup dry white wine

• ¼ cup reduced-sodium chicken broth (Progresso® recommended)

• ½ teaspoon salt

• ⅛ teaspoon pepper

• 3 tablespoons chopped fresh parsley

Instructions

Step 1: Cook the Pasta

1. In a 5-quart saucepan, bring water to a boil and cook the pasta according to the package directions.

2. Drain the pasta and return it to the pot.

3. Add the spinach, halved cherry tomatoes, and 2 teaspoons of olive oil to the hot pasta. Cover and keep warm while preparing the shrimp.

Step 2: Sauté the Onion

1. In a 12-inch non-stick skillet, heat the remaining 1 teaspoon of olive oil over medium-high heat.

2. Add the finely chopped onion and cook for 1 minute, stirring occasionally, until it begins to soften.

Step 3: Cook the Shrimp

1. Add the shrimp, garlic, and red chili flakes to the skillet.

2. Cook and stir for about 2 minutes, or until the shrimp just begin to turn pink.

Step 4: Add Liquid Ingredients

1. Pour the white wine and chicken broth into the skillet.

2. Season with salt and pepper.

3. Cook for another 2 minutes, or until the shrimp are fully pink and firm.

Step 5: Finish the Sauce

1. Remove the skillet from the heat.

2. Stir in the butter and chopped parsley until the butter is melted and the sauce is smooth.

Step 6: Combine and Serve

1. Add the shrimp and sauce mixture to the pot with the pasta, spinach, and tomatoes.

2. Toss gently to combine, ensuring the pasta is evenly coated with the sauce.

3. Serve immediately while warm.

Tips

Wine Substitute: Use additional chicken broth with a splash of lemon juice if you prefer to avoid alcohol.

Customize Heat: Reduce or omit chili flakes for a milder dish, or increase for extra spice.

Vegetable Options: Add zucchini, asparagus, or mushrooms for more variety.

Storage Options

Refrigeration: Store leftovers in an airtight container in the refrigerator for up to 3 days. Reheat gently on the stovetop or in the microwave.

Freezing: Not recommended, as the shrimp and vegetables may lose their texture when thawed.

Shrimp Scampi with Angel Hair Pasta is a quick, delicious, and wholesome meal that’s perfect for any occasion. Its vibrant flavors and fresh ingredients will leave everyone asking for seconds. Enjoy!