Homemade Honey Buns

0

Homemade Honey Buns are a delightful treat with a soft, fluffy interior, swirls of cinnamon, and a perfectly sweet glaze. These buns, fried to golden perfection, are a nostalgic reminder of classic bakery-style snacks, but better because they’re made from scratch in your kitchen. Perfect for breakfast, brunch, or as a sweet indulgence anytime, these honey buns are sure to impress with their irresistible flavor and texture.

Making honey buns at home may seem intimidating, but this step-by-step recipe simplifies the process. From the rich dough to the creamy icing, every detail is crafted for maximum flavor and enjoyment. These buns are the ultimate comfort food, perfect for sharing with loved ones or savoring with a cup of coffee.

Why You’ll Love This Recipe

Better Than Store-Bought: Homemade buns are fresher, softer, and more flavorful.

Customizable Sweetness: Adjust the cinnamon and icing to your preference.

Impressive Yet Simple: A perfect project for weekends or special occasions.

Ingredients

For the Honey Buns:

• 2¼ cups all-purpose flour

• ¼ cup sugar

• ½ tsp salt

• ⅔ cup milk

• 1 packet instant yeast

• ⅓ cup butter, melted and cooled

• 1 egg

• 2 tsp vanilla extract

• 1½ tsp vegetable oil

• 2 tsp cinnamon

• 2–2½ cups vegetable oil, for frying

For the Icing:

• 3 tbsp butter, melted

• 1¼ cups powdered sugar, sifted

• 2 tbsp milk

• 2 tsp honey

• ½ tsp vanilla extract

Instructions

Step 1: Prepare the Dough

1. In the bowl of a stand mixer fitted with a dough hook, combine the flour, sugar, and salt.

2. Heat the milk in the microwave for about 30 seconds until it reaches 110°F.

3. In a separate bowl, whisk the warm milk with yeast, melted butter, egg, and vanilla until well combined.

Step 2: Knead the Dough

1. Pour the wet ingredients into the dry ingredients in the stand mixer.

2. Knead on medium speed for 10 minutes, scraping down the sides occasionally to ensure all ingredients are incorporated.

Step 3: Let the Dough Rise

1. Grease a large bowl with vegetable oil.

2. Form the dough into a ball and place it in the prepared bowl. Cover with plastic wrap and let rise for about 1½ hours, or until doubled in size.

Step 4: Shape the Buns

1. Press down the dough and transfer it to a lightly floured surface.

2. Roll the dough into a rectangle approximately 15 inches long and 8 inches wide.

3. Sprinkle the cinnamon evenly over the dough.

4. Starting at the long edge, roll the dough tightly into a log. Seal the edge by wetting it with water and pinching it closed.

Step 5: Slice the Buns

1. Use unscented dental floss or a sharp knife to cut the log into 1-inch thick slices.

2. Place the slices on wax paper, leaving space between them. Spray the tops lightly with nonstick spray and cover with plastic wrap. Allow them to rise for 30 minutes.

Step 6: Fry the Honey Buns

1. Heat 2–2½ cups of vegetable oil in a large skillet over medium heat.

2. Once the oil is hot, fry the buns a few at a time, cooking each side until golden brown.

3. Transfer the fried buns to paper towels to absorb excess oil.

Step 7: Make the Icing

1. In a small bowl, combine melted butter, powdered sugar, milk, honey, and vanilla. Mix until smooth and creamy.

Step 8: Ice the Buns

1. While the buns are still warm, dip the tops into the icing.

2. Place the buns on wax or parchment paper and allow the icing to harden before serving.

Tips

Even Slicing: Use dental floss to cut clean slices without squishing the dough.

Perfect Frying Temperature: Keep the oil at a consistent medium heat to prevent burning.

Extra Glaze: Double the icing recipe if you love a generously coated honey bun.

Storage Options

Refrigeration: Store leftover honey buns in an airtight container in the fridge for up to 3 days. Warm them slightly before serving.

Freezing: Freeze unfrosted buns for up to 2 months. Thaw, warm, and glaze before serving.

Homemade Honey Buns are a sweet, indulgent treat that’s worth every moment of preparation. Soft, cinnamony, and topped with a luscious glaze, they’re a guaranteed hit for breakfast, dessert, or any time you want something special. Enjoy the comforting taste of these homemade delights!


Ritz Cracker Party Sandwiches

0

Ritz Cracker Party Sandwiches are the ultimate bite-sized snack, perfect for entertaining guests or satisfying a savory craving. These mini sandwiches combine buttery Ritz crackers, savory ham, and melty Swiss cheese, all topped with a flavorful mustard-butter glaze and sprinkled with poppy seeds and onions for an extra burst of flavor.

These irresistible treats are quick to assemble, bake to perfection in minutes, and are sure to be the star of any gathering. Whether for a party, game day, or a casual snack, these sandwiches are as delicious as they are easy to make.

Why You’ll Love This Recipe

Quick and Easy: Ready in under 20 minutes with minimal prep.

Crowd-Pleaser: Perfect for parties, potlucks, or family snacking.

Irresistible Flavor: The buttery glaze and melty cheese make every bite unforgettable.

Ingredients

• 48 Ritz crackers

• 8 slices deli ham, torn into small strips

• 8 slices Swiss cheese, cut into 1-inch pieces

• 4 tablespoons butter, melted

• 2 teaspoons Dijon mustard

• 1 teaspoon Worcestershire sauce

• ½ teaspoon garlic powder

• 1 teaspoon poppy seeds

• ½ teaspoon dried minced onion

Instructions

Step 1: Preheat the Oven

1. Preheat your oven to 350°F (175°C).

Step 2: Assemble the Sandwiches

1. Place half of the Ritz crackers, flat side down, in a 9×13-inch baking dish.

2. Tear the ham slices into small strips and fold them onto each cracker.

3. Place a 1-inch piece of Swiss cheese on top of the ham.

4. Top with another Ritz cracker to form mini sandwiches.

Step 3: Make the Glaze

1. In a small bowl, stir together the melted butter, Dijon mustard, Worcestershire sauce, and garlic powder.

Step 4: Add Toppings

1. Drizzle the glaze evenly over the cracker sandwiches.

2. Sprinkle poppy seeds and minced onion over the top for added flavor.

Step 5: Bake

1. Place the dish in the preheated oven and bake for 10–12 minutes, or until the cheese has melted and the tops of the crackers are golden brown.

Step 6: Serve

1. Remove from the oven and let cool slightly.

2. Serve warm and enjoy these delicious party bites!

Tips

Cheese Variations: Swap Swiss cheese for cheddar, provolone, or your favorite cheese.

Add a Sweet Twist: Mix a teaspoon of honey into the glaze for a touch of sweetness.

Make Ahead: Assemble the sandwiches and store in the fridge. Add the glaze and bake when ready to serve.

Storage Options

Refrigeration: Store leftovers in an airtight container in the fridge for up to 2 days. Reheat in the oven for a crispy texture.

Freezing: Freeze unbaked sandwiches in a freezer-safe container. Bake directly from frozen, adding a few extra minutes to the cooking time.

Ritz Cracker Party Sandwiches are a fun and flavorful addition to any occasion. With their buttery crunch, savory filling, and delicious glaze, they’re guaranteed to be a hit with guests of all ages. Serve them at your next gathering and watch them disappear!

Sausage Cream Cheese Crescents

0

Sausage Cream Cheese Crescents are the ultimate bite-sized appetizer or snack that’s quick to make and guaranteed to disappear fast. With a flaky crescent roll crust encasing a creamy, cheesy sausage filling, these crescents are perfect for parties, game days, or even a special breakfast treat.

The combination of savory sausage, tangy cream cheese, and melted shredded cheese creates a rich and flavorful filling that pairs beautifully with the buttery crescent dough. These crescent rolls are easy to prepare, making them a go-to recipe for both casual gatherings and festive occasions.

Why You’ll Love This Recipe

Crowd-Pleaser: Loved by kids and adults alike, these crescents are always a hit.

Quick and Easy: Simple ingredients and minimal prep make this recipe stress-free.

Versatile: Customize with your choice of sausage, cheese, or spices.

Ingredients

• 1 lb ground sausage (breakfast, Italian, or your choice)

• 1 cup shredded cheese (cheddar, mozzarella, or a blend)

• 8 oz cream cheese, softened

• 2 cans refrigerated crescent rolls

• Pepper, to taste

Instructions

Step 1: Preheat the Oven

1. Preheat your oven to 375°F (190°C).

2. Line a baking sheet with parchment paper or lightly grease it.

Step 2: Prepare the Crescent Rolls

1. Roll out the crescent roll dough and separate it into triangles.

2. Cut each triangle in half lengthwise to create smaller triangles.

Step 3: Cook the Sausage

1. In a skillet over medium heat, cook the ground sausage until completely browned.

2. Drain any excess grease and let the sausage cool slightly.

Step 4: Mix the Filling

1. In a large mixing bowl, combine the cooked sausage, softened cream cheese, shredded cheese, and pepper to taste.

2. Mix until the filling is evenly combined.

Step 5: Assemble the Crescents

1. Spoon a small ball (about 1 tablespoon) of the sausage mixture onto the widest end of each crescent roll triangle.

2. Starting at the wide end, roll the crescent roll dough over the filling, forming a mini stuffed crescent roll.

Step 6: Bake

1. Place the crescent rolls on the prepared baking sheet, seam side down.

2. Bake in the preheated oven for 15 minutes, or until the crescents are golden brown and cooked through.

Step 7: Serve

1. Allow the crescents to cool slightly before serving.

2. Serve warm as an appetizer, snack, or part of a breakfast spread.

Tips

Cheese Options: Cheddar works well, but you can experiment with Monterey Jack, mozzarella, or pepper jack for added flavor.

Add Herbs or Spices: Sprinkle in Italian seasoning, garlic powder, or red pepper flakes for extra zest.

Make-Ahead: Prepare the filling in advance and store it in the fridge for up to 2 days.

Storage Options

Refrigeration: Store leftovers in an airtight container in the fridge for up to 3 days. Reheat in the oven or air fryer for a crispy crust.

Freezing: Freeze unbaked crescents on a baking sheet, then transfer to a freezer bag. Bake directly from frozen, adding 3–5 minutes to the bake time.

Sausage Cream Cheese Crescents are a delicious, versatile treat that’s as easy to make as it is to enjoy. With their flaky crust and savory filling, they’re sure to become a favorite in your recipe collection. Serve them at your next gathering and watch them disappear!

PEACHES & CREAM CHEESE LOAF

0

This Peaches & Cream Cheese Loaf is a splendid treat that marries the lush sweetness of peaches with the creamy tang of cream cheese, creating a delectable dessert that’s perfect for any season. Each slice offers a moist, tender crumb that’s packed with the flavors of summer, no matter when you choose to bake it. Ideal for a leisurely brunch, a sweet end to a family dinner, or a cozy afternoon tea, this loaf boasts a harmonious blend of flavors that are sure to delight.

Adding an extra layer of interest to this loaf is the bright hint of lemon zest paired with a whisper of cinnamon, which together enhance the peach flavors beautifully. The result is a loaf that not only smells heavenly as it bakes but also looks as enticing as it tastes. This dessert is not just a treat for the palate but also a feast for the eyes, with its golden crust and juicy peach specks creating a beautiful texture and color contrast.

Why You’ll Love This Recipe:

  • Comforting and Versatile: The loaf is soft and moist, perfect for any time of day, whether it’s breakfast, brunch, or dessert.
  • Easy to Make: This recipe follows simple steps and uses ingredients that are easy to find, making it accessible even for novice bakers.
  • Delightful Flavor Combination: The rich cream cheese and the sweet peaches complement each other perfectly, while the lemon zest and cinnamon add a delightful depth of flavor.

Ingredients:

  • 8 oz cream cheese (1 package), softened
  • ½ cup butter (1 stick)
  • 1 ½ cups sugar
  • ½ tablespoon lemon zest
  • 2 eggs
  • 2 ¼ cups all-purpose flour
  • 1 ½ teaspoons salt
  • 1 tablespoon baking powder
  • 1 teaspoon cinnamon (optional)
  • 1 cup milk
  • 15 oz can sliced peaches, drained and diced

Instructions:

Preheat the Oven:

  • Begin by preheating your oven to 375°F (190°C). This ensures a good, hot oven that will help the loaf rise and brown properly.

Prepare the Loaf Pan:

  • Grease a standard bread loaf pan thoroughly to prevent sticking. Consider lining it with parchment paper for even easier removal.

Cream the Wet Ingredients:

  • In a large mixing bowl, cream together the softened cream cheese and butter until smooth and fluffy. This is best done with an electric mixer.
  • Add sugar and continue to beat until the mixture becomes light and airy. This helps create a fine crumb.
  • Incorporate the lemon zest and eggs, beating well after each addition until the mixture is homogeneous and silky.

Combine the Dry Ingredients:

  • In a separate bowl, sift together the all-purpose flour, baking powder, salt, and cinnamon if using. Sifting helps prevent lumps and ensures that the baking powder and salt are evenly distributed throughout the flour.

Mix Dry and Wet Ingredients:

  • Alternately add the dry ingredients and the milk to the creamed mixture, starting and ending with the dry ingredients. Stir just until combined after each addition to maintain a light batter.

Fold in the Peaches:

  • Gently fold the diced peaches into the batter, being careful not to overmix. Overmixing can deflate the batter and lead to a dense loaf.

Bake:

  • Pour the batter into the prepared loaf pan, smoothing the top with a spatula.
  • Bake in the preheated oven for 50-55 minutes, or until a toothpick inserted into the center comes out clean.

Cool:

  • Allow the loaf to cool in the pan on a wire rack for about 10 minutes, then turn out onto the rack to cool completely. Cooling in the pan too long can result in a soggy bottom.

Serve:

  • Slice the loaf once it has completely cooled to ensure clean cuts.

Storage Options:

  • Room Temperature: Store the loaf wrapped in plastic wrap or in an airtight container at room temperature for up to 3 days.
  • Refrigerator: For longer storage, keep it in the refrigerator for up to 7 days.
  • Freezer: Wrap the loaf securely in aluminum foil or plastic freezer wrap, or store it in a heavy-duty freezer bag for up to 3 months.

Tips:

  • Ingredient Temperature: Ensure all refrigerated ingredients are at room temperature to help them blend more smoothly and evenly.
  • Peach Prepping: If using fresh peaches instead of canned, make sure they are peeled and not overly ripe, which could add too much moisture to the loaf.
  • Spicing It Up: If desired, enhance the flavor with nutmeg or allspice in addition to cinnamon for an even richer taste.

Homemade Spaghetti

0

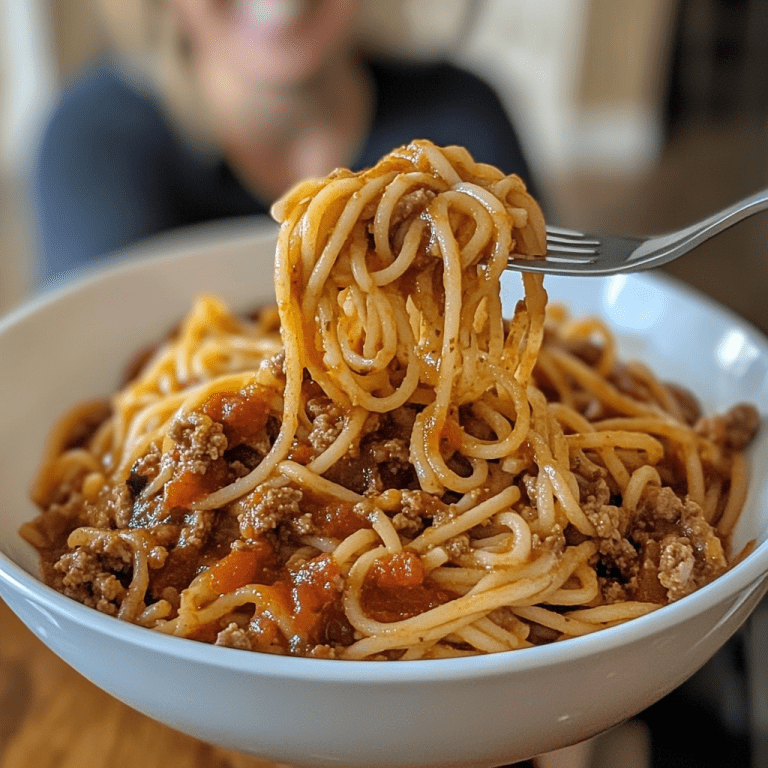
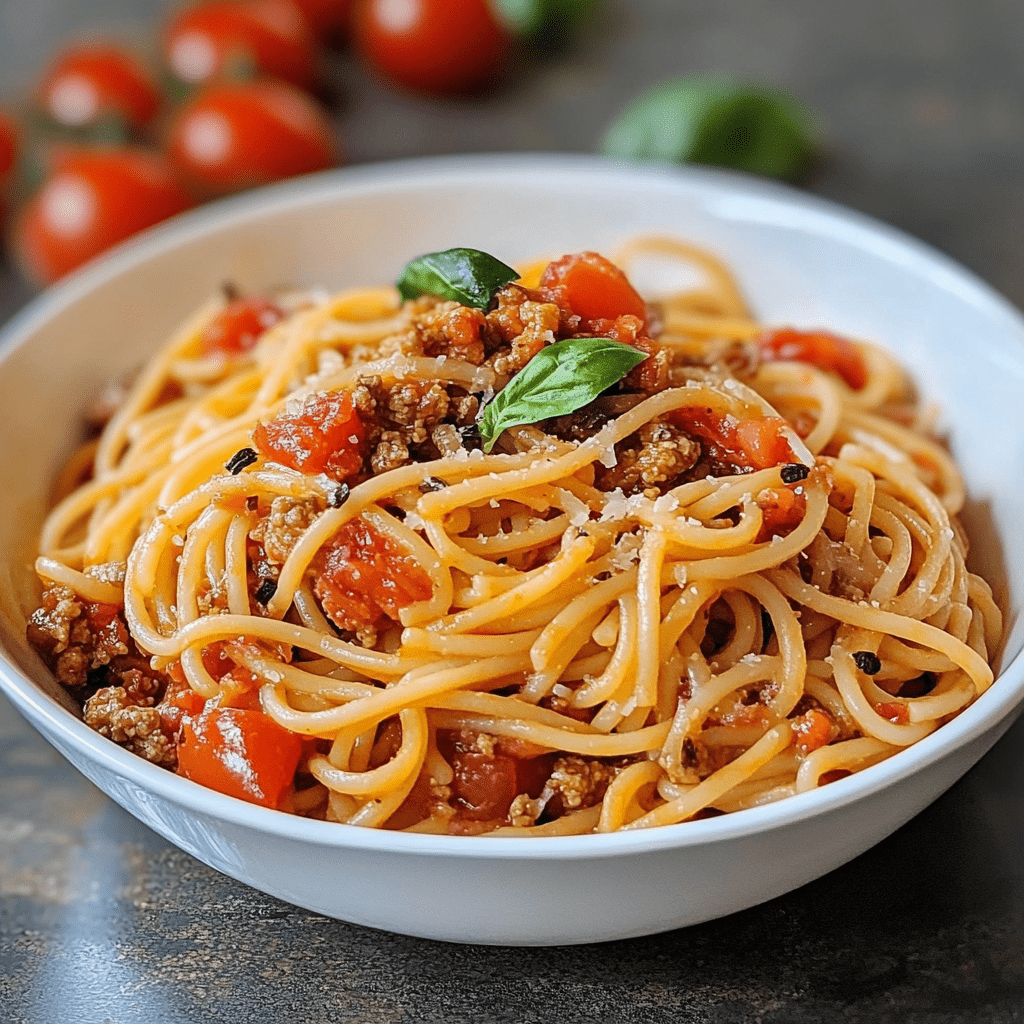
Homemade Spaghetti is the ultimate comfort food, blending tender noodles with a savory meat sauce to create a hearty and satisfying meal. This recipe simplifies the process by using an Air Pot (or Instant Pot) to streamline cooking, making it perfect for busy weeknights or when you’re craving a warm, delicious dinner without spending hours in the kitchen.

With perfectly seasoned ground beef, aromatic onions, and a rich spaghetti sauce, this one-pot meal delivers all the flavors of a traditional spaghetti dinner with minimal cleanup. Pair it with a fresh salad and garlic cheese toast for a complete family-friendly feast.

Why You’ll Love This Recipe

Quick and Easy: The Air Pot handles the heavy lifting, reducing cooking time and effort.

One-Pot Meal: Everything cooks in a single pot, making cleanup a breeze.

Classic Flavor: Traditional Italian seasonings bring out rich, bold flavors.

Ingredients

• 1 tbsp olive oil

• 1 pound lean ground beef

• ½ yellow onion, finely diced

• 1 tbsp Italian seasoning

• 2 tsp garlic powder

• 1 tsp salt

• ½ tsp pepper

• 1 tbsp freshly minced garlic

• 3 cups water

• 1 jar spaghetti sauce (about 24 ounces)

• 1 can diced tomatoes (optional)

• 16 ounces spaghetti noodles

Instructions

Step 1: Sauté the Onions and Meat

1. Set your Air Pot to the “Sauté” function.

2. Add olive oil and diced onions. Sauté until the onions are softened.

3. Add the ground beef, Italian seasoning, garlic powder, salt, pepper, and minced garlic. Cook until the meat is browned and fully cooked.

Step 2: Deglaze the Pot

1. Remove the cooked meat and set aside.

2. Add 3 cups of water to the pot and scrape the bottom thoroughly to prevent a “Burn” warning.

Step 3: Layer the Spaghetti

1. Break the spaghetti noodles in half and layer them in the Air Pot in a criss-cross pattern to prevent clumping.

2. Pour the spaghetti sauce evenly over the noodles.

3. Add the can of diced tomatoes on top of the sauce, if using.

Step 4: Add Water and Pressure Cook

1. Pour the water around the edges of the pot and over the tomatoes to ensure the noodles are covered.

2. Gently press the noodles down without stirring to keep them submerged.

3. Place the lid on the Air Pot and set the valve to “Sealing.”

4. Select the “Pressure Cook” function and set the time for 5 minutes.

Step 5: Release the Pressure

1. Once the cooking time is complete, allow a natural pressure release for 5 minutes.

2. Perform a quick release by turning the valve to “Venting” until the pin drops.

Step 6: Mix and Serve

1. Open the lid and stir the spaghetti, sauce, tomatoes, and cooked meat together until well combined.

2. Serve immediately with a side salad and garlic cheese toast, if desired.

Tips

Prevent Sticking: Layer the spaghetti in a criss-cross pattern and avoid stirring before cooking.

Customize the Flavor: Add red pepper flakes, fresh basil, or a splash of red wine for extra flavor.

Vegetarian Option: Skip the meat and add sautéed mushrooms, zucchini, or bell peppers.

Storage Options

Refrigeration: Store leftovers in an airtight container in the fridge for up to 3 days. Reheat in the microwave or on the stovetop.

Freezing: Freeze portions in freezer-safe containers for up to 2 months. Thaw overnight in the fridge before reheating.

Homemade Spaghetti is a classic dish with timeless appeal. This Air Pot version makes it quicker and easier than ever while retaining all the bold, comforting flavors you love. Perfect for feeding a crowd or meal prepping for the week, it’s a recipe you’ll return to again and again. Enjoy!

Tennessee Onions

0

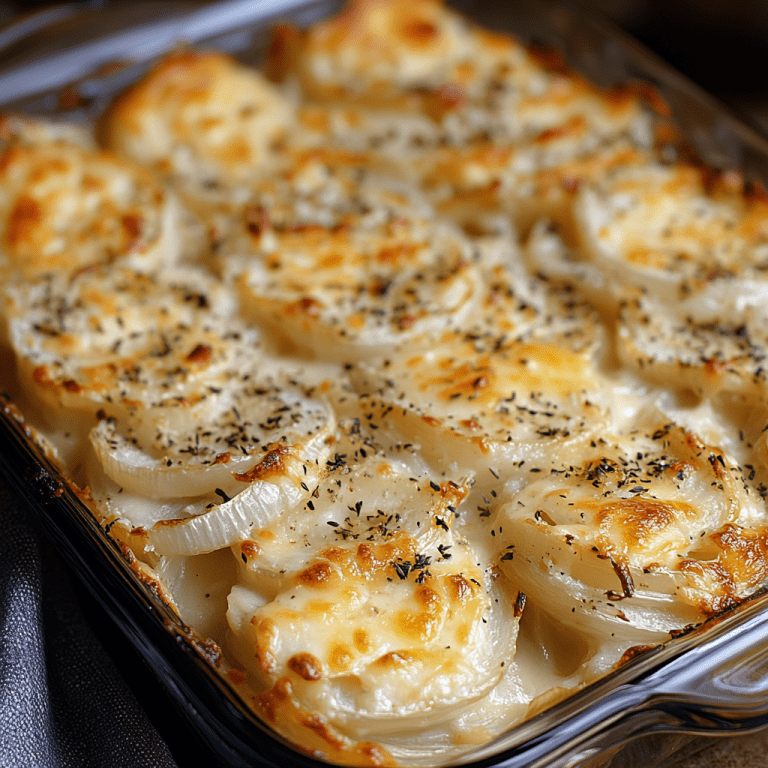
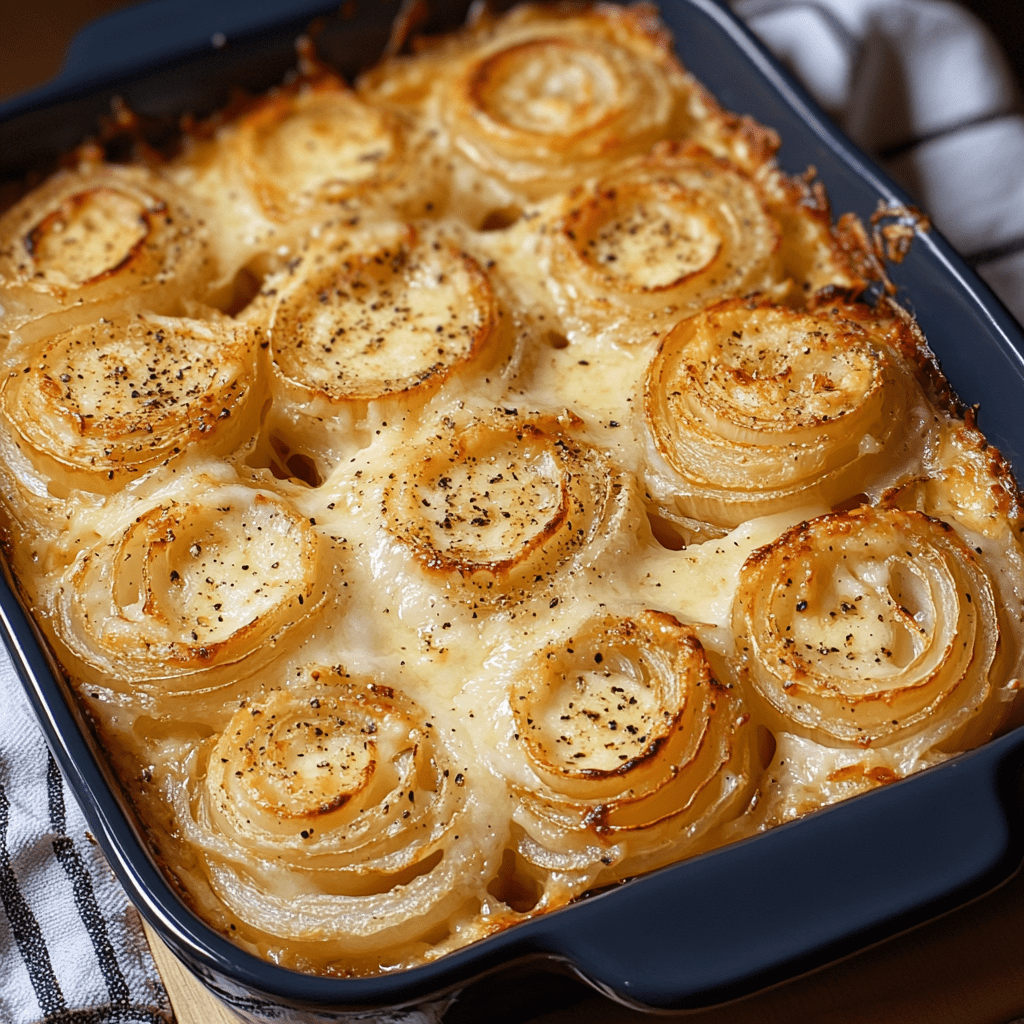
Tennessee Onions are a simple yet decadent side dish that transforms sweet Vidalia onions into a cheesy, buttery delight. Perfectly baked until tender and topped with a blend of bubbling cheeses, this dish pairs wonderfully with grilled meats, roasts, or even as a standalone appetizer. The sweetness of the onions melds beautifully with the rich, savory flavors of garlic, oregano, and the melted cheese topping.

This recipe is ideal for holidays, family dinners, or any time you want a side dish that’s both comforting and packed with flavor. It’s easy to make, requiring just a few pantry staples, and it never fails to impress.

Why You’ll Love This Recipe

Easy to Make: Requires minimal prep and simple ingredients.

Rich and Flavorful: Sweet onions combined with melted cheeses and butter.

Perfect Side Dish: Pairs well with a variety of main courses.

Ingredients

• 3 to 4 Sweet Vidalia onions

• 4 tablespoons butter

• 1 teaspoon salt

• 1 teaspoon garlic powder

• ½ teaspoon oregano

• 1 cup Italian blend cheese, shredded

• 1 cup cheddar cheese, shredded

• ½ cup Parmesan cheese, shredded

Instructions

Step 1: Preheat the Oven

1. Preheat your oven to 350°F (175°C).

2. Spray a 9×13-inch baking dish with nonstick cooking spray.

Step 2: Prepare the Onions

1. Slice the Vidalia onions into ¼-inch thick rounds.

2. Separate the onion rings and spread them evenly in the prepared baking dish.

Step 3: Season the Onions

1. Sprinkle the onion rings with garlic powder, salt, and oregano.

Step 4: Add the Butter

1. Slice the butter into 8 pieces and distribute them evenly across the top of the onions and spices.

Step 5: Add the Cheeses

1. Sprinkle the Italian blend cheese and cheddar cheese evenly over the onions.

2. Finish by sprinkling Parmesan cheese on top.

Step 6: Bake

1. Place the dish in the preheated oven and bake for 35–40 minutes, or until the cheese is melted, bubbling, and slightly browned on top.

Step 7: Serve

1. Remove from the oven and serve immediately while hot.

Tips

Use Sweet Onions: Vidalia onions are recommended for their natural sweetness, but any sweet onion variety will work.

Customize the Cheese: Try swapping one of the cheeses for mozzarella or Gruyère for a different flavor profile.

Make It a Meal: Add cooked, crumbled bacon or diced ham for a heartier dish.

Storage Options

Refrigeration: Store leftovers in an airtight container in the fridge for up to 3 days. Reheat in the oven or microwave.

Freezing: Not recommended, as the texture of the onions may become watery upon thawing.

Tennessee Onions are a deliciously indulgent dish that will quickly become a favorite at your dinner table. With their sweet, tender texture and gooey cheese topping, they’re a comforting side dish that’s as satisfying as it is easy to make. Enjoy!

Broccoli Rice Cheese and Chicken Casserole

0

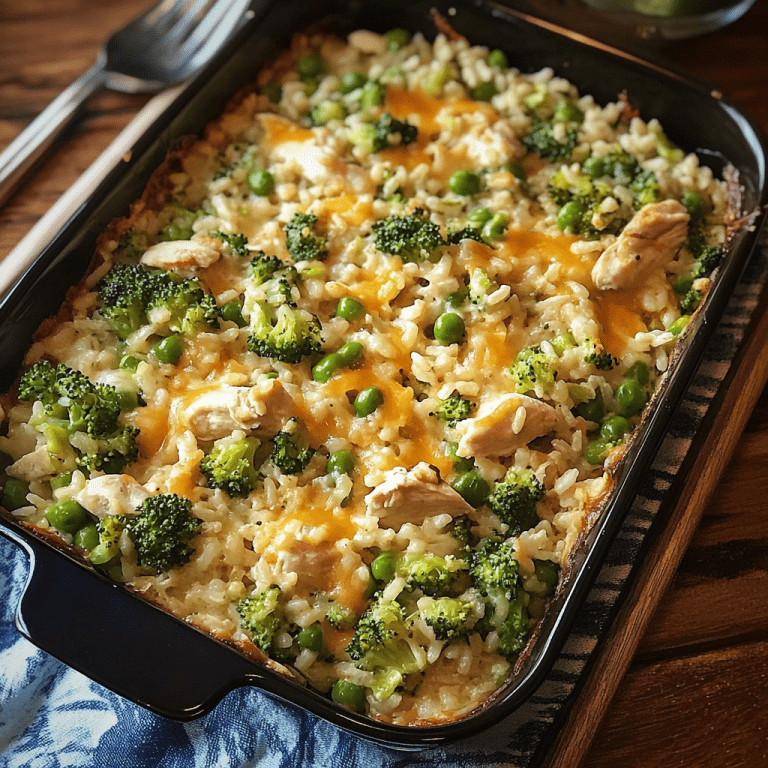
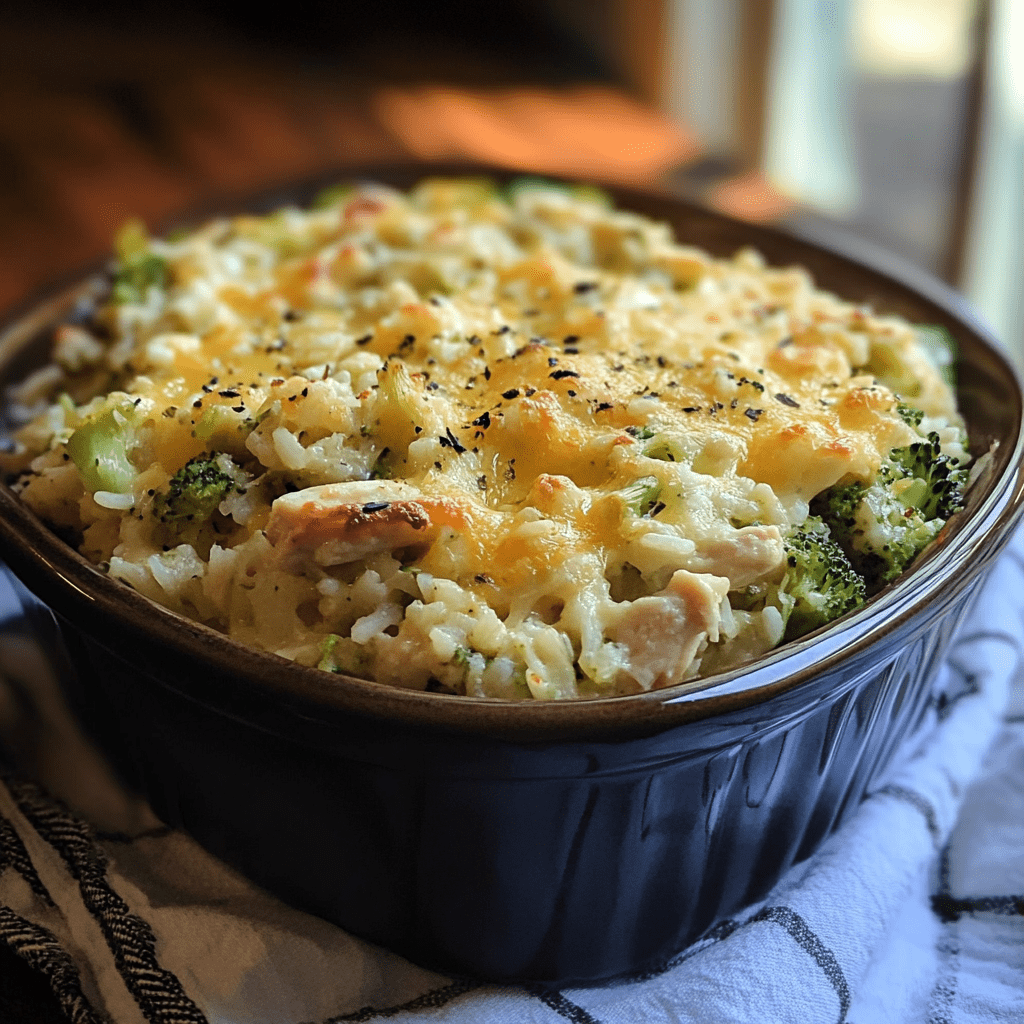
Broccoli Rice Cheese and Chicken Casserole is the ultimate comfort food, bringing together tender chicken, fluffy rice, fresh broccoli, and gooey melted cheese in one hearty dish. This casserole is a family favorite, thanks to its rich flavors and creamy texture. It’s perfect for weeknight dinners, meal prep, or when you’re in need of a warm, satisfying meal.

With a crunchy Ritz cracker topping and a cheesy, creamy base, this dish offers a variety of textures and flavors that everyone will love. Easy to make and packed with wholesome ingredients, it’s a recipe you’ll turn to again and again.

Why You’ll Love This Recipe

Comforting and Hearty: A one-dish meal that’s filling and flavorful.

Family-Friendly: Combines favorite ingredients like chicken, cheese, and broccoli.

Versatile: Easily customizable with your favorite seasonings and add-ins.

Ingredients

• 2 tablespoons butter

• 2 boneless, skinless chicken breasts (or 2 cups diced rotisserie chicken)

• 1 teaspoon Italian seasoning

• Salt and pepper, to taste

• 2½ cups chicken broth

• 1 tablespoon olive oil

• 1¼ cups white long grain rice, uncooked

• 2 cups fresh broccoli florets, uncooked

• 10.5 oz condensed cream of chicken soup

• ½ cup milk

• ½ cup sour cream

• 2 cups shredded cheddar cheese, divided

Optional Seasonings:

• 1 teaspoon dried thyme

• ½ teaspoon garlic powder

Casserole Topping:

• 1 cup Ritz crackers, crushed

• 2 tablespoons melted butter

Instructions

Step 1: Preheat the Oven

1. Preheat your oven to 350°F (175°C).

2. Lightly grease a 9×13-inch casserole dish and set aside.

Step 2: Prepare the Chicken

1. Cut the chicken into bite-sized pieces and season with Italian seasoning, salt, and pepper.

2. Heat butter in a large pot over medium heat.

3. Add the chicken and cook until golden brown on all sides, about 5 minutes. (Skip this step if using rotisserie chicken.)

Step 3: Cook the Rice and Broccoli

1. In the same pot, add chicken broth, olive oil, and rice. Bring to a boil, then reduce heat to a simmer.

2. Cover tightly and cook for 7 minutes.

3. Add fresh broccoli florets on top of the rice, replace the cover, and cook for an additional 8 minutes. Do not stir.

Step 4: Rest the Rice

1. Turn off the heat and remove the cover. Let the rice sit undisturbed for 10 minutes to allow the bottom rice to release.

Step 5: Combine the Casserole Base

1. Add the cooked chicken, condensed soup, milk, sour cream, optional seasonings, and half of the shredded cheddar cheese to the pot.

2. Stir gently to combine.

Step 6: Assemble the Casserole

1. Transfer the mixture to the prepared casserole dish.

2. Top with the remaining cheddar cheese.

Step 7: Add the Topping

1. In a small bowl, combine crushed Ritz crackers with melted butter.

2. Sprinkle the mixture evenly over the casserole.

Step 8: Bake

1. Cover the casserole with foil and bake for 15 minutes, or until heated through and the cheese is melted.

2. Optional: Remove the foil during the last 5 minutes for a crispier topping.

Tips

Rotisserie Chicken Shortcut: Save time by using pre-cooked rotisserie chicken.

Frozen Broccoli Option: If using frozen broccoli, thaw and drain well before adding to the pot.

Customize the Seasoning: Add cayenne pepper, paprika, or other spices for extra flavor.

Storage Options

Refrigeration: Store leftovers in an airtight container in the fridge for up to 3 days. Reheat in the oven or microwave.

Freezing: Freeze the casserole before baking. Thaw overnight in the fridge and bake as directed.

This Broccoli Rice Cheese and Chicken Casserole is a comforting, flavorful dish that’s as easy to make as it is delicious. With its creamy base, cheesy topping, and crunchy cracker crust, it’s a guaranteed hit for any occasion. Enjoy!

Amish Baked Custard

0

Amish Baked Custard is a timeless dessert that combines simple, wholesome ingredients to create a creamy, silky treat. This classic recipe delivers a luscious custard with a velvety texture and a gentle sweetness, enhanced by the warm, aromatic notes of vanilla and nutmeg. It’s a dessert that feels indulgent yet comforting, perfect for any occasion.

Traditionally baked in individual ramekins or a larger dish, this custard can be enjoyed warm for a cozy treat or chilled for a refreshing dessert. Its elegant simplicity makes it a favorite among dessert lovers, and its nostalgic flavors will transport you to the heart of Amish country.

Why You’ll Love This Recipe

Elegant Simplicity: With just a few ingredients, you can create a show-stopping dessert.

Versatile: Serve it warm for a comforting treat or chilled for a refreshing option.

Timeless Flavor: A classic dessert that appeals to all ages.

Ingredients

• 1 (14-ounce) can sweetened condensed milk

• 4 cups hot water

• 6 eggs

• 2 teaspoons vanilla extract

• ¼ teaspoon salt

• Nutmeg (for garnish)

Instructions

Step 1: Preheat the Oven

1. Preheat your oven to 325°F (163°C).

2. Prepare a large baking pan with high sides for the water bath.

Step 2: Prepare the Milk Mixture

1. In a large glass or metal bowl, combine the sweetened condensed milk and hot water. Stir until well mixed.

Step 3: Beat the Eggs

1. In a separate bowl, beat the eggs until they are light in color and fluffy in texture.

Step 4: Temper the Eggs

1. Gradually pour a small amount of the hot milk mixture into the eggs, whisking constantly to temper them.

2. Slowly combine the tempered eggs with the remaining milk mixture.

Step 5: Add Vanilla and Salt

1. Stir in the vanilla extract and salt until fully incorporated.

Step 6: Pour the Custard

1. Divide the custard mixture evenly among ramekins or pour it into a 2-quart baking dish.

2. Place the ramekins or dish into the prepared baking pan.

Step 7: Create the Water Bath

1. Carefully pour hot water into the baking pan until it reaches about ½ inch up the sides of the ramekins or dish.

2. Place the pan in the oven.

Step 8: Bake

1. Bake individual ramekins for 1 hour, or until a knife inserted in the center comes out clean.

2. If using a larger baking dish, bake for 1 hour 40 minutes.

Step 9: Cool and Garnish

1. Allow the custard to cool for at least 1 hour.

2. Sprinkle with nutmeg before serving.

Step 10: Serve

1. Serve warm for a comforting dessert or refrigerate and serve chilled for a cool treat.

Tips

Water Bath Importance: The water bath helps regulate the temperature and ensures even cooking for a creamy texture.

Nutmeg Garnish: Freshly grated nutmeg enhances the custard’s flavor and adds a decorative touch.

Serving Ideas: Pair with fresh berries, whipped cream, or a drizzle of caramel sauce for added flair.

Storage Options

Refrigeration: Store leftover custard in an airtight container in the fridge for up to 3 days. Serve chilled or gently reheat.

Freezing: Custard does not freeze well due to its high egg content; enjoy it fresh or refrigerated.

Amish Baked Custard is a dessert that brings simplicity and indulgence together in one elegant dish. Whether you serve it warm or chilled, its rich flavor and creamy texture will make it a favorite in your dessert rotation. Enjoy this classic treat that’s as comforting as it is delicious!

Easy Stuffed Pepper Soup

0

Easy Stuffed Pepper Soup is a hearty, comforting dish that transforms the classic flavors of stuffed peppers into a rich and satisfying soup. Loaded with ground sirloin, tender bell peppers, and aromatic spices, this one-pot meal is a quick and simple way to enjoy all the goodness of a family favorite in soup form.

The combination of savory beef, tangy tomatoes, and perfectly cooked rice creates a warm, filling dish that’s perfect for cozy dinners or meal prep. Whether you’re looking for a comforting bowl on a chilly night or a deliciously easy dinner option, this soup is sure to hit the spot.

Why You’ll Love This Recipe

One-Pot Wonder: Easy to make with minimal cleanup.

Classic Flavors: Brings the familiar taste of stuffed peppers to a comforting soup.

Hearty and Filling: Packed with protein, vegetables, and rice for a complete meal.

Ingredients

• 1 pound ground sirloin

• 1 green bell pepper, chopped

• 1 cup finely diced onion

• 1 (29-ounce) can diced tomatoes

• 1 (15-ounce) can tomato sauce

• 1 (14-ounce) can chicken broth

• ¼ teaspoon dried thyme

• ¼ teaspoon dried sage

• Salt and pepper to taste

• 1 cup white rice

Instructions

Step 1: Cook the Meat and Vegetables

1. In a large stockpot over medium heat, brown the ground sirloin. Drain any excess fat.

2. Add the chopped green bell pepper and finely diced onion to the pot.

3. Cook until the onion is translucent, stirring occasionally. Avoid browning the vegetables.

Step 2: Build the Soup Base

1. Add the diced tomatoes, tomato sauce, chicken broth, thyme, and sage to the pot.

2. Season generously with salt and pepper to taste.

3. Stir to combine, then cover the pot and let the soup simmer for 30–45 minutes, or until the peppers are tender.

Step 3: Cook the Rice

1. In a separate saucepan, bring 2 cups of water to a boil.

2. Add the rice, reduce the heat, and simmer until the rice is tender and fully cooked.

Step 4: Combine and Serve

1. Add the cooked rice to the soup and stir to combine.

2. Heat through for a few minutes before serving.

3. Serve warm, optionally garnished with fresh parsley or a sprinkle of Parmesan cheese.

Tips

Rice Options: Use brown rice, wild rice, or even cauliflower rice for a healthier twist.

Add Heat: For a spicy kick, include a pinch of red pepper flakes or chopped jalapeños.

Make It Cheesy: Stir in shredded cheddar cheese or sprinkle some on top before serving.

Storage Options

Refrigeration: Store leftover soup in an airtight container in the fridge for up to 3 days.

Freezing: Freeze the soup (without rice) in freezer-safe containers for up to 2 months. Add freshly cooked rice when reheating.

This Easy Stuffed Pepper Soup is a flavorful, hassle-free dinner that’s perfect for busy nights. With its robust flavors and hearty ingredients, it’s a recipe you’ll want to make again and again. Serve it with crusty bread or a fresh salad for a complete, satisfying meal. Enjoy!

Famous Red Lobster Shrimp Scampi

0

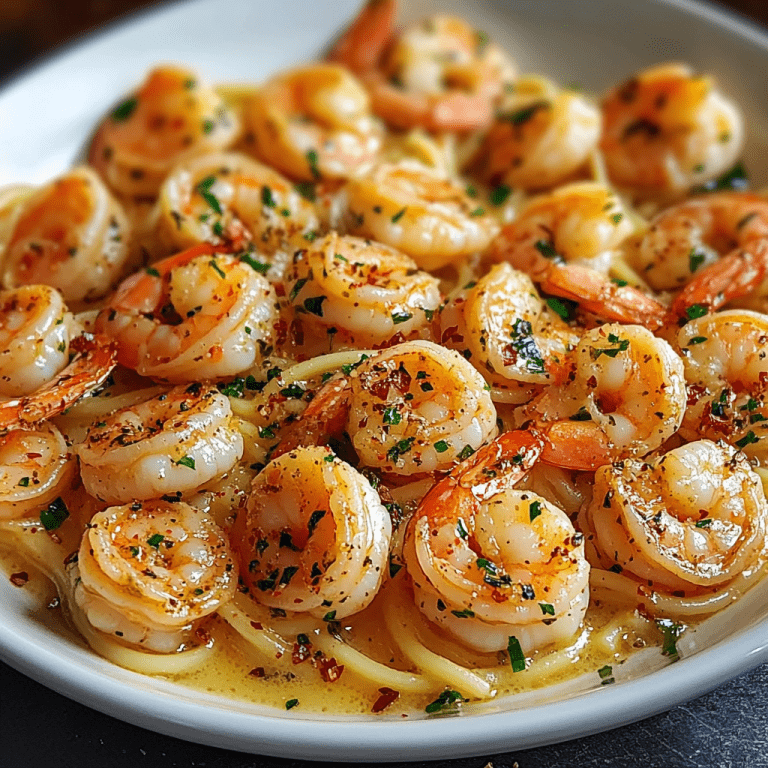
Red Lobster Shrimp Scampi is a beloved seafood classic known for its tender shrimp bathed in a luscious garlic butter sauce with white wine and a hint of lemon. This dish perfectly balances rich, buttery flavors with a fresh, citrusy tang, making it an ideal choice for an elegant dinner that’s surprisingly easy to prepare at home.

The recipe brings restaurant-quality taste to your table, with shrimp that’s perfectly cooked and coated in a silky sauce. Whether served over pasta, alongside crusty bread, or as a standalone dish, it’s a recipe that impresses with every bite.

Why You’ll Love This Recipe

Restaurant Quality: Enjoy the flavors of Red Lobster from the comfort of your own kitchen.

Quick and Easy: Ready in under 30 minutes, perfect for a weeknight meal or special occasion.

Rich and Flavorful: A buttery, garlicky sauce enhanced with white wine and lemon juice.

Ingredients

• 1 lb medium shrimp, peeled and deveined

• 1 tablespoon pure olive oil

• 2 tablespoons garlic, finely chopped

• 1½ cups white wine (Chardonnay recommended)

• Juice of ½ fresh lemon

• 1 teaspoon Italian seasoning

• ½ cup softened butter

• 1 tablespoon parsley, chopped

• ½ cup grated Parmesan cheese

Instructions

Step 1: Sauté the Shrimp

1. Heat a cast iron skillet over medium heat and add olive oil.

2. Add the shrimp and cook until tender and no longer translucent, about 2–3 minutes per side.

3. Remove the shrimp from the skillet and set aside.

Step 2: Cook the Garlic

1. Lower the heat and add the finely chopped garlic to the skillet.

2. Sauté for 2–3 minutes, stirring frequently, without letting the garlic brown to avoid bitterness.

Step 3: Create the Sauce

1. Pour in the white wine and lemon juice, stirring to combine.

2. Cook until the wine is reduced by half, about 5–7 minutes.

3. Once reduced, stir in the Italian seasoning.

Step 4: Add the Butter

1. Reduce the heat to low and slowly add the softened butter to the skillet, stirring constantly.

2. Ensure the pan is not too hot to prevent the butter from separating.

Step 5: Combine and Garnish

1. Return the cooked shrimp to the skillet, tossing them gently to coat in the sauce.

2. Add chopped parsley and season with salt and pepper to taste.

3. Sprinkle grated Parmesan cheese over the shrimp.

Step 6: Serve and Enjoy

1. Serve immediately over pasta, rice, or with crusty bread to soak up the sauce.

Tips

Choose the Right Wine: Use a dry white wine like Chardonnay for the best flavor. Avoid cooking wines.

Don’t Overcook the Shrimp: Cook just until opaque to keep them tender and juicy.

Make It Your Own: Add a pinch of red pepper flakes for a spicy kick or more lemon juice for extra tang.

Storage Options

Refrigeration: Store leftovers in an airtight container in the fridge for up to 2 days. Reheat gently on the stovetop or in the microwave.

Freezing: Freeze the cooked shrimp and sauce in a freezer-safe container for up to 1 month. Thaw overnight in the fridge before reheating.

This Famous Red Lobster Shrimp Scampi recipe delivers all the rich, buttery goodness of the original, making it a standout dish for any seafood lover. It’s quick, elegant, and utterly delicious—perfect for impressing guests or treating yourself to a restaurant-quality meal at home. Enjoy!