Brown Sugar Kielbasa Bites

0

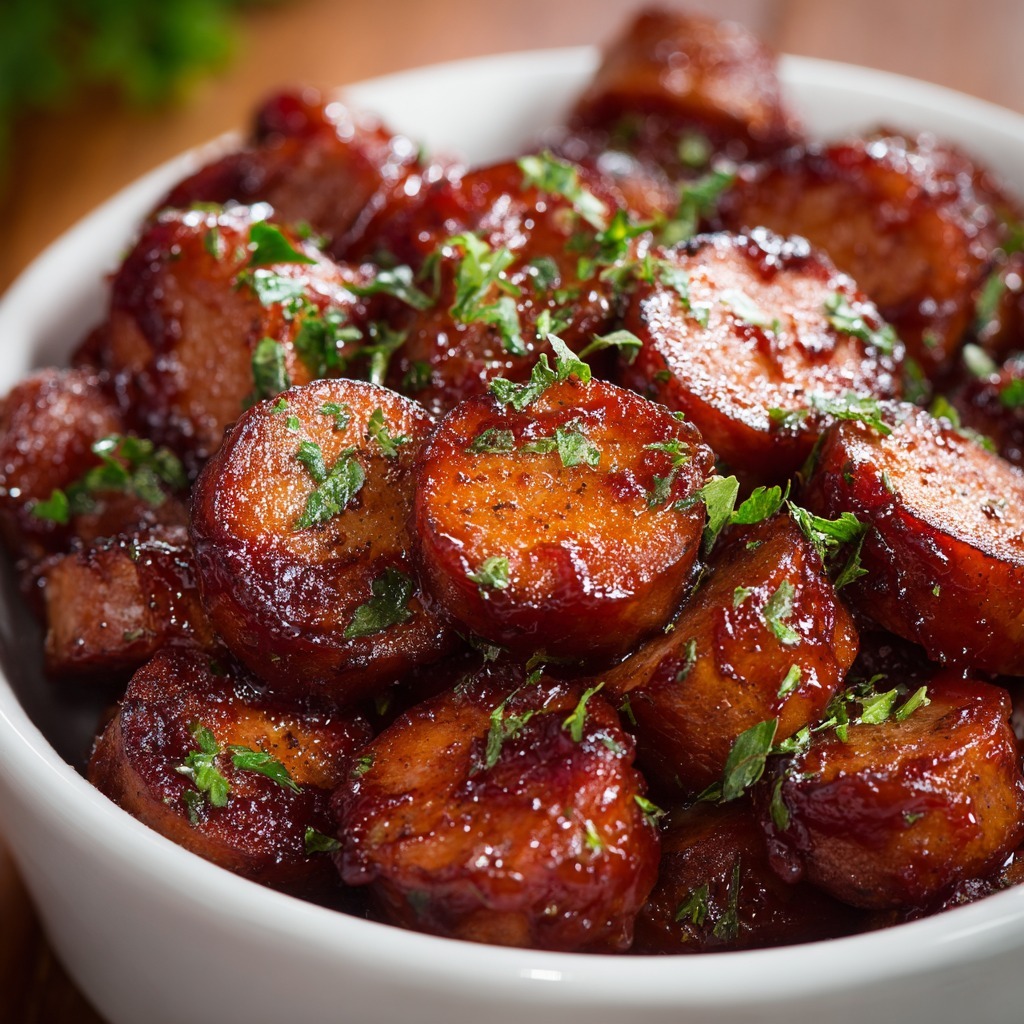
Brown Sugar Kielbasa Bites are the ultimate party appetizer—a sweet, savory, and gloriously sticky bite-sized treat that combines smoky, hearty kielbasa sausage with a caramelized, tangy-sweet glaze that is absolutely irresistible. This recipe is a celebration of bold, crowd-pleasing flavors, transforming simple sliced sausage into a glistening, caramel-coated masterpiece with minimal effort. The magic begins with a simple yet brilliant glaze: brown sugar provides deep, molasses-like sweetness, while ketchup adds tangy tomato richness, Dijon mustard contributes a subtle sharpness, and soy sauce brings an umami depth that balances the sweetness perfectly. A touch of apple cider vinegar brightens the mixture, and garlic powder and black pepper round out the savory notes. As the kielbasa bakes, this glaze transforms, thickening and caramelizing into a sticky, glossy coating that clings to every piece of sausage, creating a perfect balance of textures and flavors.

The brilliance of this recipe lies in its incredible ease and the guaranteed wow factor it delivers. With just a handful of pantry ingredients and a short bake time, you can create an appetizer that looks and tastes like it came from a gourmet caterer. The kielbasa emerges from the oven tender and juicy, each piece coated in a beautiful, lacquered glaze that is both sweet and savory. Served warm with toothpicks for easy grabbing and a sprinkle of fresh parsley for color, these bites are guaranteed to be the first thing to disappear from any party platter. They’re the perfect addition to game-day spreads, holiday gatherings, or any occasion that calls for delicious, finger-friendly food.

Why You’ll Love This Recipe:

  • Perfect Sweet and Savory Balance: The caramelized brown sugar glaze is perfectly complemented by tangy ketchup, savory soy sauce, and spicy Dijon.
  • Incredibly Easy to Make: Just whisk, toss, and bake—minimal effort for maximum flavor.
  • Crowd-Pleasing Party Favorite: A guaranteed hit at any gathering, from game day to holiday parties.
  • Versatile and Adaptable: Easily double the recipe for a crowd, or use different sausages like smoked sausage or chorizo.
  • Sticky, Glazed, and Irresistible: The caramelized coating is absolutely addictive.

Ingredients:

For the Kielbasa and Glaze:*
14 oz (400g) kielbasa sausage, sliced into ½-inch rounds
½ cup packed light brown sugar
¼ cup ketchup
1 tablespoon Dijon mustard
1 tablespoon soy sauce (low-sodium recommended)
1 tablespoon apple cider vinegar
½ teaspoon garlic powder
¼ teaspoon freshly ground black pepper

For Garnish and Serving:*
Chopped fresh parsley (optional)
Toothpicks, for serving

Instructions:

Step 1: Preheat Oven and Prepare Dish*
Preheat your oven to 375°F (190°C). Lightly grease a small baking dish (about 8×8 inches or similar) or line it with parchment paper for easy cleanup.

Step 2: Make the Glaze*
In a medium bowl, whisk together the brown sugar, ketchup, Dijon mustard, soy sauce, apple cider vinegar, garlic powder, and black pepper until the sugar is mostly dissolved and the mixture is smooth.

Step 3: Coat the Kielbasa*
Add the sliced kielbasa to the bowl with the glaze. Toss well until every piece is evenly coated.

Step 4: Arrange in Baking Dish*
Spread the coated kielbasa pieces in a single layer in the prepared baking dish. Pour any remaining glaze from the bowl over the top.

Step 5: Bake*
Bake for 20-25 minutes, stirring once halfway through. The bites are done when the sausage is heated through and the glaze is thick, sticky, and caramelized around the edges.

Step 6: Serve*
Let the bites cool in the dish for 5 minutes. Transfer to a serving plate, insert toothpicks for easy grabbing, and sprinkle with chopped parsley if desired. Serve warm.

Tips:

  • Don’t Overcrowd: Use a dish that allows the bites to sit in a single layer for even caramelization.
  • Stir Halfway: Stirring ensures all sides get coated in the thickening glaze.
  • Make it Spicy: Add a pinch of cayenne pepper or red pepper flakes to the glaze for a kick of heat.
  • Use Quality Sausage: Good-quality kielbasa or smoked sausage makes a difference. Look for one with a nice smoky flavor.
  • Double the Recipe: These disappear fast! Double the ingredients and use a 9×13-inch baking dish for a crowd.

Storage Options:

  • Refrigerator: Store leftovers in an airtight container in the refrigerator for up to 4 days.
  • Reheating: Reheat gently in a 350°F (175°C) oven or air fryer for 5-7 minutes until warmed through. The microwave works but may soften the glaze.
  • Freezing: These bites freeze well. Cool completely, transfer to a freezer-safe container, and freeze for up to 2 months. Thaw in the refrigerator and reheat in the oven.
  • Make-Ahead: You can prepare the glaze and slice the kielbasa a day in advance. Store separately in the refrigerator, then combine and bake just before serving.

Brown Sugar Kielbasa Bites are the ultimate proof that the best appetizers are often the simplest. With their sticky, sweet, and savory glaze and hearty, smoky sausage, they’re an irresistible bite that will have everyone coming back for more.

Your Method Isn’t Quite Right: Here’s the Correct Way to Maintain a Clean Home

0

Keeping a clean home isn’t just about crossing tasks off a list—it’s about creating an environment that supports your health, mood, and daily peace of mind. But here’s the thing most people get wrong: the approach. We scrub and organize and stress, yet somehow the mess always comes back faster than we expected.

The problem isn’t effort. It’s strategy.

Whether you’re a busy parent, working long hours, or just tired of feeling like your home is winning the battle against you, these guidelines will help you build a routine that actually works. No perfection required—just smarter habits that stick.

1. Why a Clean Home Actually Matters

A tidy home does more than look nice. Studies show it can lower stress, sharpen focus, and make it easier to relax in your own space. There’s also the health side—regular cleaning cuts down on dust, allergens, and bacteria that can mess with your breathing and overall well-being.

Beyond all that, a clean home just feels good. It’s a space that reflects you, supports you, and gives you a little sense of pride every time you walk in the door. That’s worth the effort.

2. Daily Habits That Keep Chaos Away

You don’t need to clean all day every day. You just need a few small habits that prevent mess from taking over.

Start with the bed. Making it in the morning takes two minutes and sets a productive tone. Spend 10–15 minutes each day tidying high-traffic areas—the living room, the kitchen—so clutter doesn’t pile up.

And clean as you go. Wash dishes right after meals instead of letting them sit. Wipe counters while dinner simmers. These tiny actions keep things from spiraling.

3. Weekly Tasks That Keep Things Sparkling

Once a week, go a little deeper. Vacuum and mop floors to pull up dirt and allergens that daily sweeping misses. Dust everything—shelves, furniture, electronics—before it builds up.

Bathrooms need weekly attention too. Scrub toilets, sinks, and showers. Swap out towels and bath mats. It’s not glamorous, but it keeps things fresh and keeps bigger messes from forming.

4. Monthly Deep-Cleaning for the Overlooked Spots

Some things only need attention once a month, but they matter. Wash windows, blinds, and curtains to let light in and improve air quality. Flip and vacuum mattresses to keep them clean and make them last longer.

Appliances need love too. Run a cleaning cycle on your washing machine, descale the coffee maker, wipe down the oven. These small chores keep your machines running well so they don’t quit on you.

5. Seasonal Cleaning: Getting Ready for What’s Next

Seasons change, and your home should too. In spring, declutter and organize. Swap heavy bedding for lighter stuff. Clear out closets to make room for warmer weather clothes.

When fall hits, prep for cold months—check heating systems, seal windows and doors, pack away summer gear. Seasonal cleaning keeps your home comfortable and functional no matter the weather.

6. The Annual Overhaul: Start Fresh Once a Year

Once a year, go all in. Deep-clean carpets and upholstery. Wash walls and ceilings. Tackle storage spaces like the attic or basement that don’t get regular attention.

This is also the time to assess what you actually need. Donate or toss things you haven’t touched in a year. An annual reset keeps your home from slowly filling up with stuff you don’t use.

7. Eco-Friendly Cleaning That Actually Works

You don’t need harsh chemicals to get things clean. Vinegar, baking soda, and lemon handle most jobs just fine. They’re effective, cheap, and way better for the planet.

Switch to reusable tools—microfiber cloths, washable mop pads—to cut down on waste. Good for your home, good for the earth, good for your wallet.

8. Making Small Spaces Feel Bigger and Work Harder

Tiny home? No problem. Use vertical space—shelves and hooks keep floors clear. Look for furniture that pulls double duty, like ottomans with hidden storage.

Clear bins and labels make closets and cabinets functional instead of chaotic. A little thought about layout goes a long way in a small space.

9. Common Mistakes That Trip People Up

The biggest mistake? No schedule. When cleaning is random, messes get overwhelming fast. Pick specific days for specific tasks and stick to them.

Another one: wrong products. Using the wrong cleaner can damage surfaces or just not work. Read labels. Know what you’re cleaning. It saves time and frustration.

10. Viral Cleaning Hacks: Do Any Actually Work?

TikTok loves a cleaning hack. Some are genius. Some are nonsense.

That lemon for stainless steel? Leaves streaks. Vinegar and baking soda down a drain? Actually works pretty well.

If you see a viral trick, test it somewhere small first. Not everything that looks good on video holds up in real life.

11. How to Stay Motivated When You’d Rather Not

Nobody feels motivated to clean every single day. That’s normal. The trick is making it manageable.

Set a timer. Fifteen minutes. That’s it. When the timer goes off, stop if you want. Often you’ll keep going, but having permission to stop makes starting easier.

Break big jobs into small chunks. Reward yourself when you finish. A treat, a break, a few minutes of guilt-free scrolling. Associate cleaning with something positive and it gets easier over time.

Honey Butter Skillet Corn

0

Honey Butter Skillet Corn is the ultimate side dish—a gloriously simple, sweet, and creamy celebration of corn that transforms a humble bag of frozen kernels into something truly spectacular in under 15 minutes. This recipe is a masterclass in the power of a few quality ingredients, where sweet corn is sautéed in a luscious combination of butter and honey until it’s tender, slightly caramelized, and absolutely irresistible. The magic begins as the butter melts and mingles with the honey, creating a sweet, glossy coating that clings to every kernel. As the corn sautés, it develops a subtle, golden-brown char in spots, adding a hint of caramelized depth. The final touch—a handful of cream cheese pieces stirred in at the end—melts into a rich, creamy sauce that envelops the corn, transforming it into a decadent, velvety side dish that’s pure comfort on a plate.

The brilliance of this recipe lies in its incredible ease and the universally beloved flavor it delivers. It requires no thawing, no complicated steps, and just a single skillet, making it the perfect last-minute addition to any meal. The balance of sweet honey, rich butter, and tangy cream cheese is simply perfect, and a simple seasoning of salt and pepper allows the corn’s natural sweetness to shine. This Honey Butter Skillet Corn is the ideal companion to everything from grilled meats and fried chicken to holiday roasts and weeknight tacos. It’s a dish that will have everyone at the table reaching for seconds, and it’s guaranteed to become a staple in your recipe rotation.

Why You’ll Love This Recipe:

  • Incredibly Quick and Easy: Ready in under 15 minutes with just a handful of ingredients.
  • Perfectly Sweet and Creamy: The combination of honey, butter, and cream cheese is simply irresistible.
  • Uses Frozen Corn: A convenient pantry staple transforms into a spectacular side dish.
  • Versatile Side Dish: Pairs beautifully with chicken, pork, steak, or fish.
  • Crowd-Pleasing Favorite: A guaranteed hit with both kids and adults.

Ingredients:

For the Corn:*
1 (16 oz) bag frozen corn kernels (no need to thaw)
2 tablespoons unsalted butter
2 tablespoons honey
2 oz cream cheese, cut into small pieces
¼ teaspoon kosher salt
¼ teaspoon freshly ground black pepper

Instructions:

Step 1: Heat the Butter and Honey*
Place a large skillet over medium-high heat. Add the butter and honey. Cook, stirring occasionally, until the butter is melted and the mixture is well combined and bubbly.

Step 2: Add the Corn*
Add the frozen corn kernels to the skillet. Sauté for 5-8 minutes, stirring occasionally, until the corn is heated through and beginning to caramelize slightly in spots.

Step 3: Add Cream Cheese and Season*
Reduce the heat to medium-low. Add the cream cheese pieces, salt, and pepper. Continue to cook and stir for another 3-5 minutes, until the cream cheese is fully melted and the corn is coated in a creamy, luscious sauce.

Step 4: Serve*
Taste and adjust seasoning if needed. Serve immediately.

Tips:

  • No Need to Thaw: Cooking the corn directly from frozen helps it retain its texture and prevents it from becoming mushy.
  • Cut Cream Cheese into Small Pieces: Smaller pieces will melt more quickly and evenly into the sauce.
  • Don’t Overcook: Cook just until the cream cheese is melted and the corn is hot. Overcooking can make the corn tough.
  • Add Fresh Herbs: Stir in a tablespoon of fresh chopped chives or parsley just before serving for a pop of color and freshness.
  • Make it Spicy: Add a pinch of cayenne pepper or red pepper flakes with the salt and pepper for a little heat.

Storage Options:

  • Refrigerator: Store leftovers in an airtight container in the refrigerator for up to 4 days.
  • Reheating: Reheat gently in a skillet over medium-low heat, stirring occasionally. You can also reheat in the microwave.
  • Not for Freezing: The creamy sauce may separate upon thawing.
  • Make-Ahead: This dish is best made fresh, but you can prepare it a few hours in advance and reheat gently before serving.

Honey Butter Skillet Corn is the perfect example of how simple ingredients, treated with care, can create something truly memorable. Sweet, creamy, and utterly delicious, it’s a side dish that will earn a permanent place at your table.

Creamed Peas on Toast

0

Creamed Peas on Toast is the ultimate expression of simple, soul-soothing comfort—a humble, elegant dish that transforms a handful of pantry staples into a warm, creamy, and deeply satisfying meal. This recipe is a celebration of the beauty of simplicity, where sweet, vibrant peas are enveloped in a luscious, velvety cream sauce and served atop a slice of perfectly toasted bread. The magic begins with a classic roux: butter and shallot are sautéed until soft, then a touch of flour is stirred in to create a foundation for the sauce. Warm milk is gradually whisked in, transforming the mixture into a smooth, silky béchamel that coats the back of a spoon. Frozen peas are stirred in at the last moment, their bright color and sweet pop providing a perfect contrast to the rich, creamy sauce. A whisper of nutmeg and a squeeze of fresh lemon juice elevate the dish, adding warmth and brightness that balance the richness beautifully.

The brilliance of this recipe lies in its incredible versatility and the profound comfort it delivers with minimal effort. It’s a dish that can be enjoyed for breakfast, a light lunch, or a quick, comforting dinner. The creamy peas can be spooned over any bread you love—crusty sourdough, hearty whole wheat, or a simple slice of white toast—and the optional garnish of fresh herbs adds a final touch of color and freshness. Creamed Peas on Toast is a reminder that the most satisfying meals are often the simplest, and that a few quality ingredients, treated with care, can create something truly special.

Why You’ll Love This Recipe:

  • Warm, Creamy, and Deeply Comforting: The velvety sauce and sweet peas are pure comfort in a bowl.
  • Incredibly Quick and Easy: Ready in under 15 minutes with simple, pantry-friendly ingredients.
  • Versatile and Adaptable: Perfect for breakfast, lunch, or a light dinner. Serve on any bread you like.
  • Bright, Fresh Flavor: Lemon juice and fresh herbs elevate the dish and balance the richness.
  • A Nostalgic Classic: A beloved, old-fashioned dish that never goes out of style.

Ingredients:

For the Creamed Peas:*
2 tablespoons unsalted butter
1 small shallot or ¼ cup finely chopped onion
2 cloves garlic, minced
2 tablespoons all-purpose flour
1 cup whole milk or 2% milk
1 cup frozen peas (no need to thaw)
¼ teaspoon salt
¼ teaspoon freshly ground black pepper
Pinch of ground nutmeg (optional but recommended)
1 teaspoon fresh lemon juice

For Serving:*
2 slices of your favorite bread (sourdough, whole wheat, or white)
Butter, for spreading on toast (optional)
Fresh herbs like parsley, chives, or mint, chopped (optional garnish)

Instructions:

Step 1: Prepare the Toast*
Toast the bread slices to your desired level of doneness. If desired, spread a thin layer of butter on the warm toast. Set aside on serving plates.

Step 2: Sauté the Aromatics*
In a medium saucepan or skillet, melt the butter over medium heat. Add the shallot (or onion) and cook, stirring occasionally, for 2-3 minutes until softened. Add the minced garlic and cook for 30 seconds until fragrant.

Step 3: Make the Roux*
Sprinkle the flour over the shallot and garlic. Stir constantly and cook for 1 minute to eliminate the raw flour taste.

Step 4: Whisk in the Milk*
Gradually pour in the milk while whisking constantly to prevent lumps from forming. Continue to cook, whisking frequently, for 2-3 minutes until the sauce thickens slightly and coats the back of a spoon.

Step 5: Add the Peas and Season*
Stir in the frozen peas and cook for 2-3 minutes until they are heated through. Season with salt, pepper, and a pinch of nutmeg (if using). Stir in the fresh lemon juice. Taste and adjust seasoning as needed.

Step 6: Assemble and Serve*
Spoon the creamy peas generously over the prepared toast. Garnish with fresh herbs if desired. Serve immediately.

Tips:

  • Frozen Peas are Perfect: Frozen peas are sweeter and more consistent than many fresh peas. There’s no need to thaw them first.
  • Don’t Skip the Lemon Juice: A small squeeze of lemon juice brightens the entire dish and balances the richness of the cream sauce.
  • Adjust the Sauce Thickness: If the sauce becomes too thick, add a splash more milk. If too thin, let it simmer an extra minute or two.
  • Customize Your Toast: Try it on a thick slice of crusty sourdough, a buttery brioche, or even a toasted English muffin.
  • Add Protein: For a heartier meal, top with a poached egg, crispy bacon, or flaked smoked salmon.

Storage Options:

  • Refrigerator: Store leftover creamed peas (without the toast) in an airtight container in the refrigerator for up to 3 days.
  • Reheating: Reheat gently in a small saucepan over low heat, stirring occasionally. Add a splash of milk if the sauce has thickened too much.
  • Not for Freezing: The cream sauce may separate and become grainy upon thawing.
  • Make-Ahead: The creamed peas are best made fresh, but you can prepare the sauce (through Step 4) in advance and stir in the peas and lemon juice just before serving.

Creamed Peas on Toast is a simple, timeless dish that delivers immense comfort and satisfaction. With its creamy sauce, sweet peas, and perfect toasted bread, it’s a meal that warms both body and soul.

90% of People Ruin Their Fabrics: Here Are 10 Laundry Habits to Break Immediately

0

Laundry is one of those chores we do on autopilot. Toss things in, push a button, walk away. But here’s the thing—most of us are accidentally destroying our clothes in the process. Faded colors, shrunken sweaters, stretched-out necklines—it’s not just bad luck. It’s habit.

Turns out, a huge number of people admit to ruining their fabrics during washing and drying. The good news? Once you know what you’re doing wrong, fixing it is surprisingly simple. Here are ten laundry habits to break starting today, so your clothes can actually last.

1. Washing Everything on the Same Cycle

It’s easy to just throw it all in and hit “normal.” But not all fabrics are built the same. Delicates like silk and lace need a gentle, slow cycle. Heavy stuff like towels and jeans can handle—and actually need—a more robust wash.

When you treat everything the same, delicates wear out faster and sturdy items don’t get as clean. Take an extra minute to sort by fabric type and pick the right cycle. Your clothes will thank you.

2. Overloading the Machine and Starving Clothes of Water

Cramming in as much as possible feels efficient, but it’s actually working against you. When the drum is too full, clothes can’t move freely. Water and detergent can’t circulate. Nothing gets properly clean, and the friction causes extra wear.

Stick to filling the machine about two-thirds full. Give everything room to tumble. A little breathing space makes a big difference in how well your laundry washes—and how long it lasts.

3. Using Too Much Detergent (Especially on Dark Clothes)

More soap does not equal cleaner clothes. In fact, excess detergent leaves residue that makes fabrics feel stiff and actually attracts more dirt. Dark clothes are especially vulnerable—that residue can cause fading and leave weird marks.

Read the instructions on your detergent. Use less than you think you need, especially if you have a high-efficiency machine. A little goes a long way, and your colors will stay richer longer.

4. Ignoring Care Labels on Delicates and Swimwear

Those tiny tags aren’t just there for decoration. They tell you exactly how to keep that garment alive. Ignore them, and you’re guessing—which is how lingerie loses its shape and swimwear stretches out.

Before you wash anything delicate, check the label. Hand washing is often best, but if you’re using a machine, invest in a mesh laundry bag and stick to a gentle cycle with cold water. It takes two extra seconds and saves your favorite pieces.

5. Tossing Activewear in With Regular Cotton Loads

Your gym clothes are made differently for a reason. They’re designed to wick moisture and stretch with your body. Washing them with regular cotton—especially with fabric softener—breaks down the elasticity and traps odors in the fabric.

Wash activewear separately with a mild detergent. Skip the fabric softener completely. Use cold water. This keeps the fabric working the way it should and smelling fresh instead of funky.

6. Machine-Washing Wool Sweaters Like T-Shirts

Wool is wonderful until you treat it like cotton. Heat and agitation are wool’s enemies—they cause shrinking, felting, and general sadness.

Hand wash wool sweaters in cold water with a detergent made specifically for wool. If you must use a machine, pick the wool or hand wash cycle and put the sweater in a mesh bag. Always lay it flat to dry. Never hang it. Your future self will thank you when it still fits.

7. Using Hot Water by Default on Fabrics That Can’t Handle It

Hot water is great for killing germs and tackling tough stains, but it’s not for everything. Using it by default fades colors, shrinks fabrics, and damages synthetics.

For most everyday loads, cold or warm water works just fine. Save the hot water for white linens or stuff that’s truly filthy. Your clothes will hold their shape and color much longer.

8. Abusing the Dryer: High Heat for Everything

The dryer is convenient, but high heat is brutal on fabric. It shrinks wool, ruins elasticity in spandex, and fades colors across the board.

Drop the heat setting. Use low or medium instead. Take things out as soon as they’re dry. And for anything delicate, just skip the dryer altogether—air drying is the gentlest option by far. It takes longer, but your clothes will last way longer too.

9. Skipping Color Sorting and Fading Your Dark Clothes

Sorting by color feels old-fashioned, but there’s a reason our grandmothers did it. Dyes bleed, especially in new clothes. When dark colors mix with lights, you risk transfer. When darks mix with other darks, they fade faster.

Take the two minutes to separate whites, lights, and darks. Toss in a color-catcher sheet if you’re nervous. It’s a small habit that keeps everything looking the way it should.

10. Letting Wet Laundry Sit and Destroy Fibers Over Time

We’ve all done it—forgotten about the wash until hours later. But letting wet laundry sit is a fast track to mildew, musty smells, and weakened fibers.

Set a timer if you have to. Move laundry to the dryer or hanging rack as soon as the cycle ends. If you absolutely can’t, at least crack the door open so air can circulate. Fresh-smelling, healthy fabric starts with timing.

Italian Meatballs

0

Italian Meatballs are the ultimate expression of comfort and tradition—tender, juicy, and bursting with herbaceous, savory flavor, these are the meatballs that dreams are made of. This recipe is a masterful blend of pork sausage and ground beef, creating a rich, complex base that is both succulent and deeply satisfying. The magic begins with breadcrumbs soaked in milk, a simple step that ensures the meatballs remain incredibly moist and tender, never dense or dry. Fresh parsley, minced onion, garlic, and a generous helping of grated Parmigiano-Reggiano add layers of authentic Italian flavor, while a touch of Worcestershire sauce provides a subtle, savory depth. The mixture is gently combined—handled just enough to incorporate the ingredients, but not so much as to toughen the meat—then rolled into generous, 2-inch balls ready for browning.

The brilliance of this recipe lies in its perfect balance and the foolproof techniques that guarantee restaurant-quality results. Browning the meatballs in a skillet creates a beautiful, caramelized crust that locks in juices and adds incredible flavor, but they can also be baked for a hands-off approach. However they’re cooked, the result is the same: a meatball that is tender, flavorful, and utterly irresistible. Served with a creamy garlic pasta, nestled in a pot of simmering marinara, or piled high on a sub roll with melted cheese, these Italian Meatballs are a versatile masterpiece. They’re the kind of dish that brings family and friends together, filling the kitchen with an aroma that promises warmth, love, and a truly memorable meal.

Why You’ll Love This Recipe:

  • Incredibly Tender and Juicy: The combination of pork, beef, and milk-soaked breadcrumbs guarantees a perfect texture.
  • Authentic, Herb-Infused Flavor: Fresh parsley, garlic, onion, and Parmigiano create a depth of flavor that’s unmistakably Italian.
  • Versatile Serving Options: Perfect with pasta, in subs, on their own, or simmered in your favorite sauce.
  • Foolproof Technique: Simple steps and gentle handling ensure success every time.
  • Freezer-Friendly: Make a double batch and freeze some for easy future meals.

Ingredients:

For the Meatballs:*
1 lb pork sausage (casings removed)
1 lb ground beef (80/20 recommended)
⅔ cup Italian breadcrumbs
½ cup whole milk, for soaking
½ cup freshly grated Parmigiano-Reggiano cheese
2 large eggs
⅓ cup fresh parsley, finely chopped
⅓ cup yellow onion, minced
3 cloves garlic, minced
1 teaspoon Italian seasoning
1 tablespoon Worcestershire sauce
½ teaspoon garlic powder
1 teaspoon kosher salt
¼ teaspoon freshly ground black pepper

For Cooking:*
2-3 tablespoons olive oil, for browning (if pan-frying)

Instructions:

Step 1: Soak the Breadcrumbs*
In a small bowl, combine the Italian breadcrumbs with the milk. Let them soak for 1-2 minutes until the milk is absorbed and the breadcrumbs are soft and pasty.

Step 2: Combine the Ingredients*
In a large mixing bowl, combine the soaked breadcrumbs, pork sausage, ground beef, grated Parmigiano-Reggiano, eggs, parsley, minced onion, minced garlic, Italian seasoning, Worcestershire sauce, garlic powder, salt, and pepper.

Step 3: Mix Gently*
Using your hands, gently mix all the ingredients together just until combined. Be careful not to overmix, as this can result in tough meatballs.

Step 4: Form the Meatballs*
Roll the mixture into 2-inch balls (about the size of a golf ball) and place them on a baking sheet or plate. You should get approximately 16-20 meatballs.

Step 5: Cook the Meatballs*

To Pan-Fry: Heat 2-3 tablespoons of olive oil in a large skillet over medium heat. Working in batches to avoid overcrowding, add the meatballs and brown on all sides, turning occasionally, until cooked through (about 10-12 minutes total). An internal temperature of 160°F (71°C) indicates doneness.

To Bake: Preheat oven to 375°F (190°C). Place the meatballs on a parchment-lined baking sheet, spacing them slightly apart. Bake for 20-25 minutes, until golden brown and cooked through.

Step 6: Serve*
Serve the meatballs hot with your favorite pasta and sauce, on a sub roll, or as desired.

Tips:

  • Soak the Breadcrumbs: This step is crucial for moist meatballs. Don’t skip it!
  • Don’t Overmix: Mix just until the ingredients are combined. Overworking the meat will make the meatballs tough.
  • Uniform Size: Roll meatballs to a similar size for even cooking.
  • Test for Doneness: Use an instant-read thermometer to ensure they reach 160°F (71°C).
  • Simmer in Sauce: For extra flavor, after browning, simmer the meatballs in your favorite marinara sauce for 20-30 minutes.

Storage Options:

  • Refrigerator: Store cooked meatballs in an airtight container in the refrigerator for up to 4 days.
  • Reheating: Reheat gently in a saucepan with a little sauce or broth, or in the microwave.
  • Freezing: These meatballs freeze beautifully. Cool completely, arrange in a single layer on a baking sheet, and freeze until solid. Transfer to a freezer bag and freeze for up to 3 months. Thaw in the refrigerator before reheating.
  • Make-Ahead: You can prepare the meatball mixture up to 24 hours in advance and keep it covered in the refrigerator. Form and cook just before serving.

Italian Meatballs are a timeless classic for good reason—they’re the perfect combination of savory, tender, and comforting. Whether served with pasta, on a sandwich, or as a standalone appetizer, they’re guaranteed to be a hit.

Strawberry Mousse

0

Strawberry Mousse is the epitome of elegant, light, and refreshing desserts—a cloud-like, airy creation that captures the pure, sweet essence of ripe strawberries in every luscious spoonful. This recipe is a masterclass in simplicity and balance, transforming just a handful of ingredients into a dessert that feels both indulgent and ethereally light. The magic begins with fresh, pureed strawberries, their vibrant color and bright, tangy sweetness forming the fruity heart of the mousse. This puree is then incorporated into a luxuriously smooth base of whipped cream cheese and powdered monk fruit sweetener, creating a creamy, tangy canvas that perfectly complements the fruit. The final, crucial step is the gentle folding of softly whipped heavy cream, which aerates the mixture, transforming it into a silky, mousse-like texture that is simultaneously rich and featherlight.

The brilliance of this recipe lies in its incredible versatility and the way it delivers a sophisticated dessert with minimal effort and no baking required. Whether you’re following a low-carb lifestyle or simply looking for a lighter, more refreshing treat, this mousse adapts beautifully. The use of powdered monk fruit sweetener keeps it guilt-free without sacrificing any of the sweetness, while the cream cheese provides a subtle tang that prevents the dessert from being cloying. Chilled for at least two hours, the mousse sets to a perfect, spoonable consistency, ready to be served in elegant glasses, topped with a fresh strawberry or a sprig of mint. It’s the perfect ending to a spring or summer meal, a dessert that is as beautiful to look at as it is delicious to eat.

Why You’ll Love This Recipe:

  • Light, Airy, and Luxuriously Creamy: The perfect balance of rich and refreshing.
  • Bright, Fresh Strawberry Flavor: Pureed fresh strawberries provide vibrant color and authentic taste.
  • No-Bake and Effortless: Comes together in minutes with simple mixing and folding.
  • Keto-Friendly and Low-Carb: Uses powdered monk fruit sweetener for a guilt-free indulgence.
  • Elegant and Impressive: Beautiful served in individual glasses, perfect for dinner parties or special occasions.

Ingredients:

For the Strawberry Puree:*
¾ cup pureed fresh strawberries (about 8-12 medium strawberries)

For the Mousse Base:*
8 oz (226g) full-fat cream cheese, softened to room temperature
1 cup powdered monk fruit sweetener (or other powdered low-carb sweetener)
2 teaspoons pure vanilla extract

For the Whipped Cream:*
1 cup heavy whipping cream

Instructions:

Step 1: Prepare the Strawberry Puree*
Wash and hull the fresh strawberries. Add them to a high-speed blender or food processor and blend until completely smooth. Set aside.

Step 2: Whip the Heavy Cream*
In a medium mixing bowl, using a hand mixer or a stand mixer with the whisk attachment, whip the heavy cream on medium-high speed until soft peaks form, about 2-3 minutes. Be careful not to overwhip. Set aside in the refrigerator.

Step 3: Whip the Cream Cheese Base*
In a separate large mixing bowl, beat the softened cream cheese with an electric mixer until light, fluffy, and completely smooth, about 2 minutes. Add the powdered monk fruit sweetener, the pureed strawberries, and the vanilla extract. Beat again for 2-3 minutes until everything is well combined and smooth.

Step 4: Fold in the Whipped Cream*
Remove the bowl of whipped cream from the refrigerator. Using a large, flexible spatula, gently fold about one-third of the whipped cream into the strawberry-cream cheese mixture to lighten it. Then, carefully fold in the remaining whipped cream until no white streaks remain. Be gentle to maintain the airy volume.

Step 5: Chill and Serve*
Spoon the strawberry mousse into individual serving glasses or ramekins. Cover and refrigerate for at least 2 hours, or until fully chilled and set. Serve cold.

Tips:

  • Use Room Temperature Cream Cheese: This is essential for a smooth, lump-free base. Let it sit out for at least an hour before starting.
  • Don’t Overwhip the Cream: Whip just to soft peaks. Overwhipped cream can become grainy and difficult to fold.
  • Fold Gently: Use a gentle folding motion to incorporate the whipped cream, preserving as much air as possible for a light mousse.
  • Chill Time is Essential: The mousse needs time to set and for the flavors to meld. Don’t rush it.
  • Customize the Sweetness: Taste the mixture before folding in the whipped cream and adjust the sweetener to your preference.

Storage Options:

  • Refrigerator: Store covered in the refrigerator for up to 3 days.
  • Not for Freezing: The texture of the mousse will become icy and grainy upon thawing.
  • Make-Ahead: This mousse is perfect for making a day in advance. Prepare, cover, and refrigerate until ready to serve.

Strawberry Mousse is a celebration of fresh, simple ingredients transformed into something truly elegant and delicious. With its light, airy texture and bright, fruity flavor, it’s the perfect sweet ending to any meal.

Beef Pizza Roll-Ups

0

Beef Pizza Roll-Ups are the ultimate handheld pizza fantasy—a fun, flavorful, and impossibly satisfying twist on traditional pizza that transforms simple ingredients into golden, spiraled bites of pure comfort. This recipe is a brilliant fusion of a classic pizza and a savory cinnamon roll, taking refrigerated pizza dough and filling it with a rich, seasoned ground beef mixture, gooey mozzarella cheese, and tangy marinara sauce, then rolling and slicing it into perfect, pull-apart pinwheels. The magic begins with perfectly browned ground beef, seasoned with Italian herbs and bound with a generous scoop of marinara, creating a savory, meaty filling that’s bursting with flavor. This mixture is spread over a rectangle of pizza dough, blanketed with a generous layer of shredded mozzarella, then rolled tightly into a log and sliced into individual rounds. As they bake, the dough puffs into a golden, flaky crust, the cheese melts into glorious, stretchy pockets, and the edges become irresistibly crisp.

The brilliance of this recipe lies in its incredible ease and the sheer joy of its presentation. Using refrigerated pizza dough streamlines the process, making these roll-ups achievable any night of the week. Each slice reveals a beautiful spiral of dough wrapped around the savory, cheesy filling, making them as fun to look at as they are to eat. Served with a side of warm marinara sauce for dipping, these Beef Pizza Roll-Ups are the perfect party appetizer, game-day snack, or a creative weeknight dinner that will have everyone at the table reaching for more. They’re a testament to the fact that the simplest ideas—pizza, rolled up—can be the most delicious.

Why You’ll Love This Recipe:

  • All the Pizza Flavor, in Fun, Dippable Form: Savory beef, tangy marinara, and melted mozzarella in a perfect, handheld spiral.
  • Incredibly Easy and Quick: Uses convenient refrigerated pizza dough for a meal that comes together in under 30 minutes.
  • Perfect for Sharing: A crowd-pleasing appetizer or main that’s ideal for parties, game day, or family dinners.
  • Customizable to Your Taste: Easily swap the beef for Italian sausage, add pepperoni, or use different cheeses.
  • Kid-Friendly and Fun: The spiral shape and dipping sauce make these a guaranteed hit with kids.

Ingredients:

For the Filling:*
1 pound lean ground beef (or regular)
1 cup thick marinara or pizza sauce, divided
1 teaspoon Italian seasoning
1½ cups shredded mozzarella cheese

For the Dough and Assembly:*
1 tube (13-14 ounces) refrigerated pizza dough
All-purpose flour, for dusting

Instructions:

Step 1: Preheat Oven and Prepare Pan
Preheat your oven to 375°F (190°C). Lightly grease a 9×13-inch baking dish or line a baking sheet with parchment paper.

Step 2: Cook the Beef
In a skillet over medium heat, cook the ground beef, breaking it up with a spoon, until fully browned and no longer pink, about 5-7 minutes. Carefully drain any excess grease. Stir in the Italian seasoning and ½ cup of the marinara sauce. Remove from heat and let the mixture cool slightly.

Step 3: Prepare the Dough*
Unroll the refrigerated pizza dough onto a lightly floured surface. Using your hands or a rolling pin, gently stretch or roll it into a large rectangle, about 10×14 inches, keeping the thickness even.

Step 4: Add the Filling*
Spread the seasoned beef mixture evenly over the dough, leaving about a ½-inch border around all edges. Sprinkle the shredded mozzarella cheese evenly over the beef.

Step 5: Roll and Slice*
Starting from one long side, carefully roll the dough up tightly into a log shape. Pinch the seam firmly to seal. Using a sharp knife, slice the log into 1½-inch thick rounds.

Step 6: Arrange and Bake*
Place the rolls cut-side up in the prepared baking dish or on the baking sheet, leaving a little space between each. Bake for 18-22 minutes, until the rolls are puffed, golden brown, and the cheese is melted and bubbly.

Step 7: Serve*
While the roll-ups bake, warm the remaining ½ cup of marinara sauce. Remove the roll-ups from the oven and let them cool slightly. Serve warm with the warm marinara sauce on the side for dipping.

Tips:

  • Drain the Beef Well: Removing excess fat prevents the filling from making the dough soggy.
  • Don’t Overfill: Stick to the recommended amounts to ensure the rolls seal properly and don’t burst open.
  • Seal the Seam Tightly: Pinch the seam well to prevent the rolls from unraveling during baking.
  • Slice with a Sharp Knife: Use a sharp knife to get clean slices without squishing the rolls.
  • Customize Your Fillings: Add chopped pepperoni, cooked Italian sausage, sautéed mushrooms, or a sprinkle of Parmesan.

Storage Options:

  • Refrigerator: Store leftover roll-ups in an airtight container in the refrigerator for up to 4 days.
  • Reheating: Reheat in a 350°F (175°C) oven or air fryer for 5-7 minutes to restore crispness. The microwave will make them soft.
  • Freezing: Assemble the unbaked roll-ups, place on a parchment-lined tray, and freeze until solid. Transfer to a freezer bag and freeze for up to 2 months. Bake from frozen, adding 5-10 minutes to the bake time.
  • Make-Ahead: You can cook the filling and assemble the rolls (through Step 5) up to 8 hours in advance. Cover and refrigerate until ready to bake.

Beef Pizza Roll-Ups are a fun, delicious, and incredibly easy way to enjoy all the flavors of pizza in a whole new form. With their golden, flaky crust and savory, cheesy center, they’re guaranteed to be a hit at any table.

Stove Top vs. Homemade Stuffing: Which One Really Belongs on Your Holiday Table?

0

When the holidays start creeping up—and honestly, does it feel like you blink and suddenly there are pumpkins and turkeys everywhere?—there’s one side dish that never fails to get my family talking. Stuffing. Or is it dressing? Depends who you ask, and trust me, that debate can get almost as lively as a family game night (but that’s a whole other story for another time).

Whether you’re serving it alongside Thanksgiving turkey or a cozy Sunday roast, stuffing always seems to stir up a little nostalgia—and maybe a tiny bit of strong opinion. But here’s the real question on everyone’s mind: do you tear open a box of Stove Top, or do you roll up your sleeves and make it from scratch?

I know people who wouldn’t dream of touching anything but homemade—hand-cut bread cubes, fresh herbs, the whole deal. Then there are those (and I’ve been there some years!) who swear by the “open box, add butter, done” approach. Both sides have their arguments, and honestly, in this house, we’ve tried them all over the years.

So let’s pull up a chair and have a real conversation about the pros, cons, and all those little real-life factors that’ll help you pick the perfect stuffing for your table this year.

The Case for Stove Top: Sometimes the Box Has Your Back

1. It’s Ridiculously Easy (and Honestly, That’s a Gift)

Look, not all of us are starring in a holiday cooking marathon. Most years, I’m juggling too many pans, last-minute grocery runs, a house full of relatives, and the occasional kitchen disaster (one year I actually forgot to thaw the turkey—ask me how that went). When things get chaotic, Stove Top stuffing is a genuine lifesaver.

Here’s how it works: boil some water, toss in butter, stir in the mix, fluff, and you’re done in five minutes flat. It’s basically the culinary equivalent of a neighbor popping over to lend a hand. When you’ve got four other sides on the stove and you’re crossing your fingers that your pie doesn’t turn into soup, boxed stuffing is the friend you didn’t know you needed.

2. Predictable Taste (and Sometimes That’s Exactly What We Want)

Let’s talk comfort. There’s something special about a dish that tastes exactly like you remember—no surprises, just soft, savory, buttery goodness. So many of us grew up with Stove Top on our holiday tables. Maybe it’s not fancy, but it’s wrapped up in warm, fuzzy memories, like that worn-out blanket you keep for chilly evenings.

And honestly, sometimes that feeling—salty, simple, familiar—is exactly what we need in the middle of the holiday hustle.

3. Long Shelf Life = A Pantry Hero

Can I share a little secret? I always keep a box tucked behind the pasta for emergencies (those who know, know). Even when it’s not Thanksgiving, that box is ready to rescue a plain rotisserie chicken, add some life to a weeknight meal, or become the backbone of a “clean out the fridge” Sunday supper.

No chopping, no drying, no prepping. It just sits there quietly, waiting to swoop in and save dinner when you’re out of ideas and energy.

The Case for Homemade: Stuffing With Soul

1. Flavor Freedom: You’re in Charge

Oh, let’s talk about the joys of homemade stuffing! When you make it yourself, you’re the boss. Sourdough cubes soaked in turkey drippings, caramelized onions, crispy pancetta? Go for it. Feeling Southern? Try cornbread, rosemary, maybe some apples. (One year I even threw in chopped figs and pecans. Best accident ever.)

Homemade stuffing is your kitchen canvas. Add whatever catches your fancy—herbs, garlic, sausage, cranberries, nuts. It’s all about your family’s favorites, old traditions, or whatever looks good at the market that week.

2. Texture, Texture, Texture

Texture matters, people. Maybe you like your stuffing soft and almost custardy, or maybe you live for those crispy, golden edges with just a hint of crunch (my family’s split, so I make both—call me a peacekeeper).

With homemade, you get to choose. Want it crusty? Bake it uncovered a little longer. Want it moist? Add a splash more broth and cover it with foil. It’s like picking out the perfect pair of slippers—soft or structured, the choice is all yours.

3. You Know What’s In It (And What’s Not)

This one hits close to home. With allergies and dietary preferences popping up more and more (hello, gluten-free kids and vegan cousins), I love knowing exactly what’s going onto every plate.

Making it from scratch means you’re in control—no mysterious “seasoning blends” or preservatives. You can adjust for food allergies, special diets, or just plain peace of mind. Homemade stuffing bends to your needs without losing any of that homey goodness.

So… Which Stuffing Deserves the Spotlight?

Brace yourself—there’s no clear winner here, and honestly, that’s exactly how I like it.

Let’s be real: not every holiday dinner looks like those glossy magazine spreads. Sometimes you’re running on empty, or the crowd around your table has more food quirks than you can count. And sometimes, all you want is the comfort of what you know—no frills, no fuss, just that taste of childhood and togetherness on your fork.

If reaching for a box of stuffing gives you one less thing to worry about, then absolutely do it. And if you want to go the homemade route, especially when you’ve got a little extra time or that dog-eared recipe from your grandmother, don’t hold back—it might just be the star of the show.

Think about:

  • Your schedule: Are you cooking for the whole crew or just bringing one dish to a potluck?
  • Your crowd: Is your family full of traditionalists (they want what they grew up with) or more adventurous eaters looking for something new?
  • Your energy: Seriously—how much do you have left at this point in the season? (Spoiler: some years my answer is “none whatsoever.”)

Here’s a little trick from my house to yours: you don’t have to pick just one. Put out both! Who says you can’t have a little of each? It’s not breaking the rules—it’s making everyone feel at home, and that’s the real win.

A Side Note on Stuffing Safety (Because Aunt Linda Asked)

Quick PSA—because I can practically hear my sister’s voice in my head: if you’re putting stuffing inside your turkey, not just in a baking dish, make sure the center hits 165°F. Otherwise, you’re asking for food safety trouble—and nobody wants a side of that at the holiday table. Don’t risk it!

Stuffing Through the Seasons

Stuffing isn’t just a holiday treat in this house. Oh no. I’ve tossed it into baked chicken casseroles and served it alongside pork chops on chilly March evenings. Get creative year-round! Use leftover challah or brioche, or mix things up with chorizo and roasted poblanos for a fun twist. The sky’s the limit—don’t save all the comfort for November.

Once you stop thinking of stuffing as a “once-a-year” thing, I promise it’ll become one of your favorite little kitchen tricks that makes any meal feel special.

Final Thoughts: More Than Just Bread and Broth

At the end of the day, stuffing is about so much more than breadcrumbs or a box mix. It’s tradition, it’s memory, it’s comfort served up family-style. Whether you’re passing Stove Top with a wink across the table or sharing your “secret” homemade recipe, what matters most is the care behind every spoonful.

Gather your people, say grace, tell old stories—just cherish the moment. Because whether your stuffing comes from a box or your backyard herb garden, it’s meant to fill your belly and your heart with something a little special.

And really, isn’t that the whole point of the season?

Garbage Bread

0

Garbage Bread is the ultimate indulgent, shareable, and gloriously messy stuffed bread—a carb lover’s dream that takes a simple pizza dough and fills it to the brim with a glorious mishmash of savory meats, melted cheese, and aromatic vegetables. This recipe is a celebration of the phrase “everything but the kitchen sink,” transforming leftover or favorite pizza toppings into a coiled, golden-brown loaf that’s perfect for dipping. The magic begins with a simple filling of seasoned ground meat, sautéed onions and peppers, and a generous handful of chopped pepperoni, all bound together with a blanket of gooey mozzarella and nutty Parmesan. This savory, cheesy mixture is spread over a rectangle of pizza dough, then carefully rolled into a tight log, sealing all those delicious fillings inside. As it bakes, the dough puffs and turns a deep golden brown, while the cheese inside melts into a glorious, cohesive, pull-apart center.

The brilliance of this recipe lies in its incredible versatility and the sheer joy of its presentation. The name “garbage bread” comes from the idea that you can throw in any leftovers or favorite ingredients you have on hand—hence the “garbage” moniker, but there’s nothing trashy about the result. Sliced into thick, spiraled pieces, each bite reveals a beautiful cross-section of dough wrapped around a savory, cheesy filling. It’s the perfect party food, game-day snack, or fun weeknight dinner when served with a side of warm marinara sauce for dipping. Garbage Bread is proof that the best ideas often come from clearing out the fridge and that simple ingredients, when combined with a little creativity, can become something truly spectacular.

Why You’ll Love This Recipe:

  • The Ultimate Customizable Stuffed Bread: Use any combination of meats, cheeses, and veggies you have on hand.
  • Perfectly Golden, Flaky Crust: The egg wash creates a beautiful, shiny, and crisp exterior.
  • Gooey, Cheesy, Savory Interior: Every slice is packed with melted cheese and flavorful fillings.
  • Fun to Make and Eat: Rolling and slicing reveals a beautiful spiral that’s as fun to look at as it is to eat.
  • Great for Sharing: Perfect for parties, game day, or a family-style dinner with marinara for dipping.

Ingredients:

For the Bread:
1 pound pizza dough (store-bought or homemade), at room temperature
1 tablespoon olive oil (for cooking)
All-purpose flour, for dusting

For the Filling:
½ pound ground beef or Italian sausage
½ cup yellow onion, finely chopped
½ cup bell pepper (any color), diced
½ cup pepperoni slices, chopped
1 cup shredded mozzarella cheese
¼ cup grated Parmesan cheese
½ teaspoon garlic powder
½ teaspoon Italian seasoning
¼ teaspoon freshly ground black pepper

For the Topping and Serving:*
1 large egg, beaten (for egg wash)
Marinara sauce, warmed, for dipping (optional)

Instructions:

Step 1: Preheat Oven and Prepare Pan
Preheat your oven to 375°F (190°C). Line a large baking sheet with parchment paper.

Step 2: Cook the Filling
In a skillet over medium heat, add the olive oil. Add the ground beef (or sausage), chopped onion, and diced bell pepper. Cook, breaking up the meat with a spoon, until the meat is browned and the vegetables are softened, about 5-7 minutes. Drain any excess grease. Stir in the garlic powder, Italian seasoning, and black pepper. Remove from heat and let cool slightly.

Step 3: Roll Out the Dough
On a lightly floured surface, roll the pizza dough out into a large rectangle, about 10×14 inches and ¼-inch thick.

Step 4: Assemble the Filling
Spread the cooked meat mixture evenly over the rolled-out dough, leaving a ½-inch border around all edges. Sprinkle the chopped pepperoni evenly over the meat, followed by the shredded mozzarella and grated Parmesan.

Step 5: Roll the Bread
Starting from one long edge, carefully roll the dough up tightly into a log, similar to a jelly roll. Pinch the seam and the ends firmly to seal and prevent the filling from leaking out during baking.

Step 6: Egg Wash and Bake
Place the rolled bread seam-side down on the prepared baking sheet. Brush the top and sides generously with the beaten egg. Bake for 22-25 minutes, until the bread is deep golden brown and sounds hollow when tapped.

Step 7: Rest and Serve*
Let the Garbage Bread rest on the baking sheet for 5-10 minutes before slicing. This allows the cheese to set slightly. Using a serrated knife, slice into 1½-inch thick pieces. Serve warm with marinara sauce for dipping, if desired.

Tips:

  • Room Temperature Dough: Cold dough is difficult to roll and may tear. Let it sit at room temperature for 30-60 minutes before rolling.
  • Don’t Overfill: A moderate amount of filling ensures the bread rolls easily and seals properly.
  • Seal Tightly: Pinch the seams and ends well to prevent cheesy leaks during baking.
  • Customize It: Use cooked Italian sausage, chopped bacon, sautéed mushrooms, spinach, or any cheese you love.
  • Make it Spicy: Add a pinch of red pepper flakes to the filling or use hot Italian sausage.

Storage Options:

  • Refrigerator: Store leftover slices in an airtight container in the refrigerator for up to 4 days.
  • Reheating: Reheat in a 350°F (175°C) oven or air fryer for 5-7 minutes to restore crispness. The microwave will make the bread soft.
  • Freezing: Garbage Bread freezes well. Cool completely, wrap tightly in plastic wrap and foil, and freeze for up to 2 months. Thaw in the refrigerator and reheat in the oven.
  • Make-Ahead: You can assemble the bread completely (through Step 5), wrap tightly in plastic, and refrigerate for up to 8 hours before baking. Brush with egg wash just before baking.

Garbage Bread is a fun, delicious, and endlessly adaptable dish that turns simple ingredients into a show-stopping centerpiece. With its golden crust, gooey cheesy interior, and perfect dippability, it’s guaranteed to be a hit wherever it goes.